A production, or a producer, may be defined as an organization who produce one or more products through processing of different production factors. These production factors may be raw materials, parts or operations.
Produced goods.
Modified goods.
Discarded goods.
A production order will most often be initiated through a customer order. In other instances the production order is ordered internally for stock.
A production order will in most instances, using parts, raw materials and operations, result in a finished product. If we take the car industry as an example, where a car is produced by combining own parts using in-house machines and their operative capacity, the whole production process is involved. In some cases the finished product needs to be modified, such as if a car model is faulty it needs to be recalled and modified. If a product is damaged in the production process, it can be scrapped and discarded.
Register resources
Resources in the production process, such as parts, machines, operations and personnel must be defined and set up before use.
Register operations
All available operations offered by the production company needs to be defined and set up before production.
Maintain production structures
Versioning and updating the content of products must be administered and maintained.
Planning
To deliver at agreed upon terms and time, the production needs to be planned in detail.
Production
The production itself is logged in a system to ensure traceability within the production factors, which again ensures a base for the invoice.
Administer products
Products which are produced or modified must contain information regarding production factors and information such as serial numbers.
Following up cost of goods and time usage
To create the base of the invoice as accurately as possible, all resources and goods needs to be priced accordingly.
Deviation handling
Handling defective goods or goods that need modification.
Administer documentation
There is a large amount of documentation involved in production, with instruction manuals, product certificates and measurement certificates. Which all needs to be administered.
The PRODUCTION workspace gives the management a ‘status’ view of the factory and the current activities. The tool gives information about key figures such as produced value, delivery performance, resource activity, delayed production and value of the delayed production, capacity utilization, measurement tools, reports ++ . So the tool is applicable both for the CEO and the production management. Needed permission to view the workspace is ViewProductionWorkspace.
 | The buttons in this section gives access to their corresponding applications: |
Prodplan - The PRODPLAN application for production planning. | |
Resources - The resource (RES) menu. | |
Product Work Balances - PWBAL application for work balances reports. | |
Delivery Performance - DPS, delivery performance statistics. |
 | Measurement tools (MET) can be added to the system as a part of the production documentation module. Keep control of your instruments status and calibration dates in RamBase. Click on the number of ‘Active tools’ to access the MET menu and use filters there to view e.g. METs needing calibration. |
Active Tools - MET with status (ST) =8 are active instruments. Inspect on number goes to the MET menu.
Overdue/On hold - Number of MET with Nextservice date that is before ‘today’
Within calibration window - Number of MET with Nextservice date that is before ‘today’ + number of days that is specified in the company setting ‘ServiceWarningDays’.
Need calibration this month - Number of MET with Nextservice between and including ‘today’ and the end of the current month.
Need calibration next month - Number of MET with Nextservice within next month.
Pending measure documents - Number of measurement documents (MSR) that are ready to be approved.
The ‘Key Figures’ section shows values for delivered (completed) productions, delivery performance, cost and time for planned production (forecast) and some figures for todays activity.

This is produced value for completed productions (SSA with DocType = PRODUCTION) with date matching the actual periods in the table. The calculated value is then the sum of the NetAmount for these actual SSAs. The sums are not calculated ‘on line’ but are stored values that are recalculated by a night batch job or by the recalculate icons at the Key Figures header.
The calculation routine checks each BOM (KIT) for sub KITs and reduces each SSAs value with any found cost from the subs that are produced internally to ensure that the produced value is not ‘doubled’ and that the values are correct within the actual periods. Purchased articles with Class = K* are calculated as any other ingoing part/material (not production).
Delivery performance (DPS) for customers in percentage, sum of early + on time.

These values are calculated from resources (RES) that are not group resources (only members and single resources) and that are classified as active (ST less than 9).
Hours/ | = planned hours = sum of all Used (DayUsed) hours for dates within the rest of the actual period. Found in the ‘Usage’ folder at each RES. |
/utilization rate = sum of DayUsed divided by sum of DayCapacity * 100 (%) for the resources and rest of the actual period.

These values are showing the sum of planned cost for planned and running productions. PWO that are confirmed and active and that have status >1 and < 9. Sum of the PWOs NetAmount and as for delivered production this is also reducing the value for each PWO with value for used sub KITs.
ProdEnd (calculated production end date) decides in which period the value is included.
The Delivered production and the Production cost plan values can also be shown as graphs by clicking at the graph icon at the section header.

Green material cost and added material cost for production history (completed production).
Orange operation cost for production history (completed production).
Blue planned material cost and added material cost for the production plan. Running and planned production.
Red operation cost for the production plan.

These two speedometers shall indicate how the available resources are utilized today and indicate how the reality meets the planned utilization.
Active resources Number of resources with running or paused jobs
Active operations Number of running or paused jobs
Delayed production (cur) The value of production orders where at least one of the operations is delayed with 1 day or more compared to planned for the operation.
Completed % prod/
orders total For running / released production orders, PWO with status (ST) > 5 and < 9.
Accumulated accrued time / accumulated planned time * 100.
Result > 100 = overused time.
Speedometer 1 | Planned utilization for all resources today. Utilization = sum DayUsed / sum DayCapasity * 100 (%). |
Speedometer 2 | Logged time today compared to planned time today. Sum logged time / sum DayUsed * 100 % |
These boxes will show some numbers and figures, some of them with inspect possibility, for number of production orders, production orders waiting to be released for production, delayed productions, production value of delays, quality reports.
 | Ready for production: PWO with ST = 4, PRODSTART <= today Running productions: PWO, ST=5 Completed productions: PWO, ST=8 |
 | Operations: Planned operations waiting for preceding operation to be completed. Resources: Resources with waiting operations. Production orders: Work orders (PWOs) with waiting operations. |
 | Operations: Active or waiting operations that are delayed compared to planned start/complete date. Resources : Resources with delayed operations. Production orders: Work orders (PWOs) with delayed operations. |

The first three lines in the list are representing the same numbers as in the Delayed productions box above but here including the value of the delayed production orders behind these numbers.
Inspect on the numbers at line 1 and 2 goes to PRODPLAN and folder Delayed operations.
Inspect on the number at line 3 goes to PRODPLAN and folder Delayed productions.
Delayed pending orders:
This is the number of customer order items or production orders that are linked to Pending, meaning that a production work order (PWO) needs to be created for this.
Inspect on the number at line 4 goes to PRODPLAN and folder Pending by Order.
Delayed external work:
Active or waiting external operations that are delayed compared to planned start/complete date.
Inspect on the number at line 5 goes to PRODPLAN and folder External Operations.

Overdue quality reports This is the number of QAR documents that are not closed (ST < 9)
and where DUEDATE < today. Inspect to the QAR menu.
Cost deviation | Number of operations with cost deviation alert. Inspect to report REP/102680 |
Time deviation | Number of operations with work log alert, that is operations that have been completed and the difference between logged work and planned work is higher than the company setting. Inspect to report REP/102681 |
REPORTS:

The reports section shows links to group of reports related to sub modules that are part of the production module.
In terms of production, a resource is a machine, an assembly area or an external capacity which can perform a task in the completion of a Production work order (PWO). A production resource needs to be configured before it can be implemented.
A new resource is configured and ready for use.
An existing resource is re-configured.
Different parameters may be attributed to a resource, which can be used to filter and trace the given resource. Among these parameters are classification, hour rate, capacity and operational capacity.
During classification of resources, it is important to state the nature of the resource, if it is a machine, a person (assembly, test, etc.). It is also possible to define resource group. A resource group may be similar machines, which are operated as alternatives to each other, such as a set of similar CNC machines, or a group of auto mechanics. In the latter example, the group may be called "Auto mechanics" and "Mechanic X" is a part of the group.
To control the resource cost of these resources, they must first be configured. An hour rate for a CNC machine may be set to 2500 NOK/hour and a mechanic may be 450 NOK/hour.
It is critical to define the capacity of resources, to avoid double bookings and the following delays and resource imbalance. For example, if you know the available capacity during the planning phase, you can state both expected start and end time of the Production work order (PWO).
Create a new resource
After purchasing a new machine, or setting up a new test station / assembly area, these must be defined as resources.
Configuring resource
The resource needs to be configured and classified.
Activating resource
After configuration, the resource needs to be activated to become operational.
Setting name | Description |
Prepick Service Parts in Production | If setting is 'ON' - The user must mark 'parts included in a service' as picked before the service can be completed |
Production resources are set up, maintained and listed in the Production resources (RESCONFIG) application.
In terms of production, a resource is a machine, an assembly area or an external capacity which can perform a task in the completion of a Production work order (PWO). A production resource needs to be configured before it can be implemented.
To open the Production resources (RESCONFIG) application, navigate to the RamBase menu and select Production then Resource management finally select Resources.

The Production resources area is filter based and can list all intended Production resources (RESCONFIG).
The header includes a search field, the Filter builder icon and the Column settings icon.
Filter builder
The Filter builder includes a set of predefined filters, listed below. A selected and active predefined filter will be placed underneath the search field and marked with color orange. A selected and inactive field will still be placed underneath the search field, but marked with color gray. Click the Remove icon to remove the predefined filter.
Active resources - This filter will list all Production resources in Status 4 (Active).
New resources - This filter will list all Production resources in Status 1 (Pending registration).
New and active resources - This filter will list all Production resources in Status 1 (Pending registration) and Status 4 (Active).
The user can also create saved filters by combining Field, Operator and Value in the Create custom filter area. Click the Save filter button to add the Custom filter to the My saved filters area. A selected custom filter will be displayed underneath the search bar like a predefined filter.
Column settings icon
Click the Column settings icon to open the Column settings. Here the user can add and remove columns from the Production resources area, Export to excel, Reset to default view and Include custom fields.
Column | Description |
|---|---|
Status | Displays the status of the Production resource (RESCONFIG):
|
Id | Displays the Production resource (RESCONFIG) identifier number. |
Activity | If there has been recent activity by the Production resource (RESCONFIG) a bell icon will be displayed. Hover over to read the description. |
Name | Name of production resource. If an operator has flagged the Production resource (RESCONFIG) in the Work order operation (WOO) application, an icon will be displayed next to the name. Hover over to read the description. |
Short name | Short name of production resource. |
Type | Defines the Type of the resource. The types can be:
|
Group | Displays the Production resource group (REGCONFIG) name which the Production resource (RESCONFIG) belongs to. |
Name field - Name of production resource. To edit, select the Reopen option in the Context menu and set the Production resource (RESCONFIG) in Status 1 (Pending registration).
Short name - Short name of production resource. To edit, select the Reopen option in the Context menu and set the Production resource (RESCONFIG) in Status 1 (Pending registration).
Type drop-down menu - Defines the type of the resource; External, Machine or Person. To edit, select the Reopen option in the Context menu and set the Production resource (RESCONFIG) in Status 1 (Pending registration).
Group drop-down menu - To add the Production resource (RESCONFIG) to a Production resource group (REGCONFIG), click the Group drop-down menu and select the intended Production resource group (REGCONFIG) from the list. Click the View icon to open the Production resource groups (REGCONFIG) application. A Production resource group (REGCONFIG) can only be added to activated Production resources (RESCONFIG). To activate a Production resource, click on the Context menu icon and select the Activate option.
Read more about the Production resource group (REGCONFIG) application here.
Banner - If an operator has flagged the Production resource (RESCONFIG) in the Work order operation (WOO) application, a banner with a description will be displayed next to the Group field. Hover over to read the description.
Description free text field - Description of production resource. Can be edited in Status 1 (Pending registration).
Allow man hours checkbox - If this checkbox is checked, Man hours can be added to the Work log elements of the Work order operations (WOO).
Allow multi operator checkbox - If this checkbox is checked, multiple operators can work on one Work order operation (WOO), at the same time.
Calculate cost by planned hours checkbox - If this checkbox is checked, operation cost is calculated based on planned operation hours. If this checkbox is left unchecked, operation cost is calculated by logged hours.
Assign to restricted stock locations checkbox - If this checkbox is checked a check will be run if the Production work order (PWO) is assigned to Goods reception items (SSAITEM) in the restricted Stock locations (STL). If not then a “swap” in assignments is done to a Goods reception item (SSAITEM) which has enough goods in the restricted Stock locations (STL). If this can not be done then an error message is displayed.
Allow grouping work order operations checkbox - Allow Production resource (RESCONFIG) to use Work order operation (WOO) grouping. To group WOO, the Allow grouping work order operations setting must be enabled in the Production resources (RESCONFIG) application. The operation time can be distributed equally between the WOO in the group. To do so, the Distribute time on grouping child setting must be enabled.
Read more about the Group work order operations (GWOO) application.
Distribute time on grouping checkbox - If this checkbox is checked, then time logged on the Operation (OPR) is distributed on all Work order operations (WOO). This setting cannot be enabled if the parent setting, Allow grouping work order operations, is disabled. The quantity in each WOO is also taken into consideration. For example, for a group consisting of two WOO, if one WOO has a quantity of one and the second WOO has a quantity of two, then a combined operation time of one hour is distributed as 20 minutes to the first WOO and 40 minutes to the second WOO.
Use the Hourly rates area to define the Production resource's (RESCONFIG) Setup. Processing and Cleanup rates. Note that the Hourly rates history is displayed in the Hour rates tab.
Setup field - Rate per hour for Work order operations (WOO) setup step, given in system currency. Editable in Status 1 (Pending registration).
Processing field - Rate per hour for Work order operations (WOO) operations step, given in system currency. Editable in Status 1 (Pending registration).
Cleanup field - Rate per hour for Work order operations (WOO) post cleanup step, given in system currency. Editable in Status 1 (Pending registration).
The Tabs area is useful in viewing specific information and adding Operators, Man hour rates, Restricted stock locations and Categories.
If one or several persons should be restricted to operate the selected Production resource (RESCONFIG), they can be added in this tab. All operators can use the resource if there is nobody added in the Restricted operators tab.
Click the Add new operator button to add a restricted operator to the Production resource (RESCONFIG).
Read more about adding operators on Production resources (RESCONFIG) here.
Columns and buttons | Description |
|---|---|
Status | Displays the status of the operator. |
PID | Displays the Personnel id number of the operator, abbreviated with PID. Details on the user can be checked in the Users (USERS) application by searching on the personnel id number. |
First name | Displays the first name of the operator. |
Last name | Displays the last name of the operator. |
| Click the Remove icon to remove the Operator from the Production resource (RESCONFIG). |
Add new operator button | Clicking the Add new operator button will open a corresponding popup where the user can select to add an operator from the New operator of production resource drop-down menu. |

Click the Add new production working time template button to open a corresponding popup where the following fields, drop-down list and buttons are available:
Columns and icons | Description |
|---|---|
Name | Displays the name of the calendar. The name is set in the Production calendars (PRODCALENDAR) application when creating a new one. |
Utilization % | Resource utilization for capacity period, given in %. Capacity = calendar day * utilization. |
Effective date | Capacity period valid from date. |
Expiration date | Capacity period valid to date. |
Description | The Description column displays the information added after clicking the Add new calendar button. Usually used to give relevant information on the calendar. |
| Clicking the Edit calendar icon will open a corresponding popup with following fields and icons:
|
| Click the Remove calendar icon to remove the Production calendar (PRODCALENDAR) from the Production resource (RESCONFIG). |


Click the Add new production working time template button to open a corresponding popup where the following fields, drop-down list and buttons are available
The Production resource capacity and load overview (RCL) application can be used to view capacity and load on specific days.
Read more about the Production resource capacity and load (RCL) application here.
The Manhour rates tab displays
Column | Description |
|---|---|
Status | This column displays icons indicating the Status of the manhour rate.
|
Type | Displays the type of man hour rate selected in the Add new man hour rate popup. The available types are:
|
Rate | Displays the rate set in the Rate field in the Add new manhour rate popup. This is accessed by clicking the Add new manhour rate button. |
Effective date | Will display the date the manhour rate was added with the Add new manhour rate button. |
Expiration date | When a manhour rate is deactivated by clicking the Deactivate manhour rate icon, the manhour rate will be set in Status 9 (Deactivated) and will be counted as expired. Therefore the date the manhour is deactivated, is the Expiration date. |
| To deactivate a Man hour rate click on the Deactivate manhour rate icon to set a man hour rate in Status 4 (Active) to Status 9 (Deactivated). |
Setting a restricted stock location for Production resource (RESCONFIG) can be useful in ensuring efficiency in the picking process for the operator in the Work order operation (WOO) application.
Read more about the Work order operation (WOO) application.
A production resource can be tailored to the Production operation (OPR) being performed. If a workstation comprised of either a person or machine, which is defined in the Production resource (RESCONFIG) application in the Type drop-down menu, has a standard Stock location (STL). One or several restricted stock locations can be added so that picking can be done efficiently from the Context menu by selecting the Reassign and pick all on restricted stock location option in the Work order operation (WOO) application. This action will pick all needed parts from the Stock location (STL). The result of the picking can be verified checking the color of the icon on the Pick button.
Read about How to restrict stock locations on Production resources (RESCONFIG).
The Hour rates tab lists all active and deactivated hourly rates set in the Hourly rates area. If Setup, Processing or Cleanup is changed in the Hourly rates area, the new rates will be set in Status 4 (Active) and the outdated rates will be set in Status 9 (Deactivated).
Read more about adding hourly rates for Production resources (RESCONFIG) here.
Column | Description |
|---|---|
Status | This column displays icons indicating the status of the rate set in the Hourly rates area location. |
Type | The Type column details the hour rate as; Setup, Processing or Cleanup. |
Rate | Displays the rate set in the Hourly rates area in the releated type field; Setup, Processing or Cleanup. |
Effective date | Will display the date the Hourly rate was created and set in Status 4 (Active). |
Expiration date | Will display the date the Hourly rate was deactivated and set in Status 9 (Deactivated). |
The Categories tab displays the Resource categories (REC) the Production resource (RESCONFIG) has been categorized as.
Resource category is an attribute which defines Production resources (RESCONFIG) in the system. Production resources (RESCONFIG) can be categorized according to their characteristics or ownership.
Read more about Production resource categories (REC) application here.
Column and buttons | Description |
|---|---|
Status column | The status icons indicates if the Production resource category (REC) is active or deactivated. |
Id column | Displays the Production resource category (REC) identifier number. This can be used to quickly access the Production resource category (REC) from the program field. REC/######. |
Name column | Production resource category (REC) name. |
Full name column | Unique name for the Production resource category (REC) . Built using the name of the Production resource category and the levels above. |
Description column | Production resource category (REC) description. This description is set in the Production resource category (REC) application. |
Remove icon | Click the Remove icon to remove the Production resource (RESONFIG) from the Production resource category (REC). |
Add category button | Click the Add category button to open a corresponding popup with the Add production resource category drop-down menu. Click the drop-down menu to the Production resource (RESCONFIG) to a Production resource category (REC). Note that for a Production resource category (REC) to be added, it must first be created and set in Status 4 (Active) in the Production resource category (REC) application. |
If Custom fields are defined and activated for the Production resources (RESCONFIG), they can be accessed through the Custom fields tab in the Production resource details area.
The values of these fields can be modified for Production resources (RESCONFIG) in Status 1 (Pending registration), or in Status 4 (Active). To display them in the Production resource area, click on the Include custom fields option in the Column settings.
Options | Description | ||||||
|---|---|---|---|---|---|---|---|
View capacity and load | Select the View capacity and load option to open the Production resource capacity and load overview (RCL) application. The selected Production resource will be visualized in an overview where the user can inspect the resource load in a specific period of time. Read more about the Production resource capacity and load (RCL) application here. | ||||||
Resource work order operations | Select the Resource work order operations option to open the Operators list of production work order operations (RWOO) application. Operators list of production work order operations (RWOO) applicationRWOO) here. | ||||||
Included in structure | Select the Included in structure option to open the Kit menu (KIT) application. All kits, which include the Production resource (RESCONFIG), are listed here. | ||||||
QAR Documents | Select the QAR Documents option to open the Quality report archive menu where the user can inspect quality issues and create new issue reports. | ||||||
Revision history | Select the Revision history option to view all changes made to the Production resource (RESCONFIG). | ||||||
Recalculate cost on production work orders (PWO) | Use this option to recalculate the planned cost for relevant Production work orders (PWO) based on changes to hourly rates. If a sub Production structure (KTIDOC) is recalculated, then the parent is continuously recalculated until the top level Production structure (KITDOC) is reached. NoteApplies to all (main and sub) Production work order structures (KITDOC) in Status 4 - Active, or lower. | ||||||
Recalculate cost for products (ART) | Use this option to recalculate the planned cost for relevant Products (ART) based on changes to hourly rates. If a sub Product structure (KTIART) is recalculated, then the parent is continuously recalculated until the top level Product structure (KITART) is reached. NoteApplies to all (main and sub) Product structures (KITART) in Status 4 - Active, or lower. | ||||||
Reactivate | Sets the selected Production resource (RESCONFIG) from Status 9 (Deactivated) to Status 4 (Active). | ||||||
Reopen | Sets the selected Production resource (RESCONFIG) from Status 4 (Active) to Status 1 (Pending registration). The Production resource (RESCONFIG) can now be edited. | ||||||
Delete | Deletes the Production resource (RESCONFIG). Only available in Status 1 (Pending registration). | ||||||
Deactivate | Sets the selected Production resource (RESCONFIG) from Status 4 (Active) to Status 9 (Deactivated). | ||||||
Activate | Sets the selected Production resource (RESCONFIG) from Status 1 (Pending registration) to Status 4 (Active). | ||||||
Set production resource condition | This can be used to flag Production resources (RESCONFIG) for maintenance or inform the planner that the machine has stopped. Setting the resource condition will only visually flag, and not limit any functions of the Production resource (RESCONFIG).
|
To open the Production resources (RESCONFIG) application, find Production in the RamBase menu and then Resource management. Click Resources to open the Production resources (RESCONFIG) application.
Click the Create new resource button.

This will open a popup, enter the intended name in the Name field and click the Create button.
This will create a resource in Status 1 (Pending registration). Choose between External, Machine or Person in the Type field.
Optionally, add more information.
Select the Activate option in the Context menu to set the Production resource in Status 4 (Active).
Use the Restricted operators tab if one or several persons should be restricted to operate the selected Production resource (RESCONFIG). All operators can use the resource if there is nobody added in the Restricted operators tab.
By default only one operator can use a Production resource (RESCONFIG) on a Production Work Order (PWO) at a time. Turn on the Allow multi operator in the Settings area, so that multiple operators can work in parallel on a Production work order (PWO) at the same Production resource (RESCONFIG).

From the Restricted operators tab, click the Add new opertor button.
Click the New operator of production resource drop-down menu to search for or select the operator to be added as an operator to the selected Production resource (RESCONFIG).
When selection is done, click the OK button.
Click on the Restricted operators tab.
Select an Active operator in Status 4 (Active).
Click on the Deactivate operator icon in the right most column to remove the operator from the Production resource (RESONFIG)
Note that if there are no operators left in the Restricted operators tab list, all operators will be allowed to operate the Production resource (RESCONFIG).
Browse the deactivated operators by using search criteria or deactivating the default Active filter.
Use the Revision history option in the Context menu to view who deactivated an operators, and when.
View and change the hourly rates in the Hourly rates area in the Production resources (RESCONFIG) application.

Note
Unless you need to calculate cost, It is not necessary to add hourly rates for Production resources (RESCONFIG).
You have three Hourly rate fields where you can enter the hourly rates for the Production resource (RESCONFIG).
Setup
This is hourly cost of the pre work for this Production resource (RESCONFIG).
Processing
This is the hourly cost for this Production resource (RESCONFIG).
Cleanup
This is hourly cost of the post-work for this Production resource (RESCONFIG).
When entering a new value in any of the fields given above, the new value is set in Status 4 (Active) and the previous value in the field is set to Status 9 (Deactivated). All values in Status 4 (Active) and Status 9 (Deactivated) can be viewed in the Hour rates tab.
Specific rates can be searched for in the search field in the Hour rates tab. Click the Filter builder to easily create a new Saved filter. Decide Field, Operator and Value. Click Save filter to save the filter.
Restricting stock locations on a Production resource limits the Production resource to only use parts that are located at the Stock locations (STL) added in the Restricted stock locations tab.
To open the Production resource (RESCONFIG) application, find Production in the RamBase menu and then Resource management. Click Resource to open the Production resources (RESCONFIG) application.
Make sure that the Production resource is in Status 1 - Pending registration.
In the Settings area, enable the Assign to restricted stock locations checkbox.
Click on the Restricted stock locations tab.
Click on the Add stock location button.
Select the intended Stock location (STL) from the list or search in the Search field.
Click the Create button. The newly created restricted stock location is now in Status 4 (Active).
When a restricted stock location is created, it cannot be deleted, only deactivated. Click the Remove from resource icon in the right most column which will set the restricted stock location in Status 9 (Deactivated). The deactivated restricted stock location is still present in the database. To view the deactivated restricted stock locations, deselect the Active filter underneath the Search field.
Tip
You can use the Restricted stock location search field to search for Stock location(s) (STL). When typing a partial name in the search field, a popup menu appears. Search by Label, Name, Status, Description, and Stock Location ID. Or use the Filter builder to build a Saved filter.
To read about more options related to restricted Stock Locations, click here.
Use the Production resource group (REGCONFIG) application to create and maintain Production resource groups (REGCONFIG).
Navigate to the application
Option 1: RamBase menu→Production→Resource management→Production resource group
Option 2: Click the Program field and type "REGCONFIG" and press ENTER.
Click here to read more about the user interface.

The following areas are described in the sections below:
The Production resource groups area
The Production resource group details area
The Hourly rates area
The Production resource group members area
The Production resource group area is used for selecting the intended Production resource group (REGCONFIG) to view details for and/or add new member in the other areas. The user can also create a new resource group by clicking the Create a new resource group button.
Search field - Use the Search field to search for the Name of the intended Production resource group (REGCONFIG). By clicking the Search field and pressing SPACEBAR, all available parameters will be listed, including CreatedAt, Description, Name and more.
Filter builder - Click the Filter builder icon to open a popup where the user can select filters from the Standard filters area. The available standard filter is New and active resource group which will include Production resource groups (REGCONFIG) in Status 1 (Pending registration) and Status 4 (Active), while excluding Production resource groups (REGCONFIG) in Status 9 (Deactivated).
Selected filters will be visible below the Search field. Active filters are marked orange, inactive are marked gray. The user can also Create custom filters by selecting Field, Operator and Value in the Create custom filters area, and then pressing the Save filter button. Saved filters will be available from the My saved filters area. Click the intended saved filter to add it below the Search field.
Column settings icon - Click the Column settings icon to open a popup with the following options:
Columns - Hover over to view a list of all available columns. Select the intended columns to be displayed in the list.
Export to excel - Click to send the contents of the list in .xlsx format to the current users e-mail. Which is set up in the Personnel (PER) application.
Reset to default view - Click to reset the selected columns and resizing of the areas in the current application. This is useful in cases where there are unexpected errors or missing information.
The available columns are:
Columns and buttons | Description |
|---|---|
St - column | Displays an icon indicating the status of the Production resource group (REGCONFIG). The available statuses are:
|
Id - column | Displays the Production resource group (REGCONFIG) identifier number. For example 123456. To quickly access that Production resource group (REGCONFIG), type "REG/123456" in the Program field. |
Name - column | The name of Production resource group (REGCONFIG), first set when creating the Production resource group (REGCONFIG). The name can be changed when the Production resource group (REGCONFIG) is in Status 1 (Pending registration). |
Type - column | The type of the Production resource group (REGCONFIG) selected in the Production resource group details area, in the Type drop-down menu. The available options are:
|
Short name - column | The short name of the Production resource group (REGCONFIG) entered in the Production resource group details area, in the Short name field. |
Create new resource group button | Click the Create new resource group button to open a corresponding popup with following options:
|
The Production resource group details area is used to define details of the Production resource group (REGCONFIG). Note that the details are only editable in Status 1 (Pending registration).
Name field - Displays the name of the Production resource group (REGCONFIG). The field is editable in Status 1 (Pending registration). To edit the Name field, select the Reopen option from the context menu. This will set the Production resource group (REGCONFIG) in Status 1 (Pending registration).
Short name - The short name of the Production resource group (REGCONFIG). To edit the Short name field, select the Reopen option from the context menu. This will set the Production resource group (REGCONFIG) in Status 1 (Pending registration).
Type drop-down menu - Click the Type drop-down menu to define the Production resource group (REGCONFIG) as either Person or Machine. To edit the Type field, select the Reopen option from the context menu. This will set the Production resource group (REGCONFIG) in Status 1 (Pending registration).
Description field - Type relevant information for the Production resource group (REGCONFIG). Editable in Status 1 (Pending registration). To edit the Description field, select the Reopen option from the context menu. This will set the Production resource group (REGCONFIG) in Status 1 (Pending registration).
The Hourly rates area is used to define the Setup, Main and Cleanup rates.
Setup field - Estimated rate per hour for operations setup step, given in system currency.
Main field -Estimated rate per hour for operations main step, given in system currency.
Cleanup field - Estimated rate per hour for the post operations step, given in system currency.
The Production resource group members area is used for viewing, removing and adding the members of the Production resource group (REGCONFIG). The user can also quickly navigate to the Production resource (RESCONFIG) application by clicking the Arrow icon to view and edit details in the Production resource (RESCONFIG) application.
Search field - Use the Search field to search for the Name of the intended Production resource group member (RESCONFIG). By clicking the Search field and pressing SPACEBAR, all available parameters will be listed, including Name, Status, ProductionResouceId and more.
Filter builder icon - Click the Filter builder icon to open a popup where the user can select filters from the Standard filters area. The standard filter available is the New and active members which will display Production resource group members (RESCONFIG) in Status 4 (Active).
Selected filters will be visible below the Search field. Active filters are marked orange, inactive are marked gray. The user can also Create custom filters by selecting Field, Operator and Value in the Create custom filters area, and then pressing the Save filter button. Saved filters will be available from the My saved filters area. Click the intended saved filter to add it below the Search field.
Column settings icon - To select which information is displayed, click on the Column settings icon and hover over Columns. Then select the intended columns. The selection of data can be exported to Excel via the Export to excel option in the Column settings. The Reset to default view is also useful in resetting column width and placement, since columns can be dragged and dropped to suit the user. A description of the columns are listed in the table below.


Options | Description |
|---|---|
Resource group work order operations | Select the Resource group work order operations option to open the Distribute work order operations from resource group to member resources (DWOO) application. |
Revision history | Select the Revision history option to review all changes made to a Production resource group (REGCONFIG). |
Reactivate | If a Production resource group (REGCONFIG) is in Status 9 (Deactivated), it can be reactivated and set in Status 4 (Active) by selecting the Reactivate option. |
Reopen | If a Production resource group (REGCONFIG) is in Status 4 (Active), the values in the Production resource group details area can be edited by selecting the Reopen option. This will set the Production resource group (REGCONFIG) in Status 1 (Pending registration). |
Delete | To delete a Production resource group (REGCONFIG), it must first be set in Status 1 (Pending registration) by clicking the Reopen option in the context menu. Then select the Delete option in the context menu to delete the Production resource group (REGCONFIG). |
Deactivate | A Production resource group (REGCONFIG) in Status 4 (Active) can be set in Status 9 (Deactivated) by selecting the Deactivate option in the context menu. |
Activate | A Production resource group (REGCONFIG) in Status 1 (Pending registration) can be set in Status 4 (Active) by selecting the Activate option in the context menu. |
To open the Production resource group (REGCONFIG) application, find Production in the RamBase menu and then Resource management. Click Production resource group to enter the Production resource group (REGCONFIG) application.
Click the Create new resource group button.
Enter a name in the Name field and click the OK button.
Define the class of the Production resource group in the Type field. Choose between External, Machine and Person.
Optionally, add more information.
Select the Activate option in the context menu to set the Production resource group (REGCONFIG) in Status 4 (Active).

From the Production resource group area, click on the Production resource group where you want to add a member.
Click the Add new member button in the Production resource group members area.
Enter the name of the resource you want to add in the New member of production resource group drop-down menu.
Select the intended member and click the OK button to add it to the Production resource group (REGCONFIG).
The Distribute work order operations to resource members (DWOO) is an application used for distributing Work order operations (WOO) from Production resource groups (REGCONFIG) to Production resource members (RESCONFIG).

The areas in the application are listed below and detailed in the sections to follow.
The Distribute work order operations from resource group to member resources area
The Work order operations area
The Member resources area
The Member resource work order operations area
The header is used to select the intended Production resource group (REGCONFIG), which contains the Production resource (RESCONFIG) members to distribute Work order operations (WOO) to.
The Production resource group drop down menu - Click the Production resource group drop-down menu to open a list where the intended Production resource group (REGCONFIG) can be either searched for or selected. Click the View icon to open the Production resource group details (REGCONFIG) application where details of the Production resource group (REGCONFIG) can be viewed and edited.
Production resource group list
Filter builder icon - From the Production resource group list, click the Filter builder icon to select the standard filter New and active resource group which will include Production resource groups (REGCONFIG) in Status 1 (Pending registration) and Status 4 (Active).
Column settings icon - From the Production resource group list, to select which information is displayed, click on the Column settings icon and hover over Columns. Then select the intended columns. The selection of data can be exported to Excel via the Export to excel option in the Column settings. The Reset to default view option is also useful in resetting column width and placement, since the list can be Enlarged and Reduced, and even viewed in Fullscreen. A description of the columns are listed in the table below.
Column
Description
St
Displays an icon indicating the status of the Production resource group:
Status 1 (Pending registration)
Status 4 (Active)
Status 9 (Deactivated)
Id
Displays the Production resource group's (REGCONFIG) unique identifier number used to identify the document in RamBase. Writing REG/ followed by the identifier number, in the Program field at the top in the RamBase header, will access the Production resource group (REGCONFIG) application directly on the Production resource group (REGCONFIG) with the unique identifier.
Name
Displays the name set in the Name field in the Production resource group details area, in the Production resource group (REGCONFIG) application. It is defined as the Production resource group (REGCONFIG) name.
The Work order operations area is used to finding the intended Work order operation (WOO) to assign to a Production resource group member (RESCONFIG). The fields listed in the table below will help the user narrow down the list to identify the intended Work order operation (WOO).
Header fields | Descriptions |
|---|---|
Serial number - type in whole number field | To list information on a specific Work order operation (WOO), the user can type the serial number of the intended Product unit (LCM) being produced by the Work order operation (WOO). Note that the complete serial number must be entered. |
Product name field | To list information on specific Work order operations (WOO), the user can type the name of an intended Product (ART) to list only Work order operations (WOO) producing products with names containing the typed values. |
Product description field | To list information on specific Work order operations (WOO), the user can type the description an intended Product (ART) to list only Work order operations (WOO) producing products with descriptions containing the typed values. |
Header buttons and icons
Assign to member button - Used to assign Work order operations (WOO) to Production resources (RESCONFIG).
Read more about assigning Work order operations to Production resources (RESCONFIG) here.
Search field - Search field - The Search filed can be used to search for specific Work order operations (WOO). Click the Search field and press SPACEBAR to list all the available parameters to search on, including, but not limited to ProductName, Status, PlannedStartAt.
Filter builder icon - Click the Filter builder icon to open a popup where the user can select filters from the Standard filters area. Selected filters will be visible below the Search field. Active filters are marked orange, inactive are marked gray. The user can also Create custom filters by selecting Field, Operator and Value in the Create custom filters area, and then pressing the Save filter button. Saved filters will be available from the My saved filters area. Click the intended saved filter to add it below the Search field.
Available standard filters are:
Ready operations - When active, will narrow down the list to only display work order operations (WOO) in Status 3 (Ready).
Waiting operations - When active, will narrow down the list to only display Work order operations (WOO) in Status 2 (In queue).
Column settings icon - To select which information is displayed, click on the Column settings icon and hover over Columns. Then select the intended columns. The selection of data can be exported to Excel via the Export to excel option in the Column settings. The Reset to default view is also useful in resetting column width and placement, since columns can be dragged and dropped to suit the user. A description of the columns are listed in the table below.
The list in the Work order operations area displays Work order operations (WOO) which can be assigned to Production resource group members (RESCONFIG). Click on a Work order operation (WOO) to highlight it, or click the Status icon to select multiple, before clicking the Assign to member
Columns | Description |
|---|---|
| Click the Select all icon to select all Work order operations (WOO) for assigning to member. |
| Displays an icon indicating the status of the Work order operation (WOO):
Click icons to select or multi-select the intended Work order operations (WOO) with the intention of assigning it or them to a member. Click a selected icon to deselect it. |
Quantity | The quantity of Product units (LCM) being produced by the initial Production work order (PWO), set when creating the Production work order (PWO). |
Work order | Displays the identifier of the Production work order (PWO) for the Work order operation (WOO). Click the View icon to open the Production work order details (PWOD) application to view and/or edit details. |
Customer | If the Production work order (PWO) and the subsequent Work order operations (WOO) are linked to a Sales order (COA), the name of the customer will be displayed in the Customer column. |
Product | The name of Product (ART) being produced is displayed in the Product column. Click the View icon to open the Product (ART) application to view and edit details on the Product (ART). |
Serial number | Displays the serial number of the Product unit (LCM) being produced by Work order operation (WOO). If there are multiple Product units (LCM) being produced, ++ will be displayed at the end of the serial number. |
Planned start at | The date which the Work order operation (WOO) is planned to start to meet the required date set when creating the Production work order (PWO). |
Remaining time | Displays the remaining time for the operations set in the Product (ART) structure. |
Operation | Displays the name of the Production operation (OPR). |
Requested completion | The requested date of completion for the Production work order (PWO) derived from the initial Service order (CSO) or Sales order (COA). |
Confirmed completion | The date on which completion of the production is confirmed. This is derived from the date set in the Production work order details (PWOD) application. |
Location | Displays information about the location where the product is being produced. |


The Member resources area displays the Production resources (RESCONFIG) assigned to the Production resources group (REGCONFIG). Click the intended member resource to assign, view or unassign Work order operations from either the Work order operations area or the Member resource work order operations area.
Search field - Use the Search field to search for the Name of the intended Production resource group member (RESCONFIG). By clicking the Search field and pressing SPACEBAR, all available parameters will be listed, including Name, Status, ProductionResouceId and more.
Filter builder icon - Click the Filter builder icon to open a popup where the user can select filters from the Standard filters area. Selected filters will be visible below the Search field. Active filters are marked orange, inactive are marked gray. The user can also Create custom filters by selecting Field, Operator and Value in the Create custom filters area, and then pressing the Save filter button. Saved filters will be available from the My saved filters area. Click the intended saved filter to add it below the Search field.
Available standard filters are:
New and active members - When active, will narrow down the list to only display Production resource members (RESCONFIG) in Status 4 (Ready).
Column settings icon - To select which information is displayed, click on the Column settings icon and hover over Columns. Then select the intended columns. The selection of data can be exported to Excel via the Export to excel option in the Column settings. The Reset to default view is also useful in resetting the list if an unexpected error occurs.
Column | Description |
|---|---|
Status | Displays an icon indicating the status of the Production resource (RESCONFIG):
|
Id | Displays the Production resource (RESCONFIG) identifier number. Click the View icon to open the Production resource (RESCONFIG) application. |
Name | Name of Production resource (RESCONFIG). If an operator has flagged the Production resource (RESCONFIG) in the Work order operation (WOO) application, an icon will be displayed next to the name. Hover over to read the description. |
Load % | Load % is a percentage value which the amount of work the Production resource (RESCONFIG) is load for the current day. The value is calculated based on the Production calendar (PRODCALENDAR) linked to the Production resource (RESCONFIG). A Production calendar is assigned in the Production resource (RESCONFIG) application by clicking on the Capacity Setup tab. Read more about the Production resource (RESCONFIG) application here. |
The Member resource work order operations area is used to either view or unassign Work order operations (WOO) assigned to the Production resource (RESCONFIG).
Search field - Search field - Search field - The Search filed can be used to search for specific Work order operations (WOO), within the Work order operations (WOO) assigned to the member Production resources (RESCONFIG). Click the Search field and press SPACEBAR to list all the available parameters to search on, including, but not limited to Location, HasPriority, ProductId.
Filter builder icon - Click the Filter builder icon to open a popup where the user can select filters from the Standard filters area. Selected filters will be visible below the Search field. Active filters are marked orange, inactive are marked gray. The user can also Create custom filters by selecting Field, Operator and Value in the Create custom filters area, and then pressing the Save filter button. Saved filters will be available from the My saved filters area. Click the intended saved filter to add it below the Search field.
Standard filters
Description
Active
Will display Work order operations (WOO) in:
Status 3 (Ready for start)
Status 4 (Changeover setup)
Status 5 (Processing)
Status 7 (Changeover cleanup)
All
Will display Work order operations (WOO) in:
Status 2 (In queue)
Status 3 (Ready for start)
Status 4 (Changeover setup)
Status 5 (Processing)
Status 7 (Changeover cleanup)
Can be grouped
Will display Work order operations (WOO) that are not grouped in the Group work order operations (GWOO) application and are in:
Status 2 (In queue)
Status 3 (Ready for start)
Completed
Will display Work order operations (WOO) in:
Status 9 (Completed)
Grouped
Will display Work order operations (WOO) that are grouped in the Group work order operations (GWOO) application and are in:
Status 2 (In queue)
Status 3 (Ready for start)
Status 4 (Changeover setup)
Status 5 (Processing)
Status 9 (Completed)
My tasks
Will display Work order operations (WOO) where the user is set as an operator.
Not grouped
Will display Work order operations (WOO) that are not grouped with the Group work order operations (GWOO) application and are in:
Status 3 (Ready to start)
Status 5 (Processing)
Status 9 (Completed)
Production
Will display Work order operations (WOO) in:
Status 4 (Changeover setup)
Status 5 (Processing)
Status 7 (Changeover cleanup)
Ready
Will display Work order operations (WOO) in:
Status 3 (Ready)
Wait
Will display Work order operations (WOO) in:
Status 2 (In queue)
Column settings icon - To select which information is displayed, click on the Column settings icon and hover over Columns. then select the intended columns. The selection of data can be exported to Excel via the Export to excel option in the Column settings. The Reset to default view is also useful in resetting column width and placement, since columns can be dragged and dropped to suit the user. A description of the columns are listed in the table below.
Columns | Description |
|---|---|
Status | Displays an icon indicating the status of the Work order operation (WOO). Hover over for a description of the status. |
Quantity | The quantity of Product units (LCM) being produced by the initial Production work order (PWO), set when creating the Production work order (PWO). |
Work order | Displays the identifier of the Production work order (PWO) for the Work order operation (WOO). Click the View icon to open the Production work order details (PWOD) application to view and edit details of the Production work order (PWO). |
Customer | If the Production work order (PWO) and the subsequent Work order operations (WOO) are linked to a Sales order (COA), the name of the customer will be displayed in the Customer column. |
Product | The name of Product (ART) being produced is displayed in the Product column. Click the View icon to open the Product (ART) application to view and edit details on the Product (ART). |
Operation | Displays the name of the Production operation (OPR). The operation is added when creating the Product (ART) structure in the Product (ART) application. |
Location | Displays information about the location where the product is being produced. |
Unassign | If the Work order operation (WOO) is in Status 3 (Ready), not started yet, the Production resource (RESCONFIG) member can be removed from the Work order operation (WOO) by clicking the Remove work order operation assignment icon. |
From the Distribute work order operations from resource group to member resources (DWOO) application.
Click the Production resource group drop-down menu, found in the Distribute work order operations from resource group to member resources area.
In the Production resource group list, select, or search for the intended Production resource group (REC).
In the Work order operations area, select the Work order operation (WOO) you want to assign to a Production resource member (RESCONFIG).
You can use the Serial number - type in whole number, Product name and Product description to further narrow the search.
You can use Standard or Custom filters to further narrow down the Work order operations (WOO) listed.
In the Member resources area, select the Production resource (RESCONFIG) you want to assign the Work order operation to, and click the Assign to member button in the Work order operations area.
The assigned Work order operation (WOO) will now be displayed in the Member resource order operations area.
From the Distribute work order operations from resource group to member resources (DWOO) application.
Click the Production resource group drop-down menu, found in the Distribute work order operations from resource group to member resources area.
In the Production resource group list, select, or search for the intended Production resource group (REC) containing the Production resource (RESCONFIG) member, which is assigned the Work order operation (WOO), you want to unassign,
From the Member resources area, click the Production resource (RESCONFIG) member you want to unassign the Work order operation (WOO).
With the Production resource (RESCONFIG) member selected in the Member resources area, locate the intended Work order operation (WOO) in the Member resource work order operation area by either selecting or searching.
Click on the Remove work order operation assignment icon in the Unassign column.
The unassigned Work order operation (WOO) will now be placed back in the Work roder operations area list. Currently unassigned.
Note
To unassign a Work order operation (WOO), it can not be active. Therefore only Work order operations (WOO) in Status 2 (In queue) or Status 3 (Ready), can be unassigned.
Production resource category (REC) is an attribute which defines and organizes Production resources (RESCONFIG) in the system. The structure of these categories is defined in the Production resource categories (REC) application.
Navigate to the application
Option 1: RamBase menu→Production→Resource management→Resource categories
Option 2: Click the Program field and type "REC" and press ENTER.
Click here to read more about the user interface.
The Production resource category (REC) application is flexible and can be tailored to any intended production plan or setup. Therefore a Production resource (RESCONFIG) can belong to several Production resource categories (REC). The user can decide if the categories should be structured by shifts, machines, work stations or other logical structures which helps them organize their layout.
An overview of the Work order operations (WOO) for each category can be seen in the List of work order operations for production resource category (RECWOO) application, which is available from the Context menu.
The application is divided into three main areas; the Production resource categories area, the Production resource category details area and the Production resources area as visualized in the screenshot below.

The Production resource categories area lists the Production resource categories (REC).
The Production resource categories (REC) can be viewed in two different ways; Tree view and Table view as listed in the sections below.
The Tree view provides the user with various information about the category, such as its status, name, and number of subcategories. Type a name in the search field to find a specific Production resource category (REC). By default, Production resource categories (REC) in Status 9 (Deactivated), are not displayed.
By design it is meant for easy overview and efficient creation of subcategories.

A description of the functions are listed below:
Search field - Use the search field to find the intended Production resource category (REC) by providing the name.
Show deactivated filter - To view deactivated Production resource categories (REC), activate the filter by clicking it. Orange is active, gray is inactive.
To expand a Production resource category (REC) and view subcategories, click the Arrow to the left of the status icon.
To add a new subcategory, click the intended parent Production resource category (REC) and click on the Plus icon to open a popup with the following options:
Name - Type the intended name for the subcategory.
Description - Type a useful description.
Create button - Click the Create button to add the new subcategory in Status 4 (Active).
Cancel button - Click the Cancel button to cancel the creation of the new subcategory.
The Table view is useful in navigating to, and viewing details on a specific Production resource categories (REC). When using the Table view, it can be beneficial in noting the Full name column to identify the intended Production resource category (REC)

Search field - Use the Search field to search for the Name the intended Production resource category (REC). By clicking the Search field and pressing SPACEBAR, all available parameters will be listed, including Name, Status, ContainingProductionResouceId and more.
Filter builder icon - Click the filter builder to list the available standard filter; Active. The user can also Create custom filters by selecting Field + Operator + Value and clicking the Save filter button. The saved filter will be save in the My saved filters area in the Filter builder popup.
Column settings icon - Clicking the Columns settings icon will list the following options:
Columns - Hover over to view a list of all available columns. Select the intended columns to be displayed in the list.
Export to excel - Click to send the contents of the list in .xlsx format to the current users e-mail. Which is set up in the Personnel (PER) application.
Reset to default view - Click to reset the selected columns and resizing of the areas in the current application. This is useful in cases where there are unexpected errors or missing information.
Column | Description |
|---|---|
St | An icon indicating the status of the Production resource category (REC).
|
Name | The Production resource category (REC) name, which is set when creating it. |
Full name | Unique name for the Production resource category (REC) . Built using the name of the Production resource category and the levels above. |
Description | Production resource category (REC) description, which is set when creating it. |
In the Production resource category details area, the name, full name (path, including parent categories) and the description of the selected category is displayed.
Use the View work order operations option in the Context menu to see the List of the operations for the selected category (RECWOO) or deactivate it (if it is active). See the context menu section for more details.
Name field - The Production resource category (REC) name, which is set when creating it.
Full name field - Unique name for the Production resource category (REC) . Built using the name of the Production resource category and the levels above.
Description free text field- Production resource category (REC) description, which is set when creating it.
The Production resources list in the Production resources area contains the list of all Production resources (RESCONFIG) linked to the selected category.
It is possible to add new Production resources (RESCONFIG) to the selected Production resource category (REC) by clicking the +ADD button in the Header, or remove them, by clicking the Remove icon in the List.
Click on the Arrow icon to open the Operators list of production work order operations (RWOO) application for the selected Production resource (RESCONFIG).
The header contains drop-down menus, buttons and checkboxes to add Production resource categories (REC) and include subcategories. The options are listed below:
Production resources drop-down menu - Click the drop-down menu to select which Production resource (RESCONFIG) to add to the selected Production resource category (REC).
+ADD button - To add a Production resource (RESCONFIG) to the selected Production resource category (REC), first select a Production resource (RESCONFIG) in the Production resource drop-down menu. This will activate the +ADD button. Then click the +ADD button.
Include subcategories checkbox - Click on the Include subcategories checkbox to display Production resources (RESCONFIG) linked to all subcategories below the selected parent node, from either the Tree view tab or the Table view tab.
Example 2. Empty Production resource category (REC) with two sub categories, both containing Production resources (RESCONFIG)
Figure 1: A category (containing 2 subcategories) does not own any resources, and by default the list is empty.
Figure 2: Clicking on the Include subcategories checkbox displays the Production resources (RESCONFIG) belonging to the subcategories of the selected Production resource category (REC).
Note
A Production resource (RESCONFIG) may be listed more than once. The reason being, a Production resource (RESCONFIG) can be added to several Resource categories (REC). Differentiate between them by verifying the Resource category name column.


The Production resource area contains several functions, including a search field and list of Production resources (RESCONFIG). All functions are detailed below.
Search field - A default search will result in only searching on the contents of the Name column. For example searching for "CNC" will list all Production resources (RESCONFIG) which has names containing "CNC". By clicking the Search field and pressing SPACEBAR, all available parameters will be listed , including Type, Status, ProductionResourceId and more.
Filter builder icon - Click the Filter builder icon to open the corresponding popup with the following areas and options:
Standard filters; Active - Select this filter to list only Production resources (RESCONFIG) in Status 4 (Active). The filter is displayed below the search field. If it is displayed in orange, it is active. If it is displayed in gray, it is inactive.
My saved filters - List all filters made with the Create custom filters tool by selecting Field + Operator + value and clicking the Save filter button.
Column settings icon - Click the Column settings icon to open a popup with the following options:
Columns - Hover over to view a list of all available columns. Select the intended columns to be displayed in the list.
Export to excel - Click to send the contents of the list in .xlsx format to the current users e-mail. Which is set up in the Personnel (PER) application.
Reset to default view - Click to reset the selected columns and resizing of the areas in the current application. This is useful in cases where there are unexpected errors or missing information.
Column | Description |
|---|---|
St | Displays an icon indicating the status of the Production resource (RESCONFIG).
|
Id | Displays the Production resource (RESCONFIG) identifier number. Click the View icon to open the Production resource (RESCONFIG) application and view details on the specific Production resource (RESCONFIG). |
Name | Displays the name of the Production resource (RESCONFIG) which is set in the Production resource (RESCONFIG) application. |
Resource category name | Displays the name set in the Name field in the Production resource category details area. Is defined as the Production resource category (REC) name. Click the View icon to go directly to the specific Production resource category (REC). This is useful, especially when the Include subcategories checkbox is selected. |
Type | Lists the type of the resource. The types can be:
|
| Clicking the Remove icon will remove the Production resource (RESCONFIG) from the selected Production resource category (REC). NoteA Production resource (RESCONFIG) can only be removed from a Production resource category (REC) when it is part of the main Production resource category (REC), not a subcategory. Note this especially when selecting the Include subcategories checkbox. |
| Clicking the Arrow icon will redirect the user to the Operators list of work order operations for production category (RWOO) application for the selected Production resource (RESCONFIG). |

The Context menu is available by clicking the Context menu icon in the upper right corner and will display the following context based options dependent on the Production resource category's (REC) status.
Operation | Description |
|---|---|
View capacity and load | Click the View capacity and load option to open the Production resource capacity and load overview (RCL) application. All Production resources (RESCONFIG), belonging to the selected Production resource category (REC) will be visualized in an overview where the user can inspect the resource load in a specific period of time. Read more about the Production resource capacity and load (RCL) application here. NoteWhen entering the Production resource capacity and load overview (RCL) application from the Production resource categories (REC) application, the option to Include subcategories will be available as a checkbox in the header. |
View work order operations | Redirects the user to the List of work order operations for production category (RECWOO) application for the selected category. Read more about the List of work order operations for production category (RECWOO) application here. |
Operation | Description |
|---|---|
Deactivate | Sets the selected Production resource category (REC) from Status 4 (Active) to Status 9 (Deactivated). Cannot contain any Production resources (RESCONFIG). |
Deactivate branch | Deactivates the selected Production resource category (REC) and all subcategories which are in Status 4 (Active). Current and all subcategories cannot contain any Production resources (RESCONFIG). |
By default, there are no Production resource categories (REC) defined in the system. To create a new main Production resource category (REC), open the Production resource category (REC) application and click on the Create first production resource category button in the Production resource categories tree.

Important: This will create a top (main) category in Status 4 (Active), with a name taken from the currently selected database. There can be only one top category in the structure. Upon activation, the category cannot be removed or deactivated.
Click on the category under which you would like to create a new subcategory. This will display the icon used for adding new items to the structure.
This will open a new popup containing the basic information of the parent category, Name (required field) and Description (optional field). Click the Create button to add a new category in Status 4 (Active).

Click on the Production resource category (REC) in the Tree view or Table view to display the Production resource category details area. The right part of the Production resource categories (REC) application shows the list of all Production resources (RESCONFIG) linked to that specific Production resource category (REC).

To add a new Production resource (RESCONFIG) to the selected category, search for the intended Production resource (RESCONFIG) in the drop-down menu and click the +ADD button.
Note
A Production resource (RESCONFIG) can be added to several Production resource categories (REC).
The Resource Work Order Operations (RWOO) application is used to show the Work order operations (WOO) related to a Production resource (RESCONFIG), with all necessary details and links to related applications.
Navigate to the application
Option 1: RamBase menu→Production→Production→Select jobs on resource
Option 2: Click the Program field and type "RWOO" and press ENTER.
Click here to read more about the user interface.

The following areas are described in the sections below:
The Operators list of production work order operations area
The Work order operations area
Header
List
The Operators list of production work order operations area is used to select the intended Production resource (RESONFIG) to view Work order operations (WOO) for. The user can also click on the Category view button to open the List of work order operations for production resource category (RECWOO) application and view Work order operations (WOO) organized by their related category.
Production resources drop-down menu - Click the Production resources drop-down menu to select the intended Production resource (RESCONFIG) and display the related Work order operations (WOO).
Resource view button - Click the Resource view button to open the Operators list of Production work order operations (RWOO) application.
Category view button - Click the Category view button to open the List of work order operations for production resource category (RECWOO) application.
Banner - If the Production resource (RESCONFIG) has been flagged in the Operators list of production work orders (RWOO) or the Work order operations (WOO) application, a status banner will be visible in the upper right area of the Operators list of production work order operations area. Hover over the banner to see a description. Set the production resource condition from the context menu options.
Read more in the Context menu options section.
Read more about Setting a resource condition in the Work order operations (WOO) application here.
After selecting the intended Production resource (RESCONFIG) in the Operators list of production work order operations area, the user can further filter the list by using the options in the Work order operations header area. The Work order operations area contains fields, drop-down menus and buttons to help the user list only the intended Work order operations (WOO).
Field, drop-down menu or button | Description |
|---|---|
Serial number (whole number) - field | To list information on a specific Work order operation (WOO), the user can type the serial number of the intended Product unit (LCM) being produced by the Work order operation (WOO). Note that the complete serial number must be entered. |
Production work order id - field | To list information on a specific Work order operation (WOO), the user can type Production work order (PWO) identifier. Only type numbers. Note that this is the same number listed in the Work order column in the Work order operations list. |
Product unit id (whole number) - field | To list information on a specific Work order operation (WOO), the user can type the Product unit (LCM) identifier. Only type numbers. |
Product name - field | To list information on specific Work order operations (WOO), the user can type the name of an intended Product (ART) to list only Work order operations (WOO) producing products with names containing the typed values. |
Product description - field | To list information on specific Work order operations (WOO), the user can type the description an intended Product (ART) to list only Work order operations (WOO) producing products with descriptions containing the typed values. |
Customer reference number - field | To list information on specific Work order operations (WOO), the user can type the customer reference number of a Sales order (COA), that has triggered the Production work order (PWO) and Work order operation (WOO), to list only Work order operations (WOO) containing the customer reference number. |
Material name - field | To list information on specific Work order operations (WOO), the user can type the name of parts to list only Work order operations (WOO) with part name containing the typed values. |
Operator - drop-down menu | Click on the Operator drop-down menu to which operator to view Work order operations (WOO) for. |
| Click the Clear filter button to remove all selected parameters in the Work order operations area. |

The list in the Work order operations area will list all Work order operations (WOO) for the selected Production resource (RESCONFIG) based on the selections made in the header. The user can also customize which columns are to be displayed by using the Column settings.
The user can also further filter the Work order operations (WOO) displayed by using the Filter builder where the user can select from standard filters or even create custom filters. The standard filters and the available columns are described in the tables below.
Filter builder, Column settings and available columns
Search field - The Search filed can be used to search for specific Work order operations (WOO). Click the Search field and press SPACEBAR to list all the available parameters to search on.
Filter builder - Click the Filter builder icon to open a popup where the user can select filters from the Standard filters area. Selected filters will be visible below the Search field. Active filters are marked orange, inactive are marked gray. The user can also Create custom filters by selecting Field, Operator and Value in the Create custom filters area, and then pressing the Save filter button. Saved filters will be available from the My saved filters area. Click the intended saved filter to add it below the Search field.
Standard filters and their descriptions are listed in the table below:
Standard filters
Description
Active
Will display Work order operations (WOO) in:
Status 3 (Ready for start)
Status 4 (Changeover setup)
Status 5 (Processing)
Status 7 (Changeover cleanup)
All
Will display Work order operations (WOO) in:
Status 2 (In queue)
Status 3 (Ready for start)
Status 4 (Changeover setup)
Status 5 (Processing)
Status 7 (Changeover cleanup)
Can be grouped
Will display Work order operations (WOO) that are not grouped in the Group work order operations (GWOO) application and are in:
Status 2 (In queue)
Status 3 (Ready for start)
Completed
Will display Work order operations (WOO) in:
Status 9 (Completed)
Grouped
Will display Work order operations (WOO) that are grouped in the Group work order operations (GWOO) application and are in:
Status 2 (In queue)
Status 3 (Ready for start)
Status 4 (Changeover setup)
Status 5 (Processing)
Status 9 (Completed)
My tasks
Will display Work order operations (WOO) where the user is set as an operator.
Not grouped
Will display Work order operations (WOO) that are not grouped with the Group work order operations (GWOO) application and are in:
Status 3 (Ready to start)
Status 5 (Processing)
Status 9 (Completed)
Production
Will display Work order operations (WOO) in:
Status 4 (Changeover setup)
Status 5 (Processing)
Status 7 (Changeover cleanup)
Ready
Will display Work order operations (WOO) in:
Status 3 (Ready)
Wait
Will display Work order operations (WOO) in:
Status 2 (In queue)
Column settings - Click the Column settings icon to:
Export to excel - Will send an .xlsx file by email to user. The email is set up in the Personnel (PER) application.
Reset to default view - Reset all changes to selected columns and resizing of the area. This is useful if encountering unexpected errors.
Columns - Hover over to select which columns should be displayed in the list. The available columns are described in the table below.
Columns
Description
St
Displays an icon indicating the status of the Work order operation (WOO). Hover over for a description of the status.
State
The State column includes informative icons and text further detailing the status of the Work order operation (WOO). The Ready at date and time is also displayed if the Ready at date is defined.
Star icon - High priority
Stop icon - Work order operation (WOO) and/or Production work order (PWO) is on hold.
Pause icon - Work order operation (WOO) and/or Production work order (PWO) in paused.
Qty
The quantity of Product units (LCM) being produced by the initial Production work order (PWO), set when creating the Production work order (PWO).
Pick
The Pick column displays icons indicating the status of the picking process for the Work order operation (WOO).
Serial number
Displays the serial number of the Product unit (LCM) being produced by Work order operation (WOO). If there are multiple Product units (LCM) being produced, ++ will be displayed at the end of the serial number.
Work order
Displays the identifier of the Production work order (PWO) for the Work order operation (WOO).
Customer
If the Production work order (PWO) and the subsequent Work order operations (WOO) are linked to a Sales order (COA), the name of the customer will be displayed in the Customer column.
Customer reference number
If the Production work order (PWO) and the subsequent Work order operations (WOO) are linked to a Sales order (COA), the customer reference number will be displayed in the Customer reference number column.
Product
The name of Product (ART) being produced is displayed in the Product column. Click the View icon to open the Product (ART) application to view and edit details on the Product (ART).
Revision
Gives information about the current revision of the product. The revision number is derived from the Product (ART) application. From the Product (ART) application, click on the View icon next to the Revision field in the header to view Article revisions.
Sequence number
Displays the operation sequence number in the Production structure (KITDOC).
Operation
Displays the name of the Production operation (OPR).
Planned start at margin
Displays the number of days in relation to the Scheduled completion date set in the Production work order (PWO) application when creating the Production work order (PWO). A positive number will be displayed if the number of days has passed the Scheduled completion date. If the Scheduled completion date is a future date, a negative number will be displayed, counting down until the Scheduled completion date.
Remaining time
Displays the remaining time for the operations set in the Product (ART) structure. Details can be quickly viewed by clicking the View icon in the Work order column and then clicking the Structure button in the Links area, in the Production work order (PWOD) application.
Operator
Displays the name of the operator who last worked on the current Work order operation (WOO). Click the View icon to open the Personnel (PER) application to view details about
Planned start at
The date which the Work order operation (WOO) is planned to start to meet the required date set when creating the Production work order (PWO).
Planned finished at
The date which the Work order operation (WOO) is planned to be completed, to meet the required date set when creating the Production work order (PWO).
Finished at
The date which the Work order operation (WOO) is set in Status 9 (Completed).
Is operation locked
Will display YES, if the planner has locked the operation in the Planned operation for production work order (PWOPLO). This can be due to inspection by external source or similar requirements.
Delivery project
Displays the name of the Delivery project (PRO) the Work order operation (WOO) is linked to. Click the View icon to open the Delivery project (PRO) application.
Read more about the Delivery Project (PRO).
Group
Displays the name of Group work order operations (GWOO). Click the View icon to open the Group work order operation (GWOO) application where the user can assign, add and run groups of Work order operations (WOO).
Read more about the Group work order operations (GWOO) here.
Priority
Ready at
Earliest date and time for starting the Work order operation (WOO).
Requested completion
Displays the requested completion date which, the planner sets in the Production work order (PWOD) application, in the Dates area.
Confirmed completion
Displays the confirmed completion date, which the planner sets in the Production work order (PWOD) application, in the Dates area.
Material name
Displays Product (ART) name and product description of the first material on the Production structure (KITDOC) list for the Product unit (LCM) being built with the specified operation. The cell will display products of class P and M only.
To display the information in the application, the Company setting (CSV), Fetch ProductStructure material and operation info in RWOO (OFF by default), must be enabled. If the Company setting (CSV) is OFF, they will no information will be displayed.
Operation info
Displays the Operation note set in the Work order operation (WOO) application.
The Company setting (CSV), Fetch ProductStructure material and operation info in RWOO (OFF by default), must be enabled to display information. If the Company setting (CSV) is OFF, no information will be displayed.
Product units received
Will display a progress bar for the total Product units (LCM) to be produced.
Production tasks
The Production tasks column displays all production tasks linked to the Work order operation (WOO). Each task is represented by an icon. These icons can be clicked to open the Task details (TASK) application to view and edit details. Note that all icons will also display the title. The user must therefore click the icon, and not the text to open the Task details (TASK) application.
Production tasks icons
 - Status 1 - To do
 - Status 4 - In progress
 - Status 5 - In review
 - Status 7 - Rejected
 - Status 8 - Done
 - Status 9 - Archived
 - Click the Show all production tasks to open a related popup listing all Production tasks, Pre-production tasks and Scheduled production tasks.
 Active and Detached production tasks
The Production tasks tab includes two standard filters. Note that detached production tasks will be listed, but with strike-through if the Standard filter, Detached tasks is selected. In example: "Detached task".
Active tasks - Displays all active production tasks in the Task process (TSP)
Detached tasks - Displays all production tasks which for various reasons are no longer attached to the Task process (TSP).
When are production tasks potentially detached from a Production work order (PWO)?
Changes to the Production structure (KITDOC)
Production work order (PWO) is cancelled
Production work order (PWO) is scrapped
Note
The space in the Production tasks column is limited. Therefore only a limited number of tasks can be displayed, meaning others can be hidden.
Pre-production tasks
The Pre-production tasks column displays all pre-production tasks linked to the Work order operation (WOO). Each task is represented by an icon. These icons can be clicked to open the Task details (TASK) application to view and edit details.
Pre-production tasks icons
- - Status 1 - To do
- - Status 4 - In progress
- - Status 5 - In review
- - Status 7 - Rejected
- - Status 8 - Done
- - Status 9 - Archived
- Click the Show all production tasks to open a related popup listing all Production tasks, Pre-production tasks and Scheduled production tasks. Note
The space in the Pre-production tasks column is limited. Therefore only a limited number of tasks can be displayed, meaning others can be hidden.
Scheduled production tasks
- Click the Show all scheduled production tasks to open a related popup listing all Production tasks, Pre-production tasks and Scheduled production tasks. The icon will be accompanied by a number. This number states the number of scheduled production tasks linked to the Work order operation (WOO).

Click the Production status info icon to open the Planned operations for production work order (PWOPLO) application where the user can inspect and change Planned operations for the Production work order (PWO).
Read more here about the Planned operations for production work order (PWOPLO) here.

Click the Confirm picking icon to open the Pick (PICK) application where the user can initialize picking and perform the intended picking of parts and products.

Click the Scan picking icon to open the Picking with hand held terminals (SCANPICK) application where the user can efficiently pick parts and products by using hand held terminals.
Read more about Picking with hand held terminals (SCANPICK) here.

Click the Assign resource icon to open the Assign resource (ASSIGNRES) application where the user can assign group members and alternative resource to the Work order operation (WOO).

Click the Arrow icon to open the Work order operation (WOO) application on the selected Work order operation (WOO).
Read more about the Work order operation (WOO) application here.


Context menu options | Description | ||||||
|---|---|---|---|---|---|---|---|
View capacity and load | Click the View capacity and load option to open the Production resource capacity and load overview (RCL) application. The selected Production resource will be visualized in an overview where the user can inspect the resource load in a specific period of time. The Show selected checkbox will automatically be checked in the Production resource capacity and load overview (RCL) application. The initial Production resource (RWOO) will therefore be the only production resource displayed. Read more about the Production resource capacity and load (RCL) application here. | ||||||
Set production resource condition | Click the Set production resource condition option to open: The Set production resource condition popup
This can be used to flag Production resources (RESCONFIG) for maintenance or inform the planner that the machine has stopped. Setting the resource condition will only visually flag, and not limit any functions of the Production resource (RESCONFIG). The set resource condition will be displayed, with an icon or a banner with the optional note, in the following applications:
| ||||||
QAR Documents | Select the QAR Documents option to open the Quality report archive menu where the user can inspect quality issues and create new issue reports. | ||||||
Group work order operations | Select the Group work order operations option to open the Group work order operations (GWOO) application where the user can assign Work order operations (WOO) to groups, add new groups and run groups. Read more about the Group work order operations (GWOO) here. | ||||||
Picklist for Service Orders | Select the Picklist for Service Orders option to open a popup where the user can define and run a report which opens the Report (NGREP/104256). The report displays the pick list for service orders and details:
|
Navigate to the application
Option 1: RamBase menu→Production→Production→Select jobs on resource
Option 2: Click the Program field and type "RWOO" and press ENTER.
Click here to read more about the user interface.
Read more about the Operators list of production work order operations (RWOO) application here.
Search for or select a Production resource (RESCONFIG) in the Production resource drop-down menu.
Work order operations (WOO) for the selected Production resource (RESCONFIG) will be displayed in the list.
Use the fields in the Work order operations area to further filter on the listed Work order operations (WOO).
After identifying the intended Work order operation (WOO), click on the Arrow icon to open the Work order operation (WOO) application on the current Work order operation (WOO) selected in the Operators list of Production work order operations (RWOO) application.
What is the application used for?
Efficiently assign Work order operations (WOO) to Production resources (RESCONFIG).
Add alternative Production resources (RESCONFIG), granting overview to quickly adjust to changing production needs.
Who uses it?
Production planners
How to access the application
The application is used in the context of either the List of work order operations for production resource category (RECWOO) or Operators list of production work order operations (RWOO) applications. The Assign production resource (ASSIGNRES) application is opened by clicking the Assign resource icon from the second column from the right.

Header
Production Resource area
Production area
Work order operation area
Tabs
Group members tab
Alternative resources tab
Context menu options

The Production resource area details the Production resource (RESCONFIG). Notable information is the Type and Group dropdown menus of the Production resource (RESCONFIG), as these determine the group members available, and the alternative resources to be added in the tab below.
Name field - Displays the name of the Production resource (RESCONFIG).
Short name field - Displays the short name of the Production resource (RESCONFIG).
Type dropdown menu - Displays the type of the Production resource (RESCONFIG). Either machine or person.
Group dropdown menu - Displays the name of the Production resource group (REGCONFIG) the Production resource (RESCONFIG), is a member of.
Description textbox- Displays the description of the Production resource (RESCONFIG), which is set in the same application.
Tip
The production resource condition is often set when encountering or clearing issues in the production resource when performing a Work order operation (WOO). The production resource conditions can be OK - red, Warning - yellow or Stopped - red and can be reflected with an icon.
The Production area details the Production work order (PWO). Notable information are the Manufacturing area and Location as these will provide the basis for which Production resources (RESCONFIG), should be added as alternative resources.
Work order field - Displays the Production work order (PWO) identifier. Click the View icon to open the Production work order (PWO) application in the context of the current identifier. The state of Production work order (PWO), for example On hold - red, is reflected by the color of the field.
Product name field - Displays the name of the Product (ART) being produced by the Production resource (RESCONFIG).
Description field - Displays the description of the Product (ART) being produced.
Manufacturing area field - Displays the name of the Manufacturing area (MAA) being used to produce the Product (ART).
Revision field - Displays the name of the Product (ART) revision, being produced.
Quantity field - Displays the quantity the of Product (ART) being produced.
Location field - Displays the short name of the Location (LOC) where the Product (ART) is being produced.
Is manufactured in batches checkbox - If checked, there will be one (1) Product unit (LCM) per Production work order (PWO). Material supply from different sources may cause the original batch Product unit (LCM) to be split.
Search field - Search for a Production resource group member (RESCONFIG). By clicking the Search field and pressing SPACEBAR, all available parameters will be listed.
The Work order operation area details the operation in terms of time and status. Notable information is the Planned start at and Planned finished at as this will determine the baseline for when to add alternative resources.
Work time progress bar - Displays the total worked time in relation to the planned work time.
Work order operation field - Displays the Work order operation (WOO) identifier along with its current status, for example Ready or Wait. The state of Work order operation (WOO), for example On hold - red, is reflected by the color of the field. Quickly navigate to the Work order operation (WOO) application by clicking the View icon.
Operation - Displays the name of the Operation (OPR) to be/being/ performed by the operator in the context of the Work order operation (WOO).
Planned start at - Displays the planned start time and date of the Work order operation (WOO). Specified in the Planned operations for the Production work order (PWOPLO) application. Displayed in YYYY.MM.DD format.
Planned finished at - Displays the planned finished at time and date of the Work order operation (WOO). Specified in the Planned operations for the Production work order (PWOPLO) application. Displayed in YYYY.MM.DD format.
The Group members and Alternative resources tabs provide the user with an efficient way of assigning, unassigning and removing Production resources to/from the Production work order(PWO)/Work order operation (WOO). Notable information is in the Load % column reflecting the load of the production resource in the Planned start at and Planned finished at time frame.

The Group members tab is used for efficiently viewing the capacity and load of group members, and making informed decisions on assigning or unassigning Production resources (RESCONFIG) to the Work order operation (WOO). The user can also quickly navigate to the Production resource (RESCONFIG) application by clicking the View icon to view and edit details in the Production resource (RESCONFIG) application.
Search field - Search for a Production resource group member (RESCONFIG). By clicking the Search field and pressing SPACEBAR, all available parameters will be listed, including Name, Status, ProductionResouceId and more.
Filter builder icon - Click the Filter builder icon to open a popup where the user can select filters from the Standard filters area. The standard filters available is the New and active members which will display Production resource group members (RESCONFIG) in Status 4 (Active).
Selected filters will be visible below the Search field. Active filters are marked orange, inactive are marked gray. The user can also Create custom filters by selecting Field, Operator and Value in the Create custom filters area, and then pressing the Save filter button. Saved filters will be available from the My saved filters area. Click the intended saved filter to add it below the Search field.
Column settings icon - To select which information is displayed, click on the Column settings icon and hover over Columns. Then select the intended columns. The selection of data can be exported to Excel via the Export to excel option in the Column settings. The Reset to default view is also useful in resetting column width and placement, since columns can be dragged and dropped to suit the user. A description of the columns are listed in the table below.
Column | Icon | Description |
|---|---|---|
Status |
| Displays an icon indicating the status of the Production resource group member (RESCONFIG). The available statuses are:
|
Id |
| Displays the Production resource (RESCONFIG) identifier of the Production resource group (REGWOO) member. To view and edit details on the Production resource (RESCONFIG) and open the application, click the View icon. |
Name |
| Displays the name of the Production resource (RESCONFIG). The condition of the resource is indicated by potential Warning or Stopped icons. |
Load % | A progress bar visualizing the load of the Production resource (RESCONFIG) in the Planned start at and Planned finished at time frame. To view capacity and load details, select the Production resource (RESCONFIG) from the Group members tab - list, and select the View capacity and load context menu option to open the Production resource capacity and load (RCL) application. | |
Assign |
| The user can assign, or unassign, Production resources (RESCONFIG) to the Work order operation (WOO) by clicking either the Assign or Unassign icon And in doing so, replacing the current Production resource (RESCONFIG). |


The Alternative resources tab provide the option of adding alternative Production resources (RESCONFIG). This allows the Production planner a quick overview of the Production resources' Load % in the production time frame, granting the Production planner the overview to quickly handle changes in production needs.
Search field - Search for a specific alternative Production resource group member (RESCONFIG) which has previously been added. By clicking the Search field and pressing SPACEBAR, all available parameters will be listed, Orderby and LegacyFilter.
Filter builder icon - Click the Filter builder icon to open a popup where the user can Create custom filters by selecting Field, Operator and Value in the Create custom filters area, and then clicking the Save filter button. Saved filters will be available from the My saved filters area. Click a saved filter to add it below the Search field. can select filters from the Standard filters area.
Selected filters will be visible below the Search field. Active filters are marked orange, inactive are marked gray.
Column settings icon - To select which information is displayed, click on the Column settings icon and hover over Columns. Then select the intended columns. The selection of data can be exported to Excel via the Export to excel option in the Column settings. The Reset to default view is also useful in resetting column width and placement, since columns can be dragged and dropped to suit the user. A description of the columns are listed in the table below.
Columns and button | Icon | Description |
|---|---|---|
Status |
| Displays an icon indicating the status of the Production resource group member (RESCONFIG). The available statuses are:
|
Id |
| Displays the Production resource (RESCONFIG) identifier. To view and edit details on the Production resource (RESCONFIG) and open the application, click the View icon. |
Name |
| Displays the name of the Production resource (RESCONFIG). The condition of the resource is indicated by potential Warning or Stopped icons. |
Load % | A progress bar visualizing the load of the Production resource (RESCONFIG) in the Planned start at and Planned finished at time frame. To view capacity and load details, select the Production resource (RESCONFIG) from the Group members tab - list, and select the View capacity and load Context menu option to open the Production resource capacity and load (RCL) application. | |
Type | Displays the type of the Production resource (RESCONFIG):
| |
Assign |
| The user can assign, or unassign, Production resources (RESCONFIG) to the Work order operation (WOO) by clicking either the Assign or Unassign icon And in doing so, replacing the current Production resource (RESCONFIG). |
| Click the Remove alternative member icon to remove the Production resource (RESCONFIG) from the Alternative resources tab. | |
Add new alternative resource button | To add a new alternative resource, click the Add new alternative resource button to open a popup where the user can add Production resources (RESCONFIG) in Status 1 - Pending registration and Status 4 - Active. Added alternative Production resources (RESCONFIG) can be assigned to the Work order operation (WOO), and in doing so, replacing the current Production resource (RESCONFIG). |
The Context menu is located in the top-right corner and provides the following options:
 - Context menu icon
Context menu options | Description |
|---|---|
Resource work order operations | Select this option to open the Operators list of production work order operations (RWOO) application in the context of the current Production resource (RESCONFIG). |
View capacity and load | Select this option to open the Operators list of production work order operations (RCL) application. |
The List of work order operations for production resource category (RECWOO) application is for efficiently sorting through Work order operations (WOO) organized by Production resource categories (REC).
Navigate to the application
Option 1: Click the Program field and type "RECWOO" and press ENTER.
Click here to read more about the user interface.

The following areas are described in the sections below:
The List of work order operations for production resource category area
The Work order operations area
Header
List
Context menu options
The List of work order operations for production resource category area is used to select the intended Production resource category (REC) to view Work order operations (WOO) for. The user can also click on the Resource view button to open the Operators list of production work order operations (RWOO) application and view Work order operations (WOO) organized by their related Production resource (RESCONFIG).
Production resource category drop-down menu - Click the Production resource category drop-down menu to select the intended Production resource category (REC) and display the related Work order operations (WOO).
Resource view button - Click the Resource view button to open the Operators list of Production work order operations (RWOO) application.
Category view button - Click the Category view button to open the List of work order operations for production resource category (RECWOO) application.
After selecting the intended Production resource category (REC) in the List of work order operations for production resource category area, the user can further filter the list by using the options in the Work order operations header area. The Work order operations area contains fields, drop-down menus and buttons to help the user list only the intended Work order operations (WOO).
The list in the Work order operations area will list all Work order operations (WOO) for the selected Production resource category (REC) based on the selections made in the header. The user can also customize which columns are to be displayed by using the Column settings.
The user can also further filter the Work order operations (WOO) displayed by using the Filter builder where the user can select from standard filters or even create custom filters. The standard filters and the available columns are described in the tables below.
Filter builder, Column settings and available columns
Search field - The Search filed can be used to search for specific Work order operations (WOO). Click the Search field and press SPACEBAR to list all the available parameters to search on.
Filter builder - Click the Filter builder icon to open a popup where the user can select filters from the Standard filters area. Selected filters will be visible below the Search field. Active filters are marked orange, inactive are marked gray. The user can also Create custom filters by selecting Field, Operator and Value in the Create custom filters area, and then pressing the Save filter button. Saved filters will be available from the My saved filters area. Click the intended saved filter to add it below the Search field.
Standard filters and their descriptions are listed in the table below:
Standard filters
Description
Active
Will display Work order operations (WOO) in:
Status 3 (Ready for start)
Status 4 (Changeover setup)
Status 5 (Processing)
Status 7 (Changeover cleanup)
All
Will display Work order operations (WOO) in:
Status 2 (In queue)
Status 3 (Ready for start)
Status 4 (Changeover setup)
Status 5 (Processing)
Status 7 (Changeover cleanup)
Can be grouped
Will display Work order operations (WOO) that are not grouped in the Group work order operations (GWOO) application and are in:
Status 2 (In queue)
Status 3 (Ready for start)
Completed
Will display Work order operations (WOO) in:
Status 9 (Completed)
Grouped
Will display Work order operations (WOO) that are grouped in the Group work order operations (GWOO) application and are in:
Status 2 (In queue)
Status 3 (Ready for start)
Status 4 (Changeover setup)
Status 5 (Processing)
Status 9 (Completed)
My tasks
Will display Work order operations (WOO) where the user is set as an operator.
Not grouped
Will display Work order operations (WOO) that are not grouped with the Group work order operations (GWOO) application and are in:
Status 3 (Ready to start)
Status 5 (Processing)
Status 9 (Completed)
Production
Will display Work order operations (WOO) in:
Status 4 (Changeover setup)
Status 5 (Processing)
Status 7 (Changeover cleanup)
Ready
Will display Work order operations (WOO) in:
Status 3 (Ready)
Wait
Will display Work order operations (WOO) in:
Status 2 (In queue)
Column settings - Click the Column settings icon to:
Export to excel - Will send an .xlsx file by email to user. The email is set up in the Personnel (PER) application.
Reset to default view - Reset all changes to selected columns and resizing of the area. This is useful if encountering unexpected errors.
Columns - Hover over to select which columns should be displayed in the list. The available columns are described in the table below.
Columns
Description
St
Displays an icon indicating the status of the Work order operation (WOO). Hover over for a description of the status.
State
The State column includes informative icons and text further detailing the status of the Work order operation (WOO). The Ready at date and time is also displayed if the Ready at date is defined.
Star icon - High priority
Stop icon - Work order operation (WOO) and/or Production work order (PWO) is on hold.
Pause icon - Work order operation (WOO) and/or Production work order (PWO) in paused.
Resource
Displays the name of Production resource (RESCONFIG) assigned to the Work order operation (WOO). Click the View to open the Production resources (RESCONFIG) application to view and edit details on the selected Production resource (RESCONFIG). If there has been set a production resource condition, a warning icon will be displayed in the column.
Read more about Setting a resource condition in the Work order operations (WOO) application here.
Qty
The quantity of Product units (LCM) being produced by the initial Production work order (PWO), set when creating the Production work order (PWO).
Pick
The Pick column displays icons indicating the status of the picking process for the Work order operation (WOO).
Serial number
Displays the serial number of the Product unit (LCM) being produced by Work order operation (WOO). If there are multiple Product units (LCM) being produced, ++ will be displayed at the end of the serial number.
Work order
Displays the identifier of the Production work order (PWO) for the Work order operation (WOO).
Customer
If the Production work order (PWO) and the subsequent Work order operations (WOO) are linked to a Sales order (COA), the name of the customer will be displayed in the Customer column.
Customer reference number
If the Production work order (PWO) and the subsequent Work order operations (WOO) are linked to a Sales order (COA), the customer reference number will be displayed in the Customer reference number column.
Product
The name of Product (ART) being produced is displayed in the Product column. Click the View icon to open the Product (ART) application to view and edit details on the Product (ART).
Revision
Gives information about the current revision of the product. The revision number is derived from the Product (ART) application. From the Product (ART) application, click on the View icon next to the Revision field in the header to view Article revisions.
Operation
Displays the name of the Production operation (OPR).
Planned start at margin
Displays the number of days in relation to the Scheduled completion date set in the Production work order (PWO) application when creating the Production work order (PWO). A positive number will be displayed if the number of days has passed the Scheduled completion date. If the Scheduled completion date is a future date, a negative number will be displayed, counting down until the Scheduled completion date.
Remaining time
Displays the remaining time for the operations set in the Product (ART) structure. Details can be quickly viewed by clicking the View icon in the Work order column and then clicking the Structure button in the Links area, in the Production work order (PWOD) application.
Operator
Displays the name of the operator who last worked on the current Work order operation (WOO). Click the View icon to open the Personnel (PER) application to view details about
Planned start at
The date which the Work order operation (WOO) is planned to start to meet the required date set when creating the Production work order (PWO).
Planned finished at
The date which the Work order operation (WOO) is planned to be completed, to meet the required date set when creating the Production work order (PWO).
Finished at
The date which the Work order operation (WOO) is set in Status 9 (Completed).
Group
Displays the name of Group work order operations (GWOO). Click the View icon to open the Group work order operation (GWOO) application where the user can assign, add and run groups of Work order operations (WOO).
Read more about the Group work order operations (GWOO) here.
Ready at
Earliest date and time for starting the Work order operation (WOO).
Production tasks
The Production tasks column displays all production tasks linked to the Work order operation (WOO). Each task is represented by an icon. These icons can be clicked to open the Task details (TASK) application to view and edit details. Note that all icons will also display the title. The user must therefore click the icon, and not the text to open the Task details (TASK) application.
Production tasks icons
- - Status 1 - To do
- - Status 4 - In progress
- - Status 5 - In review
- - Status 7 - Rejected
- - Status 8 - Done
- - Status 9 - Archived
Active and Detached production tasks
The Production tasks tab includes two standard filters. Note that detached production tasks will be listed, but with strike-through if the Standard filter, Detached tasks is selected. In example: "Detached task".
Active tasks - Displays all active production tasks in the Task process (TSP)
Detached tasks - Displays all production tasks which for various reasons are no longer attached to the Task process (TSP).
When are production tasks potentially detached from a Production work order (PWO)?
Changes to the Production structure (KITDOC)
Production work order (PWO) is cancelled
Production work order (PWO) is scrapped
Note
The space in the Production tasks column is limited. Therefore only a limited number of tasks can be displayed, meaning others can be hidden.
Pre-production tasks
The Pre-production tasks column displays all pre-production tasks linked to the Work order operation (WOO). Each task is represented by an icon. These icons can be clicked to open the Task details (TASK) application to view and edit details.
Pre-production tasks icons
- - Status 1 - To do
- - Status 4 - In progress
- - Status 5 - In review
- - Status 7 - Rejected
- - Status 8 - Done
- - Status 9 - Archived
To view all pre-production tasks in a related popup, click the Show all production tasks icon.
Note
The space in the Pre-production tasks column is limited. Therefore only a limited number of tasks can be displayed, meaning others can be hidden.
Scheduled production tasks
To view all tasks categorized by Production task, Pre-production task and Scheduled production tasks, click the Show all production tasks icon.

Show all production tasks icon.
The accompanied number states the number of scheduled production tasks linked to the Work order operation (WOO).
Click the Production status info icon to open the Planned operations for production work order (PWOPLO) application where the user can inspect and change Planned operations for the Production work order (PWO).
Read more here about the Planned operations for production work order (PWOPLO) here.
Click the Confirm picking icon to open the Pick (PICK) application where the user can initialize picking and perform the intended picking of parts and products.
Click the Scan picking icon to open the Picking with hand held terminals (SCANPICK) application where the user can efficiently pick parts and products by using hand held terminals.
Read more about Picking with hand held terminals (SCANPICK) here.
Click the Assign resource icon to open the Assign production resource (ASSIGNRES) application where the user can assign group members and alternative resource to the Work order operation (WOO).
Click the Arrow icon to open the Work order operation (WOO) application on the selected Work order operation (WOO).
Read more about the Work order operation (WOO) application here.
Options | Description |
|---|---|
View capacity and load | Click the View capacity and load option to open the Production resource capacity and load overview (RCL) application. All Production resources (RESCONFIG), belonging to the selected Production resource category (REC), will be visualized in an overview where the user can inspect the resource load in a specific period of time. Read more about the Production resource capacity and load (RCL) application here. NoteWhen entering the Production resource capacity and load overview (RCL) application from the List of work order operations for production resource category (RECWOO) application, the option to Include subcategories will be available as a checkbox in the header. |
What is the application used for?
Efficiently assign Work order operations (WOO) to Production resources (RESCONFIG).
Add alternative Production resources (RESCONFIG), granting overview to quickly adjust to changing production needs.
Who uses it?
Production planners
How to access the application
The application is used in the context of either the List of work order operations for production resource category (RECWOO) or Operators list of production work order operations (RWOO) applications. The Assign production resource (ASSIGNRES) application is opened by clicking the Assign resource icon from the second column from the right.
Header
Production Resource area
Production area
Work order operation area
Tabs
Group members tab
Alternative resources tab
Context menu options
The Production resource area details the Production resource (RESCONFIG). Notable information is the Type and Group dropdown menus of the Production resource (RESCONFIG), as these determine the group members available, and the alternative resources to be added in the tab below.
Name field - Displays the name of the Production resource (RESCONFIG).
Short name field - Displays the short name of the Production resource (RESCONFIG).
Type dropdown menu - Displays the type of the Production resource (RESCONFIG). Either machine or person.
Group dropdown menu - Displays the name of the Production resource group (REGCONFIG) the Production resource (RESCONFIG), is a member of.
Description textbox- Displays the description of the Production resource (RESCONFIG), which is set in the same application.
Tip
The production resource condition is often set when encountering or clearing issues in the production resource when performing a Work order operation (WOO). The production resource conditions can be OK - red, Warning - yellow or Stopped - red and can be reflected with an icon.
The Production area details the Production work order (PWO). Notable information are the Manufacturing area and Location as these will provide the basis for which Production resources (RESCONFIG), should be added as alternative resources.
Work order field - Displays the Production work order (PWO) identifier. Click the View icon to open the Production work order (PWO) application in the context of the current identifier. The state of Production work order (PWO), for example On hold - red, is reflected by the color of the field.
Product name field - Displays the name of the Product (ART) being produced by the Production resource (RESCONFIG).
Description field - Displays the description of the Product (ART) being produced.
Manufacturing area field - Displays the name of the Manufacturing area (MAA) being used to produce the Product (ART).
Revision field - Displays the name of the Product (ART) revision, being produced.
Quantity field - Displays the quantity the of Product (ART) being produced.
Location field - Displays the short name of the Location (LOC) where the Product (ART) is being produced.
Is manufactured in batches checkbox - If checked, there will be one (1) Product unit (LCM) per Production work order (PWO). Material supply from different sources may cause the original batch Product unit (LCM) to be split.
Search field - Search for a Production resource group member (RESCONFIG). By clicking the Search field and pressing SPACEBAR, all available parameters will be listed.
The Work order operation area details the operation in terms of time and status. Notable information is the Planned start at and Planned finished at as this will determine the baseline for when to add alternative resources.
Work time progress bar - Displays the total worked time in relation to the planned work time.
Work order operation field - Displays the Work order operation (WOO) identifier along with its current status, for example Ready or Wait. The state of Work order operation (WOO), for example On hold - red, is reflected by the color of the field. Quickly navigate to the Work order operation (WOO) application by clicking the View icon.
Operation - Displays the name of the Operation (OPR) to be/being/ performed by the operator in the context of the Work order operation (WOO).
Planned start at - Displays the planned start time and date of the Work order operation (WOO). Specified in the Planned operations for the Production work order (PWOPLO) application. Displayed in YYYY.MM.DD format.
Planned finished at - Displays the planned finished at time and date of the Work order operation (WOO). Specified in the Planned operations for the Production work order (PWOPLO) application. Displayed in YYYY.MM.DD format.
The Group members and Alternative resources tabs provide the user with an efficient way of assigning, unassigning and removing Production resources to/from the Production work order(PWO)/Work order operation (WOO). Notable information is in the Load % column reflecting the load of the production resource in the Planned start at and Planned finished at time frame.
The Group members tab is used for efficiently viewing the capacity and load of group members, and making informed decisions on assigning or unassigning Production resources (RESCONFIG) to the Work order operation (WOO). The user can also quickly navigate to the Production resource (RESCONFIG) application by clicking the View icon to view and edit details in the Production resource (RESCONFIG) application.
Search field - Search for a Production resource group member (RESCONFIG). By clicking the Search field and pressing SPACEBAR, all available parameters will be listed, including Name, Status, ProductionResouceId and more.
Filter builder icon - Click the Filter builder icon to open a popup where the user can select filters from the Standard filters area. The standard filters available is the New and active members which will display Production resource group members (RESCONFIG) in Status 4 (Active).
Selected filters will be visible below the Search field. Active filters are marked orange, inactive are marked gray. The user can also Create custom filters by selecting Field, Operator and Value in the Create custom filters area, and then pressing the Save filter button. Saved filters will be available from the My saved filters area. Click the intended saved filter to add it below the Search field.
Column settings icon - To select which information is displayed, click on the Column settings icon and hover over Columns. Then select the intended columns. The selection of data can be exported to Excel via the Export to excel option in the Column settings. The Reset to default view is also useful in resetting column width and placement, since columns can be dragged and dropped to suit the user. A description of the columns are listed in the table below.
Column | Icon | Description |
|---|---|---|
Status |
| Displays an icon indicating the status of the Production resource group member (RESCONFIG). The available statuses are:
|
Id |
| Displays the Production resource (RESCONFIG) identifier of the Production resource group (REGWOO) member. To view and edit details on the Production resource (RESCONFIG) and open the application, click the View icon. |
Name |
| Displays the name of the Production resource (RESCONFIG). The condition of the resource is indicated by potential Warning or Stopped icons. |
Load % | A progress bar visualizing the load of the Production resource (RESCONFIG) in the Planned start at and Planned finished at time frame. To view capacity and load details, select the Production resource (RESCONFIG) from the Group members tab - list, and select the View capacity and load context menu option to open the Production resource capacity and load (RCL) application. | |
Assign |
| The user can assign, or unassign, Production resources (RESCONFIG) to the Work order operation (WOO) by clicking either the Assign or Unassign icon And in doing so, replacing the current Production resource (RESCONFIG). |
The Alternative resources tab provide the option of adding alternative Production resources (RESCONFIG). This allows the Production planner a quick overview of the Production resources' Load % in the production time frame, granting the Production planner the overview to quickly handle changes in production needs.
Search field - Search for a specific alternative Production resource group member (RESCONFIG) which has previously been added. By clicking the Search field and pressing SPACEBAR, all available parameters will be listed, Orderby and LegacyFilter.
Filter builder icon - Click the Filter builder icon to open a popup where the user can Create custom filters by selecting Field, Operator and Value in the Create custom filters area, and then clicking the Save filter button. Saved filters will be available from the My saved filters area. Click a saved filter to add it below the Search field. can select filters from the Standard filters area.
Selected filters will be visible below the Search field. Active filters are marked orange, inactive are marked gray.
Column settings icon - To select which information is displayed, click on the Column settings icon and hover over Columns. Then select the intended columns. The selection of data can be exported to Excel via the Export to excel option in the Column settings. The Reset to default view is also useful in resetting column width and placement, since columns can be dragged and dropped to suit the user. A description of the columns are listed in the table below.
Columns and button | Icon | Description |
|---|---|---|
Status |
| Displays an icon indicating the status of the Production resource group member (RESCONFIG). The available statuses are:
|
Id |
| Displays the Production resource (RESCONFIG) identifier. To view and edit details on the Production resource (RESCONFIG) and open the application, click the View icon. |
Name |
| Displays the name of the Production resource (RESCONFIG). The condition of the resource is indicated by potential Warning or Stopped icons. |
Load % | A progress bar visualizing the load of the Production resource (RESCONFIG) in the Planned start at and Planned finished at time frame. To view capacity and load details, select the Production resource (RESCONFIG) from the Group members tab - list, and select the View capacity and load Context menu option to open the Production resource capacity and load (RCL) application. | |
Type | Displays the type of the Production resource (RESCONFIG):
| |
Assign |
| The user can assign, or unassign, Production resources (RESCONFIG) to the Work order operation (WOO) by clicking either the Assign or Unassign icon And in doing so, replacing the current Production resource (RESCONFIG). |
| Click the Remove alternative member icon to remove the Production resource (RESCONFIG) from the Alternative resources tab. | |
Add new alternative resource button | To add a new alternative resource, click the Add new alternative resource button to open a popup where the user can add Production resources (RESCONFIG) in Status 1 - Pending registration and Status 4 - Active. Added alternative Production resources (RESCONFIG) can be assigned to the Work order operation (WOO), and in doing so, replacing the current Production resource (RESCONFIG). |
The Context menu is located in the top-right corner and provides the following options:
- - Context menu icon
Context menu options | Description |
|---|---|
Resource work order operations | Select this option to open the Operators list of production work order operations (RWOO) application in the context of the current Production resource (RESCONFIG). |
View capacity and load | Select this option to open the Operators list of production work order operations (RCL) application. |
The application is designed for users with production manager role or equivalent, to create, update, remove or deactivate existing templates. Users with production planner roles or equivalent can only view existing templates. The goal is to be able to set up calendars that can be reused on many resources, so that users don't have to do the same work on each resource. The calendar helps users plan according to resource capacity.
Navigate to the application
Option 1: Click the Program field and type "WTT" and press ENTER.
Click here to read more about the user interface.

In Working time templates (WTT), users can create new templates and look up Working times, Unavailable periods and Resources for each working time template.
Areas
Header
List - left side
Details - right side
Context menu options
Users may switch between the Working time templates (WTT) and Unavailable period templates (UPT) applications quickly by clicking on the button with application name.
Working time templates
Unavailable period templates
Columns | Description |
|---|---|
St | Period working time template status. Potential statuses are:
|
Working time template id | Production working time template identification number |
Name | Production working time template name |
Description | Description of production working time template |
Unavailable period template | Unavailable period template name |
Created at | Date and time of creation in yyyy.MM.dd format. |
Name field - Production working time template name
Created at field - Date and time of creation
Description text-box - Description of production working time template.
Users may define new shifts by clicking the Create new working time button and providing:
Weekday (Mon-Sun) - mandatory
Start/End time - mandatory
Production resource planning factor - optional. An integer value is required - factor (End time - Start time) are multiplied by this value to calculate the actual shift capacity.
Users may modify or remove existing shifts.
Columns | Description |
|---|---|
Weekday | Day of the week |
Start time | Start time for the working hours |
End time | End time for the working hours |
Duration | Displays the time difference between the Start time and the End time of a working time element. |
Production resource planning factor | Utilization factor. Factor is multiplied with this to get the shift capacity. |
Working time Id | Working time ID |
| To open the Edit working time popup, click the Edit icon. Available options in the Edit working time popup:
NoteEditing is not allowed after the working time is set in Status 9 - Deactivated. |
| To delete the working time, click the Delete icon. NoteDeletion is not allowed after the working time is set in Status 9 - Deactivated. |

Users may select one predefined Unavailable period template (UPT) which automatically provides all non-working days for the working time template.
In addition, it is possible to define custom unavailable periods just for this specific template (WTT) by clicking the Create new unavailable period button and by providing:
From/To dates - mandatory
Description - optional
Users may modify or remove existing non-working days, but it applies to custom periods only. Predefined ones must be modified via UPT.
Columns | Description |
|---|---|
From date | First date of the non-working period |
To date | Date of last day of the non-working period |
Description | Description of unavailable period |
Unavailable period template Id | Unavailable period template identification number |
Unavailable period template | Unavailable period template name |
In the Resource, users can then add when the various resources are working and not working. This is done in the Production resource details (RESCONFIG) application under the Capacity setup tab.
Columns | Description |
|---|---|
St | Status of production resources |
Resource id | Production resource identifier |
Name | Name of production resource |
Description | Description of production resource |
Type | Defines the CLASS of the resource |
Operations
Recalculate capacity on all resources that uses this WTT - User will be able to recalculate capacity on all resources by selecting a context menu option in WTT.
Delete - User may delete working time templates which are in Status 1 - Pending registration.
Deactivate - User may deactivate, set in Status 9 - Deactivated, working time templates which are in Status 4 - Active:
EXCEPTION: It’s not possible to deactivate a template which is used by an active Production resource (RESCONFIG), but only for valid periods (template is used now and in the future).
Activate - Activate Working time templates in Status 1 - Pending registration. It is not possible to activate a template with no working time elements.
The application is designed for users with production manager role or equivalent, to create, update, remove or deactivate existing templates. Users with production planner roles or equivalent can only view existing templates.
Navigate to the application
Option 1: Click the Program field and type "UPT" and press ENTER.
Click here to read more about the user interface.

Users may switch between the Working time templates (WTT) and Unavailable period templates (UPT) applications quickly by clicking on the button with application name
Working time templates
Unavailable period templates
Name - Unavailable period template name
Created at - Date and time of creation
Description - Description of unavailable period template. Example: Easter.
In Unavailable period templates (UPT), users can create new templates by clicking the Create new unavailable period button and look up the following information for each template:
Specific days when the resource is not available, for example: state holidays. User may define new days by providing:
From/To date - mandatory
Description - optional
User may modify or remove existing days.
List of working time templates, where the unavailable period template is used.
Inspect and view
Revision history...
Operations
Activate
Deactivate - It is not possible to deactivate a template which is used by a working time template.
Delete - User may delete unavailable periods which are pending registration (St 1).
Edit mode - It is not possible to reopen or put templates in edit mode.
In terms of production, an operation is a single task in (normally) a series of tasks in the production process. A production process may also consist of a single operation. The operation usually consist of work and parts. An operation needs to be defined and configured.
A new operation is configured.
An existing operation is re-configured.
When an operation is classified, it may be classified as a test operation, a production operation, a package operation, or an external operation. For example, during production of a computer screen, the soldering of a circuit board will be a production operation while an external operation may be the assembly at a different location. The test operation is the testing and approval phase before shipping the product.
Operations need to be priced according to the production situation the operation is used in, but to set a customer specific price is also possible. This allows for two prices on an operation, to service customers who has negotiated better terms. Cost price must also be in relation with the time usage for the operation, which differs from productions. Time usage for preparation and after work also needs to be defined, as it all adds up to time used in the operation.
Create a new operation
If the company acquires new resources which enable the company to perform new tasks, these must be configured as operations.
Configure operation
The operation needs to be configured, with price, classification and resource usage.
Activating the operation
The operation needs to be activated to be ready for use.
Setting name | Description |
Move mode for Operation Planner | "Value in this setting for 'Movemode for the PLANNER/GANT' must be one of these alternatives: MINIMAL: Only move this Almanac (ALM) element, do not touch the remaining operations, unless this element is moved in front of/after an adjacent operation, in which case those operations affected will be moved according to the rules of PACK. SINGLE: Only move this Almanac (ALM) element, fail if moved across prev/next. SIMPLE: Only move this Almanac (ALM) element, do not touch the remaining operations, dont care about conflict. Even possible to move started Operations or move them to before SYS.DATE/TIME" |
Operation ID used in Rework | Value in this setting is a default Operation (OPR) needed to perform a Rework Production Work Order |
Production Work Order Picking Operation ID | Value in this setting must be the Operation (OPR) that should be used in the structure for new Products (ART) that is loaded from PDM systems (CAD-design). The files only contains the parts that should be used in the Product, and the Operation will be picked from this setting |
Wait For External Planner to start Operation | If setting is 'ON' - operations should be put on hold until release-signal is given from the external planner. |
An operation is a unit of predefined work that is required in the production process. An operation can involve several parts and/or raw materials, and is linked to a resource or resource group. The Operaitions (OPR) application contains information about all operations in RamBase.
To open the Product operations (OPR) application, select Production from the RamBase menu and then Operations management , click Operations.
To search for a specific operation, enter the search criteria in the search field. A popup appears. You can create a search query by using the search criteria given in the popup.
To create a new operation, click on the Create a new operation button in the lower left corner.
Enter a descriptive name for the operation in the Name field.
Click on the OK button. The new Operation is set to Status 1. You can see the new operation at the top of the operation list.
The Production Operations Details area gives the following fields, drop down lists and control groups.
Description - Enter a description of the operation here.
Type - Select the type of operation from the list. If you select External, you are only shown external resources in the Resource drop-down.
Applies to - Select if the operation is related to either a production resource or a resource group.
If Resourceis selected in Applies to then Resourceis displayed. Select the resource by using the Resource drop-down menu. To see more information about the selected production resource, click the arrow to open the Production resources (RESCONFIG) application.
If Resource Group is selected in Applies to then Resource Group is displayed. Select the resource group by using the Resource group drop-down menu. To see more information about the selected production resource, click the arrow to open the Production resources (RESCONFIG) application.
Set next operation ready - Specify the Value and Unit here. For example, if you specify 5 pieces, then the next operation in the sequence is automatically set as ready when the current operation has completed 5 pieces.
Settings - You can set a Checkpoint and name it. The checkpoint halts the operation until a certain task is completed. You can name the checkpoint task in the description. For example, once your operation is commenced, you can add a checkpoint to halt further operations until a quality assurance process completes.
Require picking before completion - If this option is selected, then all the necessary parts for this and previous operations must be be picked before the current operation can be completed
Require serial number before completion - If this option is selected, then all items in the trace-list for all product units must have a serial number assigned.
Processing - Specify the Run time, Setup time and Cleanup time for this operation in hours. You can also use decimals such as 0.2 hours etc.
Alternative resources - Select Add new alternative resources to add alternative production resources that can be used for the operation if the main production resource is unavailable. For example, this can be a substitute machine or operator.
Added cost - Select Add new additional cost to add additional costs from this operation. The additional cost can also come from the use of alternative resources. The additional cost is displayed in the product structure of products that contain this operation.
Custom fields - Select the Custom Fields tab to see the list of all additional fields that were added to the detail view of the given operation. Each modification of these fields are stored in the Revision history of the operation. To view the Custom fields in the Operations grid, click the Cogwheel icon and select the Include custom fields option.
Suppliers tab. This tab is activated if the Type of the production operation is External. The function of the Suppliers tab is twofold: First, the information will help in the planning process, as RamBase will be able to calculate how long the product will be unavailable because of the external work. Second, the time the product is registered away from the premises in the Suppliers tab, will be used to calculate the correct lead time for an outsourced/external operation and to set scheduled requested date for a purchase order for an outsourced/external operation.
To add a supplier, start by clicking Add new supplier at the bottom left in the tab.
Supplier field: Type the name of the relevant supplier to look it up.
Transit days to field: The number of days the product will be in transit to the supplier.
Standard lead time field: The number of days the supplier needs in order to get the job done.
Transfer days from field: The number of days the product is in transit from the supplier.
Set as preferred supplier checkbox: The first supplier added will automatically be registered as preferred, whether or not this checkbox is selected or not. The checkbox should be selected when adding other suppliers, in order to make them preferred supplier. Preferred supplier can easily be changed at a later time: In the list of suppliers in the Suppliers tab, select the radio button of the preferred supplier in the Preferred column.
Confirm arrival date checkbox: Select this checkbox to confirm that the date in the Supplier order confirmation (SOA) is in fact the arrival date of the product at the premises, and not just the date the product is ready at the supplier (for pick up).
Finally, to add the new supplier, click Create.
To activate the operation, select Operations and select Activate. Activating the operation will set it to Status 4. The following information must be specified before activating a production operation:
Type
Applies to
Resource or Resource group
Run time
Setup time
You can edit an activated operation from the context menu by selecting Operations and then Open for edit.
The other options available in the context menu are as follows.
Inspects and views give the following options:
Experience data - Select this option to open the Quality Report Archive Menu - Experience data application.
Revision history - Select this option to view the revision history of the operation.
Included in structure - Select this option to open the Kit menu application.
To open the Operation (OPR) application, find Production in the RamBase menu and then Operations management. Click Operations to enter the OPR application.
Click the Create new operation icon to open a new empty operations window.

Type the operation’s name in the Name field. This is mandatory.
Add details to the fields in the Main section.
Optionally, add a description of the operation in the Description field.
Select type from the drop-down menu in the Type field.
NOTE: During type selection, be careful to pick the correct class as it may be impossible to change after. This is evident in the EXTERNAL class where the class is set and not changeable after it has been defined and used in a kit. It does not matter if the kit is in Status 9.
The Require picking before completion check-box is used in situations where the picking of materials or parts must be completed before starting the next operation.
The Set Next Operation Ready field is used to set the next operation as ready before the current operation is completed. Enter the degree of completion (value and unit e.g. 60 % of Qty) required in order to set the next operation as ready.
To select the resource for the operation, click the Select Resource-icon (located next to the Production Resource field).The Resource Select window will appear.

The Processing area is used to define the time needed to complete the operation.
The Run time field states the total time usage for the operation, per unit.
The Setup time field is used for preparation of the production, independent of the number of units.
The Cleanup time field is used for the post production time usage, such as cleaning and removing the tools.
Click the CheckPoint box in the Settings area to indicate that you would like a hold-point in the production, where the user/operator is confronted with the message you entered in the Checkpoint Description field. The check point must be approved by the user/operator before completion of the production.
When all necessary fields in the Production operation window are filled in, activate the operation by pressing F12 to bring up the action menu and choose the option Activate. The mandatory fields are Name, Applies to, Resource or Resource group, Typeand Processing. Note: To edit the Operation after activation, use the F12 option Open for Edit to return the document to Status 1.
The Queue Time (QUEUETIME) application is used when a certain operation needs a certain waiting period before completion, either an accompanying operation or by it self.
Type QUEUETIME into the program field and press ENTER to open the application.
The header allows you to enter a default queue time between all operations and/or a default queue time after all operations if needed.
The queue time without a second operation is the queue time after Operation 1. Queue time with a second operation is the queue time between the two operations.
Click the Create new QueueTime icon.
A popup will open where you can add an operation using the Previous Operation icon. Select the operation from the operation menu.
You will then be able to enter the exact queue time for this operation.
If the queue time is only valid if Operation 1 is followed by another specific operation, you can add this using the Next Operation icon.
The operations are visible in the item lines after you have entered the operations. The columns indicate the operations number and the specific queue time.
The cost of an operation is the operation time multiplied by the resource hour rate.
In some cases there are added costs involved, and these can be defined in the folder Added Cost in the Operations (OPR) document.

Clicking the icon Add Additional Cost will prompt the Select Additional Cost popup. Here you can find defined added costs which may be added to the operation in question.

When you are in the process of adding operations to the kits which are to be produced, the added costs defined in OPR will follow the operation automatically.

If you have added the operations and parts to the kit already, it is also possible to add the added costs in the kit window, when it is still in Status 1, using the Plus icon in the item line under the Itm column.
Note that added cost in a structure is a global value, so it will change in all other structures with added cost.
External operations are used when the company needs work done which they cannot, or do not have time to perform themselves. This applies whether the operations are performed by a supplier coming on site, or the product is sent out of the house to have the operations performed at the suppliers location.
If not already created, a new resource needs to be created for the external operation. To open the Resource (RES) application, find Production in the RamBase menu and then Resource management. Click Resources to enter the RES application. Create a new RES as normal, but use External in the Class field to categorize this as an external resource.
To open the Operation (OPR) application, find Production in the RamBase menu and then Operations management. Click Operations to enter the OPR application. Create a new OPR as normal, but use External in the Class field to categorize the operation as external. Using the External class will create an article with class WX. Note: During Class selection, be careful to pick the correct one as it may be impossible to change after. This is evident in the EXTERNAL class where the class is set and not changeable after it has been defined and used in a kit. It does not matter if the kit is ST:9.
Enter a value in the Time field. This value will not be the base for the operation cost, as the purchase order price/invoiced price will be the base for the external operation cost.
The Freight Parts tab is used to enter the freight prices. This is mostly used when the part will be sent. This option requires you to have made an article class=XF (External Freight) before the freight is added.
The operation is now ready to be added to the product that needs external work. Locate the structure in question and open it.
Click the Kit button next to the Class field. If this article has yet to be defined with a structure, you will need to do this. If the article is already set up, this will open the Kit Designer with the full structure. To be able to edit this structure, it either needs to be in ST:1, or you will need to make a copy of the structure using the Copy Version button on the top. This will create a new version of the structure.
With the structure in ST:1 (editable mode), open the Designer tab. The default choice of viewing here is Parts, so you will need to click the Operations button on the top to change to view operations.
To make things easier, use the dropdown menu in the OpClass field to filter by class: external using the EXTERNAL option.
Click and hold the Class icon (the factory) of the desired operations and drag it into the structure to the left.
If you need to change the placement of the operation in the structure, return to the Kit Details tab and choose the item line and press ENTER. Enter the desired value in the OpNo field to place it within the desired range.
Finish the structure as normal with approval and activation. The product is now in ST:4.
When a production order is created for the product, the external operations will show up in the Purchase (PUR) application in the External Work folder.
Note: If there is a need to change the price of the operation, it is possible by entering the kit, choosing the operation item line, pressing ENTER and editing the price in the Price field. The criteria for this action is that the kit is in ST:1, which can be done by making a new copy, which will be in ST:1.
All purchasing for external work is done in the Purchase (PUR) application, using the External Work folder. To purchase external work for Production Work Orders (PWO):
Open the Purchase (PUR) application, by selecting Procurement > Purchasing > Purchase handling.
Select
 and select Pending orders.
You can also purchase for specific PWO by using the PENDING link in the Kit Linking view from PWO.
Check off the item lines you want to purchase for. Click the Select Action button when finished. Click the Make Order button in the popup. You also have the ability to remove item using the Remove Item button to the right of the item.
Choose the supplier for the order(s). Click the Start Action button when finished. This is a bulk action and will create Purchase Orders (SPO) for all the item lines.
Open the newly created SPO and register it the same manner as a normal SPO. Use the Change ship to address for external work-option to change address if needed.
When the products have been received back from the supplier, the operation is ready for completion.
There are two blockers for completing the production:
You will not be able to start the operation before the external work is ordered.
You will not be allowed to complete the operation before the total quantity is received from the external operation.
To split quantity from the SPO, you will have to manually select which serial numbers that are received. This is done for example in instances where partial orders are received and need to be registered.
Open the SPO.
Click the Transport Item to Another Document icon to the left in the item line.
This will open a popup where you need to choose the target document.
Click the OK button when finished.
Here you can see the different operations related to the productions with external work. Filter the results using the magnifying glass icon. From here you may enter a Pending PWO and continue with the process, or check the status.
You can also enter the External Work Logistics, which is available using the Note icon to the far right in the item line. From here you may:
Change Req
Change the required delivery date.
Change SHIPTOSUPDATE on SPO
Change the date for when you want to ship the part to the supplier of external work.
Change Conf on SOA
This option will change the confirmation date on the Purchase Order Response (SOA).
Create SRT for this operation / PWO
Will create a Supplier Return (SRT) document in ST:1. Will set the operation status to 5P: started and paused.
Create SSA for PO item
Creates SSA for PO item and registers it to ST:3 in addition to completing the operation to OPST:9 if full quantity is received.
The folder Ship External Work in Production Planning (PRODPLAN) is used for shipping to supplier. This application shows SPO / SOA items not yet shipped.
Select the desired items using the checkboxes.
Click the Select Action button at the bottom.
This will open a popup where you can review your choices, and remove unwanted items.
Click the Ship button when finished and the Start Action button on the next popup to ship the goods.
Reception from supplier is done in the Goods In (GIN) application. This action must only be taken if the full quantity is delivered. If not, please use the manual transport at SPO / SOA item.
Select the desired items using the checkboxes.
Click the Select Action button at the bottom.
This will open a popup where you can review your choices, and remove unwanted items.
Click the Register button when finished and the Start Action button on the next popup to register the goods.
Start by creating an Purchase quote request (SRQ).
Convert it to Purchase quote (SQU) through the standard External Work via the Purchase (PUR) application.
Once the Purchase quote (SQU) is created and registered, go to the KITDOC on the Production work order (PWO) that you are purchasing into:
In the upper-right corner, click the View Calculator.
In the Quote column, use the link icon to connect the Calculator to the newly created Purchase quote (SQU).
When you move the Purchase quote (SQU) forward to a Purchase order (SPO), the links will now be correct when you eventually reach Work order operation (WOO).
An external work order operation is an operation done by a supplier to a product in the Production work order (PWO). The product is sent to a supplier for this operation or the supplier runs the operation at your own site (in house external operation). This implies that an external operation includes processes for purchase, outbound logistics and inbound logistics.
We have made some changes to the procurement and logistics processes.
The main changes are:
The serial numbers are not copied to the Purchase order (SPO), therefore, there are no serial number requirements for any step in the purchase and logistics processes.
Full flexibility to do partial shipments to the supplier. The shipments are not connected to the Sales order responses (SOA) items if they exist, only to the original SPO.
The sections below describe the applications that are used for handling the external operations and the processing of these operations based on the implemented changes.
The Purchase (PUR) application has a tab for creating Purchase orders (SPO) for external work.

It is pre-filtered for the work order and operation if accessed directly from the pending link in the assignment list in the PWO, but the tab also features filtering and a multi-selection tool for creating Purchase order (SPO) for multiple work orders.
The result is always one SPO item per combination of a specific work order (PWO) and operation number.
The order confirmation from the supplier is handled by standard applications and methods. Transport the SPO item to a Supplier order response (SOA), and it can be split to several SOA items if the supplier confirms partial delivery of the ordered quantity. The same rule applies to the SOA items, one SOA item is only valid for the combination of a specific work order and operation number.
The Production work order (PWO) has no special link to the logistics view for external operations. The operations are purchased, confirmed and received and this is displayed as for the parts of the PWO BOM in the list of assignments to the PWO. The Work order operation (WOO) has a link to a view of the external work logistics:

The external work logistics application shows all the purchase and logistics details for the operation, the purchase orders, the shipments to the supplier, the received quantity and information about the previous and next operations and the scheduled dates for the operations.

The Product units received progress bar in the Product units tab shows the number of units collected from the suppliers of external operations. It is displayed only if the purchase order has been requested for the operation (work order is linked to a SPO in status 1 or higher). User may enter the External work logistics for the currently selected external operation (WOO) to see the status of the purchase orders (SPO). When product units are retrieved, the external work should be automatically completed and set to Status 9, while the subsequent, in-house operation (if it exists in the structure), should be automatically set as ready in Status 3.
It is not mandatory to create SRTs for shipment to the supplier. However, create SRT when the products are shipped by some means of transport and whenever there are partial shipments for external operations. There is no need to shipping products if the supplier is doing the operation in-house at your factory. The reference for the shipments is the Purchase order (SPO) for the operation, so even though the application shows multiple lines for creating SRT, there is only one total summary for shipments to the operation. The Create SRT button opens a popup to create SRT for the quantity to be shipped and where the reference to the shipments is shown.
Please note that the Create SRT option is displayed at each PO line for the operation, the shipment is not done to one specific SPO item or SOA item, the shipment has only reference to the SPO and the quantity to be shipped does not have to match the quantity of one specific SOA item.

Parts and material that shall be picked and shipped together with the products have to be added in the BOM (KIT) as material lines to the external operation. These parts are assigned to the Production work order (PWO), but are also added to the SRT as items to be shipped. But: The SRT items do not have any stock assignments, it is only a delivery note for the external operation. That means that the picking process is done on the PWO.
The picking is initiated when the first SRT is created for the operation, and technically because that starts the external operation, and starting the operation is the trigger for initiating picking.
Note:
The picking of these parts must be added as a routine when handling the shipment, and the picking process must be done from the PWO.
If there is a partial shipment for the external operation, the SRT items will have quantities of added parts that are matching the number of products to be shipped. But the picking is initiated for the full quantity (quantity linked to stock) and the user must reduce the picked quantity in the picking application. The balance will remain unpicked, but still initiated and locked for the next shipment where the user then must confirm more of the quantity as picked.
Change picked quantity and confirm:

Products can be received from the supplier in any quantity, and the quantity does not necessarily have to be the full quantity from a specific PO item (SPO or SOA). But the reception is done from one of these items as they need so be closed (completely received) at some time before the operation can be completed. In the example below we have selected Create SSA at one SOA item with quantity = 10. This SOA item is then the reference in the create SSA popup and 20 is suggested as quantity to be received:

We reduce the quantity to receive 6 pcs, the popup is refreshed and available quantity to receive for this SOA item is now 4 pcs. Select the Esc key to go back to the overview and it will show the result of having received 6 pcs for the SOA item:

There is no option to receive in total a higher quantity than ordered for the external operation. The operation is automatically closed (done) when the last goods reception is done. There is also no option to, for example. receive 15 pcs and select that 10 pcs is from one SOA item and 5 pcs is from another SOA item/SPO item. The source of a SSA item is only one item, it can not come from two PO items. A more flexible selection method will be evaluated for next version, but the result will always be that one SSA item can only have one SOA/SPO item as source. But an SPO/SOA item can have several partly deliveries, several SSAs.
In instances where the product needs to be delivered before all documentation has been completed, operation time can be added after the document has been closed (Status 9). Documentation is included in the total cost and is included as a unique operation in the production structure.
The criteria:
Goods reception (SSA) document with doctype=production (PRODSSA).
Status 9 (completed production work order).
To open the Goods Reception (SSA) application, find Logistics in the RamBase menu and then Reception. Click Goods receptions to enter the SSA application.
Find the SSA document you want to add time to in the menu and press ENTER.
Enter the SSA-Item, which is the Production Work Order (PWO) document.
Press F12 to open the context menu and choose the option Add Operation Time.

This opens the Add Operation Time popup. Use the drop-down menu to the right to choose the operation you want to add time to.
Three field will then be open for input:
StartDate: Enter the date the extra work was performed (can not be a date later than the current).
StartTime: Enter the start time for the work done in the form HH:MM.
Workhours: Enter the total amount of work time in decimal form.
Click the Confirm button when finished.
Gross margin (GM) at linked sales order, CostPrice on the SSA and stock value of the SSA will then be adjusted accordingly.
Use the Todays Work Order Operations Progress widget to view the progress of daily planned Work Order Operations. The widget displays the daily Planned, Running and Completed operations. A bar chart that represents the daily Planned and Logged hours is also displayed.

To add the widget to your desktop.
To add the Todays Work Order Operations Progress widget to your desktop, select
 in the desktop.
in the Search field, enter TodaysWOOProgressWidget and select the ENTER key.

Select TodaysWOOProgressWidget and select
 .
.
A product structure can be defined as the content of a production, a combination of parts and operations, which is combined to produce goods.
Creation of a new product structure.
Modification of an existing product structure.
A product structure, or the content of the production, differs from product to product. But the same product may have different product structures. For example: One specific computer monitor consists of a certain type of parts and operations, while other monitors have different parts. Parts in this situation are motherboard, power supply and screen while operations are soldering, assembly and packaging. The monitor product may receive updates, where certain parts are changed for the better, while still being the original monitor product. This calls for a modification of the product structure.
Creating a new product structure
The finished product and parts need to be structured into a product structure in the ERP system. Cost, time and price is defined.
Adding attachments
Attachments, such as drawings, instructions and other version-specific documents are connected to the structure.
Approving the product structure
After the product structure is created, it needs to be approved by an approver.
Modifying product structure
The finished product may be modified using the original as base.
Setting name | Description |
Add Cost items to a structure | If setting is 'ON' - it enables the possibility to add additional cost items to structures |
Auto Revise Kit Parts | If setting is 'ON' - Auto-increment functionality for Class = K* parts is activated. If setting in 'OFF' - Manual update must be done |
Product Change Verification | If setting is 'ON' - you can create Measurement document (MSR) to Verify the Product Structure (ARTKIT) |
To open the Product (ART) application, find Product in the RamBase menu and then Product management. Click Products to enter the ART application.
Click the Create ART icon to open the Create Article popup.
In the popup:
Enter part name.
Enter text (optional).
Select manufacturer (Mfr).
Choose Class K.
Choose relevant Production Data in the ProdLine field.
Choose either Batch or Unit in the LcmDoc field.
Choose the desired option in the SnowClaim field (Serial number claim). This determines any requirements for serial numbers on the reception and / or shipment of goods.
IN: the serial number table must be updated for all incoming goods (SSA items) for that material/article.
OUT: the serial number table must be updated for all shipment document items (CSA / SRT) for that material/article/product.
PWO: the article/product will be added automatically to LCM Part List for productions where the ART is included in the structure.
Click the Submit button.
Add the necessary information in the same way you would when creating a standard part. There is in addition a checkbox in the Purchase area where you can check if the Kit is an external production. Checking this will remove the Kit from Prodplan, as it is not a planned production, but in the Purchase (PUR) application as it is a procurement situation.
Right click, or press F12, to open the action menu and set the article to the desired status.
Press the KIT icon to the right of the Class field to enter KIT details and the designer.
Here you may input the version name, Revision number and upload any drawing of the structure.
Click the Designer tab.
The Designer contains two panes. The structure definition is always displayed in the left pane. The right pane is used to display parts from the ART-archive, or operations from the OPR archive. To switch archives, use the two icons in the header.

Operations are added first, to have the structure in which articles and parts are added to be included in the structure.
To add new parts to the structure, click a part icon and hold, then drag and drop it at the appropriate position in the structure definition (on the left).
Click the Kit Details folder to start the Approval process.
Click the Request Approval icon and the structure will receive ST:2.
The approval will be sent to the approver who are defined as such. After approval, the structure will receive ST:3.
To activate the structure, click the Activate Version Icon.
A popup will be opened where you are given the option to update the production plan.
Press Activate when you are done to finish the activation of the structure, and the structure will receive a valid status.
Special structures can be created for a Sales Order (COA). Add customer and other mandatory information as you would normally have done making a new COA.
When you add the desired product, you add the quantity and mandatory information and click the Create button.
Double-click the item line to enter the COA item.

In the context menu, choose the option Create new or copy product structure to item.
In the popup, decide whether you want to create a special product structure from scratch, or you want to copy an existing structure/version from the Product (ART) application.
This option is used when you wish to modify an existing structure. You copy the existing structure you choose from the Product structure lookup field in the COA and make your modification to suit the desires of the customer.
This option creates a new empty structure where you may add articles and operations.

You can see the View Structure for sales order item icon in the item line. The Context menu option View standard structure is used to inspect the original standard structure. Clicking the Inspect special structure icon on the item line or the Context menu option View structure for sales order item, will bring you to the KITDOC window.

The special structure is now in ST:1. Now you may perform any desired modifications to the structure, such as add or replace operations or articles.
When the desired changes has been performed, press ESC twice to return to the COA document. Special structures do not need to be in ST:4 to be ready for sale, but the special structure needs to be released for production. Choose the Context menu option Release all items for production.
To create a new version of a structure, enter the kit you wish to create a new version for.

When the structure is done and ready for approval from the approver, click the Request Approval icon at the top. This will set the structure in ST:2.
The request will be sent to whoever is defined as approver of the structures in your company. The approver will then inspect the structure and approve. After approval the structure will receive ST:3. It is still possible to edit this by clicking the icon Open for Edit, which will send the structure back to ST:1.
The last step in the process is to activate the structure which is performed by clicking the icon Activate Version. You will then be asked in a popup if there is a need to update production plan. Choosing YES will update all non-started productions containing the previous kit version.
In RamBase, there is flexibility in deciding when serial numbers are required for parts used in a production.
You can decide when serial numbers should be required by setting up Products (ART), Operations (OPR), adjusting Product units (LCM) in the Life cycle management (LCM) application or applying the requirement to specific parts in either the Product structure (KITARTOPRITM) or Production structure (KITDOCOPRITM).
But before you begin:
Parts are defined in the Product (ART) application. To require a serial number before a production can be completed, a part must be defined as traceable material.
Navigation
1. Product (ART) → 2. Select Product (ART) → 3. Properties tab → 4. Main data sub-tab → 5. Check the Is traceable material of product unit checkbox
Note that during production of a product structure, each produced unit generates a list of traceable materials included in the finished unit. When the Is traceable material of product unit checkbox is true, this product is included in the list of traceable materials.
Behavior summary
Level | Element and name | Description | Impact | Procedure number and name |
|---|---|---|---|---|
Operation (OPR) | Checkbox - Require serial number before completion | The Require serial number before completion checkbox acts as a template for potential Production structures (KITDOC). | If enabled When the Work order operation (WOO) is completed - the Product unit (LCM) parts are validated for serial numbers. Applies to all potential Product units (LCM). | Procedure 1: Enable Serial Number Validation on an Operation (OPR) |
Product (ART) | Checkbox - Require serial number when traceable material | Decides the initial value of the RequireSerialNo on a part in the Part list of the Product unit (LCM). | If enabled A specific part/material will require serial number in the Part list in the Product unit (LCM). | Procedure 2: Define Serial Number Requirement on a Product (ART) |
Product unit (LCM) | Checkbox - Req serialno | Check for the existence of required serial number on parts in the Part list of the Product units (LCM). | If enabled Applies to the specific part in the Product unit (LCM). | Procedure 3: Override by disabling the Serial Number Requirement in the LCM Application |
Product structure (KITARTOPRITM) and Production structure (KITDOCOPRITM) | Checkbox - CheckSerialnoOnParts | During the production of a structure, each produced unit generates a list of traceable materials included in the finished unit. The CheckSerialnoOnParts can either be enabled or disabled on the Operation (KITARTOPRITM/KITDOCOPRITM). Changing the value of CheckSerialnoOnParts on operation in the Production structure (KITDOC), in the Operation (KITDOCOPRITM) does not update Req serialno on parts in the Product unit (LCM) part list. It is only enabling or disabling the check of serial numbers for parts on the current and/or previous operation. | If enabled If CheckSerialnoOnParts is enabled in KITARTOPRITM/KITDOCOPRITM, and the Require serial number when traceable material checkbox is enabled in the Product (ART), this product requires a serial number in the Part list before the Work order operation (WOO) it belongs to can be completed. If disabled If CheckSerialnoOnParts is disabled on the Operation (KITDOCOPRITM) for the Production structure (KITDOC), when completing this Work order operation (WOO), there will be no serial number check. |
Objective: Configure whether serial numbers should be required for parts in a Product/Production structure (KITART/KITDOC), or not - applies to all traceable materials in the Work order operation (WOO), created by the Operation (OPR).
Steps
Decide the context of the Operation (OPR) by opening the a) Product structure (KITART), b) Production structure (KITDOC), or the c) Operation (OPR) directly.
In the context of the Product structure (KITART)
Navigate to the Product structure (KITART) application
Option 1: RamBase menu→Product→Product management→Products→ Select the product →Click the Structure button in the header.
Option 2: Click the Program field and type "ART" and press ENTER, then → Select the product →Click the Structure button in the header.
Click here to read more about the user interface.
In the Product structure (KITART), find the Operation (OPR) in the Kit Details tab, followed by finding the Part/Operation column. Click the link to open the Operation (OPR) application in the context of the correct Operation (OPR).
In the Operation (OPR) application, select the Open for edit option in the Context menu. This will set the Operation (OPR) in Status 1 - Pending registration, allowing for edit.
In the Settings area, enable the Require serial number before completion checkbox.
To set the Operation (OPR) in Status 4 - Active, select the Activate option in the Context menu.
In the context of the Production structure (KITDOC)
Note
A Production structure (KITDOC) is always the result of released Production work order (PWO) and should be accessed in that context, as detailed below.
Navigate to the Production structure (KITDOC) application
Option 1: RamBase menu→Production→Production→Production work orders→ Open the Production work order (PWO) →Click the Structure button in the Links area.
Option 2: Click the Program field and type "PWOMENU" and press ENTER, then → Open the Production work order (PWO) →Click the Structure button in the Links area.
Click here to read more about the user interface.
In the Production structure (KITDOC), find the Operation (OPR) in the Kit Details tab, located in the Part/Operation column. Click the link to open the Operation (OPR) application in the context of the correct Operation (OPR).
In the Operation (OPR) application, select the Open for edit option in the Context menu. This will set the Operation (OPR) in Status 1 - Pending registration, allowing for edit.
In the Settings area, enable the Require serial number before completion checkbox.
To set the Operation (OPR) in Status 4 - Active, select the Activate option in the Context menu.
Directly in the Operation (OPR) application
Navigate to the Operation (OPR) application
Option 1: RamBase menu→Production→Operations management→Operations
Option 2: Click the Program field and type "OPR" and press ENTER.
Click here to read more about the user interface.
In the Operation (OPR) application, select the Operation (OPR) to be edited, from the Production operations list.
In the Operation (OPR) application, select the Open for edit option in the Context menu. This will set the Operation (OPR) in Status 1 - Pending registration, allowing for edit.
In the Settings area, enable the Require serial number before completion checkbox.
Locate the relevant Operation (OPR) in the Product structure (KITART) or Production structure (KITDOC).
Find the field CheckSerialNoOnParts.
Set the value to true to enable serial numbers validation for parts in the trace list.
Save the changes.
Note
When this flag is enabled, the system will validate serial numbers for parts in the LCM trace list based on their individual settings.
Objective: Specify whether a product should require a serial number when included in a trace list during production.
Steps:
Open the Product (ART) application.
Navigate to the Product (ART) application
Option 1: RamBase menu→Product→Product management→Products
Option 2: Click the Program field and type "ART" and press ENTER.
Click here to read more about the user interface.
Search for, or select the Product (ART).
Locate the Require serial number in trace list checkbox, by selecting the Properties tab, followed by the Main data sub-tab.
Do one of the following:
Check the box to require a serial number when the product is used in a trace list.
Uncheck the box if serial number tracking is not required.
Note
During production, if CheckSerialNoOnParts is enabled in the Product structure (KITDOC) and this flag is true, the Product (ART) must have a serial number registered in the trace list before the Work order operation (WOO) can be completed.
Objective: Disable the serial number requirement for individual parts in the Part list of a Product unit (LCM).
Steps:
Open the Life cycle management (LCM) application and navigate to the relevant Product unit (LCM).
Navigate to the Life cycle management (LCM) application
Option 1: RamBase menu→Production→Life cycle management→Life cycles
Option 2: Click the Program field and type "LCM" and press ENTER.
Click here to read more about the user interface.
Click and press ENTER, or click the link in the Docid column to open the Life cycle management (LCM) application in the context of the selected Product unit (LCM).
Now in the correct context, go to the Part list tab.
Locate the part you want to configure.
Do one of the following:
Use the Req serialno checkbox directly in the list to toggle the requirement to off, removing the requirement.
Or, double-click the part to open the LCM Part info popup and adjust the Require serial number checkbox there.
Note
This override applies only to the current Product unit (LCM) and does not affect the default setting in the Product (ART).
During production of a structure, each produced unit generates a list of traceable materials included in the finished unit.
If CheckSerialnoOnParts is enabled in KITARTOPRITM/KITDOCOPRITM, and the Require serial number when traceable material checkbox is enabled in the Product (ART), this product requires a serial number in the Part list before the Work order operation (WOO) it belongs to, can be completed.
Enabled CheckSerialnoOnParts on Product structure operation item (KITARTOPRITM)
Navigate to the Product structure (KITART) application
Option 1: RamBase menu→Product→Product management→Products→ Select the product →Click the Structure button in the header.
Option 2: Click the Program field and type "ART" and press ENTER, then → Select the product →Click the Structure button in the header.
Click here to read more about the user interface.
In the Product structure (KITART), find the Operation (OPR) in the Kit Details tab, followed by finding the Part/Operation column. Click to highlight the line, and then press ENTER to open the Product structure operation item (KITARTOPRITM) application.
In the Resources area, enable the CheckSerialnoOnParts checkbox.
Enabled CheckSerialnoOnParts on Production structure operation item (KITDOCOPRITM)
Navigate to the Production structure (KITDOC) application
Option 1: RamBase menu→Production→Production→Production work orders→ Open the Production work order (PWO) →Click the Structure button in the Links area.
Option 2: Click the Program field and type "PWOMENU" and press ENTER, then → Open the Production work order (PWO) →Click the Structure button in the Links area.
Click here to read more about the user interface.
In the Production structure (KITDOC), find the Operation (OPR) in the Kit Details tab, followed by finding the Part/Operation column. Click to highlight the line, and then press ENTER to open the Production structure operation item (KITDOCOPRITM) application.
In the Resources area, enable the CheckSerialnoOnParts checkbox.
This function enhances structure control by adding the option of limiting when multiple Product structures (KITART) can be updated by adding or replacing parts/cost, and allows for information flow to the customer on updates made, or requests to do so.
The levels of restrictions are:
No restriction - Selected Product structures (KITART) with this level will be updated. This is the stock setting and does not need to be actively set.
Update and notify - Selected Product structures (KITART) will be updated. A task will be generated for the user with a reminder to inform the customer about the update. The user will have to do so externally (mail, phone etc.).
Prevent and notify - Selected Product structures (KITART) will not be updated. A task will be generated with information about the missing update. The user will also be reminded to consult the customer before updating the Product structure (KITART). The user will have to do so externally (mail, phone etc.).
Note
The restrictions are not retroactive and therefore do not apply to previously created Production work order (PWO) structures (KITDOC).
The restrictions are only active when performing updates from the Kit menu (KIT) application. Performing changes to a Product structure from the Kitart (KITART) application, via the Structure button in the Product (ART) application, is still enabled.
Restrictions are set in the Kitart (KITART) application which can be accessed via Product (ART) application.
To open the Kitart (KITART) application, find Product in the RamBase menu and then Structures management. Click Product structures to open the Product (ART) application.
The Product (ART) application will now be filtered on products with structures, class K and KA.
Search for or select the product where restrictions are wanted.
Click on the Structure button in the header. This will open the product in the Kitart (KITART) application.
Click on the Update restrictions dropdown menu and select the required restriction.
No restriction - Selected Product structures (KITART) with this level will be updated. This is the stock setting and does not need to be actively set.
Update and notify - Selected Product structures (KITART) will be updated. A task will be generated for the user with a reminder to inform the customer about the update. The user will have to do so externally (mail, phone etc.).
Prevent and notify - Selected Product structures (KITART) will not be updated. A task will be generated with information about the missing update. The user will also be reminded to consult the customer before updating the Product structure (KITART). The user will have to do so externally (mail, phone etc.).
Mass updates are done from the Kit menu (KIT) application.
To open the Kit menu (KIT) application from the RamBase menu, click on Production or Product, and then Structures management. And finally Structures management.
From the Kit menu (KIT) application
From the list, identify the Product structures (KIT) in need of updating.
Select multiple structures from the list by clicking the Checkboxes of the structures.
Click the Select Action button to open the Select Action - KITMENU popup.
The level of restriction will be displayed in the Validation column with an icon in the right column.
No restriction - A green check mark icon with the text "OK".
Update and notify - A yellow warning icon with the text "WARNING Product structure has update restriction - update and notify".
Prevent and notify - A red error icon with the text "ERROR Product structure has update restriction - prevent and notify"
Click on the appropriate button; Add part, Replace part, Add cost or Replace cost.
Add/replace the part or cost and click the Validate button. Note the information in the Validation column.
Click the Start action button.
Note the information in the Bulk entry info popup.
Note
Remember to check the Task (TASK) application.
If either of the restrictions Update and notify or Prevent and notify are set on the Product structure (KITART), a task will be generated in the Task (TASK) application. Information on the update will be displayed in the Description area. The user can use that information to inform the customer in an external system (phone, e-mail etc).
Action - What has been done, in example parts or resources added/replaced.
Result - The result of the action, in example Update restriction - not updated.
Product - The identifier and name of the Product (ART), in example ART/#123456 - Motor
Structure - The identifier number for the Product structure (KIT), in example KIT/12345
Adding part/cost or replacing part/cost - The identifier of the added or replaced part/cost.
REPORT/112584 - View all Product structures (KITART) with update restrictions
To edit the Company settings (CSV) from the RamBase menu, click on Admin and then Overview. Click on Company settings and then Production. Finally click on Production from the list and navigate to the Use update restrictions for product structure setting.
Must be enabled
Use update restrictions for product structures - This setting enables the option of restricting updates on selected product structures.
This procedure outlines how to remove a part from Product structure(s) (KITART).
Using this procedure will result in creating a new version for the Product structure(s) (KITART) without the filtered part.
Please note these elements in the user interface as they are relevant for the following procedure:

Filter icon
Select article checkbox
Select action button
Starting point consequences:
Removing a part from a Product structure (KITART) can be done from either starting off via the Filter icon or Select action button.
By starting off via the Filter icon, all Product structures (KITART) containing the selected part, will be listed in the Kit menu (KIT) application, allowing the user to multi-select Product structures (KITART).
This starting point can also be reached from the Product (ART) application, by selecting the part to be removed and selecting the Structures this product is included in option in the Context menu. The user can then continue from step 6 in the procedure listed below.
Remove part from Product structure(s) (KITART) via the Kit menu (KIT) application by filtering on Part/Material
To open the Kit menu (KIT) application from the RamBase menu, click on Production or Product, and then Structures management. And finally Structures management.
To open the Kit filters popup, click the Filter icon.
To select part to remove, open the Select value popup by clicking the Filter icon,in the Kit Structure Fields area.
In the Select value popup click on the part to remove and press ENTER.
This will close the Select value popup and return the user back to the Kit Filters popup, where the Part/Material field now has the part to be removed.
In the Kit Filters popup, click the OK button.
This will close the Kit Filters popup and return the user back to the Kit menu (KIT) application, but the list will now be filtered on Product structures (KITART) containing the part to be removed.
To select the Product structures (KITART), having the filtered part removed, click the Select article checkbox.
When all Product structures (KITART) are selected, click the Select action button to open the Select Action - KITMENU popup.
In the Select Action - KITMENU popup, note the Validation column.
Validation
When preparing Product structures (KITART) for part removal, the Validation column is useful in ensuring the outcome.
The version of the Product structure (KITART) must be in Status 4 - Active.
If unforeseen errors occur, verify setup and the procedure for the levels of restrictions; Update and notify and Prevent and notify.
To open the Start Action - KITMENU - REMOVEPART popup, click the Remove Part button.
To remove the part, from the listed Product structures (KITART) in the Start Action - KITMENU - REMOVEPART popup, click the Start Action button.
This will start a process and when finished, information on the outcome will be displayed.
Note
A new version for all selected Product structures (KITART) will now have been created, without the filtered part.
Enabling the functionality for Multiple product structures, now referred to in bold - in example Multiple product structures, allows for one (1) Product structure (KITART) per Manufacturing area (MAA). This requires one (1) default Manufacturing area (MAA), as there must be one corresponding, default Product structure (KITART).
Additionally it supports the import of a new Product structures (KITART) version / revision without necessarily replacing a current Product structure (KITART).
Warning
Once Multiple product structures are enabled in a system, it is NOT recommended to switch the functionality off again.
Doing so, may cause data corruption and unpredictable or erratic behavior of various functionalities related to Products (ART), Product structures (KITART) and/or Production work orders (PWO).
Important
The setup, procedures and general information provided in this text only applies to system where the functionality of Multiple product structures is enabled.
This text should be used as an overview of various contexts where the Multiple product structures functionality is relevant.
The following description refers to products defined in the Products (ART) application.
When a new product requires a Manufacturing area (MAA), it is supplied automatically and according to the value provided in the Company setting (CSV), Default Manufacturing Area.
Navigate to the Company settings (CSV) application and the settings listed below
Option 1: RamBase menu → Admin → Overview → Settings → Company settings → Production → Production
Option 2: Click the Program field and type "CSV + name of setting" and press ENTER.
Click here to read more about the user interface.
Company setting (CSV) - Use multiple product structures
Description from Company settings (CSV) application:
When this setting is turned on then it is possible to one set of product structures per manufacturing area for the same product.
Company setting (CSV) - Default Manufacturing Area
Description from Company settings (CSV) application:
Default value of Manufacturing Area that should be used in the system when field MAANO is required. Value taken from MAA archive and can be viewed in MAA applications. Default value: 100000
Product structures (KITART) imported by Load Product Structures (PDMIMPORTTOPRODUCT) - INP/73720 will be supplied with the Manufacturing area (MAA) based on the identifier value provided in the Company setting (CSV), Default Manufacturing Area.
New Products (ART) of Class = K, KA or KS will be assigned the default Manufacturing area (MAA), automatically.
Deviation from systems with single product structures
The Manufacturing area (MAA) can not be changed from the Product (ART) application → Properties tab → Production sub-tab → Manufacturing area drop-down menu.
The Manufacturing area (MAA) can be changed from the Product (ART) application → Structure button → Kit Details tab → Manufacturing area drop-down menu.
The first version of a Product structure (KITART) will be linked to the default Manufacturing area (MAA). This can be changed via the Product structure (KITART) application by selecting a different Manufacturing area (MAA) from the drop-down menu in the upper right corner of the application.

Activating Multiple product structure options
After performing the action, it is possible to define the Product structure (KITART) in the standard way. Then, after activating it, the application will display information about the default Product structure (KITART) of the Product (ART), and some new subsequent options, which are described in the following subsections.

To create a Product structure (KITART) for a Manufacturing area (MAA), different than the default, click the Create Structure for other MAA icon.

This will open the Create Product Structure popup with a list of all active Manufacturing areas (MAA) in the system. To select the new Manufacturing area (MAA), double-click on the row.

After defining and setting a Product structure (KITART) in Status 4 - Active, it is possible to set it as default by clicking the Set as Default Structure icon.

Note
This will change the Manufacturing area (MAA) at the Product structure (KITART) level.
Changing the Manufacturing area (MAA) by setting a new default structure in the Product structure (KITART) application will influence, for example, Product structures (KITART) in Sales order items (COAITEM) where the default structure is always used, and other functionality that automatically creates Production work orders (PWO).
To define a Product structure (KITART) with a copy from another Manufacturing area (MAA), click the Copy from other MAA icon, which is available for Product structures (KITART) in both Status 1 - Draft and Status 4 - Active.

This will open the Create structure from other Manufacturing Area popup which displays all Product structures (KITART).
The Product structures (KITART) can be filtered by Manufacturing area (MAA), by making a selection in the Source Manufacturing Area drop-down menu.

To copy the default Product structure (KITART) from another Product (ART), click the Copy from other Part icon to open the Part Select popup, where a Product (ART) with a Product structure (KITART) can be selected.
Using the Context menu option to Copy product and choosing to copy the Product structure (KITART) by checking the Product structure checkbox in the Copy product popup, will copy the default Product structure (KITART) of a source Product (ART).
The Kit menu (KIT) application displays Product structures (KITART) in Status 4 - Active, for each Manufacturing area (MAA), meaning that the same Product (ART) may be listed multiple times, depending on the number of defined structures.
It is possible to perform selected actions as Add part, Remove parts etc. on the default Product structure (KITART) and additional Product structures (KITART) at the same time.

Materials used in production of Class = M, P, C are not linked to a Manufacturing area (MAA) when created via the Product (ART) application.
The production plan can be updated when activating a Product structure (KITART). This option will be only executed for Production structures (KITDOC) belonging to the current Manufacturing area (MAA).

When creating a new Production work order (PWO) via the Production work orders (PWOMENU) application, it is possible to select a Manufacturing area (MAA) for a given product. The first visible Manufacturing area (MAA) in the Manufacturing area drop-down is always the default one for the Product (ART).

It is possible to select a Manufacturing area (MAA) when creating a Production work order (PWO) from one of the following tabs in the Production planning (PRODPLAN) application:

Pending Orders by Part
Pending by Order
Pending by minimum stock
When Production work orders (PWO) are created via the Pending Single Orders tab, they will always be assigned the default Manufacturing area (MAA).
When creating a new Production work order (PWO) via the Production planning (PRODPLAN) application, the default structure can be changed by selecting a Product structure (KITART) in Status 4 - Active, in the ManArea drop-down menu.

The info about the currently used Manufacturing area (MAA) is displayed In the upper right corner of the Production structure (KITDOC) application. This will be identical to the area used by the linked Production work order (PWO).

Comparing with a valid product structure - In the Production work order (PWOD) application
It is possible to compare the Production structure (KITDOC) with a valid Product structure (KITART) by selecting the Context menu option, Compare with valid ART structure.

This will open the Compare structure popup and the Product structure (KITDOC) is compared with the Product structure (KITART) for the corresponding Manufacturing area (MAA).

It is possible to change the Production structure (KITDOC) of not released Production work orders (PWO) via Copy version from ARToption, in the Context menu.
Statuses of not released Production work order (PWO)
Status 1 - Pending registration
Status 2 - Pending purchase or production
Status 3 - Pending goods reception
Status 4 - Pending scheduled production start

In the Copy version from ART popup, confirm the choice by either pressing ENTER or double-clicking on a desired row. It is possible to filter the Product structures (ART) by Manufacturing area (MAA) with the Source Manufacturing Area drop-down menu.
This operation will change the Manufacturing area (MAA) of the Production work order (PWO) and its Production structure (KITDOC).
Important
This option may be useful if a new Production work order (PWO) is created and linked to the wrong Manufacturing area (MAA). The Context menu option is unavailable if the Production work order (PWO) is released and the Work order operations (WOO) have been started.

In the Production work order (PWOD) applicatoin, using the Copy current structure to product option in the Context menu will change the Product structure (KITART) of the Product (ART) with the corresponding Manufacturing area (MAA).
In the Manufacturing areas (MAA) application, the user can verify the list of Product structures (KITART) associated with a Manufacturing area (MAA). Since it’s possible to define multiple Product structures (KITART) in Status 4 - Active, the same Product (ART) may be displayed on different lists.

Upon Production work order (PWO) completion, once Product unit (LCM) is forwarded to stock, the user can access the Goods reception item (SSAITEM) to rework a Product unit (LCM). In such cases, the default Manufacturing area (MAA) will be selected for the rework work order. If a rework for a product linked to an active work order is selected, the default manufacturing area will be chosen as well.
Updating planned times on the Operations (OPR) in the Product structures (KITART), through the Update product structure operation planned times (PRODTIMEUPDATE) application, uses the Product structure (KITART) tied to the default Manufacturing area (MAA) of that Product (ART). The list of Operations (OPR), average and planned times, and the number of completed Work order operations (WOO) are also taken from the default Product structure (KITART).

The Accumulated worklogs' total values grouped by periods (PERIODTOTALS) and Accumulated worklog's total values grouped by production work orders (PERIODPWO) applications contain the summary of work related costs and logged hours, which can be filtered by specific Production work orders (PWO) or Products (ART).
The latter option accumulates all worklogs regardless of the Manufacturing area (MAA) used in the Production work order (PWO) or in the Product (ART) itself.

Creating new Sales orders (COA) are always performed for the default Product structure (KITART). Subsequently, any special structures created prior to a Sales order (COA) registration are fetching revision history from that Product structure (KITART).

It is possible to create new Production work orders (PWO) according to provided sales requirements through the Sales and operations planning (SOP) application. These Production work orders (PWO) will be generated based on the default structure of a given Product (ART).


Planning, or resource planning, is a process to get the optimal use of the resource capacity and to deliver the product before deadline.
The needs of production is identified.
The needs of production is collated.
The production order is registered.
If a production company does not produce goods itself, most production orders will be initiated by a customer order. This means that the sales department, which receives the customer order, need to hand the planning process over to a production planner, before terms can be agreed upon.
A planning process such as this involves the identification, categorization and prioritization of a production need in sequence. This prioritization books resources such as machines, personnel and any external resources. Planned delivery is then communicated back to the sales department.
This planning phase may also result in several customer orders for the same product to be combined and produced in the same production run. This enables the production company to save production costs and delver at an earlier date.
Creating a new production order
Production need is identified through customer orders or orders from the warehouse manager.
Planning production orders
The production order is planned through prioritization, time usage and cost price vs. sales price.
Preparing production orders for production
Production orders ready to start must be ordered by releasing it for the involved resources.
Setting name | Description |
Automatically link Products (ART) with Product Structure to Pending | If setting is 'ON' - Sales Order items with Class=K* will be automatically be set to Pending by the program. |
AutoSync PlanningOperation with WorkOrderOperation | |
Default Production Lead time | Value in this setting is used as Default Lead time, - if no leadtime is set on the Product (ART). To be used in production calculation. |
Default view in Resource WorkOrders folder | Value in this setting could be one of these alternatives: READY - Resource WorkOrders folder is filtered on ready Production Work Orders (Operation in Status=3). ACTIVE- Filter on ready and running Production Work Orders (Operation in Status=3 and 5). ALL - Showing all Production Work Order. If setting is not activated, default will be 'ACTIVE' - ready and running (Operation status=3 and 5) |
Pending by Minimum Stock folder in PRODPLAN | If setting is 'ON' - the folder 'Pending by Minimum Stock' will be available in PRODPLAN, and thereby the possibility to see production needs based on the Product setting for minimum stock - ReorderQuantity and ReorderPoint on Product (ART) |
Production Customer Forecasting | If setting is 'ON' - The functionality that will allow company to use Customer Forecasting in Production module is activated. NOTE: Forecast functionality is not ready for use in Rambase |
Production Work Order (PWO) - Assign To Stock | If this setting is 'ON' - the users have the option to start a job that try to link all items in the production work order to stock. In case there is no free stock, the program will try to swap links with other documents. The job is started by the option Assign To Stock. |
Set Confirmed Date on change of Prodend in a Production Work Order | If this setting is 'ON' - The Confirmed Date (ProdConf) is updated and set when changing the production start or end date. |
The Resource free capacity is limited | Value in this setting is a percentage that will impact the Resource available shown in the Resource Planner. If resource day load is less than the percentage set in this value, the resource day 'bar' is shown in green colour at the resource planner overview. Colour shown yellow if load exceeds this percentage |
The Resource free capacity is low | Value in this setting is a percentage that will impact Resource available shown in the Resource Planner. If resource day load is exceeds the percentage set in this value, the resource day 'bar' is shown in red colour at the resource planner overview |
Time resolution for production calendars | Value in this setting is the Time resolution for production calendars. Example: 00:15 allows calendar shift start and end time to be hh:15,hh:30,hh:45,hh:00. Default resolution if setting is deactivated is '00:30' |
Use PLO Archive For Planning | This setting will be used temporary by the JHC development team to allow old and new code during the implementaion phase, replacing ALM with PLO for planning purposes. |
Use Assignment Window for Production Work Order (PWO) | If both this setting and 'Margin for SalesLeadTime Assignment Window' is turned "ON", Production Work Orders will always get assignment from PENDING if LINKDELDATE in SAR is outside of the period given by SALESLEADTIME from ART plus the value from the setting 'Margin for SalesLeadTime Assignment Window'. The SAR optimize process will only re-assign production work orders inside of this window. In case several companies have common ART and SAR registers (Group Structure), 'Margin for SalesLeadTime Assignment Window' should only be set up for the company that is set up as OWNERDB, while 'Use Assignment Window for Production Order' should be set for each one of the sales databases. |
Warning for Shipping to Supplier on External Operations | Value in this setting is how many days before warning is displayed in the column "ShiptoSupDate" for shipping to External Work. If the setting is 'OFF' - the "External Operations" folder in ProdPlan will not show. |
Production Planning (PRODPLAN) is a planning tool used to create Production Work Orders (PWO), and manage the forthcoming production needs.
Navigate to the application
Option 1: RamBase menu→Production→Planning→Production planner
Option 2: Click the Program field and type "PRODPLAN" and press ENTER.
Click here to read more about the user interface.

To inspect your company's production needs, you can see this in the Pending Orders by Part tab. The Qty column shows the quantity of the part in the item line waiting to be produced.
To deliver selected products (partial delivery) for external work, use the following procedure:
To open the Production Planning (PRODPLAN) application, find Production in the RamBase menu and then Planning. Click Production planner to enter the PRODPLAN application.
Click the External Operations folder.

Find the line you want to partly deliver and click the External Work Logistics icon on the right side.

Click the Create SRT for SPO/xxxxxx-x icon to open the External Work: Create Shipping Document popup.
Click the Create SRT button next to the Create SRT for PWO/xxxxxx-x to partly deliver the SPO.
Note! It is also possible to create SRT for the whole SPO in the popup.
The Scheduled production jobs (SPJ) application is designed to efficiently schedule operations on multiple Production work orders (PWO).
Navigate to the application
Option 1: RamBase menu→Production→Planning→Scheduled production jobs
Option 2: Click the Program field and type "SPJ" and press ENTER.
Click here to read more about the user interface.
Operations include
Release Production work order (PWO)
Release Production work order (PWO) and its subproductions
Confirm Production work order (PWO)
Cancel Production work order (PWO)
Why is this useful?
Production work orders (PWO) with complex structures can include subproductions with equally complex structures.
Releasing with subproductions or confirming individual Production work orders (PWO) can be time consuming.
Schedule operations on Production work orders (PWO) at a specific time - even at night.
Canceling multiple Production work orders (PWO) can be time consuming.
Procedure
Create a Scheduled production job (SPJ).
Add items.
Register the Scheduled production job (SPJ).
Wait for the system to run the job.
Verify the output.
The Scheduled production jobs lists all scheduled production jobs. The columns contain relevant information on when they are scheduled and when they are to be executed. Available columns can be selected/deselected in the Column settings.
Column | Description |
|---|---|
Status | Displays a status icon indicating the status of the scheduled production job. Available statuses are:
|
Id | Displays the Scheduled production job (SPJ) identifier. |
Name | Displays the name given to the Scheduled production job (SPJ) when adding a new scheduled production job with the Add new job button. |
Description | A description which can be edited when the Scheduled production job (SPJ) is in Status 1 - Pending registration. The field is found in the Scheduled job area in the Description field. |
Scheduled at | Displays the planned time of the job execution. If this is empty, the Scheduled production job will start immediately after being registered. |
Executed at | Displays the time the scheduled production job was executed. |
Buttons
Add new job - Click to open a popup where the following fields and buttons are available:
Choose job type to schedule for selected objects dropdown
Choose one of the following:
Release production work order - Performs release operation on Production work orders (PWO) selected as scheduled production job items in the Input tab.
Release production work order with subproductions - Performs release operation on Production work orders (PWO) and all their subproductions selected as scheduled production job items in the Input tab
Note
A released Production work order (PWO) will be set to Status 5 (In production) and available for the operator in the Operators list of production work order operations (RWOO) application.
Confirm production work order - Performs confirm operation on Production work orders (PWO) selected as scheduled production job items in the Input tab.
Note
A confirmed Production work order (PWO) will forward the Production work order (PWO) to Status 4 (Pending scheduled production start) if all materials are available.
If all materials are not available, the Production work order (PWO) will be forwarded to Status 2 (Pending purchase or production). Or forwarded to Status 3 (Pending goods reception).
Cancel production work order - Performs cancel operation on Production work orders (PWO) selected as scheduled production job items in the Input tab.
Name field - Type a name for the scheduled production job. If no name is set, the default name will be the type selected in the previous dropdown with the time of creation.
Release time - selection
As soon as possible button -Queues the Scheduled production job to be run at
Scheduled at button - Click to add a specific time for the scheduled production job.
Type in the yyyy.MM.dd.hh:mm tt format or select a time with the icons:


The header includes details on the selected Scheduled production job (SPJ), which depending on the status, can also be edited.
Type dropdown - Can only be edited in Status 1 - Pending registration. Click to change the type of the scheduled production job. Read about the Choose job type to schedule for selected objects button for full description of the options.
Name field - Can only be edited in Status 1 - Pending registration. Type a new name.
Scheduled at - Can only be edited in Status 1 - Pending registration. Displays the time the Scheduled production job was added with the Add new job button.
Executed at - Displays the time the scheduled production job was executed.
Scheduled by field - Displays the name of employee who has scheduled the production job.
Description textbox - Can only be edited in Status 1 - Pending registration. Add a necessary description or relevant info.
The tabs lists the input and output of the scheduled production jobs. Quick navigation to useful applications can be done via icons. The Input tab also has the Add new item button to efficiently schedule Production work orders (PWO).
More output than input
When scheduling a Production work order (PWO), it can trigger subproductions. Therefore more Production work orders (PWO) might be listed in the Output tab, than the Input tab.
Search field - Search for a Production work order (PWO) or use the Filter builder to customize one. The predefined Failed filter is especially useful in this context.
Column | Icons | Description |
|---|---|---|
Status |
| Displays the status of the Scheduled production job item (SPJ). View details in the Job result column. |
Element |
| Displays the status and identifier of the Production work order (PWO) that has been included in the schedule production job. Click the View icon in the Element column to open the Production work order (PWO) application to view and edit details. |
| ||
Executed at | Displays the time the operation was executed on the Scheduled production job (SPJ) element. | |
Subitems |
| Click the View icon to open a popup listing all subproductions with information on Production work order id, Part, Level, Remaining quantity. Click the View icon in the Production work order id column to open the Production work order (PWO) application to view and edit details. |
| Open in PWOTREE to open the Inspect subproductions (PWOTREE) application. Read more about the Inspect subproductions (PWOTREE) application. | |
Job results |
| Displays a status icon and text indicating the result of the job, including status description and potential errors. |
Actions |
| Click to open a popup where the user can confirm or cancel the removal of the item. Click Yes to remove the item from the list. Note that the Scheduled production job (SPJ) must be in Status 1 - Pending registration, for items to be removed. |


Button
Add new item button - Click to open a popup where the user can select which Production work orders (PWO) are to be added to the list of scheduled items.
The Add new item button is available for Scheduled production jobs (SPJ) in Status 1 - Pending registration.
Production work orders (PWO) in the following statuses can be added:
Tip
When confirming Production work orders (PWO), add Production work orders (PWO) in Status 1 - Pending registration.
When releasing Production work orders (PWO), add Production work orders (PWO) in Status 4 - Pending scheduled production start.
When canceling Production work orders (PWO), it is possible to add Production work orders (PWO) which are lower than Status 5.
Be aware
It is possible to add Production work orders (PWO) in Status 2 - Pending purchase or production and Status 3 - Pending goods reception. But as long as they are not in Status 1 or Status 4, jobs will be completed in Status 9 - Processed, but the output item status will be set to Status 7 - Failed.
Note that predefined filters can be added by clicking the Filter builder icon.
The Output tab displays information on the result of the production jobs that were scheduled. It also allows for quick navigation to the elements with View icon in the Element column.
Search field - Search for a Production work order (PWO) or use the Filter builder to customize one. The predefined Failed filter is especially useful in this context.
Column | Icons | Description |
|---|---|---|
Status |
| Displays a status icon indicating the output of the Scheduled production job.
View details in the Job results column. |
Element |
| Displays an icon indicating the status of the Production work order (PWO) and its ID. |
| Click the View icon to open the Production work order (PWO) application. | |
Executed at | Displays the time the operation was executed on the Scheduled production job (SPJ) element. | |
Job results |
| Displays an icon indicating the status of the Scheduled production job (SPJ) and a text detailing the output. |

Click the Context menu options icon to see available options.
Context menu options | Description |
|---|---|
Delete | Click to delete the Scheduled production job (SPJ). Available in Status 1 - Pending registration. |
Recreate (Copy) | Click to create a new Scheduled production job (SPJ) with the same items in Status 1 - Pending registration. This is useful if for any reason an element has failed, or the user wants to repeat the Scheduled production job (SPJ). Available in Status 7 - Failed and Status 9 - Processed. |
Reopen | Click to return the Scheduled production job to Status 1 - Pending registration. This is useful if the user wants to edit details as Type or Name. Available in Status 2 - Pending activation |
Register | The Register option will set the Scheduled production job (SPJ) in Status 2 - Pending activation. Available in Status 1 - Pending registration. Automation in Status 2 - Pending registrationA registered Scheduled production job (SPJ) in Status 2 - Pending activation will be automatically be picked up by the system every 5 minutes. The system will run 3 jobs at a time. The application will not automatically refresh. To inspect the output, please refresh the page. |
The table below lists relevant Company settings (CSV) for Scheduled production job (SPJ) application. Note that the description mirrors the description used in the Company settings (CSV) application.
From the Production planning (PRODPLAN) application, the Pending by minimum stock tab gives the required minimum stock of the product required for daily operations.
The minimum stock is set on the product representing the material or part. To open the Product (ART) application, select Product, then Product management and finally Products in the RamBase menu. The Stock tab details the current stock and the quantity available for use.
In Properties, select the Main data tab. Navigate to the Procurement area. Enter the desired value in the Reorder point field.

The Pending by Minimum Stock tab in the Production planning (PRODPLAN) application lists the products where there is a shortage. Only products with a specified minimum quantity are shown here.

Press ENTER on the selected line to open the Production work order (PWO) application. The quantity shown in the Qty field, in the Production work order (PWO) application, is comprised of the minimum stock quantity. This field is editable, and can be updated according to the Reorder point given for the selected product from the Product (ART).

If the Create Production button is clicked, the entry in Pending Minimum Stock is not displayed from the Production planning (PRODPLAN) application.
Note
If there are active production work orders to complete in the future, for products with a specified shortage quantity, the free quantity is affected by this in the way that the future productions fill the current shortage. If you have shortage, but RamBase does not show a purchase requirement in the Purchase (PUR) application, check if there are any production orders that make up for the shortage in the future.
To open the Production Planning (PRODPLAN) application, find Production in the RamBase menu and then Planning. Click Production planner to enter the PRODPLAN application.
Find the kit which you wish to start production for, highlight the item line and press ENTER.

Enter the Pending by Order folder to see all the pending orders for this kit.
Check the boxes in the select column for the orders you wish to start.
After your selection is finished, click the Create Production button at the bottom.
This will create a Production Work Order (PWO) for the selected quantity of kits to be produced.

Inspect the information to ensure everything is correct.
Click the Confirm Production button at the bottom when you are ready to confirm the production.
Files from Sales order items (COAITEM)
When creating a Production work order (PWO) from the Pending by order or Pending by single order tab in the Production planner (PRODPLAN application, files and notes from both Sales order (COA) and Sales order item (COAITEM) are copied to the new Production work order (PWO).
If automatic copying is not possible, the related Sales order item (COAITEM) is still accessible in the File manager for the Production work order (PWO).
Whether making to order, making to stock or assembling to order, creating a product can also require the production of the parts which make up the final product.
A produced product includes a Bill of Materials, which is often referred to as a BOM for short. In RamBase a BOM is stored as a Product (ART) of type or class KA or K, and these products are referred to as KITs.
When a Production work order (PWO) is created, the Product structure (KITART) is copied to a Production structure (KITDOC). This allows for a flexible production while maintaining the integrity of the intial BOM.
About KITART and KITDOC
Product structure (KITART) - Is accessed via the Product (ART) application and the active version is the current BOM for the product. It can be updated by creating new versions or revisions. When creating a new version, planned Production work orders (PWO) in Status 1-4 (and Status 5, if pick is not initiated and no time has been logged) can be updated with the new version, if changes are made.
Production structure (KITDOC) - Is accessed via the Production work order (PWO) application and is the flexible structure copied from the Product structure (KITART). Changes to a Production structure (KITDOC) will not reflect back on the Product structure (KITART), unless a new version is copied from the Production structure (KITDOC) to the Product structure (KITART).
This is relevant if the product is customer specific by creating a special structure for the Sales order item (COAITEM).
Complex Product structures (KITART), products of type KA, are often made up of other product structures, products of type K, which again can potentially require other product structures of type K. In other words, some kits might require sub kits, which also can require their own sub kits.
To simplify we can differentiate between the relative kits by calling them top level kits and sub kits.
Take a look at the example below from the Product structure (KITART) application:

View from the KITART application, opened via the Product (ART) application, Structure button > Kit Treeview tab.
Figure 2. Simplification of the top level Product structure (KITART)
Top level kit
Sub kit 1
Sub kit 1-1
Sub kit 1-2
Sub kit 1-2-1
Sub kit 1-2-2
Sub kit 1-3
Sub kit 2
Sub kit 3
Sub kit 3-1
Sub kit 3-2
Important
If there is a need for sub kits, Production work orders (PWO) for these can be automatically created. But only if the auto create functionality is configured to do so.
As visualized in figure 1 and 2, creating and completing a Production work order (PWO) for the top level kit will require a total of ten sub kits on various levels.
Production work orders (POW) for these sub kits can be created manually, as a production need will be created, but to save time and planning they can be automatically created.
How
Activate a company setting to auto create Production work orders (PWO) for all sub kits.
If this is activated, it is useful to verify that activating the setting also activates the checkboxes for auto create in Product (ART) and Product structure (KITART)/Production structure (KITDOC).
Note that if it is only activated in the Production structure (KITDOC), unless it is copied as new version to the Product structure (KITDOC), enabling the checkbox will only apply to that Production work order's (PWO) auto created sub kits.
Activate on all levels
The auto create functionality only applies one level down. Therefore the auto create functionality must be enabled on every level that has sub kits. If not, Production work orders (PWO) will not be created for lower sub kit levels.
The Company setting (CSV), Default create value for products - Auto create workorder can be set to Yes to simplify the procedure.
Using the example, figure 2 - the simplification of kit levels, as visualized above:
If the setting is on and a Production work order (PWO) is created for the top level kit, Production work orders (PWO) will only be created for the first sub level, in this example sub kit 1, sub kit 2 and sub kit 3. The setting does not apply to the second sub level, in our example sub kit 1-1, sub kit 1-2, sub kit 3-1 and sub kit 3-2 and so on.
To create Production work orders (PWO) for the total potential sub kits, follow the procedures listed in the section below.
To automatically create Production work orders (PWO) for sub structures, open the Product (ART) application and enable the Auto create work orders for sub structures checkbox.
Open the Product (ART) application from the RamBase menu by selecting Product followed by Structures management and finally Product structures.
This will open the Product (ART) application pre-filtered on products containing structures, as the Auto create work orders for sub structures checkbox is only available for those products.
Select or search for the product in the left list in the Product (ART) application.
To enable the Auto create work orders for sub structures checkbox, click the Properties tab followed by the Production sub-tab.
Click the Auto create work orders for sub structures checkbox to either enable or disable the feature.
Repeat steps 2-4 for all sub kits, and their sub kits.
Open the Product (ART) application from the RamBase menu by selecting Product followed by Structures management and finally Product structures.
This will open the Product (ART) application pre-filtered on products containing structures.
Select or search for the top level kit in the left list in the Product (ART) application.
Click the Structure button to open the Product structure (KITART) application.
Click the Kit details tab.
Locate, and then select the product structures of class K or KA by clicking the line, highlighting it.
Double left click or press ENTER to open the Structure part item (KITARTITM) application.
In the Parameters area, enable the AutoCreateSubProduction checkbox, or verify that it is.
Repeat steps 5-6 for all sub kits, and their sub kits.
In the Production structure (KITDOC)
Tip
Navigation to the Production structure (KITDOC) is based on the users role and context. This example will use the Production work orders (PWO) as the starting point as it lists all Production work orders (PWO), independent of status.
A Production structure (KITDOC) is only created when a Production work order (PWO) for the Product structure (KITART) is created.
Open the Production work orders (PWO) application from the RamBase menu by selecting Production followed by Production again and finally Production work orders.
Select or search for the top level Production work order (PWO).
To open the Production work order (PWO) applicaiton, select it and press ENTER or click the Right arrow icon.
In the Links area, click the Structure button to open the Production structure (KITDOC) application.
Click the Kit details tab.
Locate, and then select the product structures of class K or KA by clicking the line, highlighting it.
Double left click or press ENTER to open the PWO Structure part item (KITDOCARTITM) application.
In the Parameters area, enable the AutoCreateSubProduction checkbox, or verify that it is.
Repeat steps 5-6 for all sub kits, and their sub kits.
Activate the Company settings (CSV), Default create value for products - Auto create workorder
Activate the Auto create work orders for sub structures checkbox in the Product (ART) application
The Product structure planned time deviations (PRODTIMEDEV) application works in unison with the Update product structure operation planned times (PRODTIMEUPDATE) application.
Application synergy
Product structure planned time deviations (PRODTIMEDEV) application - Identify deviations in total planned time of all Operations (OPR) and the average production time for Product structures (KIT).
Update product structure operation planned times (PRODTIMEUPDATE) application - View all Operations (OPR) for a selected Product (ART) with a structure. Adjust the planned time for Operations (OPR) based on the deviations, specified by the user.
Navigate to the application
Option 1: Click the Program field and type "PRODTIMEDEV" and press ENTER.
Click here to read more about the user interface.
Simplified workflow
Situation: Deviations in planned and average production time has been found in the Product structure planned time deviations (PRODTIMEDEV) application. The planner opens the Update product structure operation planned times (PRODTIMEUPDATE) application to inspect the deviations and adjust accordingly.
Selects product.
Uses the fields in the header to adjust the deviation scope.
Identifies red arrows for Operations (OPR) with longer duration than the planned time, and green arrows for Operations (OPR) with shorter duration than the planned time.
Selects the appropriate action in the Actions column:
Edit product structure operation to manually adjust planned times.
Set product structure operation times to average.
Updates the structure which contains the Operations (OPR) with the Update structure button.

The application contains a header and a list. The user provides varaibles in the header to define deviations in the list.
The header is used for defining deviations in planned time for all Operations (OPR) and the average production time for Product structures (KIT). The user can filter the list on a product name and the list will display Products (ART) with a Product structure (KITART) of type/class K, KA, KS or KM. These Products structures (KITART) contains Operations (OPR). The Operations' (OPR) setup, run and cleanup time is then displayed in the columns of the list. Based on the user defined deviations, these will be noted by green or red arrows.
Product name search field - To filter on Product names (ART), type a value and the list will be filtered on product names which contains the provided value.
Below planned time deviation field, checkbox and Arrow icon - Define a deviation (Red arrow icon or Green arrow icon) in planned and average time by deciding the below planned time percentage.
Example with a value set at 10%: If the average time is 10% or greater than the planned time for Planned run time , Planned setup time or Planned cleanup time a green arrow will be displayed. As this will indicate that the average time used is 10% or below the planned time.
Default value is 10%
Changes to this field will be reverted back to the default value, if navigating from the application.

To enable or disable the filtering function of the Below planned time deviation field.

Increase or decrease the percentage value by one (1), by clicking the Arrow icons.
Above planned time deviation field, checkbox and Arrow icon - Define a deviation to display a Red arrow icon in planned and average time by deciding the above planned time percentage.
Example with a value set at 10%: If the average time is 10% or greater than the planned time for Planned run time, Planned setup time or Planned cleanup time, a Red arrow icon will be displayed. As this will indicate that the average time used is 10% or greater than the planned time.
Default value is 10%
Changes to this field will be reverted back to the default value, if navigating from the application.
To enable or disable the filtering function of the Above planned time deviation field.
Increase or decrease the percentage value by one (1), by clicking the Arrow icons.
Reset all filters button - To reset the changes made to the header, click the Reset all filters button.
When deviations have been defined in the Header area, planned time for all Operations (OPR) and the average production time for Product structures (KIT) will be listed by Product (ART). The list will display Products (ART) with a Product structure (KITART) of type/class K, KA, KS or KM. These Products structures (KITART) contains Operations (OPR). The Operations' (OPR) setup, run and cleanup time is then displayed in the columns of the list. Based on the user defined deviations, these will be noted by green or red arrows.
The user can further filter the list by using the Search field, the Filter builder and decide which information is displayed by enabling or disabling columns in the Column settings.
Detailed filtering options for the list
Search field - Click the Search field and then press SPACEBAR. This will list all of the available fields to filter the list on. Either select the intended filter or use the UP and DOWN arrow keyboard keys to navigate to the necessary filter and press the ENTER key to apply the filter. A popup will appear with filter query expressions. The expressions can be inspected here.
Once you select the expression another popup will follow where you can decide which operator option to use. There is an And, Or and OrderBy operator option available which enables you to add another field to the filter. When finished building your filter query, press the ENTER key and the filtered result is displayed in the list.
Filter builder icon - Click the Filter builder icon to open a popup where the user can select filters from the Standard filters area. Selected filters will be visible below the Search field. Active filters are marked orange, inactive are marked gray. The user can also Create custom filters by selecting Field, Operator and Value in the Create custom filters area, and then pressing the Save filter button. Saved filters will be available from the My saved filters area. Click the saved filter to add it below the Search field.
Column settings icon - To select the information displayed, click on the Column settings icon and hover over Columns. Then select the intended columns. The selection of data can be exported to Excel via the Export to excel option in the Column settings. The Reset to default view is also useful in resetting column width and placement. A description of the columns are listed in the table below.
Column | Icons | Descriptions |
|---|---|---|
Name | ' | Displays the name and description of the Product (ART). The product contains a Product structure (KITART) of type/class K, KA, KS or KM. To open the Product (ART) application, and view and edit details of the product, click the View icon. |
Completed work orders | Displays the number of completed Production work orders (PWO) for the listed Product (ART). | |
Average total time | Displays the sum of the values in the columns; Average run time, Average setup time and Average cleanup time. | |
Planned total time | Displays the sum of the values in the columns; Planned run time, Planned setup time and Planned cleanup time. The individual values are defined when setting up the Operation (OPR), in the Processing area in the Operation (OPR) application. | |
Average run time | Displays the average run time for all completed Work order operations (WOO) for a single Production work order (PWO). | |
Deviation run time | Displays the deviation between the Planned run time and the Average run time in percent. | |
Shortest run time | Displays the shortest run time for all completed Work order operations (WOO) for a single Production work order (PWO). | |
Longest run time | Displays the longest run time for all completed Work order operations (WOO) for a single Production work order (PWO). | |
Planned run time | Displays the planned run time for all completed Work order operations (WOO) for a single Production work order (PWO), displayed in the HH:MM format. Note that in the Operation (OPR) application, the Planned run time is setup in decimal hours HH.MM. | |
Average setup time | Displays the average setup time for all completed Work order operations (WOO) for a single Production work order (PWO). | |
Deviation setup time | Displays the deviation between Planned setup time and Average setup time, in percent. | |
Shortest setup time | Displays the shortest setup time for all completed Work order operations (WOO) for a single Production work order (PWO). | |
Longest setup time | Displays the longest setup time for all completed Work order operations (WOO) for a single Production work order (PWO). | |
Planned setup time | Displays the planned setup time for all completed Work order operations (WOO) for a single Production work order (PWO), displayed in the HH:MM format. Note in the Operation (OPR) application, the Planned setup time is defined in decimal hours HH.MM. | |
Average cleanup time | Displays the average cleanup time for all completed Work order operations (WOO) for a single Production work order (PWO). | |
Deviation cleanup time | Displays the deviation between Planned cleanup time and Average cleanup time, in percent. | |
Shortest cleanup time | Displays the shortest cleanup time for all completed Work order operations (WOO) for a single Production work order (PWO). | |
Longest cleanup time | Displays the longest cleanup time for all completed Work order operations (WOO) for a single Production work order (PWO). | |
Planned cleanup time | Displays the planned cleanup time for all completed Work order operations (WOO) for a single Production work order (PWO), displayed in the HH:MM format. Note in the Operation (OPR) application, the Planned setup time is defined in decimal hours HH.MM. | |
| To open the Update product structure operation planned times application, click the Right arrow icon. The application allow a view of all Operations (OPR) for a selected Product (ART) with a structure. Adjust the planned time for Operations (OPR) based on the deviations, specified by the user. |

The Update product structure operation planned times (PRODTIMEUPDATE) application is an extension of the Product structure planned time deviations (PRODTIMEDEV) application. It is used by production planners to further narrow down deviations between planned time and average time for Operations (OPR), and adjust those Operations (OPR) to a more accurate planned time.
Application synergy
Product structure planned time deviations (PRODTIMEDEV) application - Identify deviations in total planned time of all Operations (OPR) and the average production time for Product structures (KIT).
Update product structure operation planned times (PRODTIMEUPDATE) application - View all Operations (OPR) for a selected Product (ART) with a structure. Adjust the planned time for Operations (OPR) based on the deviations, specified by the user.
Navigate to the application
Option 1: Click the Program field and type "PRODTIMEUPDATE" and press ENTER.
Click here to read more about the user interface.
Simplified workflow
Situation: Deviations in planned and average production time has been found in the Product structure planned time deviations (PRODTIMEDEV) application. The planner opens the Update product structure operation planned times (PRODTIMEUPDATE) application to inspect the deviations and adjust accordingly.
Selects product.
Uses the fields in the header to adjust the deviation scope.
Identifies red arrows for Operations (OPR) with longer duration than the planned time, and green arrows for Operations (OPR) with shorter duration than the planned time.
Selects the appropriate action in the Actions column:
Edit product structure operation to manually adjust planned times.
Set product structure operation times to average.
Updates the structure which contains the Operations (OPR) with the Update structure button.

The Header is used to select a Product (ART) with a Product structure (KITART) of type/class K, KA, KS or KM. These Products structures (KITART) contains Operations (OPR). The Operations' (OPR) setup, run and cleanup time is then displayed in the columns of the list.
The Header is further used to define what a deviation in planned time is, noted with either a green or red arrow.

Field | Icon | Description |
|---|---|---|
Product | Displays the name of the selected Product (ART). The product contains a Product structure (KITART) of type/class K, KA, KS or KM. Icon descriptions
| |
Work order operation quantity From: To: |
| The Work order operation quantity field is used to set a range where only completed Work order operations (WOO), with a quantity within that range, are taken into account when calculating the average times. This is to verify that the deviation analysis is according to the users preferences. To adjust the value of the From or To field by one (1), click either the Up or Down icons. To input a specific value, click either field, and type the required value. Example scenario: The user wants the deviation analysis to differentiate between low quantity and high quantity productions. |
Earliest completed at |
| The date provided, in the Earliest completed at field, is used to adjust which completed Work order operations (WOO) are taken into account when calculating averages. The date must be provided in the yyyy.MM.dd format, or click the Calendar icon to select a date. Example: The date 2023.12.31 is set in the Earliest completed at field. Result: All Operations (OPR) are still displayed in the list, but only completed Work order operations (WOO) after the provided date is used in the calculation of averages. |
Last completed at |
| The date provided, in the Last completed at field, is used to adjust which completed Work order operations (WOO) are taken into account when calculating averages. The date must be provided in the yyyy.MM.dd format, or click the Calendar icon to select a date. Example: The date 2023.12.31 is set in the Last completed at field. Result: All Operations (OPR) are still displayed in the list, but only completed Work order operations (WOO) before the provided date is used in the calculation of averages. |
Below planned time deviation |
| Define a deviation (Red arrow icon or Green arrow icon) in planned and average time by deciding the below planned time percentage. Example with a value set at 10%: If the average time is 10% or greater than the planned time for Planned run time , Planned setup time or Planned cleanup time a green arrow will be displayed. As this will indicate that the average time used is 10% or below the planned time. Default value is 10%. NoteDefault value is 10%. Changes to this field will be reverted back to the default value, if navigating from the application. |
Above planned time deviation |
| Define a deviation to display a Red arrow icon in planned and average time by deciding the above planned time percentage. Example with a value set at 10%: If the average time is 10% or greater than the planned time for Planned run time, Planned setup time or Planned cleanup time , a Red arrow icon will be displayed. As this will indicate that the average time used is 10% or greater than the planned time. NoteDefault value is 10%. Changes to this field will be reverted back to the default value, if navigating from the application. |
Reset all filters |
| To reset all filters, but keep the selected Product (ART), click the Reset all filters button. |


Operations (OPR) included in the selected Product structure (KITART) will be displayed according to the selections made in the header.

Detailed filtering options for the list
Search field - Click Search field and then press SPACEBAR. This will list all of the available fields to filter the list on. Either select the intended filter or use the UP and DOWN arrow keyboard keys to navigate to the necessary filter and press the ENTER key to apply the filter. A popup will appear with filter query expressions. The expressions can be inspected here. Once you select the expression another popup will follow where you can decide which operator option to use. There is an And, Or and OrderBy operator option available which enables you to add another field to the filter. When finished building your filter query, press the ENTER key and the filtered result is displayed in the list.
Filter builder icon - Click the Filter builder icon to open a popup where the user can select filters from the Standard filters area. Selected filters will be visible below the Search field. Active filters are marked orange, inactive are marked gray. The user can also Create custom filters by selecting Field, Operator and Value in the Create custom filters area, and then pressing the Save filter button. Saved filters will be available from the My saved filters area. Click the intended saved filter to add it below the Search field.
Column settings icon - To select the information displayed, click on the Column settings icon and hover over Columns. Then select the intended columns. The selection of data can be exported to Excel via the Export to excel option in the Column settings. The Reset to default view is also useful in resetting column width and placement. A description of the columns are listed in the table below.
Important icons and buttons
Icon/button | Function | Description |
|---|---|---|
| Indicates that the operation takes longer time than the planned time, according to the parameters in the header. | For all columns partially named "Average", the Green arrow and Red arrow icons indicates a deviation from planned time set on the Operations (OPR). What specifies a deviation, is user defined by the selection(s) made in the header. |
| Indicates that the operation takes less time than the planned time according to the parameters in the header. | |
| To edit the Planned run time, Planned setup time and/or Planned cleanup time, click the Edit product structure operation icon. Note that once clicked, the fields in the related columns are editable. To save or cancel changes, click the Save or the Cancel icons. These icons are only available once changes have been made. Note that the font color of fields with saved changes will be marked with blue. Along with the addition of the Edited icon. | Located in the Actions column. Allows manual editing of the fields located in the columns:
|
| To set the Planned run time, Planned setup time and Planned cleanup time to the average time used, click the Set product structure operation times to average icon. Note that the font color of updated fields will be changed to blue. Along with the addition of the Edited icon. | Located in the Actions column. Updates the following columns with the average time used:
|
| If changes have been made to any columns with planned time, click the Update structure to update the Product structure (KITART) with the new Operation (OPR) times. To cancel any changes, click the Undo changes button. | Located in the Footer of the application. |


Column | Icon | Description |
|---|---|---|
Sequence number | Displays the Operation (OPR) sequence number which is defined when designing the parts and operations in the Product structure (KITART) application. | |
Name |
| Displays the name of the Product (ART) selected in the Product field in the Header. The product contains a Product structure (KITART) of type/class K, KA, KS or KM. |
Completed work order operations | Displays the number of times the listed Operation (OPR) has been run and completed as a Work order operation (WOO), included in a Production work order (PWO) according to the filtering in the Header area. | |
Average total time | Displays the sum of the values in the columns; Average run time, Average setup time and Average cleanup time. | |
Planned total time | Displays the sum of the values in the columns; Planned run time, Planned setup time and Planned cleanup time. The individual values are defined when setting up the Operation (OPR), in the Processing area in Operation (OPR) application. | |
Average run time | Displays the average run time of the Operation (OPR) in completed Work order operations (WOO). | |
Shortest run time | Displays the shortest run time of the Operation (OPR) in completed Work order operations (WOO). | |
Longest run time | Displays the longest run time of the Operation (OPR) in completed Work order operations (WOO). | |
Planned run time | Planned run time for the Operation (OPR) displayed in the HH:MM format. Note in the Operation (OPR) application, the Planned run time is setup in decimal hours HH.MM. | |
Average setup time | Displays the average setup time of the Operation (OPR) in completed Work order operations (WOO). | |
Shortest setup time | Displays the shortest setup time of the Operation (OPR) in completed Work order operations (WOO). | |
Longest setup time | Displays the longest setup time of the Operation (OPR) in completed Work order operations (WOO). | |
Planned setup time | Planned setup time for the Operation (OPR) displayed in the HH:MM format. Note in the Operation (OPR) application, the Planned setup time is defined in decimal hours HH.MM. | |
Average cleanup time | Displays the average cleanup time of the Operation (OPR) in completed Work order operations (WOO). | |
Shortest cleanup time | Displays the shortest cleanup time of the Operation (OPR) in completed Work order operations (WOO). | |
Longest cleanup time | Displays the longest cleanup time of the Operation (OPR) in completed Work order operations (WOO). | |
Planned cleanup time | Planned cleanup time for the Operation (OPR) displayed in the HH:MM format. Note in the Operation (OPR) application, the Planned setup time is defined in decimal hours HH.MM. | |
Actions |
| Allows manual editing of the fields located in the columns:
To edit the Planned run time, Planned setup time and/or Planned cleanup time, click the Edit product structure operation icon. Note that once clicked, the fields in the related columns are editable. |
| Updates the following columns with the average time used:
To set the Planned run time, Planned setup time and Planned cleanup time to the average time used, click the Set product structure operation times to average icon. Note that the font color of updated fields will be changed to blue. Along with the addition of the Edited icon. |
The Planned operations for production work order (PWOPLO) application allows for inspection and change of planned operations for the Production work orders (PWO).
Status 0 - Planned
The application is especially useful when planning Operations (OPR) for Production work orders (PWO) which are not yet released.
The application works as an extension of other applications and is primarily accessed from those.
Examples are:
Production planning (PRODPLAN) - In the Orders tab, by clicking the Operation icon in the ProdConf column.
Production work order (PWO) - In the Links area, by clicking the Operations button.
Orders overview (OOV) - By clicking the Inspect planned operations icon.
Navigate to the application
Option 1: RamBase menu→Production→Planning→Production planner and click the link to required Production work order (PWO). In the Production work order (PWO) application, click the Operations button in the Links area.
Option 2: Click the Program field and type "PWOPLO/ + identifier" and press ENTER.
Example "PWOPLO/123456"
Click here to read more about the user interface.

The following information is available in the Planned operations for Production work order (PWOPLO) application:
Planned operations for production work order (PWOPLO) - Left side - List
Planned operations for production work order (PWOPLO) - Right side - Details
Planned operation area
Source area
States area
External planner states area
Planned by day area
Lists all Operations (OPR) for the Production work order (PWO)
Column | Icon | Description |
|---|---|---|
St |
| This column displays the current status of an operation. Available statuses are:
|
Id | Displays the identifier number of the Planned operation (PLO). | |
State | This column displays the state of the operation, a text extension of the St column. | |
Op No | Displays the operation sequence number in the Production structure (KITDOC). | |
Resource name |
| Displays name of the Production resource (RESCONFIG) or the Resource group (REGCONFIG) that is assigned to the Operation (OPR) included in the Production work order (PWO). |
Tasklist |
| Displays the Production resource (RESCONFIG) identifier. Click the View icon to view all tasks assigned to the Production resource in the Operators list of work order operations (RWOO) application. |
Operation | Displays the name of the Operation (OPR) set in the Product structure (KITART) or Production structure (KITDOC). | |
Planned | Displays the total planned time of Setup, Processing and Cleanup set in the Operation (OPR). Hover over to display details. | |
Logged | Displays the total logged time of Setup, Processing and Cleanup. The time is logged by the operator in the Work order operation worklog (WOO) application. | |
Remaining | Displays the difference between Planned and Logged time and is calculated as the remaining time. | |
Man hours | If Man hours is enabled on the Production resource (RESCONFIG), the logged time is displayed. | |
Time deviation |
| Displays the Time deviation in percent. The value is calculated: (Accrued time - Planned time) * 100/planned time. Click the View icon to open the Worklog Deviation Details popup where details are displayed. Deviations can also be inspected and/or approved by clicking Approve button in the popup. |
Cost deviation |
| Displays the Cost deviation in hours. Indicates that there is a deviation between accrued and planned cost and that the deviation is larger than the difference between approved cost value and planned cost. Click the View icon to open the Cost Deviation Approval popup where details are displayed. Deviations can also be inspected and/or approved by clicking Approve button in the popup. |
Planned start | The planned date of production start in the format YYYY.MM.DD. | |
Is operation locked | Will display either Yes or No, based on the selection made in the States area. | |
Critical date | Critical date is a latest possible start date of the operation to complete it by the planned end date. Is displayed in the format YYYY.MM.DD. | |
Estimated end | Displays the estimated end date of production in the format YYYY.MM.DD. | |
Ready | Displays the date of when the Work order operation (WOO) is set, by the operator, in Status 3 - Ready for start. The information is displayed in the format YYYY.MM.DD. | |
Started | Displays the date of when the operation is started in the Work order operation (WOO) application, by the operator, and set in either Status 4 - Changeover setup or Status 5 - Processing. | |
Finished | Displays the date of when the operation was finished. This is done by the operator in the Work order operation (WOO) application when the Work order operation (WOO) is set in Status 9 - Completed. | |
Delay | Displays delay. Can be negative if the operation has been finished ahead of time. Shows the difference between estimated end and critical date. | |
On hold to | Displays the date and time the operator has set the Work order operation (WOO) to be on hold to. The information is reflected from the On hold to field, which the operator has available by clicking the Hold button in the Work order operation (WOO) application. | |
On hold description | Displays the description the operator has set in the Work order operation (WOO). The information is reflected from the Work order on hold description field, which the operator has available by clicking the Hold button in the Work order operation (WOO) application. | |
On hold category | Displays the category the operator has set in the Work order operation (WOO). The information is reflected from the Work order on hold reason field, which the operator has available by clicking the Hold button in the Work order operation (WOO) application. | |
Latest operator | Displays the name of the last operator who performed a Work order operation (WOO) on the Production work order (PWO) | |
Is outsourced operation | Displays either Yes or No. | |
Outsourced purchase order item | Displays the identifier of the outsourced Purchase order item (SPOITEM). Example: "SPO/123456". Click the View icon to open the Purchase order item (SPOITEM) application. This link can be used to quickly verify the Requirements and attachments sent to the supplier, which can be found in the tab with same name, in the Purchase order item (SPOITEM) application. | |
Outsourced purchase order supplier | Displays the name of the Supplier (SUP) for the materials. Click the View icon to open the Suppliers (SUP) application to view details. | |
Worklog |
| Click the View icon to open the Work order operation worklog popup where the user can inspect worklog related information for the operation. The user can efficiently add worklog elements for the operation. |
Icon |
| Displays an icon that indicates the status of the production operation, if it is delayed or completed. |
Scheduled production task |
| Displays an icon and a number. To view all pre-production, production and scheduled production tasks for linked to the operation, click the Scheduled production task icon. The number indicates the total number of tasks associated with the operation. The tasks are available for the operator in the Work order operation (WOO) application, in the Tasks tab. Active and Detached production tasksThe Production tasks tab includes two standard filters. Note that detached production tasks will be listed, but with strike-through if the Standard filter, Detached tasks is selected. In example: "Detached task".
When are production tasks potentially detached from a Production work order (PWO)?
|
| Click the Right arrow icon to open the Work order operation (WOO) application and to view details from the operator's perspective. |


Field | Description |
|---|---|
Planned start at | Displays the planned start date in the format YYYY.MM.DD 00:00:00 AM/PM. The date can be edited if the operation has not yet started. Click the Edit icon to open the Change planned start date popup. If the Planned start at date is moved, the Planned finished at will be moved as well. |
Planned finished at | Displays the planned completion date in the format YYYY.MM.DD 00:00:00 AM/PM. For external operations, planned finished at date is calculated: Planned start at + Run time + Lead time. |
Setup time | Displays the changeover pre/setup time in hours. |
Run time | Displays the runtime of the product structure operation. Changeover time is not included here. |
Cleanup time | Displays the changeover post/cleanup time in hours. |
Wait time | The wait time is used to specify if the products needs to wait before continuing to the next operation. A typical example is the time required for drying after the application of paint. The wait time is specified in hours. Status 8 - Wait/Queue. |
Lead time | For external operations. Displays material lead time in days. This lead time is the total of: Transit days to, Standard lead time, Transit days from, which is set on the Supplier (SUP). |
Fields | Description |
|---|---|
Source | Displays the source Production work order (PWO) for the operation. Click the View icon to open the Production work order (PWO) application. |
Quantity | Displays the quantity being produced in the Work order operation (WOO). |
Part | Displays the name of the product being produced. Click the View icon to open the Product (ART) application to view and edit details. |
Planner | Displays the full name of the production planner. Click the View icon to open the Personnel (PER) application to view the user details. |
Checkbox | Description |
|---|---|
Operation locked | If the operation is locked, the Planned start date can not be moved. Can be due to inspection by external source or similar requirements. It can also be due to a triggered Scheduled production process which has been set up to notify the customer ahead of start date. If the customer has been notified, the operation will be locked. Read more about how to setup tasks for customer notification. |
Priority | Sets a flag which indicates that the Work order operation (WOO) has been prioritized. The field is read only, and the flag is set in the Production work order (PWO) application. |
Line production | The checkbox is checked if this product is planned and manufactured in a line production. The field is read only. Read more about Line production method and setup. |
Checkbox | Description |
|---|---|
Pending external planner | This checkbox is selected if the plan is transferred to the Resource planner (RPLAN), and the operation is waiting for an update from the Resource planner (RPLAN). This does only apply if the Company setting (CSV), Wait for external planner to start operation is enabled. Production work orders (PWO) with one or more operations, with this flag on, can not be released for production, unless the flag is set to 0 for the operations in the PWOCRITICALDATE (operations list) application in the Production work order (PWO). |
Changed | If this checkbox is checked, the operation has been changed by an external planning system and is waiting to be updated in the Work order operation (WOO) application for the operator. |
Resource capacity and load for the Production resource (RESCONFIG) performing the operation, listed by date. The list is informational only.
Column | Description |
|---|---|
Date | Displays the date in the format YYYY-MM-DD. |
Week day | Displays the week day of the date. |
Work time | The planned work time for the selected operation, per date. |
Load | Work load of the Production resource (RESCONFIG), per date, displayed in percent. |
Capacity | Capacity of the Production resource (RESCONFIG) in hours. |
Option | Description |
|---|---|
Reopen work order operation | To reopen operations in Status 9 - completed, select the Reopen work order operation option. The user can has the option to create a new reason, or select a preexisting one. Reopen work order operation popup
A reopened Work order operation (WOO) will return to the previous state from before it was completed. |
View details | To open the Product planning operation (PLO) application and view details, select the View details option. |
The Orders overview (OOV) application lists all open Sales order items (COAITEM). It is an alternative to the Production backlog customer backlog (PBCOA). The filtering options allow for easy organizing to the users' need.
Navigate to the application
Option 1: RamBase menu→Finance→Receivables→Customer billing
Option 2: Click the Program field and type "CUSBILL" and press ENTER.
Click here to read more about the user interface.
The following areas are described in the sections below:

The Orders overview header
The Orders overview list
The Orders overview header contains fields which are used to filter the list below.
Read more about filtering in RamBase here.
Fields and buttons | Description |
|---|---|
Quick search field | Click on the Search field to look up a specific Sales order item (COAITEM), Production work order (PWO) or a Product (ART). The owner of a document can also be found, for example a Goods reception (SSA) identifier number, if the linked production has been forwarded to stock. Click on the Quick search filter icon to select which of the following options are to be included in the search:
|
Location field | Click on the Location field to filter the Sales order item (COAITEM) list on a specific Location (LOC). Click on the Arrow down icon to select, or search for, a location from the Location popup. |
Product field | Click on the Product field to filter the Sales order item (COAITEM) list on a specific Product (ART). Click on the Arrow down icon to select, or search for, a Product (ART) from the Product popup. The user can also create a new Product (ART) by clicking on the Create new product icon in the lower left corner of the popup. This will open the Product (ART) application. |
Seller field | Click on the Seller field to filter the Sales order item (COAITEM) list on a specific seller. Note that only employees in Status 4 - Active will be available. |
Customer field | Click on the Customer field to filter the Sales order item (COAITEM) list on a specific Customer (CUS). Typing will open the popup from which a Customer (CUS) can be selected. |
Sales order planner field | Click on the Sales order planner field to filter the Sales order item (COAITEM) list on the planner set in either the Sales order (COA) or Production work order (PWO) application. |
Assignee field | Click on the Assignee field to filter the Sales order item (COAITEM) list on a specific employee. |
Reset all filters button | Click the Reset all filters button to remove all filters and show all open Sales order items (COAITEM) in the list. |
The displayed Sales order items (COAITEM) are based on the selections made in the Orders overview fields area.
The Orders overview list includes a search field. In addition to the fields and variables in the header, the scope of the search can be further filtered by clicking the Filter builder icon to the right of the search field.
Clicking the Filter builder icon will display a popup with the options to add a Standard filter and/or Create custom filters. All custom filters can be saved and then added to the My saved filters area.
Standard filters | Filter description |
|---|---|
Confirmed completion delayed | This filter displays all Sales order items (COAITEM) with Confirmed delivery date before the Confirmed completion date. |
Delayed orders | This filter displays all Sales order items (COAITEM) in Status 6 - Delayed. Delayed Sales order items (COAITEM) orders which have |
Has priority | This filter displays all Sales order items (COAITEM) where the associated Production work order (PWO) has high priority. The priority of the Production work order (PWO) is set by the production planner in the Production work order (PWO) application. This information is also displayed by a Star icon on the Work order column in the Orders overview (OOV) application. |
Confirmed completion date is locked | This filter will only display Sales order items (COAITEM) where the associated Production work order (PWO) has Confirmed completion date locked in the Production work order (PWO) application. This is done by the production planner in the Production work order (PWO) application, in the Dates area. Lock or unlock, by clicking the Padlock icon. |
My orders | This filter will only display Sales order items (COAITEM) where the current user is set as the Assignee on the Sales order (COA). |
Has negative material trend | This filter will display Sales order items (COAITEM) where the associated Production work order (PWO) has a negative material trend. A negative material trend implies that the required materials for the Production work order (PWO) are either Unconfirmed or Pending purchase. |
Pending shipping | This filter displays Sales order items (COAITEM) in Status 8 - Ready for shipment. |
Product type K* | This filter displays types related to parts, structures, and Structures management (KIT). |
Revision mismatch | This filter displays Sales order items (COAITEM) where the revision of the Product (ART) included in the Sales order (COA), differs from the Product (ART) revision being produced by the Production work order (PWO). This information is displayed as a Warning icon in the Revision column. |
Scheduled completion delayed | This filter displays Sales order items (COAITEM) with Confirmed completion date set before the Scheduled completion date. |
Standard sales order type | This filter displays normal Sales order items (COAITEM). A normal sales order item (COAITEM) is defined as a sales order item (COAITEM) without an assigned type. |
The user can customize the order of the columns by drag and drop, in addition to hover over icons and columns for further descriptions.
The user can also go directly to the Sales order item (COAITEM) by clicking the Right arrow icon, which is found in the rightmost column.


The Production Work Order (PWO) Status - Distribution widget displays the frequency of the various statuses for production work orders in a color-coded donut chart. You can see the number of occurrences of every status.

To add the widget to your desktop.
In the Rambase desktop, click Add widget.

Enter production work order status in the search field and select the Enter key.
Select ProductionWorkOrderStatusWidget to highlight it and select Add.
To view the Production Work orders with similar status.
Click any section in the donut chart. The Production Planning window opens. The PWO with status corresponding to the section you clicked are displayed in the Productions tab.

For some products, each Production work order (PWO) must have a Minimum quantity. The MINIMUMPRODUCTIONORDERQTY is specified in the location table for the product. This should only apply to PWO that are created for minimum stock or created by part. Order based production must keep the required quantity for the order.
By create PWO for minimum stock or by part:
Newly created Production work orders should show information about MINIMUMPRODUCTIONORDERQTY for the LOC.
If the required quantity is less than MINIMUMPRODUCTIONORDERQTY for the LOC. adjust the PWO to MINIMUMPRODUCTIONORDERQTY.
If the required quantity is greater than MINIMUMPRODUCTIONORDERQTY for the LOC, keep the required quantity.
The following applications are affected by the Minimum quantity specified in the PWO.
Article (ART)
The ARTLSTOCK popup has a new field named Min PWO qty, which is also visible in the ART > Local Stock tab. By default the field is blank, so all productions should behave as usual. If it is filled with a numerical value, that affects the creation of PWO as described in the section below.

Production work order (PWO)
If the PWO is created from scratch, its quantity will be adjusted. For each new production, a new system message informs you that the quantity was changed.
 |  |
Sales and operation planning (SOP)
If you create a production for a specific plan, the suggested quantity from the plan is adjusted in the newly created PWO. You can do this from the Production requirements tab, in the Product requirements by period popup in the Plan view, or directly by selecting Create production in the grid in List view, as shown in the figure below.

PRODPLAN
Pending orders by Part
If you create a production to adjust for the shortages, the newly created production order Pending orders by part is also changed.

Pending by minimum stock
If you create a production to adjust for the shortages, the newly created production order Pending by minimum stock is also changed.

The Delivery project (PRO) application is a useful, yet complex application that binds together information from various sources to display information to enhance cost and progress control. The applications that are used in unison are; Delivery project (PRO), Delivery project snapshot (PROSS) and Finance project (PRJ). This topic will mainly cover Delivery project (PRO) and Delivery project snapshot (PROSS).
All Sales orders (COA) added to a Delivery project (PRO) must be from the same Customer (CUS).
Only one Finance project (PRJ) for each Delivery project (PRO).
Only for Production work orders (PWO) derived from a Sales order (COA). In other words, the Production work order (PWO) must be linked to the Sales order (COA).
Production work orders (PWO) that are not liked to Sales order (COA), will not be presented in Delivery project (PRO).
The Delivery project (PRO) will not display information related to Service orders (CSO).
The Delivery project (PRO) is not designed to interact with Project order (POD).
The Delivery project (PRO) application is divided into the two main areas; PRO area and Delivery project area, as visualized in the screenshot below.

The PRO area is used for the creation and selection of Delivery projects (PRO).
Create a new project
To access the information provided by a snapshot, one must first be created in the Delivery project (PRO) application.
From the Delivery project (PRO) application, click the Create a new project button in the lower left corner in the PRO area.
Select or search for the intended customer in the Customer drop-down menu.
Type a name for the project in the Project name field.
Optionally, select or search for a finance project in the Finance project drop-down menu.
Click the Create button to create the delivery project.
The displayed information can be tailored by clicking the Column settings icon and choosing which columns are to be displayed. The table below describes the available columns.
Columns | Description |
|---|---|
St | Displays a status icon indicating the status of the Delivery project (PRO).
|
Project id | Displays the Delivery project's (PRO) unique identifier number used to identify the document in RamBase. Note that it is the same number displayed in the program field at the top in the RamBase header. |
Project name | Displays the name set in the Project name field in the Delivery project area. Note the dotted line, indicating it is editable in all statuses. |
Customer id | Displays the Customer's (CUS) unique identifier number used to identify the document in RamBase. Writing CUS/ followed by the identifier number, in the Program field at the top in the RamBase header, will access the Customer (CUS) application on the customer with the identifier. |
Customer name | Displays the Customer (CUS) name. |
Finance project | Displays the name of the Finance project (PRJ) connected to the Delivery project (PRO). The name is derived from the selection made in the Finance project drop-down menu, in the Delivery project area. |

The Delivery project area displays information and allows actions as listed below:
Project name field - An editable field displaying the project name. Type the intended name for the delivery project.
Customer name field - An informational field displaying the customer name.
Finance project drop-down menu - Connect the Delivery project (PRO) to a Finance project (PRJ). Note that the Delivery project must be in Status 1 for a Finance project (PRJ) to be connected. Click the View icon to open the Finance projects (PRJ) application. If none are connected, the application will list all Finance projects (PRJ). If a Finance project (PRJ) is connected, the application will open on the connected Finance project (PRJ).
Notes field - A free text field where relevant information can be added.

Snapshots can be made at any time if the Delivery project (PRO) is active by using the Create snapshot button in the context menu. The process will run automatically every night, and present a new snapshot if there are any changes since the previous snapshot. This is useful in identifying progress, as unchanged Snapshots will not be updated.
Create a snapshot
From the list in the PRO area, select, or search for, the intended project.
Select the Create snapshot option in the context menu.
Click on the Snapshots tab in the Delivery project area to start a batch to calculate the new snapshot.
Wait 5 seconds, then refresh the browser.
A snapshot should now be listed in the Snapshot tab.
To select which information is displayed, click on the Column settings icon and hover over Columns. Then select the intended columns. The selection of data can be exported to Excel via the Export to excel option in the Column settings. The Reset to default view is also useful in resetting column width and placement, since columns can be dragged and dropped to suit the user. A description of the columns are listed in the table below.
Column | Description |
|---|---|
Date | An informational field displaying the date when the snapshot was created. |
Milestone | A milestone is a measure of progress for the Delivery project (PRO), noted by the snapshot. The informational field is derived from the Milestone input field in Delivery project snapshot (PROSS) application. |
Last day of period | The last day of the accounting period. |
Sales value | The sum of the total value of the connected Sales orders (COA). |
Accrued income | Calculated based on completed percent. |
Invoiced value | The sum of all Customer invoices (CIN) connected to the Delivery project (PRO). |
Planned cost | Planned production cost. |
Accrued cost | Sum of all ongoing and finished productions. The Accrued cost is also split and detailed with the following columns:
|
Planned time | Planned time on all connected Production work orders (PWO). |
Accrued time | Sum of time on all connected and finished Production work orders (PWO). |
Planned material cost | Planned material cost from Production work orders (PWO). |
Accrued material cost | Cost of all materials that are picked for Production work order (PWO) and sub Production work orders (PWO). |
Planned operation variable cost | The planned operation variable cost of the Production work order (PWO), derived from the structure in the KITDOC, multiplied by the production quantity. |
Accrued operation variable cost | Accrued operation variable cost of the Production work order (PWO), derived from the structure in the KITDOC, multiplied by the production quantity. |
Planned operation fixed cost | The planned operation fixed cost of the Production work order (PWO), derived from the structure in the KITDOC, multiplied by the production quantity. |
Accrued operation fixed cost | Accrued operation fixed cost of the Production work order (PWO), derived from the structure in the KITDOC, multiplied by the production quantity. |
Planned added fixed cost | The planned added fixed cost of the Production work order (PWO), derived from the structure in the KITDOC, multiplied by the production quantity. |
Accrued added fixed cost | The accrued added fixed cost of the Production work order (PWO), derived from the structure in the KITDOC, multiplied by the production quantity. |
Planned added variable cost | The planned added variable cost of the Production work order (PWO), derived from the structure in the KITDOC, multiplied by the production quantity. |
Accrued added variable cost | The accrued added variable cost of the Production work order (PWO), derived from the structure in the KITDOC, multiplied by the production quantity. |
Total income | The sum of Invoiced amount and Other income (Invoiced amount + Other income). |
Total cost | The sum of the accrued totalt cost, other cost of goods, wages and other expenses (Accrued total cost + Other cost of goods + Wages + Other expences). |
Profit | The difference of the total income and total cost. (Total income - Total cost). |
Other cost of goods | The Other cost of goods field displays goods purchased directly to the Delivery project (PRO). For example requisition purchases, including direct postings in the General ledger (ATR). The goods are not connected to the inventory flow. The link between the Other cost of goods field and the General ledger (ATR) is the PRO_OTHERCOSTOFGOODS account group in the Report account group (ACG) application. |
Other expenses | The Other expenses field displays expenses derived from Supplier invoices (SIN) for services and non-goods like tools and indirect cost. The product types X-Expenses and V-Value added service can be used on requisition Purchase orders (SPO). Direct postings can be registered in the General ledger (ATR). The link between the Other expenses field and the General ledger (ATR) is the PRO_OTHEREXPENSES account group in the Report account group (ACG) application. |
Other income | The Other income field displays income derived from Customer invoices (CIN) for services and non-goods like freight and testing services. The product types X-Expenses and V-Value added service can be used on outgoing Customer invoices (CIN). Direct postings can be registered in the General ledger (ATR). The link between the Other income field and the General ledger (ATR) is the PRO_OTHERINCOME account group in the Report account group (ACG) application. |
Wages | The Wages field displays cost related to personnel cost like wages, but also other costs like travel can be put into this group. The Wages field is presented together with other key-figures for the Delivery project (PRO). This field is connected directly to the General ledger (ATR) through the account group in the Report account groupd (ACG) application: ACG/PRO_WAGES. |
Inventory | Inventory value for a Delivery project (PRO) is sum of all inventory in the related Finance project (PRJ). NoteInventory purchased to the Finance project must not be used on Sales orders (COA) outside the Delivery project (PRO). |
| Click the Arrow icon to open the Delivery project (PROSS) snapshot application on the intended date. The user can also select the date and press ENTER to open the Delivery project (PROSS) snapshot application. Read more about the Delivery project (PROSS) snapshot application in the corresponding section. |
The Orders tab displays an overview of the Sales orders (COA) added to the Delivery project. To view details on a Sales order (COA) in the Orders tab, click on the View icon in the Order id column.
Adding Sales orders (COA) to a Delivery project (PRO)
Click the Add order to project button in the Delivery project area.
Select or search for the intended Sales order (COA) by clicking the Order lookup drop-down field. Filters can be added by clicking the Filter builder icon, and the displayed columns can customized by clicking the Column settings icon.
If adding multiple Sales orders (COA), check the Create another check box.
Click the Create button to add the Sales order (COA) to the Delivery project (PRO).
Note
A Sales order (COA) or Sales order (COA) items can only be added to one Finance project (PRJ).
If a Sales order (COA) is not connected to a Finance project (PRJ) and is added to a Delivery project (PRO), it will also be added to the Finance project (PRJ) connected to the Delivery project (PRO).
The table below describes the available columns in the Orders tab.
Columns | Description |
|---|---|
St | Displays the status of the Sales order (COA) with a corresponding icon. |
Type | Displays the information derived from the Type field in the Sales order (COA) application. |
Created at | Displays the registration date of the Sales order (COA). |
Customer ref no | Displays the customers reference number derived from the Sales order (COA). |
Sellers ref no | Displays the sellers reference number derived from the Sellers ref. no in the Sales order (COA) header. |
Customers ref | Displays the customers reference number derived from the Sales order (COA). |
Currency | Displays the currency set on the Sales order (COA) in the Currency drop-down menu in the Finance area. |
Sub total | Total amount of the object in object currency, excluding VAT. |
VAT | Displays the VAT amount. |
Total amount | Sub total + VAT |
Fee amount | Fee amount in transaction document's currency. |
Freight amount | Freight amount in transaction document's currency. |
The Billing tab will show all Customer invoices (CIN) connected to a Delivery project (PRO). Also includes Customer invoice plan (CIP) or Sales credit notes (CCN).
Icon | Column | Description |
|---|---|---|
| St | Indicates the status of the document. |
| Invoice id | An informational field displaying the invoice document name and identification number. Click the View icon to open the relevant application for the document. In example, the invoice name and identification number CIN/00000 will open the Customer invoice (CIN) application on the related invoice. |
Date | Lists dates relevant for the document type:
| |
Type | Displays the information derived from the Type field in the Sales order (COA) application. | |
Product | Lists the name of the Product (ART) being invoiced. | |
Customer Ref No | Displays the customers reference number derived from the Sales order (CIN). This is set while the Sales order (CIN) is in Status 1 (Pending registration). | |
Quantity | Lists the Product (ART) quantity of the selected invoice. | |
Net price | Final price per unit after deducting all discounts etc. | |
Net amount | Final price of items after deducting all discounts etc. |

The Chart tab can be used to visualize the Delivery project (PRO). Select which checkboxes to display the intended information.
Checkbox | Description |
|---|---|
Sales backlog | Number of Sales orders (COA) connected to the Delivery project in Status 2, 3, 4, 5, 6 and 8. |
Accrued income | Total accrued income from the connected Sales orders (COA). |
Invoiced amount | The total invoiced amount on the Sales orders (COA) connected to the Delivery project (PRO). |
Planned cost | Planned production cost. |
Accrued cost | Sum of all ongoing and finished productions. The Accrued cost is also split and detailed with the following columns:
|
Planned hours | Planned hours from the connected Production work orders (PWO). |
Accrued hours | Total registered time of the Work log elements from the Production work order (PWO) application. Includes all completed and ongoing work log elements. |
Planned material cost | Planned material cost from Production work orders (PWO). |
Accrued material cost | Cost of all materials that are picked for Production work order (PWO) and sub Production work orders (PWO). |
Pln fixed added cost | The planned added fixed cost of the Production work order (PWO), derived from the structure in the KITDOC, multiplied by the production quantity. |
Acr fixed added cost | The accrued added fixed cost of the Production work order (PWO), derived from the structure in the KITDOC,multiplied by the production quantity. |
Pln var added cost | The planned added variable cost of the Production work order (PWO), derived from the structure in the KITDOC, multiplied by the production quantity. |
Acr var added cost | The accrued added variable cost of the Production work order (PWO), derived from the structure in the KITDOC, multiplied by the production quantity. |
Pln fixed opr cost | The planned operation fixed cost of the Production work order (PWO), derived from the structure in the KITDOC, multiplied by the production quantity. |
Acr fixed opr cost | Accrued operation fixed cost of the Production work order (PWO), derived from the structure in the KITDOC, multiplied by the production quantity. |
Pln var opr cost | The planned operation variable cost of the Production work order (PWO), derived from the structure in the KITDOC, multiplied by the production quantity. |
Acr var opr cost | Accrued operation variable cost of the Production work order (PWO), derived from the structure in the KITDOC, multiplied by the production quantity. |
The context menu is found in the top right corner and is opened by clicking the Context menu icon.

The options are context based on the Delivery project's (PRO) status.
Create snapshot - available for Delivery projects (PRO) in Status 4.
Close project - available for Delivery projects (PRO) in Status 1 and 4. Will set the Delivery project (PRO) in Status 9.
Open for edit - available for Delivery projects (PRO) in Status 4 and 9. The Delivery project (PRO) is set to Status 1.
Activate project - available for Delivery projects (PRO) in Status 1 and 9. The Delivery project (PRO) is set to Status 4.
From the RamBase Home the user can add widgets displaying information from the Delivery project (PRO) application by clicking the +Add widget button in the top right corner. The following widgets are available:
DeliveryProjectCostWidget - Project: Delivery cost
DeliveryProjectIncomeWidget - Project: Delivery income
DeliveryProjectWorkHoursWidget - Projects: Delivery work hours
A snapshot in the Delivery project (PRO) application generates an overview of useful information. The Delivery project snapshot (PROSS) application is used to display even more detailed information.
To open the Delivery project snapshot (PROSS) application, from the Delivery project (PRO) application, click on the Arrow icon or press ENTER on the intended snapshot in the Snapshots tab.
The tables below lists fields, functions and columns used to handle the information provided by the Delivery project snapshot (PROSS) application.

The user can select which columns are to be displayed by clicking the Column settings icon. The selection of columns can be saved to templates by selecting the + Add template to list option in the Column settings. The template can be selected by clicking the Current view drop-down list.
The Delivery project snapshot (PROSS) will display the selected template upon reentering the application.
The header is found at the top of the application and is comprised of some editable fields, and mostly informational fields.
Field | Description |
|---|---|
Customer | An informational field displaying the customer name. |
Milestone | An input field where the user can define the project milestone, the snapshot represents. |
Snapshot date | Date the snapshot generated. |
Completed % | An input field where the user can define the snapshot's representation in project completion, in percent. |
Sales value | The sum of the total value of the connected Sales orders (COA). |
Invoiced value | The sum of all Customer invoices (CIN) connected to the Delivery project (PRO). |
Accrued income | Calculated based on completed percent. Can be overwritten by entering adding a percentage to the Completed % field in the header. |
Initial planned cost | The expected cost from the Product structures (KITART), which provides an important view of the expected production cost before work starts, or accruals are available. |
Currency | The currency derived from the Sales order (COA). |
Planned cost | Planned production cost. |
Accrued cost | Sum of all ongoing and finished productions. The Accrued cost is also split and detailed with the following columns:
|
Planned time | Planned time on all connected Production work orders (PWO). |
Accrued time | Sum of time on all connected and finished Production work orders (PWO). |
Planned material cost | Planned material cost from Production work orders (PWO). |
Accrued material cost | Cost of all materials that are picked for Production work order (PWO) and sub Production work orders (PWO). |
Other cost of goods | Connected to a dedicated Report account group (ACG) based on the users inclusion of General ledger (GL) accounts. Read more in the Limitations on using the Report account groups (ACG) section. |
Other expenses | Connected to a dedicated Report account group (ACG) based on the users inclusion of General ledger (GL) accounts. Read more in the Limitations on using the Report account groups (ACG) section. |
Other income | Connected to a dedicated Report account group (ACG) based on the users inclusion of General ledger (GL) accounts. Read more in the Limitations on using the Report account groups (ACG) section. It is recommended to exclude General ledger (GL) accounts that are used for Customer invoices (CIN). |
Wages | The Wages field displays cost related to personnel cost like wages, but also other costs like travel can be put into this group. The Wages field is presented together with other key-figures for the Delivery project (PRO). This field is connected directly to the General ledger (ATR) through the account group in the Report account groupd (ACG) application: ACG/PRO_WAGES. |
Total income | (InvoicedAmount + OtherIncome) |
Total cost | (Accrued.TotalCost + OtherCostOfGoods + Wages + OtherExpences) |
Profit | (TotalIncome - TotalCost) |
Inventory | Inventory value for a Delivery project (PRO) is sum of all inventory on the related Finance project (PRJ). |

The user can select which columns are to be displayed by clicking the Column settings icon. The selection of columns can be saved to templates by selecting the + Add template to list option in the Column settings. The template can be selected by clicking the Current view drop-down list.
The Delivery project snapshot (PROSS) will display the selected template upon reentering the application.
The available columns and functions are described in the table below.
Icon | Column | Description |
|---|---|---|
| Level | Decide the levels displayed in the WBS list. Click the 1 button to display only the Scope level which includes the inital Sales order (COA). |
| Level | Decide the levels displayed in the WBS list. Click the 2 button to display the Scope and Deliverable levels which includes the inital Sales order (COA), the triggered or linked Production work order (PWO). |
| Level | Decide the levels displayed in the WBS list. Click the 3 button to display the Scope, Deliverable and Operation levels which includes the inital Sales order (COA), the triggered or linked Production work order (PWO) and the operation and material information. |
| Level | Decide the levels displayed in the WBS list. Click the 4 button to display the Scope, Deliverable, Operation, Material levels including all sub-productions. |
| Level | Export to excel. Click the Export to excel button to generate and download a .xlsx file. This function will only export the selected columns in the Column settings. |
| Status | An icon indicating the status of the Sales order (COA) or Production work order (PWOD). |
Order id | Lists the order and identification number of the document, in example PWO/00000, Click the View icon to enter the primary document or alternatively type the order and identification number in the Program field. | |
| Order id | Clicking the View icon will open the relevant application for the order. A Sales order (COA) id, in example COA/00000, will open the Sales order (COA) application on the order in question. A Production work order (PWOD) id, in example PWO/00000, will open the Production work order (PWOD) application on the work order in question. |
Order id | Clicking the Structure icon will open the KITDOC application and display the structure of the part being produced by the Production work order (PWOD). | |
Product / Operation | An informational field displaying the name of the product being produced and name of the related operation. | |
Operation / Materials status | This unnamed column, in the Delivery project snapshot (PROSS) application, displays information which can be used to identify which Production work orders (PWO) to prioritize by stating the operation and material status like; Ready to start or In stock. | |
Prod qty | The quantity being produced by the connected Production work orders (PWO). | |
Sales value | The sum of the total value of the connected Sales orders (COA). | |
Accrued income | Calculated based on completed percent. | |
Invoiced value | The sum of all Customer invoices (CIN) connected to the Delivery project (PRO). | |
Initial planned cost | The expected cost from the Product structure (KITART), which provides an important view of the expected production cost before work starts, or accruals are available. | |
Planned cost | Planned production cost. | |
Accrued cost | Sum of all ongoing, finished and shipped Production work orders (PWO). The Accrued cost is also split and detailed with the following columns:
| |
Accrued cost active | Accrued cost of all active, in Status 5 and 6, Production work orders (PWO). | |
Accrued cost finished | Cost of all completed Production work orders (PWO), in Status 9, that are forwarded to stock but not yet shipped to customer. | |
Accrued cost shipped | Cost of shipped products. | |
Deviation total cost | This is the difference between total planned cost and accrued cost for each element and total difference at each work package and deliverable level. Only for completed sub levels and at the scope. | |
Accrued total cost % | Accrued cost in percentage of planned cost for elements with deviation. | |
Planned time | Accrued time per operation and total accrued time for each work package and deliverable level. | |
Accrued time | Accrued time per operation and total accrued time for each work package and deliverable level. | |
Deviation hours | The difference between operation planned and accrued time and total difference at each work package and deliverable level. Only for completed sub levels and at the scope. | |
Accrued hours % | Accrued hours in percentage of planned cost for elements with deviation. | |
Delayed days | Operation delay in days. | |
Completed % | Manual input at scope level. This is reset to blank by each new snapshot. | |
Completed % calculated | Calculated completed percentage for the deliveries. | |
Requested delivery | Requested delivery date for the customer order item. | |
Confirmed delivery | Confirmed delivery date for the customer order item. |


It is possible to register cost and income elements directly to the general ledger and connect them to the Delivery project (PRO). To be able to do so, there are a few conditions to consider.
The Delivery project needs to be connected to a Finance project (PRJ).
Values can be registered to the Delivery project (PRO) using accounts that are defined in the Report account groups (ACG) mentioned below.
Report account groupd (ACG) | Delivery project snapshot (PROSS) field |
|---|---|
PRO_OTHERCOSTOFGOODS | Other cost of goods |
PRO_OTHEREXPENSES | Other expenses |
PRO_OTHERINCOME | Other income |
PRO_WAGES | Wages |
These are the fields that are displayed in the Delivery project snapshot (PROSS) application header.
Register either directly to the general ledger using a General ledger posting (ATR) or through a Sales invoice (CIN) or Supplier invoice (SIN). Read about how to book a cost invoice here.
Note the Report account groups (ACG) listed in the application.

Which accounts to group in the Report account groups (ACG) application, can be selected at will, but should should never include accounts that are meant for value flow.
Account groups that includes these Product (ART) types must be excluded:
Part (type P)
Material (type M)
Consumption parts (type C)
Kit and kit assemblies (type K and KA)
RPLAN is a tool that you use to see a comprehensive visual presentation of the production plan and the resource load. You can drag activities and tasks to change the plan.
Several users with permissions can make changes to the same plan, so the users must decide the protocol for making changes to plans. RamBase or RPLAN do not manage or control multiple versions of the plan.

Preferences
To access the Preferences, click on the cogwheel icon in the upper right corner of the application. Each change must be submitted and RPLAN must be reloaded for the modifications to work.

Preferences are divided into three tabs:
General
Allows the user to set the number of weeks that will be displayed in the timeline. The setting by default is limited to 26 weeks before/after the current date.
Important
There is a hard limit of maximum 52 weeks in advance (after the current date).
The user can also activate or deactivate the Show delivery project filter.

Resources
In this tab the user can override the default sorting by providing a custom numbering.

The user can also set background color on each resource by clicking on the color palette icon.

The user can change several settings for the Export to PDF tool.
Margins - user can change the top/bottom/right/left margins on the printed document. The default value is 10.
Page orientation - user can change the orientation of the document from the portrait to landscape. The default value is portrait.
Printing mode - modifies the way the image in the document is generated.
Page format - the user can select a predefined format or provide the width and height in millimeters.
Zoom factor in % - modifies the zoom factor for the image in the document.
Vertical/horizontal page count limit - limits the number of vertical/horizontal pages in the document.
Product licensing and access control
RPLAN is licensed from a third party vendor, Netronic Software. The tool is used as an add-in to RamBase. The license is based on a monthly subscription for the RamBase customer with an unlimited number of users. RamBase (JHC) manages access to the tool in the near term. When a customer is given access, a RamBase partner manages the user access.
If you have permission to view planned operations and make changes in RPLAN, you can view and update the plan in RamBase. If you do not have permission to update planned operations, you will see an error message and cannot update the plan.
Read permission | ViewPlannedOperations Task: Run RPLAN Role : Run RPLAN |
Update permission | UpdatePlannedOperations Task: Plan production work orders Role: Production planner |
Features
The key features of RPLAN are:
When you open RPLAN, data is loaded directly from the resources, the work orders and the associated operations.
View plan by resources, planned jobs and load (resource load).
Drag to move jobs along the timeline. or between resources.
RamBase does not automatically save the changes you make in RPLAN. You can decide whether to save the changes or not.
Various colors denote the various statuses, similar to the status colors in RamBase.
Overloaded resources are indicated by a warning icon.
Detailed information about jobs and work orders.
Shows connections (constraints) between the jobs for a work order.
High priority job marking.
Scroll functions to move horizontally in time and to scale the view per day/week up and down.
Use a variety of preference settings to customize the RPLAN overview.
Export the different views as PDF files.
Display the World view to get an additional overview of the operations.

Save your changes to RamBase
Select Save changes to RamBase.
Your changes are committed to the corresponding Planned operations (PLO) in RamBase and the flag IsChangedByPlanner is set to 1 in these PLOs. There are two options to commit the changes to the Work order operations (WOO) and subsequently the job list for the Resources (RWOO):
The company setting AutoSync Planning Operation with Work Order Operation is set to ON: The WOO is updated automatically by changing the corresponding PLO.
The autosync is set to OFF: Use PRODPLANSYNC and update the work order operations by command.
To discard your changes, close RPLAN or select Reload Data.
Use RPLAN
To start RPLAN, Type RPLAN in the Program field and press the Enter key.
Resource view – resources and planned jobs
When you open RPLAN, the Resource view is displayed by default. The resources and resource groups are shown on the left and the planned operations (PLO) are shown as bars in the grid. The assigned resource or resource groups are shown along with the plan timelines. The Production work order (PWO) number is shown in the bar, and the color of the bar indicates the status of the task.
Purple - the task is active.
Blue - the task is ready to start.
Gray - the task in waiting on some pending action.
White - the work order is not released for production
Mouse scroll functions
Use the mouse scroll wheel to access various functions in RPLAN.
Place the cursor in the grid and scroll up or down to scroll through the resources and production tasks.
Place the cursor in the grid and select shift to scroll the timeline in either direction.
Double-click the timeline bar and scroll to scale the display from days to weeks or hours and minutes.
Drag the timeline in either direction to advance the timeline or go back.
View more Information on production tasks
Every bar in the grid represents one Planned operation (PLO). Do the following to get more information about the operations and the work orders.
Hover over a bar to see the workorder number, operation status, requested completion date, start time, end time, and planned times.
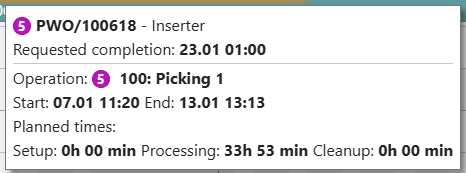
Click the bar to see connections to other operations for the work order.

Double-click the bar to see more information about the work order and operation such as information regarding the product, customer order (if applicable), and external operation (if applicable). Click the X in the top right corner or the ESC button on your keyboard to exit the pop-up window.
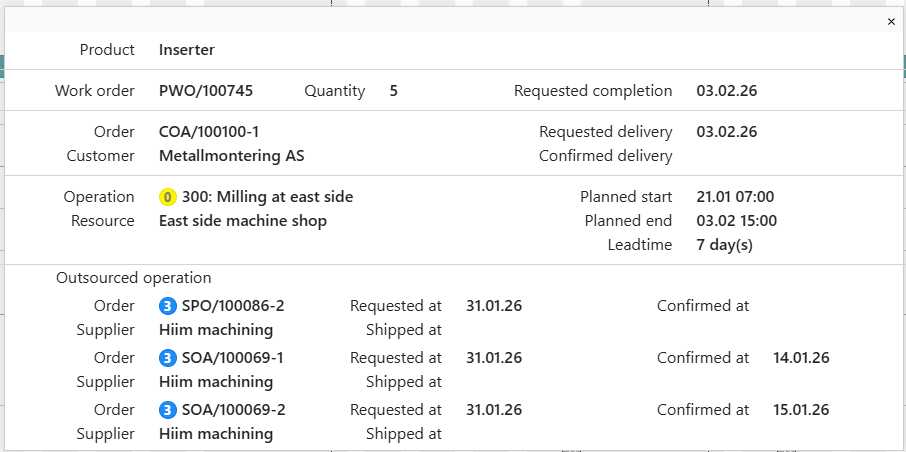
High priority production tasks
High priority PLO are indicated by a yellow dot in the upper right corner of the bar.

Change the plan by moving production tasks
You can move the production tasks in three ways.
Change the start date and time for one task. Drag the bar horizontally to the necessary start date and time. The accuracy of the new start time depends on the selected granularity of the timeline. If the scale of the timeline is in minutes, the start time can be set more accurately by dragging, than if the scale of the timeline was in months. The rules for changing production tasks by dragging are as follows:
You can overlap production tasks.
You cannot move production tasks that have commenced, which are indicated by purple bars,
Assign the production task to another resource. A production task can be assigned from the resource group to one of the members of that group or from one member to another. Drag the production task to the necessary resource.
Select several jobs for moving to a new start time or to another resource group member. Ctrl + click the necessary task bars and right click them to select the necessary action. You can move the selected production tasks by x number of days or assign them to a different resource.
Setup move mode
The Move mode setting must be enabled. Type CSV in the program field and press the Enter key.
Set the Move mode for Operation Planner to ON. There are three options in the list, select the necessary option.
MINIMAL: Only move this Planned operation (PLO) element, do not touch the remaining operations, unless this element is moved in front of/after an adjacent operation, in which case the affected operations are moved according to the rules of PACK.
SINGLE: Only move this Planned operation (PLO) element, fail if moved across prev/next.
SIMPLE: Only move this Planned operation (PLO) element, do not touch the remaining operations. Even possible to move started operations or move them to before SYS.DATE/TIME.

External operations for external resources
External operations that are not yet purchased, unlinked to an Purchase Order (SPO) and/or Purchase order response (SOA) can now be moved in the planner. External operations that have been purchased, indicated by the padlock icon in the bar, cannot be moved.

To change external operations, change the purchase order, then reconfirm the purchase order.
Note
Calculation logic of external operation start and end dates
When an external operation is not yet purchased, no outsourced orders are linked to it, the Start and End dates in RPLAN are calculated according to Lead time for the external operation.
Lead time ignores any unavailable periods or non working days from working time templates that the external resource might be using in that given period.
If Lead time is not defined, the operation Run time is used instead.
Run time is calculated according to the working time template the external resource might be using in that given period.
When an external operation is purchased (SPO) and later confirmed by a purchase order response (SOA), the following logic applies:
If a purchase order (SPO) has a Scheduled shipping date defined and it is earlier than the Planned start on the external operation, then the Scheduled shipping date is used as the start date. If multiple purchase orders are linked to the same operation, the earliest Scheduled shipping date will be identified and used. Otherwise, the Planned start date is used.
If a purchase order response (SOA) has a Confirmed delivery date defined and it is later than the Planned end on the external operation, then the Confirmed delivery date is used as the end date. If multiple purchase order responses (SOA) are linked to the same operation, the latest Confirmed delivery date will be identified and used. Otherwise, the Planned end date is used.
Resource load warning
You can see a warning icon, a yellow triangle on the left of resources that have more assigned work than available capacity for one or more days.

Select arrow icon to the right of the resource to inspect the load.

Select the red load bar to see a pie chart of the planned tasks and hours assigned.
Load view – resource load by date
The load view shows the resources, capacity and load per day.

The bars in the load view are color-coded as follows:
A white bar represents the capacity in hours per calendar shift for the day.
A green bar indicates the load per day when the load is within the available capacity.
A red bar indicates the resource load exceeds the assigned hours for that date.
Select any bar to see a pie chart of the planned tasks and hours assigned.
Filters
Resource filter
Use the resource filter to limit the view to selected resources, Select one or more resources or resource groups to view.

Customer and customer order filter
Select a customer in the Customer list, which shows only customers related to open work orders. The view is limited to work orders (main and subs) for the selected customer. Bars applicable to other customers appear dimmed. Select the Customer order (COA) number in Order lookup to limit the view to work orders related to one specific customer order item.

A Production work order (PWO) or a Work order operation (WOO) that is set on hold is indicated by Stop icon on one or more bars.

Delivery project filter
See the Preferences section for instructions on how to activate the filter.
The delivery projects filter displays a list of Projects (PRO) for a selected customer. This view is limited to projects that are linked to order items for the selected customer. If a Project (PRO) is not linked to any items, it will not be displayed on list.

Handling paused operations
Work order operations (WOO) that are currently paused are indicated by Pause icon in RPLAN.

When you double-click the operation bar shown above, a window appears, to inform you that the operation has been rescheduled . The paused plan window is shown below.

Rescheduled (paused) operations are put on the plan according to the planned start date. If the operation has commenced again, the actual start time is used and displayed. The plan may have to be reloaded in RPLAN to use the actual start time as shown in the window below.

Change the start and end date/time in the operation
You can change the start and end time of an operation by right clicking on the associated bar, and selecting force start and end time.

You can manually change the given periods. You must change both the start and end time before the changes can be saved.

Planned start and end dates are changed in RamBase only after the changes are saved in RPLAN. This function is only available for operations which are not active.

Recalculate all operations for a resource
You can recalculate the planned operations according to the current capacity of a given resource.
You must select a specific resource by using the left mouse button. Select multiple resources with Ctrl + left click.
Right click on your selection and select Recalculate resource.

Every operation is calculated separately to comply with the current resource calendar, while maintaining the original start date. If some operations cannot be modified for any reason, RamBase notifies you.

After the resource recalculation, you must save the changes to RamBase.

Product and quantity information for a selected operation
The popup window for the selected operation now displays information about the quantity and the product that will be manufactured under the production order.

The Production resource capacity and load (RCL) application is a production resource capacity and load visualization tool. The daily load for various Production resources (RESCONFIG) and Production resource groups (REGCONFIG) are displayed. The resource load is displayed as a percentage based on the following calculation (Assigned hours / Capacity Hours * 100). The Production resource capacity and load (RCL) tool only displays data, the data can not be changed.
Navigate to the application
Option 1: RamBase menu→Production→Planning→Resource capacity and load graphic view
Option 2: Click the Program field and type "RCL" and press ENTER.
Click here to read more about the user interface.
Note
Only Production resources (RESCONFIG) in Status 4 - Active will be displayed in the list.
The load cells are color-coded.
Green indicates the load is within allowable limits
Yellow indicates the load is in warning state
Red indicates the load is in the error state
The user can set the allowable limits, warning and error thresholds.
There are two relevant settings for Production resource capacity and load (RCL)
The Resource free capacity is limited
The Resource free capacity is low
Edit Company settings (CSV)
To set the allowable limits, warning and error access the Company settings (CSV) from the RamBase menu by selecting Admin and then Overview. Select Settings and then Company settings. Select Production, and then Planning.
Enable the setting The Resource free capacity is limited and enter the warning percentage value for the resource daily load in the field. If the resource daily load is less than the percentage set in this value, the resource day icon is shown in green color in the resource planner overview. The color is yellow if the load exceeds this percentage.
Enable the setting The Resource free capacity is low and enter the error percentage value for the resource daily load in the field. If the resource daily load is less than the percentage set in this value, the resource day icon is shown in yellow in the resource planner overview. The color is red if the load exceeds this percentage.

From the RamBase menu select Productionand then Planning, then select the Resource capacity and load graphic view option to open the Production resource capacity and load overview (RCL) application.

To filter the results by Production resource (RESCONFIG), type the name of the resource in the Filter by production resource name field and press the ENTER Key.
By selecting the Show selected checkbox, only the data for the selected Production resource (RESCONFIG) will be displayed.
You can view the resource capability and load by date. The assigned hours and capacity are given as values below the progress bars. The progress bars visualize the loads as percentages. Select
 or
or  on the left and right sides of the date field to go back or advance the date. You can also select
  to open the calendar app to select the necessary date, or enter the date in the Date field in the yyyy.mm.dd format.
Select From Today to see the resource capacity and load from the current date. The tool shows resource capacity and load for four weeks forward from the current date.
Select any load cell by double-clicking to view a bar and the following data for the resource or resource group.

Capacity hours
Available hours
Assigned hours
Assigned to active work orders
Assigned to planned work orders
Load
List of planned and active Production work orders (PWO) for the selected date.
Click the View icon related to the identifier number to quickly navigate to a listed Production work order (PWO).
If there are no planned activity, the "No planned or active production work orders" message will be displayed.
Production resources (RESCONFIG) can be categorized into Production resource groups (REGCONFIG). Click on the
in the Id column to expand a Production resource (REGCONFIG) group and see its Production resources (RESCONFIG).
Note
If there are notifications related to a Production resource's (RESCONFIG) state, an icon will be displayed in the Name column. Hover over to see the description.
The Planned Resources Capacity Utilization widget shows you the history of utilization of planned resource capacity as a line chart. This widget is useful to get a quick history of the utilization of the planned resources. The Y-axis shows the utilization as a percentage of the total available capacity. The X-axis shows the time interval in months.

In the gray areas at the top of the widget, the planned and accrued percentage utilization is shown for the Year to Date (YTD), which is from 1st January of the current year to the current date. The planned and accrued percentage utilization is also shown for the current and previous months.
To add the widget to your desktop, select
in the desktop.Select ResourceCapacityUtilization and select
 .
.
Select the Chart type to view the chart as either a Fluctuating line, Accumultaed line, or Bar chart.
The Assign to Stock functionality is useful when you want to release a production, since this requires that all parts used in the first operation must be assigned to stock.
When you create a Production Work Order (PWO), the parts needed for the production will be assigned to goods in stock (SSA), to goods produced by another production (PWO), to a Purchase Order (SPO/SOA) or to a pending purchase (PENDING).
The Assign to Stock functionality will take all the assignments that are not assigned to and try and assign them to stock. If no goods are available in stock, the program will try and swap assignments with other not started production work orders and sales orders which are assigned to stock. If no swapping can be performed the old assignment is kept.
Is not assigned to stock
Must be a physical part
Not locked
Not initialized for picking
Same part
Same location
Must be assigned to stock
Must be a physical part
Not allowed for goods owned by other customers
Not locked
Not initialized for picking
Production work order that the part will be taken from could not be started
The setting Production WorkOrder Assign To Stock must be activated.
Assign to Stock functionality is also available for sales orders. The setting Sales Order Assign To Stock must be activated.

A production is the process where something is produced using resources and operations.
Finished produced product.
Modified product.
Scrapped product.
There are several phases one needs to take into consideration during a production. Resources and operations need to be prepared, such as warming up machines, programming machines or maintaining them. Another situation may be workers who need to read instruction manuals, drawings or other relevant documentation.
The production phase is also divided into different steps. If you need raw materials for a production, these needs to be picked from the warehouse, for example circuit boards, screws, frames and other necessities need to be picked to produce a computer screen. Every step is logged into the system to keep track of the production process. Another important step is to log all used hours during the production, including picking, measuring, quality testing and other actions. In our example, a computer screen needs to be checked for picture and color quality.
This, together with the cost of goods, will create an overview of the total cost of the product. The combination of raw material costs, worked hours and profit margin will then create the base for sales price, modification or scrapping.
Pick job
There will most likely be several production orders waiting for the same resource. The jobs are the set in a priority queue and picked by certain criteria.
Logging work hours
Work hours used per operation or per production order needs to be registered.
Confirming picking from warehouse
Goods to be included in the production needs to be picked from warehouse, and the production operator needs to confirm the pick.
Performing testing and quality check
Produced goods needs to be tested and quality checked to ensure they are ready for delivery.
Finishing production
After the produced goods have been tested and marked as ready for delivery, it needs to be freed and marked done.
Setting name | Description |
Activate the use of Measurement Standards | If setting is 'ON' - functionality for using Measurement Standards is activated. |
Adjusting Production Total Cost | Value in this setting is a CST reference with COSTTYPE=FIXED and CostAmount= 0. Used as Default Cost Element for Adjusting Total Cost on a Production Goods Reception (SSA). Format to be used: CST/NNNNNN (N for numbers). |
Allow forward to stock and move to stock location | If this setting is turned on then the operator should be able to forward goods to stock and move it to a different location than "unassigned". The functionality is available in the PWO application. |
Allow Update of USEDQTY in PWO KIT | Allow to add real used quantity in PWO KIT part lines, field USEDQTY. Will overrule planned used quantity. |
Allow Continuous Work Order Delivery To Stock | Allow Delivery to stock from Work order operations (WOO) where only part of the quantity has been completed. |
Automatically cancel SubOrders in Production | If setting is 'ON' - All sub productions will be canceled when canceling the main Production Work Order. |
Automatically split sub orders when splitting main Production Work Order (PWO) | If setting is 'On' - Sub orders are split according to the split done on the top level of the Production Work Order (PWO) |
Block for production on Sales Order (COA) | If setting is 'ON' - Sales Order items (COA-ITM) for Class=K* products will get =1. Un-check "Block for production" on item to release Sales Order item to ProdPlan for creating Production Work Order (PWO) |
Block purchase on Production Work Orders (PWO) | If this setting is 'ON' -Default will be blocking on new Production Work Order (PWO) from purchase. Production Work Order item will contain value '1' in the field ISBLOCKEDFORPURCHASE. Text is also showing at Production Work Order. Use F12 - 'Release for purchase' to allow purchase to handle the Production Work Order. |
Calculate WorkOrder and Material When Pick | If the setting is on then the calculation done in SARKITLINKCALC and ITMPRODCALC is done in a batch job and not during the execution of pick. |
Close Work Order Operation when operation is completed | If setting is 'ON' - Closes the WorkOrder Operation application (WOO) when operation is stamped as completed |
CloseWorkOrderOperationOnStartPause | If On: Will close the WOO application when START/CONTINUE or PAUSE buttons are pushed. |
CombineMainAndItemCustomerReferenceAtWorkOrder | CombineMainAndItemCustomerReferenceAtWorkOrder |
Default cost element for part change on Rework | If setting is 'ON' - Negative cost is added when a part change is perfomed on a Rework process. |
Default Manufacturing Area | Default value of Manufacturing Area that should be used in the system when field MAANO is required. Value taken from MAA archive and can be viewed in MAA application.Default value: 100000 |
Default Material for PDM Import | Default Material for PDM Import. Format to be used: ART/#123456 |
Default Production Calendar | Value in this setting is the Default production calendar that must exist if the production module is to be used. The Production calender has to be created from Company (COM) / Settings / Config Applications, by Add Program and choose PRODCALENDAR. The PCA reference to get, has to be added as value in this setting. Format to be used: PCA/NNNNNN (N for numbers) |
Default scrap stock location | Name of the stock location which will be used as default for scrapping |
Default Step Between Operations when building a product structure | Value in this setting is the Default step between operations when building product structure. '10': First Production Operation (OPR) gets OpNo=10, next gets OpNo=20 |
Default supplier for production work order | This setting is used for setting the supplier account on a production work order when it is created.Default value: SUP/100000 |
Default Supplier when performing a Rework | Value in this setting is a default Supplier (SUP) for creating Purchase Order (SPO) for part change on LifeCycle (LCM) where product is purchased externally and not produced on a Production Work Order (PWO) |
Department As Mandatory On Production Work Order | |
Disable 'Forward To Stock' button on Production Orders | If setting is 'ON' - Disables the 'Forward to stock' button at Productions (PWO) in st=8 (completed). Option to put products to stock is then to use the GIN program. |
Dismantle Supplier Account | Value in this setting is default Dismantle Supplier Account when supplier is not recognized for parts going to stock in the dismantle process. Format to be used : NNNNNN (N for numbers) |
Forward Work Order To Goods Reception | If the setting is on then forward to goods reception is allowed in applications and button displayed. Child setting: |
Link off Parts when part change on LifeCycle (LCM) that are not picked | If setting is 'On' - Allows you to "steal" parts when performing a part change on the LifeCycle (LCM)document even if GoodsReception (SSA) has no free quantity. This can only be done from orders where parts haven't been picked |
MAAs with no output for work order and job card | MAAs with no output for work order and job card. This can be a comma list of MAA names. |
Not Close Operations Log On Start Or Pause | If setting is 'ON' - Will not close the APP/RESLCMWORK when a PRODUCTION step is started. Or when the production step is completed, and there is a following production step in the same operation. NOTE: This setting is not in use |
Open new workLog element at midnight | Open new Work log element at midnight. This setting is 'OFF' by default. As the system will assume that the operator forgot to end the Work order operation. If this setting is 'OFF' the system will end all Work log elements at midnight and not open a new Work log element for the following day. If this setting is 'ON' the system will close all Work log elements at midnight and open new Work log elements for the following day. Note that the system will only start work log elements for ended work log elements from the previous day. |
Override Operation Sequence in Productions | If setting is 'ON' - it is allowed to override the operation sequence at a Production (PWO), e.g. start and finish third operation before second operation. If setting is 'OFF' - the 'set ready for start' button will not show on Production Resource (RES) |
PDMImportActivateNewStructure | |
PDMImportCreateNewPart | If set on new parts/materials may be created when importing PDM files. |
PDMImportDefaultManufacturerID | Value in this setting is a ManufacturerId. The ManufacturerId will be used if a file with Productstructure is loaded into Rambase, and the file doesn't contain ManufacturerId, - value from this setting will be used as default on the products. Format to be used: MFR/NNNN (N for numbers) |
PDMImportOperationNo | |
Production Cancel Message if Sales Order is Cancelled | If setting is 'ON' - a message 'Customer Order Cancelled/Deleted' will be set on the Production Work Order (PWO) if the Sales Order is cancelled. |
Production team test setting | This is an on/off setting used for test purposes for the roduction development team. |
Production Work Order quantity to create and confirm | Value in this setting is the quantity you can create or confirm for unit production work orders.Default value: 9999 |
Production Work Order quantity to release | Value in this setting is the quantity you can release for unit production work orders.Default value: 999 |
Resource usage gauge type in WOO application | Default value: Resource usage gauge is based on time |
Resource Work Log Calculation | If this setting is 'ON' - Functionality that will calculate work done by Resource and Date (RWL) is activated |
Round Up Quantity for Material Wastage Pct | |
Sub Production Update On Time Change | If this setting is 'ON' - Sub Production Work Order will be updated when changing production startdate or enddate |
Supplier Account for part change on purchased Products (ART) | Value in this setting should be a Supplier Account (SUP) that is used when part change is done for products ART) that are bought, - and not build by the firm |
Third country material cost calculation | If this setting is 'ON' - Functionality that calculates Third country material cost from finished Production, based on Sales Orders (COA) or Shipping Advice (CSA) is activated |
Use document requirements for production | Generate document requirements (RQM) and planned document requirements (RQT) for production work orders (PWO) based on file types (FIT) |
Use GaugeMeter in ShopFloor Application | When setting is 'ON' - GaugeMeter in ShopFloorApplication (WOO) is shown |
Use multiple product structures | When this setting is turned on then it is possible to one set of product structures per manufacturing area for the same product. |
Use ProduceInMultipleOf when split | If the setting is ON then the split QTY has to be a multiple of ART.ProduceInMultipleOf value. If setting is OFF split is allowed in whatever quantity user wants to. |
Use SNT Archive for SerialNumber | This setting must be set to ON to enable the serial number template (SNT) setup . The SNT defines the serial number format for product units (LCMs). If this setting is activated, all Company Settings that include 'Serial number' under Production/LifeCycleManagement must be 'OFF' |
Verification of Product Structure | If setting is 'ON' - batchjobs that runs verification of Product structures are activated. |
View Structure Tab in WOO app | If ON - Structure tab will show in WOO application |
Warning icon for overdue days in resource planner | Value in this setting is a number of days. Warning icon is set in resource planner at Production Work Order (PWO)/operation, - if the operation is delayed more than CriticalMargin. (CriticalDays > CriticalMargin) |
The purpose of this setting is to provide the option of increasing the quality and accuracy of the production plan by updating critical production dates due to changes in Sales orders (COA). Enabling these settings ensures that corrections made to the requested delivery date in a Sales order (COA) is connected all way down, including potential sub Production work orders (PWO).
Company setting | Description |
|---|---|
Sub Production Update On Time Change | If this setting is 'ON' - Sub Production Work Order will be updated when changing production startdate or enddate. |
Important
The following text only applies if the Company setting (CSV), Sub Production Update On Time Change is enabled.
If the Sales order (COA) is registered, meaning Status 2 - Pending purchase or production or higher, the user can forward a Sales order item (COAITEM) by selecting the context menu option, Forward to sales order.
This will open the popup Forward to sales order where the user can change the Requested delivery date.

Result: The Scheduled start date and Scheduled completion date will be updated for all Production work orders (PWO) which are linked to the Sales order (COA).
The Requested completion dates in Production work orders (PWO) are updated to reflect the Sales order (COA) with the earliest Shipping date.
If a single Sales order (COA) is linked to multiple Production work orders (PWO), the Requested completion dates in all the Production work orders (PWO) are updated to reflect the Requested delivery date from the Sales order (COA).
If the Company setting (CSV) - Sub Production Update On Time Change is enabled, changing the dates for a top level Production work order (PWO), examples being Scheduled start date or Scheduled end date, will also update the dates for the linked sub Production work orders (PWO).
Company setting (CSV) | Description |
|---|---|
Reschedule production work order when sales order delivery is reconfirmed | Setting ON: Register sales order (COA) will calculate scheduled shipping date and the production work order (PWO) that is assigned to the sales order item will be rescheduled to earliest required delivery if the PWO is not released for production. |
The main tool for operators is the job queue in the Resource (RES) application. Here they will find the jobs released for production.
To open the Resources (RES) application, find Production in the RamBase menu and then Resource management. Click Resources to enter the RES application.

From here the operator may enter his own resource by highlighting the item line and pressing ENTER.
This will open the resource window which lists all work orders registered on himself.

The folder WorkOrders lists all open work orders which the operator may start. The list of work orders is sorted by planned start date and time, and the status of the work can be seen in the status column. It may be ready to start, in progress, paused or finished.
Most operators are members of a group with their own work orders. If you are in a resource and would like to view the other members work orders, you can check the box at the bottom called Show jobs for other members of RES/X group. To view work details, press F12 to open the action menu and choose the option Work Details. Here you may inspect the group members, transfer resources and add additional resources to the work order.
You may use the radio buttons to filter the results.
All
Shows all the operations on the resource.
Active
Shows all the active operations (ST:3-8) on the resource.
Ready
Shows all the ready operations (ST:3) on the resource.
In Production
Shows all the operations in production (ST:5) on the resource.
Wait
Shows all the operations waiting (ST:2) on the resource.
Completed
Shows all the completed operations (ST:9) on the resource.
My Tasks
Shows all the operations registered with the logged in PID as operator.

To pick a work order to start, highlight the desired work order and press ENTER.
The Resource Work Order Operations (RWOO) application is used to show the Work order operations (WOO) related to a Production resource (RESCONFIG), with all necessary details and links to related applications.
Navigate to the application
Option 1: RamBase menu→Production→Production→Select jobs on resource
Option 2: Click the Program field and type "RWOO" and press ENTER.
Click here to read more about the user interface.
The following areas are described in the sections below:
The Operators list of production work order operations area
The Work order operations area
Header
List
The Operators list of production work order operations area is used to select the intended Production resource (RESONFIG) to view Work order operations (WOO) for. The user can also click on the Category view button to open the List of work order operations for production resource category (RECWOO) application and view Work order operations (WOO) organized by their related category.
Production resources drop-down menu - Click the Production resources drop-down menu to select the intended Production resource (RESCONFIG) and display the related Work order operations (WOO).
Resource view button - Click the Resource view button to open the Operators list of Production work order operations (RWOO) application.
Category view button - Click the Category view button to open the List of work order operations for production resource category (RECWOO) application.
Banner - If the Production resource (RESCONFIG) has been flagged in the Operators list of production work orders (RWOO) or the Work order operations (WOO) application, a status banner will be visible in the upper right area of the Operators list of production work order operations area. Hover over the banner to see a description. Set the production resource condition from the context menu options.
Read more in the Context menu options section.
Read more about Setting a resource condition in the Work order operations (WOO) application here.
After selecting the intended Production resource (RESCONFIG) in the Operators list of production work order operations area, the user can further filter the list by using the options in the Work order operations header area. The Work order operations area contains fields, drop-down menus and buttons to help the user list only the intended Work order operations (WOO).
Field, drop-down menu or button | Description |
|---|---|
Serial number (whole number) - field | To list information on a specific Work order operation (WOO), the user can type the serial number of the intended Product unit (LCM) being produced by the Work order operation (WOO). Note that the complete serial number must be entered. |
Production work order id - field | To list information on a specific Work order operation (WOO), the user can type Production work order (PWO) identifier. Only type numbers. Note that this is the same number listed in the Work order column in the Work order operations list. |
Product unit id (whole number) - field | To list information on a specific Work order operation (WOO), the user can type the Product unit (LCM) identifier. Only type numbers. |
Product name - field | To list information on specific Work order operations (WOO), the user can type the name of an intended Product (ART) to list only Work order operations (WOO) producing products with names containing the typed values. |
Product description - field | To list information on specific Work order operations (WOO), the user can type the description an intended Product (ART) to list only Work order operations (WOO) producing products with descriptions containing the typed values. |
Customer reference number - field | To list information on specific Work order operations (WOO), the user can type the customer reference number of a Sales order (COA), that has triggered the Production work order (PWO) and Work order operation (WOO), to list only Work order operations (WOO) containing the customer reference number. |
Material name - field | To list information on specific Work order operations (WOO), the user can type the name of parts to list only Work order operations (WOO) with part name containing the typed values. |
Operator - drop-down menu | Click on the Operator drop-down menu to which operator to view Work order operations (WOO) for. |
| Click the Clear filter button to remove all selected parameters in the Work order operations area. |
The list in the Work order operations area will list all Work order operations (WOO) for the selected Production resource (RESCONFIG) based on the selections made in the header. The user can also customize which columns are to be displayed by using the Column settings.
The user can also further filter the Work order operations (WOO) displayed by using the Filter builder where the user can select from standard filters or even create custom filters. The standard filters and the available columns are described in the tables below.
Filter builder, Column settings and available columns
Search field - The Search filed can be used to search for specific Work order operations (WOO). Click the Search field and press SPACEBAR to list all the available parameters to search on.
Filter builder - Click the Filter builder icon to open a popup where the user can select filters from the Standard filters area. Selected filters will be visible below the Search field. Active filters are marked orange, inactive are marked gray. The user can also Create custom filters by selecting Field, Operator and Value in the Create custom filters area, and then pressing the Save filter button. Saved filters will be available from the My saved filters area. Click the intended saved filter to add it below the Search field.
Standard filters and their descriptions are listed in the table below:
Standard filters
Description
Active
Will display Work order operations (WOO) in:
Status 3 (Ready for start)
Status 4 (Changeover setup)
Status 5 (Processing)
Status 7 (Changeover cleanup)
All
Will display Work order operations (WOO) in:
Status 2 (In queue)
Status 3 (Ready for start)
Status 4 (Changeover setup)
Status 5 (Processing)
Status 7 (Changeover cleanup)
Can be grouped
Will display Work order operations (WOO) that are not grouped in the Group work order operations (GWOO) application and are in:
Status 2 (In queue)
Status 3 (Ready for start)
Completed
Will display Work order operations (WOO) in:
Status 9 (Completed)
Grouped
Will display Work order operations (WOO) that are grouped in the Group work order operations (GWOO) application and are in:
Status 2 (In queue)
Status 3 (Ready for start)
Status 4 (Changeover setup)
Status 5 (Processing)
Status 9 (Completed)
My tasks
Will display Work order operations (WOO) where the user is set as an operator.
Not grouped
Will display Work order operations (WOO) that are not grouped with the Group work order operations (GWOO) application and are in:
Status 3 (Ready to start)
Status 5 (Processing)
Status 9 (Completed)
Production
Will display Work order operations (WOO) in:
Status 4 (Changeover setup)
Status 5 (Processing)
Status 7 (Changeover cleanup)
Ready
Will display Work order operations (WOO) in:
Status 3 (Ready)
Wait
Will display Work order operations (WOO) in:
Status 2 (In queue)
Column settings - Click the Column settings icon to:
Export to excel - Will send an .xlsx file by email to user. The email is set up in the Personnel (PER) application.
Reset to default view - Reset all changes to selected columns and resizing of the area. This is useful if encountering unexpected errors.
Columns - Hover over to select which columns should be displayed in the list. The available columns are described in the table below.
Columns
Description
St
Displays an icon indicating the status of the Work order operation (WOO). Hover over for a description of the status.
State
The State column includes informative icons and text further detailing the status of the Work order operation (WOO). The Ready at date and time is also displayed if the Ready at date is defined.
Star icon - High priority
Stop icon - Work order operation (WOO) and/or Production work order (PWO) is on hold.
Pause icon - Work order operation (WOO) and/or Production work order (PWO) in paused.
Qty
The quantity of Product units (LCM) being produced by the initial Production work order (PWO), set when creating the Production work order (PWO).
Pick
The Pick column displays icons indicating the status of the picking process for the Work order operation (WOO).
Serial number
Displays the serial number of the Product unit (LCM) being produced by Work order operation (WOO). If there are multiple Product units (LCM) being produced, ++ will be displayed at the end of the serial number.
Work order
Displays the identifier of the Production work order (PWO) for the Work order operation (WOO).
Customer
If the Production work order (PWO) and the subsequent Work order operations (WOO) are linked to a Sales order (COA), the name of the customer will be displayed in the Customer column.
Customer reference number
If the Production work order (PWO) and the subsequent Work order operations (WOO) are linked to a Sales order (COA), the customer reference number will be displayed in the Customer reference number column.
Product
The name of Product (ART) being produced is displayed in the Product column. Click the View icon to open the Product (ART) application to view and edit details on the Product (ART).
Revision
Gives information about the current revision of the product. The revision number is derived from the Product (ART) application. From the Product (ART) application, click on the View icon next to the Revision field in the header to view Article revisions.
Sequence number
Displays the operation sequence number in the Production structure (KITDOC).
Operation
Displays the name of the Production operation (OPR).
Planned start at margin
Displays the number of days in relation to the Scheduled completion date set in the Production work order (PWO) application when creating the Production work order (PWO). A positive number will be displayed if the number of days has passed the Scheduled completion date. If the Scheduled completion date is a future date, a negative number will be displayed, counting down until the Scheduled completion date.
Remaining time
Displays the remaining time for the operations set in the Product (ART) structure. Details can be quickly viewed by clicking the View icon in the Work order column and then clicking the Structure button in the Links area, in the Production work order (PWOD) application.
Operator
Displays the name of the operator who last worked on the current Work order operation (WOO). Click the View icon to open the Personnel (PER) application to view details about
Planned start at
The date which the Work order operation (WOO) is planned to start to meet the required date set when creating the Production work order (PWO).
Planned finished at
The date which the Work order operation (WOO) is planned to be completed, to meet the required date set when creating the Production work order (PWO).
Finished at
The date which the Work order operation (WOO) is set in Status 9 (Completed).
Is operation locked
Will display YES, if the planner has locked the operation in the Planned operation for production work order (PWOPLO). This can be due to inspection by external source or similar requirements.
Delivery project
Displays the name of the Delivery project (PRO) the Work order operation (WOO) is linked to. Click the View icon to open the Delivery project (PRO) application.
Read more about the Delivery Project (PRO).
Group
Displays the name of Group work order operations (GWOO). Click the View icon to open the Group work order operation (GWOO) application where the user can assign, add and run groups of Work order operations (WOO).
Read more about the Group work order operations (GWOO) here.
Priority
Ready at
Earliest date and time for starting the Work order operation (WOO).
Requested completion
Displays the requested completion date which, the planner sets in the Production work order (PWOD) application, in the Dates area.
Confirmed completion
Displays the confirmed completion date, which the planner sets in the Production work order (PWOD) application, in the Dates area.
Material name
Displays Product (ART) name and product description of the first material on the Production structure (KITDOC) list for the Product unit (LCM) being built with the specified operation. The cell will display products of class P and M only.
To display the information in the application, the Company setting (CSV), Fetch ProductStructure material and operation info in RWOO (OFF by default), must be enabled. If the Company setting (CSV) is OFF, they will no information will be displayed.
Operation info
Displays the Operation note set in the Work order operation (WOO) application.
The Company setting (CSV), Fetch ProductStructure material and operation info in RWOO (OFF by default), must be enabled to display information. If the Company setting (CSV) is OFF, no information will be displayed.
Product units received
Will display a progress bar for the total Product units (LCM) to be produced.
Production tasks
The Production tasks column displays all production tasks linked to the Work order operation (WOO). Each task is represented by an icon. These icons can be clicked to open the Task details (TASK) application to view and edit details. Note that all icons will also display the title. The user must therefore click the icon, and not the text to open the Task details (TASK) application.
Production tasks icons
- - Status 1 - To do
- - Status 4 - In progress
- - Status 5 - In review
- - Status 7 - Rejected
- - Status 8 - Done
- - Status 9 - Archived
- Click the Show all production tasks to open a related popup listing all Production tasks, Pre-production tasks and Scheduled production tasks. Active and Detached production tasks
The Production tasks tab includes two standard filters. Note that detached production tasks will be listed, but with strike-through if the Standard filter, Detached tasks is selected. In example: "Detached task".
Active tasks - Displays all active production tasks in the Task process (TSP)
Detached tasks - Displays all production tasks which for various reasons are no longer attached to the Task process (TSP).
When are production tasks potentially detached from a Production work order (PWO)?
Changes to the Production structure (KITDOC)
Production work order (PWO) is cancelled
Production work order (PWO) is scrapped
Note
The space in the Production tasks column is limited. Therefore only a limited number of tasks can be displayed, meaning others can be hidden.
Pre-production tasks
The Pre-production tasks column displays all pre-production tasks linked to the Work order operation (WOO). Each task is represented by an icon. These icons can be clicked to open the Task details (TASK) application to view and edit details.
Pre-production tasks icons
- - Status 1 - To do
- - Status 4 - In progress
- - Status 5 - In review
- - Status 7 - Rejected
- - Status 8 - Done
- - Status 9 - Archived
- Click the Show all production tasks to open a related popup listing all Production tasks, Pre-production tasks and Scheduled production tasks. Note
The space in the Pre-production tasks column is limited. Therefore only a limited number of tasks can be displayed, meaning others can be hidden.
Scheduled production tasks
- Click the Show all scheduled production tasks to open a related popup listing all Production tasks, Pre-production tasks and Scheduled production tasks. The icon will be accompanied by a number. This number states the number of scheduled production tasks linked to the Work order operation (WOO).
Click the Production status info icon to open the Planned operations for production work order (PWOPLO) application where the user can inspect and change Planned operations for the Production work order (PWO).
Read more here about the Planned operations for production work order (PWOPLO) here.
Click the Confirm picking icon to open the Pick (PICK) application where the user can initialize picking and perform the intended picking of parts and products.
Click the Scan picking icon to open the Picking with hand held terminals (SCANPICK) application where the user can efficiently pick parts and products by using hand held terminals.
Read more about Picking with hand held terminals (SCANPICK) here.
Click the Assign resource icon to open the Assign resource (ASSIGNRES) application where the user can assign group members and alternative resource to the Work order operation (WOO).
Click the Arrow icon to open the Work order operation (WOO) application on the selected Work order operation (WOO).
Read more about the Work order operation (WOO) application here.
Context menu options | Description | ||||||
|---|---|---|---|---|---|---|---|
View capacity and load | Click the View capacity and load option to open the Production resource capacity and load overview (RCL) application. The selected Production resource will be visualized in an overview where the user can inspect the resource load in a specific period of time. The Show selected checkbox will automatically be checked in the Production resource capacity and load overview (RCL) application. The initial Production resource (RWOO) will therefore be the only production resource displayed. Read more about the Production resource capacity and load (RCL) application here. | ||||||
Set production resource condition | Click the Set production resource condition option to open: The Set production resource condition popup
This can be used to flag Production resources (RESCONFIG) for maintenance or inform the planner that the machine has stopped. Setting the resource condition will only visually flag, and not limit any functions of the Production resource (RESCONFIG). The set resource condition will be displayed, with an icon or a banner with the optional note, in the following applications:
| ||||||
QAR Documents | Select the QAR Documents option to open the Quality report archive menu where the user can inspect quality issues and create new issue reports. | ||||||
Group work order operations | Select the Group work order operations option to open the Group work order operations (GWOO) application where the user can assign Work order operations (WOO) to groups, add new groups and run groups. Read more about the Group work order operations (GWOO) here. | ||||||
Picklist for Service Orders | Select the Picklist for Service Orders option to open a popup where the user can define and run a report which opens the Report (NGREP/104256). The report displays the pick list for service orders and details:
|
When the picking process has been performed, it must be confirmed to ensure strict control of the stock.

You can use both the SCANPICK and PICK application for this. For details concerning the use of SCANPICK, please refer to the SCANPICK documentation.
Click the button called Confirm Picking to start the confirmation process.
This will take you to the PICK application.

Highlight the item line containing the articles you need to confirm and detailed information will appear on the right side of the screen. Either enter the quantity you want to pick in the number field in the Picked Qty column, or click the Pick All button to pick the full quantity of the stock location. Click the Confirm button when finished.
If everything is completed without errors, PICKING COMPLETED will appear on the top of the screen.

Press ESC to go back to the operation log window.
To complete the operation, click the PROD Completed button.
If a Holdpoint have been defined on the operation, this must be approved before the operation is completed using the Approve Holdpoint button.
The Product Unit Picking popup is designed to enhance material tracking and traceability during production. This interface allows operators to efficiently pick materials per Product unit (LCM) by entering or scanning Goods receptions (SSA). This also includes automatic reassignment for traceable material, saving clicks and without having to use applications like the Stock assignment production order kit-item (SARK).
The key functionalities include:
Material Picking: Enables users to pick quantities from different Good receptions (SSA) without having to manually change assignments, ideal for dynamic production environments.
Traceability: Builds comprehensive traceability records for materials used in production.
User Navigation: Accessible via the Work Order Operation (WOO) application, with multiple navigation options for ease of use.
Pick for a single, or multiple Product units (LCM)
Only applies for traceable material and Production work orders (PWO) in Status 5 - In production
This functionality applies to Products (ART) used as parts in a Product structure (KITART) / Production structure (KITDOC), defined as Is traceable material of product unit in the Product (ART) application.
Picking can only be done on Production work orders (PWO) in Status 5 - In production.
Read more about "How to find duty and roles that include a specific permission".
ViewPicking - PRM/100597
UndoPickSingleProductionWorkOrder - PRM/103466
PickSingleProductionWorkOrder - PRM/103464
When it is time to pick, navigate to the popup by selecting one of the options below.
Navigate to the popup via the Work order operation (WOO) application.
Option 1:

To open the Production work order (PWO) application, find Production in the RamBase menu and then Production.
Click Production work orders to open the Production work orders (PWOMENU) application.
From the listed Production work orders (PWOMENU), click the intended Production work order (PWO) and press ENTER.
This opens the Production work order (PWO) application for the selected Production work order (PWO). Click on the View icon next to the Work order operations field to open the Work order operations (WOO) application.
The Work order operations field is found in the lower right corner in the Product units and current work order operation area.
To open the Product units picking popup, in the Work order operation (WOO) application, click the Product units tab, and then click the Pick icon in the Pick column.

Pick icon
Option 2:
Click the Program field and type "WOO/ + Identifier" and press ENTER. Then continue from step f. in the list above.
Example "WOO/123456"
Click here to read more about the user interface.
If Serial number template (SNT) is set up for any of the materials
When opening the popup in the context of a Production work order (PWO), as an operator performing a Work order operation (WOO), the fields in the header are already filled out.
There are multiple ways to pick for production. You may choose the picking route by selecting Material and then which Goods reception to pick from, or selecting or scanning a Goods reception item (SSAITEM), which will automatically select the material of the Goods reception item (SSAITEM).
Tip
When working with pallets that are set up with Goods reception (SSA), starting with the Goods reception field can the be the most efficient as it will detect the material of the scanned Goods reception item (SSAITEM).
Select Material → Select Goods reception → Decide Quantity → Click Pick button
Scan or type Goods reception → Decide Quantity → Click Pick button
Select Material serial number → Click Pick button → Decide Quantity → Click Pick button
Once the material(s) has been picked, it will populate the grid below.
When it is time to pick, navigate to the popup by selecting one of the options below.
Navigate to the popup via the Work order operation (WOO) application.
Option 1:
To open the Production work order (PWO) application, find Production in the RamBase menu and then Production.
Click Production work orders to open the Production work orders (PWOMENU) application.
From the listed Production work orders (PWOMENU), click the intended Production work order (PWO) and press ENTER.
This opens the Production work order (PWO) application for the selected Production work order (PWO). Click on the View icon next to the Work order operations field to open the Work order operations (WOO) application.
The Work order operations field is found in the lower right corner in the Product units and current work order operation area.
To open the Product units picking popup, in the Work order operation (WOO) application, click the Product units tab, and then click the Pick icon in the Pick column.
Pick icon
Option 2:
Click the Program field and type "WOO/ + Identifier" and press ENTER. Then continue from step f. in the list above.
Example "WOO/123456"
Click here to read more about the user interface.
If Serial number template (SNT) is set up for any of the materials
When opening the popup in the context of a Production work order (PWO), as an operator performing a Work order operation (WOO), the fields in the header are already filled out.
When the popup opens, you can pick for all selected product units.
To do so, click the Produced product unit id drop-down to expand the list of Product units (LCM). With the list expanded, clicking an element in the list will populate the area to the right with identifiers of the now selected Product units (LCM).
Picking will then apply to all Product units (LCM) which populates the area to the right of the Produced product unit id drop-down menu.
Note
Pick quantity is distributed across the selected units. The progress bar and traceability indicators update accordingly.
The column, Traceable material quantity, shows how much was picked per Product unit (LCM).
There are multiple ways to pick for production. You may choose the picking route by selecting Material and then which Goods reception to pick from, or selecting or scanning a Goods reception item (SSAITEM), which will automatically select the material of the Goods reception item (SSAITEM).
Tip
When working with pallets that are set up with Goods reception (SSA), starting with the Goods reception field can the be the most efficient as it will detect the material of the scanned Goods reception item (SSAITEM).
Select Material → Select Goods reception → Decide Quantity → Click Pick button
Scan or type Goods reception → Decide Quantity → Click Pick button
Select Material serial number → Click Pick button → Decide Quantity → Click Pick button
Once the material(s) have been picked, the grid below will show the picked quantity for each selected product unit.
Tip
The filter, Show only picks for traceable materials, allows you sort out the possibility to view picks for non-traceable materials. If not, these will appear with traceable quantity = 0, as well with a icon for easy identification.
| Non-traceable material icon |

Important
If you need to undo a pick that was performed for multiple units, the entire batch will be undone. A confirmation message will warn you before proceeding.
The interface is divided into five sections:

The header section provides information on the Production work order (PWO), Work order operation (WOO), and the current Product unit (LCM). It includes fields for viewing and editing details of the PWO, WOO, and LCM, with options to switch between different Product units (LCM). The serial number for the Product Unit is displayed, typically sourced by automation and set up in the Serial Number Templates (SNT) application.
Field | Icon | Description |
|---|---|---|
Production work order |
| An informational field displaying the identifier of the source Production work order (PWO). The Production work order (PWO) includes the Work order operation (WOO) where the picking can potentially be completed. To view and edit details, click the View icon to open the Production work order details (PWOD) application. |
Work order operation |
| An informational field display in the sequence number and name for the Operation (OPR) being worked on, as a Work order operation (WOO). To close the popup, and return to the Work order operation (WOO), click the View icon. |
Produced product unit id |
| Displays the identifier of the currently selected Product unit (LCM). To switch to another, click the Produced product unit id drop-down menu. Note that only Product units (LCM) included in the source Production work order (PWO) can be selected. To view and edit details on the Product unit (LCM) by opening the Life cycle management (LCM) application, click the View icon. |
Produced serial number | Displays the serial number for the Product unit (LCM). This is can typically be sourced by automation, set up in the Serial number templates (SNT) application. |
The List of materials allows the user to select a material to be picked. When a material has been clicked, highlighted by the color orange, the fields Goods reception and Stock location - will only list matches which include the selected part/material.
Note
The user can pick more than the planned quantity. If so, a Warning icon will be displayed next to the Material name.
| Warning icon |

Note
It is allowed to pick non-traceable materials. These will appear with traceable quantity = 0, as well as an icon for easy identification.
| Non-traceable material icon |
Tip
Icon/Button | Description |
|---|---|
| To apply a filter, click the Filter icon to select one of the available options. TipThe optional filters can be combined with the Filter by material name field. Optional filters
|
In this section, you can select or search for Goods reception (SSA) and Stock location (STL). If the material is chosen first, the Goods receptions (SSA) will be filtered accordingly, and selecting a Goods reception (SSA) will auto-fill the Stock location field. You can also search by serial number and decide the quantity to pick using the Arrow icons or by typing the numerical quantity.
Field/Drop-down | Icon | Description |
|---|---|---|
Goods reception |
| To select which Goods reception (SSA) to pick from, click to select or search. Note that if the material is selected first, the Goods receptions (SSA) will be filtered on those which contain the material. |
Stock location |
| To select which Stock location (STL) to pick from, click to select or search. Note that if Goods reception (SSA) is selected first, the Stock location (STL) of the Goods reception (SSA) will automatically fill in the Stock location field. To open the Stock location (STL) application, to view and edit details, click the View icon. Read more about Stock locations (STL). |
Material serial number filter | Search for a serial number for the potential serial number for the picked material. | |
Quantity |
| Decide the quantity to pick of the selected material, by clicking the Arrow icons or click the field and type the numerical quantity. |
This section provides details on the progress of picking materials for the current Product Unit (LCM). It includes an informational progress bar for the picked quantity and displays the total picked quantity for the whole Production Work Order (PWO).
The section also explains how to pick materials and the criteria required for picking.
Field/Button | Icon | Description |
|---|---|---|
Picked quantity |
| Informational progress bar indicating the progress of the potential picking quantity, for the current Product unit (LCM). The user can pick more than the planned quantity. If so, a Warning icon will be displayed next to the progress bar. ImportantIf the material is non-traceable, the progress bar will be grayed out to indicate that the selected material is non-traceable. |
Total picked quantity (work order) |
| Displays the total picked quantity of the selected material, for the whole Production work order (PWO). The user can pick more than the planned quantity. If so, a Warning icon will be displayed next to the progress bar. Examples Simple example: There is a total of 3 Product units (LCM) being produced by the Production work order (PWO). For each Product unit (LCM) there are 4 materials to be picked, with various required quantity. Below, the operator has selected Product unit 1 in the Produced product unit id drop-down menu.
Result: When material 2 is selected the Total picked quantity will display a green progress bar with 3 out of 3 picked for all the Product units (LCM) in the Production work order (PWO). A green dot will also mark the material in the Material list, indicating that the required material quantity has been picked for the current Product unit (LCM). When any other material is selected the Total picked quantity will display a gray progress bar with 0 out of 3 or 12 picked for the Product units (LCM) in the Production work order (PWO). A gray dot will also mark those materials in the Material list, indicating that the required material quantity has not been picked for the current Product unit (LCM). Common example: There is a total of 3 Product units (LCM) being produced by the Production work order (PWO). For each Product unit (LCM) there are 4 materials to be picked, with various required quantity. Below, the operator has selected Product unit 1 in the Produced product unit id drop-down menu.
Result: When material 1 is selected, the Total picked quantity will display an orange progress bar with 8 out of 12 picked, as it describes the progress for all the Product units (LCM) in the Production work order (PWO). A gray will also mark the material in the Material list, indicating that the required material quantity has not been picked for the current Product unit (LCM). When material 2 is selected the Total picked quantity will display a green progress bar with 3 out of 3 picked for all the Product units (LCM) in the Production work order (PWO). A green dot will also mark the material in the Material list, indicating that the required material quantity has been picked for the current Product unit (LCM). When material 3 is selected the Total picked quantity will display a gray progress bar with 0 out of 3 picked for all the Product units (LCM) in the Production work order (PWO). A gray dot will also mark the material in the Material list, indicating that the required material quantity has been picked for the current Product unit (LCM). When material 4 is selected the Total picked quantity will display an orange progress bar with 1 out of 3 picked, as it describes the progress for all the Product units (LCM) in the Production work order (PWO). An gray will also mark the material in the Material list, indicating that the required material quantity has been partially picked for the current Product unit (LCM). |
| To pick the material, click the Pick button. Criteria to pick
Criteria to pick:
If pick is performed, the grid below will populate with the material details. |

This section provides a detailed list of the selected materials that have been picked for the current Product unit (LCM). It includes information such as the operation sequence, product unit identifier, material name, serial numbers, and quantities picked. Additionally, it offers options to view and edit details for each item and undo picks if necessary.
Column | Icon | Description |
|---|---|---|
Operation |
| Displays the sequence number and Operation name (OPR). To view and edit details, click the View icon |
Product unit |
| Displays the Product unit identifier (LCM). To open the Life cycle management (LCM) application, to view and edit details, click the View icon. |
Product unit serial number | Displays the potential Serial number (SNO) of the Product unit (LCM). This is can typically be sourced by automation, set up in the Serial number templates (SNT). | |
Material |
| Displays the name of the material, which is maintained in the Product (ART) application. To view and edit details in the Product (ART) application, click the View icon. |
| Displays an icon indicating which type of material the Product (ART), is. An example is: M - Material. | |
Material serial number | Potential serial number for the picked material. | |
Picked quantity | Displays the quantity picked. | |
Picked by | Displays the user who initiated the picking. | |
Traceable material quantity | Traceable Material Quantity refers to the amount of a picked material that is specifically linked to one or more traceable Product Units (LCMs) during a production operation. This value represents how much of the picked quantity is assigned and recorded in the traceability structure of each product unit.
| |
Actions |
| To undo the pick, click the Pick icon. |


The field UsedQty in KIT makes it possible to add value at part lines in Production Work Orders (PWO) KITs. Use this if the planned quantity does not match the real used quantity.
Follow this procedure to adjust the quantity:
To open the Production Work Orders (PWO) application, find Production in the RamBase menu and then Production. Click Production work orders to enter the PWO application.
Click the Kit icon to enter the KIT document for the PWO.
Click the Edit Used Quantity icon in the Qty/Time column to open the Edit Used Quantity popup.
Set the real used quantity in the UsedQty field and click the Confirm button.

The setting Allow update of USEDQTYin PWO KIT must be switched on.
PICK has not been initiated.
Material with Class C or M.
KitFixQty can not be used at such part lines.
Some product are used to make a set amount of product. You can add the total quantity on the product using the ProduceInMultipleOf field in the Misc tab. Add a number here and it will be inherited by the Production Work Order (PWO) when it is used in production. The system will force through a number which is a multiple of the given number regardless of the number entered.

To the left in the operator screen you can see the LCM Measures box. Here you may view and add measures related to the kit.
The Measurement (MSR) module is only available if activated for the company.
To add a measure for the kit, for example the dimensions, click the Add Measure icon in the measures column.
This takes you to the Key Characteristics Inspections window. Here you may add relevant information related to the dimensions of the product, tolerance class and the tool used.
When the information has been added, your Personal Identification Number (PID) will be picked up and you will be set as the creator in the UserId column.
Click the CONFIRM button to finish.
When creating a new definition, file type may be added from the File type drop-down menu.
When a definition has a chosen file type, it is inherited by templates. This means that the file type will be automatically set when creating a measurement report from the template. It is possible to set file type for existing templates and measurement reports without a set file type. If no file type is chosen when a measurement report is created, MSR will be the default file type.

The purpose of this document is to describe the functionality for creating Measurement documents (MSR), definitions and templates.
Measure definition (MEASUREDEF) is the application and tool to create the layout and content for MSR classes like PIF, ITP, THREAD, CALIBRATION and CHECKLIST. These MSR types are controlled/specified via the Class field. One definition (Class) decides the layout for all MSRs within this class.
Exception
The definition for the class DIMENSION cannot be viewed or modified as this is a fixed global setup.
Important
Be aware of that by changing the Definition, one does also change the layout/columns of all templates and MSRs belonging to that specific class. All Class values must be specified in a value list, and until further this can only be done by RamBase (via Domain menu (DOF)).
Measure standards, ISO or other approved standards, defines the allowed tolerances for mechanical measurements. There are several classes and types, and each of them have their own set of tolerances. These standards are used by the Measurement documents (MSR) both to inform the users about the tolerances that apply and to warn the user if the measured value is out of tolerance and therefore deviates from the upper or lower tolerance that is set.
A measure standard can be added for several measurement units by defining the “permissible deviations for”, which again can have several tolerance classes like Rough, Medium” and Fine.
Each Definition may have several MSR Templates. A template can be valid for one specific Product (ART) or for a planning category (group of products) and is the basis for the measurement form’s values and steps. A single template can include up to 700 rows
When creating an MSR, it is always based on a template. The MSR will get all values and fields from the template, but the layout, field names and columns are controlled by the definition.
Templates are often linked to one measure standard at the top level as values will automatically get their upper and lower tolerances in the table view (especially for dimension templates). Symbol and Unit will then automatically be filled based on the Standard and ToleranceClass that is chosen in the dropdown menu. However, one may change the measure standard on one or several values in the table if necessary.
This option is typically used for the DIMENSION class as dimension measurements are normally product specific, but templates for other classes can also be linked to one specific product. Go to the Product (ART) by clicking the link in the Product field and choose the Context menu option, Measures. Choose a Class in the dropdown menu and then click the New Template icon. You can choose to create a new template from scratch or copy a template from another product by using the option Copy from other Part.
Templates for a group of products are normally created for classes like Check lists, Product inspection forms and Thread certificates.
Planning categories are specified in the Domain values (DOV) application, and must be added to the Products by navigating to the Properties and the selecting the Production sub-tab.
In the Product (ART) application:

In the MSR template:

All classes must be defined in a value list in Domain menu (DOF) application, but this is restricted to consultants.
The Measurement menu has a radio button, Definitions for users that are allowed to create and modify measurement definitions.

The New definition option opens the application Measure definition (MEASUREDEF) where you select Class and add a Class description before starting to build the layout.

Header fields
All selected header fields will be at the header of the measurement form
Body fields
All selected body fields will be columns in the measurement form
Footer fields
There are two available fields for the measurement form footer
The Field column shows the field name from the data dictionary. The corresponding field name that is wanted to be shown in the layout and print of the final measurement forms must be specified in the column Label.
Some fields in the header and the body have an action linked to it, like Select tool, Remove selected tool, etc. These icons will show behind the column/field if chosen to be included.
Sort fields of columns in the body grid (table). First column is “1”. Only numeric, non-decimal values.
Field length specified by number of characters with the restriction of maximum 120 characters. It is important to evaluate and limit the length of fields. There is a total width of characters at the body layout, limited by i.e. printout.
Remember that minimum length for body fields should be the length of the chosen field name.
The include operations select box at the header is only to be used if the work operations are done during production, i.e. milling, MPI, pressure test should be specified at the footer of the printout.
The procedure for building a new definition is as follows:
Select the Class and set the Class Description at the header of the document
Activate the Definition by clicking the Activate Template icon in the upper right corner
Start selecting fields/columns, give them names, length and sorting
It is possible to preview the measurement form by clicking the Preview button.
Note
There are some fixed fields that will be added to the form. These are fields gathered from the actual Production work orders (PWO) that the measurement form is created for, like serial number, drawing number, revision, order number, part number (product) etc.
The Measurement menu (MSR) has a radio button, Templates that will open a list off all templates that are created. Valid templates have Status 4, not valid have Status 9 and not yet activated Status 1.
Valid templates can be opened by clicking the Make edit version, and then modified. The old version will be closed by activating the new version and the new version will be valid for all measurement forms that uses that template.
A new template is created by the following steps:
Select the class (definition) to create a template for:

When selected, click the New Template icon and a new template MSR is created in Status 1. Fields and columns are set by the corresponding definition. Select a Planning category and set the measure points in the table and fixed values for header/footer fields before activating the template to Status 4.
Approval of measurement forms is set on the measurement template (Approval YES/NO). Configuration of whom is to approve the actual measurement forms is done by creating an approval group in the Group application (GRP):
Name: MEASUREAPPROVAL
CLASS: MEASUREAPPROVAL
Members: The people responsible for approving the measurements
Once this is configured the members of the measurement approval group will get the admittance to approve measurement forms
When operators are working on specific Work order operations (WOO), the natural first step of adding measurements would be by navigating to the Product units tab and then to the Measures column:

The different options in the Measures column are the different definitions that are defined in the system. The operator will then get a measurement form based on whether there is a template created for the chosen definition.
In this example there is a template created for the specific product that the operator is producing. When choosing Dimension, a measurement form called First article inspection will then open, and they will only need to fill the measures in each row:

When the Measure column is filled, the operator will choose Confirm. If approval is necessary, the person added to the approval group will get an Approve icon in the upper right corner. The next natural step will then be to Create and link pdf. This can be added to the documentation package and sent to the customer. The Create and link PDF" option will attach the PDF as a file to the Product unit (LCM) where the measurement was performed.
Measuring tools (MET) can be added to Measurements (MSR) of class DIMENSION. This can either be done in the First article inspections (MEASURELCM)/ Key characteristics inspections (MEASURELCM) application, or the from the Work order operations (WOO) application.
Navigate to the application
Option 1: RamBase menu → Production → Documentation → Measurements
Option 2: Click the Program field and type "MSR" and press ENTER.
Click here to read more about the user interface.
About Class = DIMENSION
Measurements (MSR), of class DIMENSION, are used for mechanical measures, lengths, diameters etc.
Type = FAI - First article inspection
Type = KCI - Key characteristics inspection
Navigate to First article inspection/Key characteristics (MEASURELCM) application
To open the Measurements menu (MSR) application from the RamBase menu, click Production, then Documentation and finally Measurements.

In the Measurements menu (MSR) application, find the Measurement (MSR) of DocType FAI or KCI, where tool is to be added.
To open the First article inspection/Key characteristics inspection (MEASURELCM) application, click the link in the Docid column or double-click. Alternatively, click the line to highlight it and then press ENTER.
Add a Measuring tool (MET)
In the First article inspection/Key characteristics inspection (MEASURELCM) application, find the Tools area.

To open the popup where a Measuring tool (MET) can be added to the Measure (MSR), click the Add tool icon.

Add tool icon

To add a single Measuring tool (MET), click a line to highlight it and then press ENTER.
To add multiple Measuring tools (MET), click the Arrow icon, as shown in the green box in the image above.
To remove a Measuring tool (MET), click the Remove icon, as shown in the red box in the image above.
Tip
Hover over the Arrow icon to list which Measure(s) (MSR) the Measuring tool (MET) will be added.
Hover over the Remove icon to list which Measure(s) (MSR) the Measuring tool (MET) will be removed.
If the Product unit (LCM) has a measurement requirement, the operator can, from the Work order operations (WOO) application, easily add a tool by using a quick link or the Context menu to navigate to the First article inspection/Key characteristics inspection (MEASURELCM) application.
Navigate from the Work order operations (WOO) application to the First article inspection/Key characteristics inspection (MEASURELCM) application
In the Work order operations (WOO) application, find the Work progress area, and then click the Product units tab.
In the Measures column, click the DIMENSION icon to open the First article inspection/Key characteristics inspection (MEASURELCM) application.
Continue from step 3, in the Add a Measuring tool (MET) procedure, above.
Add a Measuring tool (MET) to the Measure (MSR) with the Add measuring tool to dimensions MSR's context menu option
In the Work order operations (WOO) application, click the Context menu option.
Context menu icon
To open the Measure select (METSELECT) popup, select the Add measuring tool to dimensions MSR's option.
In the Add measuring tool to dimensions MSR's popup, select which of the listed Measuring tools (MET) are added to the Measures (MSR).
Measuring tool (MET) will be added to all potential Measures (MSR)
When adding a Measuring tool (MET) from the Work order operations (WOO) application, the Measuring tool (MET) will be added to all potential Measures (MSR).
If the Product unit (LCM) has a measure requirement, the operator can, from the Production work order (PWOD) application, easily add a tool by using a quick link or the Context menu to navigate to the First article inspection/Key characteristics inspection (MEASURELCM) application.
Navigate from the Production work order (PWOD) application to the First article inspection/Key characteristics inspection (MEASURELCM) application
In the Production work order (PWOD), find the Product units and current work order operation area.
In the Measures column, click the DIMENSION icon to open the First article inspection/Key characteristics inspection (MEASURELCM) application.
Continue from step 3, in the Add a Measuring tool (MET) procedure, above.
Navigate from the Production work order (PWOD) application to the First article inspection/Key characteristics inspection (MEASURELCM) popup via the Context menu
In the Production work order (PWOD) application, click the Context menu option.
Context menu icon
In the Context menu, select the Measures option. This will open the Measures (MSR) application, where the relevant Measures (MSR) will be listed.
To open the First article inspection/Key characteristics inspection (MEASURELCM) application, click to highlight a Measure (MSR) and press ENTER.
Continue from step 3, in the Add a Measuring tool (MET) procedure, above.
Objective
Enable users to quickly populate a measurement template by copying setup data from an existing part.
Important
You must have access to the Article inspection template (MEASURETEMPLATE) application.
The Article inspection template (MEASURETEMPLATE) must be in Status 1 - Draft.
The part you want to copy from, must have a measurement template defined.
Copied templates include all measurement lines, tolerances and units.
Existing data in the target Product (ART) will be overwritten.
The function is useful for standardizing templates across similar parts.
Procedure - Copy from other part
Navigate to the source Article inspection template (MEASURETEMPLATE) via the Measure menu (MSR) application:
Navigate to the Measures menu (MSR) application and list templates
Option 1: RamBase menu → Production → Documentation → Measurement templates
Option 2: Click the Program field and type "MSR" and press ENTER, then click the Templates radio button.
Click the link in the DOCID column to open the source measurement in the Article inspection template (MEASURETEMPLATE) application.
In the Article inspection template (MEASURETEMPLATE) application, click the Copy from other Part icon, found in the top right corner of the header.
A dialog box will appear. Locate the source Product (ART) with the template to be copied from.
Once located, either click to highlight and then press ENTER, or double click to copy the source Article inspection template (MEASURETEMPLATE) to the destination Article inspection template (MEASURETEMPLATE).
A Production work order (PWO) is a request to produce one or more pieces or units of a certain product. Products may be produced for stock, or according to a specific Sales order (COA).
The Production work orders (PWO) application contains information about production orders and is managed by the Production planning (PRODPLAN) application. In the Production planner (PRODPLAN) application, the Production work orders (PWO) are listed in the Productions tab.
To open the Production Planning (PRODPLAN) application, find Production in the RamBase menu and then Planning. Click Production planner to enter the Production planner (PRODPLAN) application.

To view details about a specific Production work order in Production planner (PRODPLAN), click the Docid link in the Docid column, or from the Production Menu (PWO), select a line in the list and press ENTER.
The Production work order (PWO) application will open.

A Production work order (PWO) is usually created based on one of the following needs; Make to stock, Make to order or Assemble to order. The user can however create a Production work order (PWO) without any of these initial needs.
Optional starting points
Listed below are some of the applications the user can use to create a Production work order (PWO).
Production planning (PRODPLAN) - Procedure A listed below.
Production work orders (PWOMENU) - Procedure B listed below.
To create a Production work order (PWO), use one of the following procedures:
A. Create a Production work order (PWO) in the Production planning (PRODPLAN) application
To open the Production planning (PRODPLAN) application from the RamBase menu, select Production and then Planning. Finally select the Production planner option.
Once in the application, click the Productions tab and Create PWOCREATE icon in the lower left corner to open the PWOCREATE popup with the following options:
Part search field, lookup icon - Required
When a part is selected the Inspect part icon allows the user to open the part in the Product (ART) application to view and edit details.
Text textbox
Add a description
Req textbox and Select date icon - Required
Type the requested completion date in YYYY.MM.DD format or click the Select date icon to select a date.
Qty textbox - Required
Type the quantity.
ManArea dropdown menu - Required
Select a manufacturing area.
Create new PWO button
At a minimum select a Part, a Requested completion date and type a required Qty.
To create a Production work order (PWO) in Status 1 - Pending registration and open the Production work order (PWO) application, click the Create new PWO button.
The new Production work order (PWO) will be opened in the Production work order (PWO) application. To confirm, follow the steps in Procedure C.
B. Create a Production work order (PWO) in the Production work orders (PWOMENU) application
To open the Production work orders (PWOMENU) application from the RamBase menu, select Production and then Production again. Finally select the Production work orders option.
Once in the application, click the +Create new order button to open a popup with the following options:
Product dropdown menu - Required
Description field
Location dropdown menu
Requested completion date field and Calendar icon - Required
Quantity field with Increase/decrease icons
Manufacturing area dropdown menu
Create another checkbox
Create button
Close button
At a minimum select a Product and a Requested completion date.
To create a Production work order (PWO) in Status 1 - Pending registration and open the Production work order (PWO) application, click the Create button.
The new Production work order (PWO) will be opened in the Production work order (PWO) application. To confirm, follow the steps in Procedure C.
C. Having followed either procedure A or B, the user can continue to confirm in the Production work order (PWO) application
To confirm the Production work order (PWO) click the Confirm button in the Actions area.
Clicking the Confirm button will forward the Production work order (PWO) to Status 4 (Pending scheduled production start) if all materials are available.
To confirm the Production work order (PWO) click the Confirm button in the Actions area.
Clicking the Confirm button will forward the Production work order (PWO) to Status 4 (Pending scheduled production start) if all materials are available.
If all materials are not available, the Production work order (PWO) will be forwarded to Status 2 (Pending purchase or production).
Or forwarded to Status 3 (Pending goods reception).
Tip
Read more about the Production work order (PWO) application
The Production work orders menu (PWOMENU) application lists all Production work orders (PWO) in the system.
Navigate to the application
Option 1: RamBase menu→Production→Production→Production work orders
Option 2: Click the Program field and type "PWOMENU" and press ENTER.
Click here to read more about the user interface.
The Production work orders menu (PWOMENU) application have extensive filtering options, so that users may easily customize the list of production work orders (PWO) according to their needs:
Status filters:
At the top of the application, there are boxes that represent each possible status of a production work order (PWO). It is possible to select multiple statuses at once, and to combine this filter with other filter types to customize the selection of production work orders (PWO). Items and Qty are automatically refreshed to accurately represent the number of productions of the specified type in each of the statuses.
Quick search:
In the Quick search field, users may search for a production work order (PWO) by Product name or Production work order identifier. Click the Quick search filter icon and select/deselect the check-boxes to customize if the search should be limited to Product name or Production work order identifier or include both (default).
Filter builder:
Click the Filter builder icon in order to set Standard filters , Create custom filters or both.
Other:
It is possible to use different lookup fields as filters, for example the Location lookup field (which is set to the default company stock location).
The list of Production work orders (PWO) is presented based on the selections made in the Header.
Notable functionality is the option to navigate to the Production work order (PWO) application by click to select and then press ENTER, or clicking the Right arrow icon.
Column | Icon | Description | ||||||||||||||||||||||||||||||||
|---|---|---|---|---|---|---|---|---|---|---|---|---|---|---|---|---|---|---|---|---|---|---|---|---|---|---|---|---|---|---|---|---|---|---|
| Displays the current status of the Production work order (PWO). Potential statuses for Production work orders (PWO)
| |||||||||||||||||||||||||||||||||
Work order id |
| Displays the Production work order (PWO) identifier number. For example 123456. To quickly access that Production work order (PWO), type "PWO/123456" in the Program field. Or click the View icon to open the Production work order details (PWOD) application. | ||||||||||||||||||||||||||||||||
Forwarded to |
| If a partial quantity of the initial Production work order (PWO) has been forwarded to stock, or split to a new Production work order (PWO), the new identifier will be displayed here. To open the "forwarded to" document (PWO/SSA), click the View icon to open the related application. Examples
| ||||||||||||||||||||||||||||||||
Info |
| Icons can potentially be displayed to inform the user on relevant information. Hover over the icon to displays detailed information.
| ||||||||||||||||||||||||||||||||
Product |
| The name and description of the product being produced which is defined in the Product (ART) application. Click the View icon to open the Product (ART) application. | ||||||||||||||||||||||||||||||||
Remaining quantity | If a quantity lower than the total quantity of the initial Production work order (PWO) was released, the remaining quantity of the products to produce is displayed here. NoteThis only applies to the initial Production work order (PWO). Released sub Production work orders (PWO) will display the quantity released to that sub Production work order (PWO), until production is completed. | |||||||||||||||||||||||||||||||||
Potential production quantity | Number of products possible to produce with the current stock. | |||||||||||||||||||||||||||||||||
Assignments |
| Displays the Inspect assignments icon. Click the Inspect assignments icon to open the Stock assignment registry (SARS) application to view and edit details. | ||||||||||||||||||||||||||||||||
Kit |
| Displays an icon indicating the type of the Product (ART). To open the Production structure (KITDOC) application to view details on the structure being produced, click the icon. | ||||||||||||||||||||||||||||||||
Revision | Displays the current Product (ART) revision in production. The revision will typically be a major change, as opposed to minor changes stored in the version of the Product structure (KITART). | |||||||||||||||||||||||||||||||||
Manufacturing area |
| Displays the Manufacturing area that the product is assigned to. The assigning is done in the Product (ART) application. To view which products are assigned to which Manufacturing areas (MAA), click the View icon to open the application. | ||||||||||||||||||||||||||||||||
Material delayed days | Displays information regarding the required materials of Operations (OPR) included in the Production work order (PWO). If the required materials have a confirmed delivery date earlier than the scheduled start date, a positive value will be displayed. If the required materials have a confirmed delivery date later than the scheduled start date, a negative value will be displayed. If the linked Purchase order (SPO) of the required materials are either pending purchase or unconfirmed, the Material delayed days column will be empty, as it is assumed that the delivery of materials will be as requested. | |||||||||||||||||||||||||||||||||
Available quantity | Displays the percentage which is not allocated, of the remaining quantity. | |||||||||||||||||||||||||||||||||
Planning category | Displays the planning category for the Product (ART). Planning categories are used to group different types of products. | |||||||||||||||||||||||||||||||||
Scheduled start at | The date on which the production is scheduled to start. | |||||||||||||||||||||||||||||||||
Requested completion date | The requested date of completion for the Production work order (PWO). | |||||||||||||||||||||||||||||||||
Confirmed completion date | The date on which completion of the production is confirmed. | |||||||||||||||||||||||||||||||||
Scheduled completion date | The date on which the production is scheduled to complete. | |||||||||||||||||||||||||||||||||
Confirmed delivery date | The confirmation date from the linked Sales order (COA). | |||||||||||||||||||||||||||||||||
Latest start at | The latest date by which production must start, to be able to meet the Scheduled completion date. | |||||||||||||||||||||||||||||||||
Customer | Displays the name of the customer (name of company or surname/familyname/lastname of a person). | |||||||||||||||||||||||||||||||||
Customer's reference number | Displays the Customer's (CUS) order reference. If the Production work order (PWO) is derived from a Sales order (COA), the customers order reference will be the same as in the Sales order COA). Usually used as a reference to an external system. | |||||||||||||||||||||||||||||||||
Finance project |
| If the Sales order (COA) is is linked to a Finance project (PRJ), this field will display the Finance project (PRJ) identifier. Click the View icon to open the Finance project (PRJ) application. | ||||||||||||||||||||||||||||||||
Delivery project | If the Production work order (PWO) is linked to a Delivery project (PRO), the name will be listed in this field. Click the View icon to open the Delivery project (PRO) application. The Delivery project (PRO) application is a useful application that binds together information from various sources to enhance cost and progress control. | |||||||||||||||||||||||||||||||||
Planner | Displays the name of the production planner. The planner is the one to oversee, release and split productions. The planner will also be notified on important actions taken by operators on Work order operations (WOO). | |||||||||||||||||||||||||||||||||
Production tasks | The Production tasks column displays all production tasks linked to the Work order operation (WOO). Each task is represented by an icon. These icons can be clicked to open the Task details (TASK) application to view and edit details. Note that all icons will also display the title. The user must therefore click the icon, and not the text to open the Task details (TASK) application. Production tasks icons
Active and Detached production tasksThe Production tasks tab includes two standard filters. Note that detached production tasks will be listed, but with strike-through if the Standard filter, Detached tasks is selected. In example: "Detached task".
When are production tasks potentially detached from a Production work order (PWO)?
NoteThe space in the Production tasks column is limited. Therefore only a limited number of tasks can be displayed, meaning others can be hidden. | |||||||||||||||||||||||||||||||||
Pre-production tasks | The Pre-production tasks column displays all pre-production tasks linked to the Work order operation (WOO). Each task is represented by an icon. These icons can be clicked to open the Task details (TASK) application to view and edit details. Pre-production tasks icons
NoteThe space in the Pre-production tasks column is limited. Therefore only a limited number of tasks can be displayed, meaning others can be hidden. | |||||||||||||||||||||||||||||||||
Scheduled production tasks |
The icon will be accompanied by a number. This number states the number of scheduled production tasks linked to the Work order operation (WOO). | |||||||||||||||||||||||||||||||||
Documentation |
| Click the Inspect document status overview icon to open the Manufacturing record book (MRB) application. The Manufacturing record book (MRB) application displays a graphical report and a document list of the required documents for the production. | ||||||||||||||||||||||||||||||||
| Click the View document requirements icon to open the Document requirements popup with the following options:
| |||||||||||||||||||||||||||||||||
Project leader | The name of the project leader. This value is inherited from the linked Sales order (COA) when creating a new Production work order (PWO). | |||||||||||||||||||||||||||||||||
Document controller | The name of the document controller. This value is inherited from the linked Sales order (COA) which triggered the creation of the Production work order (PWO). | |||||||||||||||||||||||||||||||||
Scheduled production jobs | The Scheduled production jobs column displays all Scheduled production jobs (SPJ)linked to the Production work order (PWO). Each icon represents a Scheduled production job (SPJ) associated with a specific production work order. Hover over the icons to view details such as job type and execution date. The icons are color-coded to indicate different statuses:
| |||||||||||||||||||||||||||||||||
| To open the Production work order (PWO) application, click the Right arrow icon. |


The Create new order button in the bottom left corner allows the user to create new Production work orders (PWO) for the selected product. Users may also add a Description and specify the Requested completion date and Quantity. Selecting the Create another checkbox will keep the popup open, to speed up the process of creating subsequent work orders.
To create a new Production work order (PWO) in Status 1 - Pending registration and open the Production work order (PWOD) application, click the +Create new order button.
In the following popup, the following options are available:
Product drop-down menu - Required
Description field
Location drop-down menu
Requested completion date field, and Calendar icon - Required
Quantity field with Increase/decrease icons
Manufacturing area drop-down menu
Create another checkbox
Create button
Close button
At a minimum select a Product and a Requested completion date.
To create a Production work order (PWO) in Status 1 - Pending registration and open the Production work order (PWO) application, click the Create button.
Result: The new Production work order (PWO) will be opened in the Production work order (PWOD) application.
Users can search for specific Production work orders (PWO), select a number of items and schedule an automatic run job to confirm and release:
Multiselect the relevant items by selecting their Status code icon to the right on each item, or all items on the page by selecting the checkbox at the top of the column.
Select Scheduled new production jobs from the Context menu.
Choose job type to schedule for selected objects:
Confirm production work orders. This option will confirm each item in Status 1 (Pending registration) for production if no other blockages are present.
Release production work orders. This option will release each item in Status 3 and 4 (Pending production) for production if no other blockages are present.
Release production work orders with sub-productions. This option will release each item and all their sub-productions in Status 3 and 4 (Pending production) for production if no other blockages are present.
Cancel production work order . This option performs cancel operation on Production work orders (PWO) selected as scheduled production job items in the Input tab.
Use additional options to Register the job immediately (default) and to schedule the job to be released As soon as possible or at a later time by specifying a Custom time.
Note
When no item is selected, it is possible to navigate directly to the Scheduled production jobs (SPJ) application via the Scheduled production jobs option in the Context menu.
Read more about the Scheduled production jobs (SPJ) application here.
The Production work order (PWOD) application is a hands-on planner tool for Production work orders (PWO).
The Production work order (PWOD) application was created for the planner to streamline and centralize all the required information to manage production from a single screen.
Navigate to the application
Option 1: RamBase menu→Production→Production→Production work orders, click the Production work order (PWO) and press ENTER.
Option 2: Click the Program field and type "PWO/ + Identifier" and press ENTER.
Example "PWO/123456
Option 3: From the Production planning (PRODPLAN) application→Productions tab, click link in Docid column.
Click here to read more about the user interface.

The Production work order (PWOD) application is divided into several areas. All areas, and their functions, are described in the sections below. Use the table of contents in the upper right corner to quickly navigate to the intended area or search for an intended phrase or word by pressing CTRL + F and then ENTER.

The Production area displays the base production information.
Field and checkboxes | Description |
|---|---|
Product name | The name of the product being produced which is derived from the Product (ART) application. Click the View icon to open the Product (ART) application. |
Description | The description of the product derived from the Product (ART) application. |
Manufacturing area | The Manufacturing area that the product is assigned to. The assigning is done in the Product (ART) application. From the Click on the Properties and then the Production sub-tab. Locate the Manufacturing area drop-down list. Read more about the Manufacturing areas here. |
Revision | Gives information about the current revision of the product. The revision number is derived from the Product (ART) application. If the produced Product (ART) revision differs from the ordered revision on Sales order (COA), a Warning icon will be displayed next to this field. |
Planner | The name of the production planner. The planner can be changed by clicking on Planner drop-down menu and selecting the intended planner from the list. The planner is the one to oversee, release and split productions. The planner will also be notified on important actions taken by operators on Work order operations (WOO). Read more about Work order operations here. |
Quantity | The initial product quantity of the Production work order (PWO). This is usually derived from a production need based on a Sales order (COA) or the Reorder point set in the Product (ART) application. |
Forwarded quantity | If the Production work order (PWO) was released from another Production work order (PWO), then the quantity of products released to the new Production work order (PWO) is displayed here. In example, a Production work order (PWO) with quantity 10 is created. The planner decides to release 5 Product units (LCM) for production. A new Production work order (PWO) is generated and will display the quantity of 5 in the Forwarded quantity field. |
Remaining quantity | If a quantity lower than the total quantity of the initial Production work order (PWO) was released, the remaining quantity of the products to produce is displayed here. Note that this only applies to the initial Production work order (PWO). Released sub Production work orders (PWO) will display the quantity released to that sub Production work order (PWO), until production is completed. |
Potential quantity | Number of Product units (LCM) possible to produce with the current stock. |
Location | Gives information about the location where the product is being produced. |
Price | The Production work order (PWO) price per produced Product unit (LCM). |
Is manufactured in batches | If selected, the production is in batches. If not selected, the production is in units. Batch production is a method whereby a group of identical products are produced simultaneously (rather than one at a time). |
Project leader | The name of the project leader. This value is inherited from the linked Sales order (COA) when creating a new Production work order (PWO). |
Document controller | The name of the document controller. This value is inherited from the linked Sales order (COA) which triggered the creation of the Production work order (PWO). |

The Dates area can be viewed in either Timeline view or Form view by selecting the corresponding icon in the top right corner of the Dates area.
Icon | Description |
|---|---|
| Timeline view - Lists the production timeline dates chronologically. Includes warning icons. |
| Form view - Lists the production timeline. The dates can be dragged and dropped, and also hidden by clicking the Hide date icon. |


The table below describes the functions and fields in the Timeline view.
Field | Description |
|---|---|
Registration | The date the Production work order (PWO) was created. |
Scheduled start date | The date on which the production is scheduled to start. If this date is after the Latest start date, a warning icon is displayed instead of the calendar icon. The warning icon is displayed only in the timeline view. For Production work orders in Status 4 (Pending scheduled production start), this field can be changed to a future date by clicking on the field and then clicking on the Calendar icon. |
Scheduled completion | The date on which the production is scheduled to complete. If this date is after the Requested completion date, a warning icon is given on the left. The warning icon is displayed only in the timeline view. For Production work orders in Status 4 (Pending scheduled production start) this field can be changed to a future date by clicking on the field and then clicking on the Calendar icon. |
Requested completion | The requested date of completion for the Production work order (PWO) derived from the initial Service order (CSO) or Sales order (COA). |
Latest start | The latest date by which production must start, to be able to complete by the Scheduled completion date. |
Confirmed completion date | The date on which completion of the production is confirmed. Clicking the Calendar icon will open a popup to set the Confirmed completion date. Clicking the Lock icon can either lock or unlock the Confirmed completion date. |
The table below describes the functions and fields in the Form view. These fields can be dragged and dropped, or even hidden by clicking the Hide date icon to the left of the intended field. To the right of the fields, in parenthesis, the year and week number is displayed (YYWN).
Field | Description |
|---|---|
Registration date | The date the Production work order (PWO) was created. |
Scheduled start state | Scheduled/planned date of Production work order (PWO) start. |
Scheduled completion date | Scheduled/planned date of Production work order (PWO) completion. |
Requested completion date | The requested date of completion for the Production work order (PWO) derived from the initial Service order (CSO) or Sales order (COA). |
Latest start at date | The latest date by which production must start, to be able to meet the Scheduled completion date. |
Confirmed delivery date | The confirmation date from the linked Sales order (COA) or Service order (CSO). |
Confirmed completion date | The date on which completion of the Production work order (PWO) is confirmed. Clicking the Calendar icon will open a popup to set the Confirmed completion date. Clicking the Lock icon can either lock or unlock the Confirmed completion date. |
Restore default fields | The Restore default fields button is displayed when hiding a field by clicking the Hide date icon. Clicking the Restore default fields button will show all hidden fields. |

The Material deliveries area displays information about the materials used in the Production work order (PWO) in a chart or list view. The chart view is shown as a pie chart, where green portion represents the material in stock. Unconfirmed material is given in red, material that is pending purchase is given in orange, and confirmed material is given in yellow.
Click a particular portion of the pie chart to open the Production work order assignments (PWOSARLINKS) application, where you can see the materials and their quantity. A warning label is displayed if the production has material shortage.
Rework can be done from the Production work order assignments (PWOSARLINKS) application
From the Production work order assignments (PWOSARLINKS) application, In the Actions column, the user can click the Rework icon to open the Rework popup.
An overview is displayed above the pie chart, detailing the number of materials and the outsourced operations in the production. The information displayed underneath the pie chart can be hidden by clicking the intended label. The displayed information is In stock, Confirmed, Unconfirmed and Pending purchase.
The list view displays all of this information in text form. There are separate sections for materials that are unconfirmed, confirmed, pending purchase, in stock or not in stock. Click on a label to open the Production work order assignments (PWOSARLINKS) application and view the links for that portion.
If there is a negative material trend, this will be noted by a blue flag at the lower part of the Material deliveries area.
A negative material trend implies that the required materials for the Production work order (PWO) are either Unconfirmed or Pending purchase.
Icon | Description |
|---|---|
| Will display the Material deliveries in the chart view. |
| Will display the Material deliveries in the list view. |


The Chart view fields are described in the table below:
Chart view | Description |
|---|---|
Material | The quantity of internal assigned to the Production work order (PWO) in the Production work order assignments (PWOSARLINKS). Includes materials in stock, confirmed and unconfirmed materials. |
Outsourced operations | The quantity of materials of type = WX (External work). |
Total | The total quantity of materials assigned to the Production work order (PWO) in the Production work order assignments (PWOSARLINKS), includes all types of materials. |
In stock | The quantity of materials in stock, also displayed in the pie chart with the color green. |
Confirmed | The quantity of materials with confirmed delivery dates, also displayed in the pie chart with the color yellow. |
Unconfirmed | The quantity of materials with unconfirmed delivery dates, displayed in the pie chart with red color. |
Pending purchase | The quantity of materials pending purchase, also displayed in the pie chart with the color orange. |
The List view field are described in the table below:
List view | Description |
|---|---|
Not in stock | Lists the quantity of materials that are not in stock. Also lists the quantity of outsourced operations, in example Products (ART) with type=WX (External work). Click the View icon to open the Production work order assignments (PWOSARLINKS). |
Pending purchase | Lists the quantity of materials pending purchase. Also lists the quantity of outsourced operations, in example Products (ART) with type = WX (External work). Click the View icon to open the Production work order assignments (PWOSARLINKS). |
Unconfirmed | Lists the quantity of materials that are linked to Purchase orders (SPO) with unconfirmed delivery dates or Production work orders (PWO) with unconfirmed completion dates. Click the View icon to open the Production work order assignments (PWOSARLINKS). |
Confirmed | Lists the quantity of materials that are linked to Production work orders (PWO) with confirmed completion dates or Purchase orders (SPO) with confirmed delivery dates. Click the View icon to open the Production work order assignments (PWOSARLINKS). |
In stock | Lists the quantity of materials in stock. Click the View icon to open the Production work order assignments (PWOSARLINKS) and view the linked Goods receptions (SSA). |

The actions area allows quick handling of the Production work order (PWO). The available actions are described in detail in the table below. The available actions are dependent on the status of the Production work order (PWO).
Button | Description. |
|---|---|
Confirm | Clicking the Confirm button will forward the Production work order (PWO) to Status 4 (Pending scheduled production start) if all materials are available. If all materials are not available, the Production work order (PWO) will be forwarded to Status 2 (Pending purchase or production). Or forwarded to Status 3 (Pending goods reception). As noted in the Material deliveries area. The action is available in:
|
Complete service | This action is available for Production work orders (PWO) which are forwarded from Service orders (CSO). Clicking the Complete service button will forward the Production work order (PWO) to Status 9 (Processed) |
(On) Hold on/off | A Production work order (PWO), or selected Work order operations can be put on hold. Read more about putting a Production work order (PWO) on hold here. |
Release | Clicking the Release button will open the Release production work order popup with the following fields and options:
The released Production work order (PWO) will be set to Status 5 (In production) and available for the operator in the Operators list of production work order operations (RWOO) application. Read more about the Operators list of production work order operations (RWOO) application here. The action is available in:
|
Split | Clicking the Split button will open the Split production work order popup with the following fields and options: There are two headers, one listing relevant dates and quantity for the source Production work order (PWO), and one listing relevant split dates and quantity for the potential new Production work order (PWO). PWO/######
Split to new production work order
Tabs
A split Production work order (PWO), will generate a new Production work order (PWO) with the selected quantity and will be set to Status 4 (Pending scheduled production start), if the required materials are in stock. The action is available in:
|
To goods reception | Click the To goods reception button to forward the Product units (LCM) to stock. Click the drop-down menu to select which Stock location (STL) to forward the goods to. The action is available in:
|

The Customer area displays general information regarding the customer and the Sales order (COA) that triggered the Production work order (PWO).
Fields | Description |
|---|---|
Customer name | Displays the name of the customer (name of company or surname/familyname/lastname of a person). To view the customer details, click the View icon to open the Customer (CUS) application. |
Sales order | Internal RamBase identifier of the Sales order (COA). Click the View icon to open the Sales order (COA) application. Click the Risk icon to open the related Risk list (RISK) application. |
Ordered product revision | Displays the revision information of the Product (ART), which was ordered by the Customer (CUS). A warning symbol will be displayed next to the Ordered product revision field if the ordered Product (ART) revision is different than the revision produced in the Production work order (PWO). A revision will typically be a major change, as opposed to minor changes stored in the version of the Product (ART) structure. |
Customers reference number | Displays the Customer's (CUS) order reference. If the Production work order (PWO) is derived from a Sales order (COA), the customers order reference will be the same as in the Sales order COA). Usually used as a reference to an external system. |
Finance project name | If the Sales order (COA) is is linked to a Finance project (PRJ), this field will display the Finance project (PRJ) identifier. To link the Production work order (PWO) to a Finance project (PRJ), click the Finance project lookup dropdown, and select one from the list. Click the View icon to open the Finance project (PRJ) application. Read more about the Finance project (PRJ) application. |
Sales delivery project name | If the Production work order (PWO) is linked to a Delivery project (PRO), the name will be listed in this field. Click the View icon to open the Delivery project (PRO) application. The Delivery project (PRO) application is a useful application that binds together information from various sources to enhance cost and progress control. Read more about the Delivery project (PRO) application here. |
Department name | If the Production work order (PWO) is linked to a Department (DEP), this field will display the Department (DEP) identifier. To view the Department (DEP) details, click the View icon to open the Department (DEP) application. To link the Production work order (PWO) to a Department (DEP), click the Department lookup dropdown menu and select one from the list. Read more about the Department (DEP) application. |

The Links area allows quick navigation to various related applications from the Production work order (PWO) application. The available links are listed in the table below.
Links | Description |
|---|---|
Structure | Click the Structure button to open the Production structure (KITDOC) application to view details about the specific structure being produced. Read more about kits and structures here. |
Cost | Click the Cost button to open a popup detailing the production cost. |
Pick | Click the Pick button to open the Pick (PICK) application. From the Pick list details (PICK) application the following options are available from the header:
|
Operations | Click the Operations button to open the Planned operations for production work order (PWOPLO) application where the planner can inspect and change planned operations for the Production work orders (PWO). Read more about the Planned operations for production work orders (PWOPLO) application here. |
Deliveries | Clicking the Deliveries button will open the report Deliveries to stock where the user can select different views including:
|
Assignments | Clicking the Assignments button will open the Stock assignment (SAR) for the Production work order (PWO). |
Worklog | Clicking the Worklog button will open the Production work order worklog (PWOWL) application. Which is used to log time on operations for a Production work order (PWO). Read more about the Production work order worklog (PWOWL) here. |
Tasks | Clicking the Tasks button will open the Tasks popup. Three tabs are available:
|

The Drawing, Drawing links and Custom fields area is used to display drawings and if added, Custom fields.
Tabs | Description |
|---|---|
Drawing | Displays Drawings added to the Product (ART) being produced by the Production work order (PWO). To quickly access the Product (ART) application, where the drawing is added, click the Structure button in the Links area. |
Drawing links | Displays the links to all added drawings from the Product (ART) structure. |
Custom fields | Enabled Custom fields will be available here. Read more here to learn how to add Custom fields (CUSTOMFIELDS). |
The Worklog summary area gives a summary of the time spent on various tasks in the production. The planned and actual times are given in the progress bars. The progress bars are colored green if the actual work time is less than the planned operation time, and it turns red if it exceeds the planned operation time.
The counted time is derived from work log elements from the Work order operations (WOO) application. Detailed information can be found by clicking the Worklog button in the Links area.
Read more here about how hourly rates are added to Resources (RESCONFIG).
User notifications gives various notifications to the users. You can add new messages by entering the message and pressing the ENTER key. You can also set a message as a priority. Select any message to edit or delete it.
Field/Icon name/Checkbox | Icon | Description |
|---|---|---|
Dotted line free-text field | Click on the line to input the intended message. Click on the Send icon to display the message in the User notifications area. | |
Information |
| Information icons. Click on the icon to open the Edit notification popup. The Edit notification popup
|
Important checkbox | Check the checkbox to mark the notification as important. A user notification with the Important checkbox checked will be marked with a red information icon. | |
Show on print checkbox | Checking the Show on print checkbox will add the added notification to all print documents related to the Production work order (PWO). | |
Send |
| Click on the Send icon to add the typed message to the User notification area. |


The System notifications area displays messages from the system to the users, such as the actions performed on the Production work order (PWO) by various users.
| All notable actions performed on the Production work order (PWO) will be time stamped with the user information and time, and displayed in the System notifications area. |
| Messages set on the in Product (ART) application, from the context menu, will be displayed with a warning icon. The message will be generated in the System notifications area when the Production work order (PWO) is created. |
The Product units and current work order operation area displays information on the related Work order operations (WOO) for triggered by the Production work order (PWO). The Product units (LCM) being produced in the Work order operation (WOO) are also detailed and listed.
Product units and current work order operation
Work order operation field - Displays the Work order operation (WOO) identifier. If the Production work order (PWO) or a Work order operation (WOO) is put on hold, the field will be colored red. Click on the View icon to access the Work order operation (WOO) application.
Operation - Displays the name of Production operation (OPR). Click the View icon to open the Production operation (OPR) application.
Resource activity plan - Displays the name of the production resource. Click on the View icon to open the Operators list of production work order operations (RWOO) application.
Production resource group - This field will be available if the operation is linked to a Production resource group (REGCONFIG). The field displays the name of the Production resource group (REGCONFIG). Click on the View icon to open the Distribute work order operations from resource group to member resources (DWOO) application to view the assigned Work order operations (WOO) to the member resources.
Column | Description |
|---|---|
Status | Displays the status of the Product unit (LCM). |
Product unit | Displays the identifier for the Product unit (LCM). Click on the View icon to open the Life cycle management (LCM) application. |
Serial number | Displays the unique serial number of the Product unit (LCM) being produced. |
Quantity | An informational field that displays the number of units being produced in that Product unit (LCM). For unit Production work orders (PWO) the quantity will always be 1, for each Product unit (LCM). For batch productions, if the Is manufactured in batches option is checked in the Production work order (PWO) application, the quantity column will be relevant as each line displays the quantity in the batch. |
Measures | Displays the various measurements being performed on the Product unit (LCM). Click on the items in the Measures column to inspect the intended Measurement (MSR) document. |
Information | Displays information if the Product unit (LCM) contains replaced traceable materials. |
Completed at | Displays the date and time the Product unit (LCM) was completed. |
| Click the radio button to open the Life cycle management (LCM) application where details of the Product unit (LCM) can be viewed and edited. |


The context menu is found in the upper right corner by clicking the Context menu icon. The tables below describes the different options categorized by sections. The available options in the context menu are dependent on the status the of Production work order (PWO), In other words, by the context of Production work order (PWO).
Actions and operations | Description | |||||||||||||||||||||||||||||||||||||||||||||||||||||
|---|---|---|---|---|---|---|---|---|---|---|---|---|---|---|---|---|---|---|---|---|---|---|---|---|---|---|---|---|---|---|---|---|---|---|---|---|---|---|---|---|---|---|---|---|---|---|---|---|---|---|---|---|---|---|
Adjust produced quantity (Batch) | Clicking the Adjust produced quantity (Batch) will open the corresponding popup where NetQty can be adjusted. Quantity can only be adjusted for completed batch Production work orders (PWO) in Status 8 (Completed). | |||||||||||||||||||||||||||||||||||||||||||||||||||||
Assign material to stock | Updates the Stock assignments (SAR) on the Production work order (PWO). Clicking this option will start the process of trying to link all required parts in the Production work order (PWO) to materials which are in stock. Available for Production work orders (PWO) in:
Optional usage of customer owned materialIf the settings, listed below, are set to 'ON', using the Assign material to stock option will also take into consideration material which are customer owned, if customer ownership matches the Production work order (PWO). Company and child settings Goods recepetions (SSA) which are customer owned will be prioritized when assigning to stock, over those which are not customer owned. | |||||||||||||||||||||||||||||||||||||||||||||||||||||
Assign (relink) material to backlog and stock | Updates the Stock assignments (SAR) on the Production work order (PWO). Clicking this option will start the process of trying to link all required parts in the Production work order (PWO) to materials which are in stock. If there are no free stock, RamBase will try to swap links with other documents. Available for Production work orders (PWO) in:
Optional usage of customer owned materialIf the settings, listed below, are set to 'ON', using the Assign (relink) material to backlog and stock option will also take into consideration material which are customer owned, if customer ownership matches the Production work order (PWO). Company and child settings Purchase orders (SPO) and Purchase order responses (SOA) which are customer owned will be prioritized for assigning to backlog and stock, over those which are not customer owned. | |||||||||||||||||||||||||||||||||||||||||||||||||||||
Assign serial numbers to LCM trace list | Assign serial numbers to LCM trace list is used in the Production work order details (PWOD) application to automatically assign serial numbers to parts listed in the Life Cycle Management (LCM) Part list, also referenced as the trace list. This function is designed for maintaining traceability of materials and components used in production, ensuring that parts can be tracked by its serial number throughout the product's lifecycle. WarningIs non-reversible. Rules
Optional assignment of serial numbersIf the settings, listed below, are set to 'ON', using the Assign serial numbers to LCM trace list option will allow the assignment of serial numbers to parts of class = P and M, as well as sub-kits in the Parts list in the Life cycle management (LCM) application. Company and child settings
Available for Production work orders (PWO) in:
| |||||||||||||||||||||||||||||||||||||||||||||||||||||
Block for purchase | If Production work order (PWO) is blocked for purchase, no Purchase quotes (SQU) or Purchase orders (SPO), with the Production work order (PWO) needs, can be registered as the needs will not be sent to Purchase (PUR). To revert, click the Release for purchase option in the context menu. | |||||||||||||||||||||||||||||||||||||||||||||||||||||
Cancel production work order | Selecting this option will cancel the Production work order (PWO) and set it in Status 9 (Processed). | |||||||||||||||||||||||||||||||||||||||||||||||||||||
Change priority | Click the Change priority option to either flag or unflag the Production work order (PWO) as high priority. The flag will be displayed in the upper right corner in the Production work order (PWO) application. The priority change will also be applied to related Work order operations (WOO) in the corresponding application. This is noted by a star icon in the Work order operation (WOO) application banner. | |||||||||||||||||||||||||||||||||||||||||||||||||||||
Compare with valid ART structure | When a Production work order (PWO) is created, the structure is copied from the Product (ART). Changes can be made to the copied structure and this option lets the planner compare the Product (ART) structure to the Production work order (PWO) structure. | |||||||||||||||||||||||||||||||||||||||||||||||||||||
Copy current structure to product | Clicking the Copy current structure to product will copy the current product structure, in the Production work order (PWO), to the Product (ART) structure. The new product structure will be available as a version in the KITART. To access the new structure, from the Product (ART) application, click on the Structure button. Click on the Kit details tab and then click on the Version drop-down menu. The new structure will be listed in Status 1 (Draft) and named Copied from active structure of PWO/####. | |||||||||||||||||||||||||||||||||||||||||||||||||||||
Copy version from ART | Selecting the Copy version from ART option will open a corresponding popup which will list all the versions of the Product (ART). Select the intended version and press ENTER. | |||||||||||||||||||||||||||||||||||||||||||||||||||||
Copy info from product structure (KIT) as a printable message | Selecting this option will allow for printable Product structure (KIT) notes. | |||||||||||||||||||||||||||||||||||||||||||||||||||||
Extract to external planning system | Extracts data to an external planning system. | |||||||||||||||||||||||||||||||||||||||||||||||||||||
Forward to stock by quantity | This function adds the option of forwarding the batch or units directly to stock, while production is ongoing. This can be useful if the units or batches are needed in the main production, especially for making large series of sub assemblies available in portions without having to split work orders manually. Read more about Continuous forward of Production work order (PWO) to stock here. | |||||||||||||||||||||||||||||||||||||||||||||||||||||
Forward to stock by selecting units | The Forward to stock by quantity function will select ascending LCMs equal to the number provided by the user. The LCMs will be moved to a new Production work order (PWO). This new Production work order (PWO) will be completed and forwarded to stock automatically. Read more about Continuous forward to Production work order (PWO) to stock here. | |||||||||||||||||||||||||||||||||||||||||||||||||||||
Increase quantity | Clicking the Increase quantity will open the corresponding popup with the following fields and buttons:
| |||||||||||||||||||||||||||||||||||||||||||||||||||||
Log operation time | Clicking the Log operation time option will open the Production work order details (PWOWL) application where the planner can get an overview over the worklog for the Work order operations (WOO). Read more about the Production work order details (PWOWL) application here. Available for Production work orders (PWO) in: Status 5 (In production)
| |||||||||||||||||||||||||||||||||||||||||||||||||||||
Lock production work order assignments | Select this option to lock all Stock assignments (SAR). | |||||||||||||||||||||||||||||||||||||||||||||||||||||
Multisplit | If there is more than one item to be produced, it is possible to use the Multisplit option to divide these Product units (LCM) into multiple, separate Production work orders (PWO). Clicking the Multisplit option will open the Split pwo (PSPLIT) application where the user can Create split by units and dates and Create split by work orders and units. | |||||||||||||||||||||||||||||||||||||||||||||||||||||
Lock to customer | If the Production work order (PWO) is forwarded from a Sales order (COA), in other words, a customer is set on the Production work order (COA), the Lock to customer option will lock the produced Product units (LCM) to the Customer (CUS), so only the specified Customer (CUS) has access to it. | |||||||||||||||||||||||||||||||||||||||||||||||||||||
Prioritize queued background processes | To set the priority for background processes related to the Production work order (PWO), select the Prioritize queued background processes option. The background process will then be executed as soon as possible. | |||||||||||||||||||||||||||||||||||||||||||||||||||||
Release for purchase | If Production work order (PWO) is blocked for purchase, no purchase quotes (SQU) or Purchase orders (SPO), with the Production work order (PWO) needs, can be registered as the needs will not be sent to Purchase (PUR). To revert, click the Release for purchase option in the context menu. Available for Production work orders (PWO) in:
| |||||||||||||||||||||||||||||||||||||||||||||||||||||
Recalculate cost | Recalculates the costs on the Production work order (PWO). | |||||||||||||||||||||||||||||||||||||||||||||||||||||
Remove project from all items | If the Production work order (PWO) is included in a project. This option will remove the project from all Production work order (PWO) | |||||||||||||||||||||||||||||||||||||||||||||||||||||
Scrap and release | Select this option to open the Scrap and release popup where split Production work orders (PWO) in Status 6 - In scrapping process can be handled. To start scrap and/or release of the Product unit's (LCM) parts, find the Context menu in the top right corner and click on the Scrap multiple product units option. From the Scrap multiple product units popup, select the Product unit (LCM) intended for scrapping and select the Scrap and release manually option. This will split the main Production work order (PWO) and create a new sub Production work orders (PWO) for the Product unit (LCM) with the parts intended for scrapping or releasing back to stock. The split Production work order (PWO) will be in Status 6 (In scrapping process) with the selected quantity. | |||||||||||||||||||||||||||||||||||||||||||||||||||||
Rework to other product | Click to a Product (ART) before performing rework. Only available for rework Production work orders (PWO) in Status 5 - In production. | |||||||||||||||||||||||||||||||||||||||||||||||||||||
Select customer and lock | If no Customer (CUS) is linked to the Production work order (PWO), clicking the Select customer and lock option will open a popup where the user can set a customer on the Production work order (PWO) by selecting from the list. The user can also lock the Production work order (PWO) to the Customer (CUS) by clicking the Lock to customer button. Locking the Customer (CUS) to the Production work order (PWO) will result in locking the linked Stock assignments to the Customer (CUS). | |||||||||||||||||||||||||||||||||||||||||||||||||||||
Set serial numbers on product units | Opens the Serial number scan (SNOSCAN) application where the user can set serial numbers on Product units (LCM). | |||||||||||||||||||||||||||||||||||||||||||||||||||||
Scrap multiple product units | This option is used to efficiently scrap multiple Product units (LCM) and/or release Production work orders (PWO) with quantity equal to, or higher than 1. Read more about scrapping multiple product units. Available for Production work orders (PWO) in:
Scrap multiple product units popup
| |||||||||||||||||||||||||||||||||||||||||||||||||||||
Synchronize planned operations | To start a manual recalculation of the Planned operations (PWOPLO) for the Production work order (PWO), select the Synchronize planned operations option. This is especially useful after modifying a Production resource's (RESCONFIG) capacity, by for example changing the Working time template (WTT). Available for Production work orders (PWO) in:
| |||||||||||||||||||||||||||||||||||||||||||||||||||||
Unassign (delink) material and block for purchase | To unassign (delink) material from the Production work order (PWO) and block for purchase, select this option. Consequences of using this option:
TipIf Production work order (PWO) is blocked for purchase, no purchase quotes (SQU) or Purchase orders (SPO), with the Production work order (PWO) needs, can be registered as the needs will not be sent to Purchase (PUR). To revert, click the Release for purchase option in the context menu. | |||||||||||||||||||||||||||||||||||||||||||||||||||||
Undo release of production work order | ||||||||||||||||||||||||||||||||||||||||||||||||||||||
Update department number on production work order | ||||||||||||||||||||||||||||||||||||||||||||||||||||||
Update project on all items | ||||||||||||||||||||||||||||||||||||||||||||||||||||||
Undo scrapping | Clicking the Undo scrapping option will set the Production work order (PWO) back to Status 5 (In production). Available for Production work orders (PWO) in:
Read more about the Scrap and release functionality here. LINK | |||||||||||||||||||||||||||||||||||||||||||||||||||||
Update serial number at product units (LCMs) | Clicking the Update serial number at product units (LCMs) option will open a corresponding popup with the following fields, checkboxes and buttons: Update serial number at product units (LCMs) popup
Available for Production work orders (PWO) in:
| |||||||||||||||||||||||||||||||||||||||||||||||||||||
Unlock production work order from customer | Clicking the Unlock production work order from customer option, removes the linking between the Production work order (PWO) and the Customer (CUS) and releases the lock on the product on the Stock assignment register (SAR) level. | |||||||||||||||||||||||||||||||||||||||||||||||||||||
View product units to scrap | From the Context menu, select the View product units to scrap to open the corresponding popup. From the View product units to scrap popup, left side list, select the Production work order (PWO) with the Product unit (LCM) containing parts intended for either scrap or release to stock. |


Inspect and views | Description |
|---|---|
Experience | Clicking the Experience option will open the Quality report archive menu - experience date report which displays previously added quality issues. |
Inspect production plan | Clicking the Inspect production plan option will open the Production planning (PRODPLANPART) application where the Production work orders (PWO) are displayed in a table with columns noting year and week numbers (YYWW) and rows for relevant statuses. |
Item account information | Clicking the Item account info option will open the Item account information popup where useful item account information can be viewed and edited, including Account, DepNo, VatCode. |
Measures | Clicking the Measures option will open the Measures menu (MSR) application where relevant measures are listed. |
Product marking specification | Clicking the Product marking specification will open a corresponding popup where the user can add product marking rules or templates for how Product units (LCM) should be marked. Roles that allow editing this input are usually Production managers and Production planners. The Roles with this permission can be viewed in the Permissions (PRM) application. Related Permissions (PRM):
Note that the Product marking specification input field is mirrored in the Production work order (PWO) and the Work order operations (WOO) applications. Meaning that changing one, will update the other. Available for Production work orders (PWO) in:
|
Production tree view | Clicking the Production tree view option will open the Production tree view (PWOTREE) application where the main Production work order (PWO) is listed with the subsequent Production work orders (PWO). |
Quality issues | Clicking the Quality issues option will open the corresponding popup where the user can view and create issues. |
Revision history | The Revision history popup will detail all changes done to the Production work order (PWO) and by whom. |
View document requirements | In the context menu, the View document requirements option is available. The Document requirements popup will display the current statuses of requirements that indicates if requirements have been met or not. If a requirement is met, it will have Status 8, meaning it has one or more documents connected to it. Connected documents will not be displayed in this popup, but they can be inspected in the Manufacturing record book (MRB) application. This Manufacturing record book (MRB) can be accessed via the Context menu by selecting the Document status overview (MRB) option. In the Document requirements popup footer there are three buttons:
|
View serial numbers | Clicking the View serial numbers option will open the corresponding popup where the user can view and edit serial numbers for the Product units (LCM) being produced. The user can update a single Product unit (LCM) or multiple. Setting a quantity and prefix can also be done. |
View workorder progress | Opens the Production workorder progress (PWOPROG) application where the user can view an overview detailing the all Work orders operations (WOO) including operation status, material status, quantity, time, material cost and total cost. |
View picking history | Opens a report detailing the Production work order (PWO) and the related Goods reception (SSA) item, Product (ART), the picked quantity and the Stock location (STL). Available for Production work orders (PWO) in:
|
Print/send | Description |
|---|---|
Document status overview (MRB) | This will open the Manufacturing record book (MRB) application. Where the user can view and document requirements and create the final Manufacturing record book (MRB). Read more about the Manufacturing record book (MRB) application here. |
Outgoing print/email | Opens the Output print/email popup containing the Correspondence tab and Advanced/technical tab. The user can view all correspondence and print jobs derived from the Production work order (PWO), including the technical jobs which have been triggered in the Production work order (PWO). |
Opens the Choose document to send/print popup allowing the user to choose which documents to print. The documents can be selected by pressing ENTER. Edit the intended document by clicking Pencil icon, or previewed by clicking the PDF icon. | |
Print product labels | Opens the Product labels popup where the user can decide where and what to print. To print, click the Print button. |
Print return-material-list | Selecting the Print return-material-list will print a list specifying which parts are to be returned to stock. Available for Production work orders (PWO) in:
|
Print unit sequence labels | Opens the Unit sequence labels popup where the user can decide where and what to print. Click the Print button when the intended choices have been made. |
The table below lists relevant Company settings (CSV) for Production work order (PWO) application. Note that the description mirrors the description used in the Company settings (CSV) application.
Setting | Child setting | Description |
|---|---|---|
Allow to assign serial numbers to parts | If enabled then this setting will allow to not only assign serial numbers to sub-kits in the LCM trace list, but also to parts. | |
Allow picking customer goods from restricted Stock Locations | If setting is ON: allows to pick customer goods from SSA (CLASS: CUSOWNED) if related PWO is for same customer. | |
Allow to pick from another goods reception (SSA) located at a production resource's (RES) restricted stock locations | If setting is 'ON' - Allow to pick from another goods reception (SSA) than production work order (PWO) has assignments from, as long as the goods are located at a stock location which is set up as a restricted stock location for the current production resource (RES). Swapping of assignments will then take place in the background. Will have no effect unless the setting ProductionWorkOrderAllowToPickFromAnotherGoodsReception is 'ON' | |
Allow to scan product id at pick of production work order | If setting is 'ON' - Allow to scan product id (IT number of format #123456) at pick of production work orders (PWO) in the SCANPICK application. Will have no effect unless setting ProductionWorkOrderAllowToPickFromAnotherGoodsReception is 'ON' | |
Allow releasing PWO in status 2 | If setting is 'ON', a Production work order (PWO) can be released before all parts are assigned. | |
Allow to pick from another goods reception (SSA) where pick is initialized | If setting is 'ON', -Allow to pick goods from another goods reception (SSA), even if this has assignments to other shipping advice (CSA), sales order (COA) or production work order (PWO) where picking is already initialized. The assignments will anyway be swapped in the background. Will have no effect if the accordingly setting for ProductionWorkOrderAllowToPickFromAnotherGoodsReception or ShippingAdviceAllowToPickFromAnotherGoodsReception is not 'ON' | |
Allow to pick production work order (PWO) from another goods reception (SSA) | If setting is 'ON' - Allow to pick production work order (PWO) from another goods reception (SSA) than what it has assignments from. The assignments will then be swapped in the background. Note that this setting has child settings. | |
Allow Update of USEDQTY in PWO KIT | Allow to add real used quantity in PWO KIT part lines, field USEDQTY. Will overrule planned used quantity. | |
Assignment Register (SAR) Optimization by special rules | If this setting is "ON", stock assignment optimization will be prioritized by special rules for the given locations. The child setting CSV/LocationsForOptimizationBySpecialRules must also be turned 'ON', and locations must be set up in this CSV. Note that this setting has child settings. | |
Assignment Register (SAR) Optimization by standard rules | This setting needs to be "ON" to run the scheduled batchjob 'Logistics: SAR: Optimize' for the company to run using standard rules. The job is optimizing the Assignment Register (SAR) links. In addition must also database and time be set up in Local Filters in SCV/63983. The child setting CSV/LocationsForOptimizationByStandardRules must also be turned 'ON', and locations must be set up in this CSV. For new Customers the setting can be 'OFF', -but could be turned 'ON' in agreement with the Customer after they have been explained the consequences. Note that this setting has child settings. | |
Assign serial numbers in ascending order enabled | If enabled, Assign serial numbers in ascending order operation is available on PWO. | |
Automatically split sub orders when splitting main Production Work Order (PWO) | If setting is 'On' - Sub orders are split according to the split done on the top level of the Production Work Order (PWO) | |
Block purchase on Production Work Orders (PWO) | If this setting is 'ON' -Default will be blocking on new Production Work Order (PWO) from purchase. Production Work Order item will contain value '1' in the field ISBLOCKEDFORPURCHASE. Text is also showing at Production Work Order. Use F12 - 'Release for purchase' to allow purchase to handle the Production Work Order. | |
Deactivate Info message - Production Work Order (PWO) has been delinked by | If this setting is "ON" - The document message is not activated. If the setting is "OFF" - The document message is activated for Production Work Order Item (PWO-ITM) | |
Deactivate Info message - Production Work Order (PWO) on hold off | If this setting is "ON" - The document message is not activated. If the setting is "OFF" - The document message is activated for Production Work Order Item (PWO-ITM) | |
Production Work Order (PWO) - Assign To Stock | If this setting is 'ON' - the users have the option to start a job that try to link all items in the production work order to stock. In case there is no free stock, the program will try to swap links with other documents. The job is started by the option Assign To Stock. | |
Reconfirm production work order (PWO) when sales order (COA) is reconfirmed | When confirmed date is updated in a sales order item (COA) with products of type "K" or "KA", the user will be asked to also update confirmed date in the assigned production work orders (PWO) | |
Related content for PWO | If this setting is On, LCMs are listed as related objects for production order PWO, and materials are listed under each LCM. If the setting is Off, materials will be listed directly under PWO. | |
Use Assignment Window for Production Work Order (PWO) | If both this setting and 'Margin for SalesLeadTime Assignment Window' is turned "ON", Production Work Orders will always get assignment from PENDING if LINKDELDATE in SAR is outside of the period given by SALESLEADTIME from ART plus the value from the setting 'Margin for SalesLeadTime Assignment Window'. The SAR optimize process will only re-assign production work orders inside of this window. In case several companies have common ART and SAR registers (Group Structure), 'Margin for SalesLeadTime Assignment Window' should only be set up for the company that is set up as OWNERDB, while 'Use Assignment Window for Production Order' should be set for each one of the sales databases. Read more about Goods assignments (SAR) and the standard and special rules. |
Note
Some settings have child settings which can be viewed by clicking the Show all child settings in the Company settings (CSV) application.
A production, or selected operations can be put on hold.
Putting a Production work order (PWO) on hold is done from the Production work order (PWOD) application.
NOTE: A PWO must be registered and confirmed for it to be put on hold.
To open the Production work order details (PWOD) application, find Production in the RamBase menu and then Production. Click Production Work Orders to enter the PWO application.

Double-click the desired PWO.
Navigate to the Actions area and click the On hold button.

To put the PWO on hold click the On hold. The date and time will be automatically set from the point the PWO was put on hold.

Note
All Work order operations (WOO) and their work log elements must be paused for a Production work order (PWO) to be put on hold. In other words, the Production work order (PWO) can not have any started operations which are not paused or completed.
You can also specify the following information:
On hold to - The PWO will be set on hold until the selected date and time.
Reason - Choose an optional reason from the Drop-down menu.
On hold reason - Add an optional description detailing why the PWO is put on hold.
The PWO is now set on hold, as noted in the top right corner.

A user can not split, nor change the priority or quantity of a Production work order (PWO) on hold while pending production.
While on hold:
Actions in the Actions and operations context menu are unavailable.

Linked actions in Work order operations (WOO) are unavailable.
To continue working on the order click the On hold off button in the Actions area.
To clear the on hold, state click the On hold off button.

NOTE: A Production work order (PWO) is automatically set on hold when:
An item structure is in the works for a Production work order (PWO).
There is scrapping in progress on the Production work order (PWO).
Putting a Work order operation (WOO) on hold is done from the Work order operation (WOO) application. The Work order operation (WOO) application is found in the Product units and current work order operation area by clicking the arrow next to the Work order operation field.
Start in the PWO application.
Select the desired PWO and navigate to the Product units and current work order operation area. Click on Work order operation.

Click the On hold button.

To put the Work order operation (WOO) on hold, click the On hold button. The date and time will be automatically set from the point the Work order operation (WOO) was put on hold.

You can also specify the following details:
On hold to - The WOO will be set on hold until the selected date and time.
Reason - Choose an optional reason from the Lookup menu.
Description - Add an optional description detailing why the PWO is put on hold.
Operator - If the operation uses the list for handling multiple operators, one of them may be selected to put the operation on hold. NOTE: If no operator is selected the currently logged user will be selected.
A user can not perform actions on a Work order operation (WOO) on hold. Including rescheduling of the operation. Users can check the on hold reason in:
Operators list of production work order operations (RWOO)
Planned operations for production work order (PWOPLO) - In the Links area

When manufacturing Product units (LCM) with complex structures (type = K or KA), the operator and planner need to be able to handle parts (type =P, C, K) that are broken and assess if they can be recovered. The scrap and release function is used to handle those situations.
A broken or partially broken Product unit (LCM), with parts that might be salvaged, is discovered in the production process. Scrap and release is initiated to either scrap or recover the affected parts. Scrap and release splits a sub Production work order (PWO) with the selected quantity, for the affected Product unit (LCM) in production, from the initial Production work order (PWO).

The Production work orders (PWO) can then be handled individually; normal production, scrap, or release back to stock.
The scrap and release process is initiated from the Context menu in the Production work order (PWO) application by selecting the Scrap multiple product units option to create sub Production work orders (PWO) in Status 6 - In scrapping process. The Scrap and release and View product structures to scrap options in the Context menu can then be used. The user will also be directly forwarded to the Scrap and release popup when the Scrap and release manually option is used.
The Scrap and release and View product structures to scrap popups are comprised of two areas:

Product units to scrap forwarded from PWO/##### - A list displaying Production work orders (PWO) containing a Product unit (LCM) in Status 6 (In scrapping) or Production work orders (PWO) that have completed scrapping in Status 9.
List of materials in PWO, scrapped unit s/n: SNO-#### - A list displaying parts in the selected Production work order (PWO).

The Product units to scrap forwarded from PWO/###### contains a search field with a corresponding Predefined filters icon.
The list can be filtered by clicking the Predefined filters and selecting the desired filters. The available filters are listed in the table below. Selected filters will be placed underneath the search field. Gray filters are deactivated. Orange filters are active.
Predefined filter | Function |
|---|---|
Active | Includes Production work orders (PWO) that are registered and not processed. Excludes Production work orders (PWO) in Status 1 and Status 9. |
In production | Includes Production work orders (PWO) in Status 5 (In production). |
In scrapping process | Includes Production work orders (PWO) in Status 6 (In scrapping process). |
Processed | Includes Production work orders (PWO) in Status 9 (Processed), meaning the production is completed and the goods are forwarded to Goods reception (SSA). |
Production completed | Includes Production work orders (PWO) in Status 8 (Production completed, pending forward to Goods reception (SSA). |
Pending goods reception | Includes Production work orders (PWO) in Status 3 (Pending goods reception). |
Pending scheduled production start | Includes Production work orders (PWO) in Status 4 (Pending scheduled production start). |
Pending purchase or production | Includes Production work orders (PWO) in Status 2 (Pending purchase or production). |
Pending registration | Includes Production work orders (PWO) in Status 1 (Pending registration). |
The PWO list also includes a Column settings icon which is used to select displayed columns, but also to Export list to Excel, Reset to Default View and Include custom fields. Click the Column settings icon and hover over the Columns option. Select the desired columns from the list. The available columns are described in the table below.
Column | Description |
|---|---|
Status | An icon indicating the status of the Production work order (PWO) |
Production work order | The identifier for the Production work order (PWO). |
Serial number | The serial number of the Product unit (LCM) being produced by the Production work order (PWO). |
Unit Id | The Product unit (LCM) document identifier. To view and edit details on the Product unit (LCM) from the Production work order (PWO) application and open the Product unit (LCM) application, click on the View icon in the Product unit column in the Product units and current work order operation area. |

The Scrap and release popup contains a list of materials where the user can efficiently handle the scrapping or releasing of parts.
This area will list all parts linked to the Production work order (PWO) in Status 6 containing the Product unit (LCM) to be scrapped. The following fields and functions are available:
Function or field | Result |
|---|---|
Scrap all parts button | Clicking the Scrap all parts button will set the released quantity of all the parts in the Production work order (PWO) to zero (0). Note the effects in the Release qty column. |
Release all parts button | Clicking the Release all parts button will set the release quantity of all parts in Production work order (PWO) to the total quantity of parts linked to the Production work order (PWO), the value of the Qty column. |
Change scrap location for all drop-down menu | Type the name for the intended location or click the Change scrap location for all drop-down menu to list all Locations (STL). The selection will apply to all parts and can be verified in the Scrap to drop-down menu. Clicking either the Predefined filters or Column settings icons will allow further customizing of the list and also display properties like Picking blocked and Linking blocked. |
Change release location for all drop-down menu | Type the name for the intended location or click the Change release location for all drop-down menu to list all Locations (STL). The selection will apply to all parts and can be verified in the Release to field in the part list, where the Stock location (STL) name will be displayed. Clicking either the Predefined filters or Column settings icons allows further customizing of the list and also display properties like Picking blocked and Linking blocked. |
Predefined filter icon | Clicking the Predefined filter icon will list all available filters. Selecting a filter will place it underneath the Enter your search criteria here field. Gray color equals inactive, orange color equals active. Descriptions of the predefined filters are available in the table below. |
Column settings icon | Clicking the Column settings icon gives the following options:
|
Scrap to drop-down menu | Type the name for the intended Stock location (STL) or click the Scrap to drop-down menu to list all Locations (STL), to specify where the part will be scrapped to. The selection will apply to the selected part. Clicking either the Predefined filters or Column settings icons will allow further customizing of the list and also display properties like Picking blocked and Linking blocked. |
Release qty field | The Release qty field can be used to decide the quantity being released to stock, but also the quantity being scrapped. When scrapping is started, the default value will be 0, meaning all parts will be scrapped to the selected location, if the Complete scrapping of PWO/#### button is clicked. If a part is to be salvaged, and the quantity of said part is 1, setting the Release qty to 1 will release that part back to stock. If 1 of 2 parts is to be salvaged, the quantity of the part being 2. Setting the Release qty to 1 will release 1 part back to stock and scrapping 1 part to the selected scrap location. |
Release to drop-down menu | Type the name for the intended Stock location (STL) or click the Scrap to drop-down menu to list all Locations (STL), to specify where the part will be released to. The selection will apply to the selected part. Clicking either the Predefined filters or Column settings icons will allow further customizing of the list and also display properties like Picking blocked and Linking blocked. |
Complete scrapping PWO/##### | Clicking the Complete scrapping of PWO/#### button will apply all the selections of quantity and locations made in the Scrap and release/View product units to scrap popup. To be a able to complete scrapping:
|
The Enter your search here field allows the user to search for specific parts. The scope of the search can also be specified by using the Predefined filters or from the Column settings.
Predefined filter | Description |
|---|---|
Confirmed | Includes parts with confirmed delivery date. |
Excluded Stock Assignments | Exclude parts with Stock assignments (SAR). |
In stock | Include parts that are in stock. |
Only Consumption Parts | Show only parts that are consumption parts, Type = C. |
Pending purchase | Show only parts in Purchase orders (SPO) pending Purchase order response (SOA) in Status 3. |
Unconfirmed | Show only Purchase order (SPO) items without confirmed delivery date. |
Columns | Description |
|---|---|
Part | Displays the part name set in the Product (ART) application. |
Type | Displays the part type, for example P (type = part), C (type = consumption part) etc. |
Op No | The sequence number of the operation the part designated to. Derived from the KITART application and set in the Product (ART) application via the Designer tab. |
Qty | Part quantity assigned to the Production work order (PWO). |
Scrap to | Contains the drop-down menu used to specify the Scrap to location. |
Release qty | Contains the field used to decide the quantity to be released to stock, or if set to 0 - scrapped. |
Release to | Contains the drop-down menu used to specify the Release to location. |
Linked to | Displays the Goods in (SSA) information of the part. |
To start scrap and/or release of the Product unit's (LCM) parts, find the Context menu in the top right corner and click on the Scrap multiple product units option. The procedure can be found here: Scrap multiple Product units (LCM).
This will split the main Production work order (PWO) and create a new sub Production work orders (PWO) for the Product unit (LCM) with the parts intended for scrapping or releasing back to stock. The split Production work order (PWO) will be in Status 6 (In scrapping process) with the selected quantity.
Undo scrapping - From the Production work order (PWO) in Status 6 (In scrapping), click on the Context menu and select the Undo scrapping option.
To undo the scrapping process, the split/sub Production work order (PWO) must still be in Status 6 (In scrapping).
The Production work order (PWO) will be returned to Status 5 (In production). But the Production work order (PWO) will still be split from the main Production work order (PWO).

Note
Main and sub Production work orders (PWO) are relative, meaning a sub Production work order (PWO), of the initial Production work order (PWO), can be the main Production work order (PWO) of another sub Production work order (PWO).
From a main Production work order (PWO) in Status 5 (In production) with a sub Production work order (PWO) in Status 6
From the Context menu, select the View product units to scrap to open the corresponding popup.
From the View product units to scrap popup, left side list, select the Production work order (PWO) with the Product unit (LCM) containing parts intended for either scrap or release to stock.
Continuing in the View product units to scrap popup, select the quantity for scrapping or releasing to stock:
Scrap quantity of the parts can be decided by either clicking the Scrap all button which will set the release quantity in the Release qty column to 0 for all parts. Or setting the individual part's scrap quantity by changing the Release qty drop-down menu to the intended quantity.
Release quantity of the parts can be decided by either clicking the Release all button which will set the release quantity, in the Release qty column, to the maximum quantity in the Qty column. Or setting the individual part's release quantity by changing the Release qty drop-down menu to the intended quantity.
Example 3. Example
If the total quantity of a part is 6 and the Release qty is set to 4. Then 4 of the parts will be released back to stock, and the remaining 2 will be scrapped to a selected scrap location.
Continuing in the View product units to scrap popup, select the intended quantity to verify the intended scrap or release locations.
If the selected part is to be scrapped to a specified location, verify the location in the Scrap to column by clicking the corresponding drop-down menu.
If all parts are to be scrapped to the same location, verify the location in the Change scrap location for all field in the header, by clicking the corresponding drop-down menu.
If the selected part is to be released back to stock to a specified location, verify the release location in the Release to column by clicking the corresponding drop-down menu.
If all parts are to be released back to stock to the same location, verify the location in the Change stock location for all field in the header, by clicking the corresponding drop-down menu.
Click the Complete scrapping of PWO/###### button to complete scrapping and releasing the intended quantity to the intended locations.
Note
While the scrap and release process is ongoing, the user can continue with other tasks. The process will work continue to work in the background.
From the sub/split Production work order (PWO) in Status 6 (In scrapping process)
From the Context menu, select the Scrap and release to open the corresponding popup.
From the Scrap and release popup, left side list, select the Production work order (PWO) with the Product unit (LCM) containing parts intended for either scrap or release to stock.
Continuing in the Scrap and release popup, select the quantity for scrapping or releasing to stock:
Scrap quantity of the parts can be decided by either clicking the Scrap all button which will set the release quantity in the Release qty column to 0 for all parts. Or setting the individual part's scrap quantity by changing the Release qty drop-down menu to the intended quantity.
Release quantity of the parts can be decided by either clicking the Release all button which will set the release quantity, in the Release qty column, to the maximum quantity in the Qty column. Or setting the individual part's release quantity by changing the Release qty drop-down menu to the intended quantity.
Example 4. Example
If the total quantity of a part is 6 and the Release qty is set to 4. Then 4 of the part will be released back to stock, and the remaining 2 will be scrapped to a selected scrap location.
Continuing in the View product units to scrap popup, select the intended quantity to verify the intended scrap or release locations.
If the selected part is to be scrapped to a specified location, verify the location in the Scrap to column by clicking the corresponding drop-down menu.
If all parts are to be scrapped to the same location, verify the location in the Change scrap location for all field in the header, by clicking the corresponding drop-down menu.
If the selected part is to be released back to stock to a specified location, verify the release location in the Release to column by clicking the corresponding drop-down menu.
If all parts are to be released back to stock to the same location, verify the location in the Change stock location for all field in the header, by clicking the corresponding drop-down menu.
Click the Complete scrapping of PWO/###### button to complete scrapping and releasing the intended quantity to the intended locations.
Note
While the scrap and release process is ongoing, the user can continue with other tasks. The process will continue to work in the background.
When manufacturing Product units (LCM) with complex structures (type = K or KA), the operator and planner need to be able to handle parts (type =P, C, K) that are broken and assess if they can be recovered. The scrap and release function is used to handle those situations.
Procedures:
A. Scrap and/or release Product units (LCM) of a unit production
B. Scrap and/or release Product units (LCM) of a batch production - Includes splitting of Product unit (LCM) quantity
C. Scrap and/or release multiple Product units (LCM) of a unit or a batch production manually - Includes splitting of Product unit (LCM) quantity
A. Scrap and/or release Product units (LCM) of a unit production
Navigate to the Production work order (PWO) with the Product unit(s) (LCM) to be scrapped or released.
From the RamBase menu, select Production, then Production again and finally the Production work orders option.
In the Production work orders (PWOMENU) application, select or search for the Production work order (PWO) where scrap or release are to be initiated.
Note
Only available for Production work order (PWO) in Status 5 - In Production and Status 8 - Production completed.

When selected, press ENTER or click the Right arrow icon to open the Production work order (PWO) application.
Start scrapping multiple product units
To open the Scrap multiple product units popup in the Production work order (PWO) application, click the Context menu(1) and then select the Scrap multiple product units(2) option.

In the Scrap multiple product units popup, select the Product unit(s) (LCM) to be scrapped or released by clicking on the Status icon. To select all, click on the Checkbox at the header of the list.
Note that the quantity selected is represented in both the Selected quantity field and on the Scrap/Release buttons.

Select a Scrap location and/or Release location.
To scrap the selected quantity of Product units (LCM), click the Scrap button.
Note
The function scraps all parts from selected units. Parts will be moved to the selected Scrap location. A Stock correction (SAW) will then be made.
or
To release the selected quantity of Product units (LCM), click the Release button.
Note
The function extracts all parts from the selected Product units (LCM). The parts will be moved to the default Release location or the one selected in the drop-down menu.
The scrapped or released Product unit(s) (LCM) will be forwarded to the selected location(s).
B. Scrap and/or release Product units (LCM) of a batch production
Navigate to the Production work order (PWO) with the Product unit(s) (LCM) to be scrapped or released.
From the RamBase menu, select Production, then Production again and finally the Production work orders option.
In the Production work orders (PWOMENU) application, select or search for the Production work order (PWO) where scrap or release are to be initiated.
Note
Only available for Production work order (PWO) in Status 5 - In Production and Status 8 - Production completed.
When selected, press ENTER or click the Right arrow icon to open the Production work order (PWO) application.
Start scrapping multiple product units
To open the Scrap multiple product units popup in the Production work order (PWO) application, click the Context menu (1) and then select the Scrap multiple product units(2) option.
For batch productions, Product units (LCM) with quantity higher than 1 can be split.
Tip
Enabling the Quantity column is especially helpful when handling batch productions in distinguishing between different Product units (LCM).
To open the Split LCM popup, click the Split product unit icon.

Type the quantity to be split in the Split Qty(2) field.
Note
The Batch quantity(1) field is useful in noting the the total batch quantity which can be split.

To confirm the split, click the Split button.
In the Scrap multiple product units popup, select the Product units (LCM) to be scrapped by clicking on the Status icon. To select all, click on the Checkbox at the header of the list.
Note that the quantity selected is represented in both the Selected quantity field and on the Scrap/Release buttons.

Select a Scrap location and/or Release location.
To scrap the selected quantity of Product units (LCM), click the Scrap button.
To release the selected quantity of Product units (LCM), click the Release button.
The scrapped or released Product unit(s) (LCM) will be forwarded to the selected location(s).
Scrap and/or release multiple Product units (LCM) manually
Navigate to the Production work order (PWO) with the Product unit(s) (LCM) to be scrapped or released manually.
From the RamBase menu, select Production, then Production again and finally the Production work orders option.
In the Production work orders (PWOMENU) application, select or search for the Production work order (PWO) where scrap or release are to be initiated.
Note
Only available for Production work order (PWO) in Status 5 - In Production and Status 8 - Production completed.
When selected, press ENTER or click the Right arrow icon to open the Production work order (PWO) application.
Start scrapping multiple product units manually
To open the Scrap multiple product units popup in the Production work order (PWO) application, click the Context menu(1) and then select the Scrap multiple product units(2) option.
In the Scrap multiple product units popup, select the Product unit(s) (LCM) to be scrapped or released by clicking on the Status icon. To select all, click on the Checkbox at the header of the list.
Note that the quantity selected is represented in both the Selected quantity field and on the Scrap and release manually button.
Note
The quantity of batch Product units (LCM) can be split with the Split LCM icon in the Split product unit column.

Select a Scrap location and/or Release location.
To split the main Production work order (PWO) and create a new sub Production work order (PWO) for the Product units (LCM), click the Scrap and release manually button.
The split Production work order (PWO) will be set in Status 6 - In scrapping process, with the quantity equal to the selected Product units (LCM).
The user will be sent to the Scrap and release popup where final handling of the potential scrapped and/or released Product units (LCM) can be finalized.
Read more about scrap and release here.
From the Scrap and release popup, left side list, select the Production work order (PWO) with the Product unit (LCM) containing parts intended for either scrap or release to stock.
Continuing in the Scrap and release popup, select the quantity for scrapping or releasing to stock:
Scrap quantity of the parts can be decided by either clicking the Scrap all button which will set the release quantity in the Release qty column to 0 for all parts. Or setting the individual part's scrap quantity by changing the Release qty drop-down menu to the intended quantity.
Release quantity of the parts can be decided by either clicking the Release all button which will set the release quantity, in the Release qty column, to the maximum quantity in the Qty column. Or setting the individual part's release quantity by changing the Release qty drop-down menu to the intended quantity.
Example 5. Example
If the total quantity of a part is 6 and the Release qty is set to 4. Then 4 of the part will be released back to stock, and the remaining 2 will be scrapped to a selected scrap location.
Continuing in the View product units to scrap popup, select the intended quantity to verify the intended scrap or release locations.
If the selected part is to be scrapped to a specified location, verify the location in the Scrap to column by clicking the corresponding drop-down menu.
If all parts are to be scrapped to the same location, verify the location in the Change scrap location for all field in the header, by clicking the corresponding drop-down menu.
If the selected part is to be released back to stock to a specified location, verify the release location in the Release to column by clicking the corresponding drop-down menu.
If all parts are to be released back to stock to the same location, verify the location in the Change stock location for all field in the header, by clicking the corresponding drop-down menu.
Click the Complete scrapping of PWO/###### button to complete scrapping and releasing the intended quantity to the intended locations.
Note
While the scrap and release process is ongoing, the user can continue with other tasks. The process will continue to work in the background.
The scrapped or released Product unit(s) (LCM) will be forwarded to the selected location(s).
The Inspect subproductions (PWOTREE) application is an overview application for Production work orders (PWO) with subproductions. The application grants overview by displaying the subproductions in relation to a main Production work order (PWO). This is done by giving each Production work order (PWO) a level.
Contains information regarding the main Production work order (PWO). It can also include information on the Sales order (COA) it is linked to, and even the Goods reception item (SSAITEM), if a completed Production work order (PWO) has been forwarded to one.
The Header information is from the Production work order (PWO) and Sales order (COA) applications.
Read more about the Sales order (COA) application here.
Read more about the Production work order (PWO) application here.
Icon | Description |
|---|---|
| Click the View icons in the Header to open the Production work order (PWO), Sales order (COA) or Goods reception item (SSAITEM). |
PWO/######
Product name
Planner
Registration
Manufacturing area
Product revision
Scheduled start
Scheduled completion
Estimated start
Requested completion
Confirmed completion
If the Production work order (PWO) is triggered by a Sales order (COA), a gray area will display the following information:
COA/######
Registration date
Customer
Location
Assignee
Customer reference number
Delivery project
Project leader
A Production work order (PWO) will be listed here with level 0. This is the main Production work order (PWO). The subproductions will be listed below. Note the Level column which displays the level of the subproduction in relation to the main Production work order (PWO)
Column | Icons | Description |
|---|---|---|
Element |
| Displays the status and identifier of the Production work order (PWO). |
Level | Displays the level of the Production work order (PWO) in relation to the initial Production work order (PWO). In example, a Sales order (COA) triggers a Production work order (PWO). Which also requires additional Parts (KIT) with class K or class KA. These requirements will become subproductions, which can also have their own requirements. triggering new subproductions. Level 0 - The initial Production work order (PWO) Level 1 - Subproduction 1 Level 2 - Subproduction 2 | |
Part | The name of the product being produced which is derived from the Product (ART) application. Click the View icon to open the Product (ART) application. | |
Revision | Gives information about the current revision of the product. The revision number is derived from the Product (ART) application. | |
Remaining quantity | If a quantity lower than the total quantity of the Production work order (PWO) was released, the remaining quantity of the products to produce is displayed here. | |
Inspect |
| Displays the Inspect assignments icon. Click the Inspect assignments icon to open the Stock assignment registry (SARS) application to view and edit details. |
| Displays the Show production plan icon. Click the Show production plan to open the Planned operations for production work order (PWOPLO) application, which allows inspection and change of planned operations for the Production work orders (PWO). | |
Latest start at | The latest date by which production must start, to be able to meet the Scheduled completion date. | |
Scheduled start at | Scheduled/planned date of Production work order (PWO) start. | |
Scheduled completion date | Scheduled/planned date of Production work order (PWO) completion. | |
Confirmed completion date | The confirmation date from the linked Sales order (COA) or Service order (CSO). | |
Material delayed days | Displays information regarding the required materials of Operations (OPR) included in the Production work order (PWO). If the required materials have a confirmed delivery date earlier than the scheduled start date, a positive value will be displayed. If the required materials have a confirmed delivery date later than the scheduled start date, a negative value will be displayed. If the linked Purchase order (SPO) of the required materials are either pending purchase or unconfirmed, the Material delayed days column will be empty, as it is assumed that the delivery of materials will be as requested. |


This function adds the option of forwarding the batch or units directly to stock, while production is ongoing. This can be useful if the units or batches are needed in the main production, especially for making large series of sub assemblies available in portions without having to split work orders manually.
Enable the setting AllowContinuousWorkOrderDeliveryToStock from the Company settings (CSV)

From the RamBase menu Select Admin, click Overview and then Settings.
Click on the Company settings button and from the Modules list select Production.
Navigate to the setting AllowContinuousWorkOrderDeliveryToStock and enable it.
Value = 1 (ON) - Enables the new Production work order (PWO) functions Forward to stock by quantity and Forward to stock by selecting units(LCM's).
Permissions for the functions are in the Permissions (PRM) application with the permission name ForwardProductionWorkOrderToGoodsReceptionItem (PRM/101545).
The functions are available for Production work orders (PWOs) with Status 5 (In production).
Forward to stock by quantity
Start in the Production work order (PWO) application and select the intended Production work order, or navigate to the lower left corner and click the Create new icon to create a new Production work order(PWO).
From the Production work order (PWOD) application, the enabled function Forward to stock by quantity is available from the context menu.
Select Forward to stock by quantity.
Specify the quantity to be forwarded to stock and click the Forward to Stock button.
The user can additionally specify Stock location (STL) for the Goods Reception (SSA). The function will automatically split the batch LCM according to specified quantity.
Clarification on selecting by quantity
Batch productions
The Forward to stock by quantity function will not work if the PWO already has more than one LCM for batch productions. The error message “Illegal Operation: Use function Forward to stock by Units, when LCM has been split.” will be displayed.
If all LCMs but one is forwarded to stock on a batch production, the option to forward to quantity will be available again. If this requirement is not met, it is still possible to Forward to stock by selecting units (LCM).
Unit productions
The Forward to stock by quantity function will select ascending LCMs equal to the number provided by the user. The LCMs will be moved to a new Production work order (PWO). This new Production work order (PWO) will be completed and forwarded to stock automatically.
Forward to stock by selecting units (LCM's)
Start in the Production work order (PWO) application and select or create the intended PWO.
From the Production work order (PWOD) application, the enabled function Forward to stock by selecting units (LCMs) is available from the context menu.
Select Forward to stock by selecting units(LCMs).
Select which units (LCMs) that are to be forwarded to stock. The quantity that will be forwarded to stock is the sum of the quantity for the selected units.
The user can additionally specify Stock location (STL) for the Goods Reception (SSA).
Criteria
Pick the necessary amount of parts and materials for the intended split quantity to be completed.
A minimum of one started or closed work log element for all the operations of the PWO.
The selected quantity must be less than the net item quantity.
All checkpoints in the Work order operation (WOO) are checked.
Note
If these criteria are not met an error message with a descriptive explanation will appear.
Accessing the Work order operations (WOO) application is done from the Production work order (PWO) application.
Navigate to the application
Option 1
To open the Production work order (PWO) application, find Production in the RamBase menu and then Production.
Click Production work orders to open the Production work orders (PWOMENU) application.
From the listed Production work orders (PWOMENU), click the intended Production work order (PWO) and press ENTER.
This opens the Production work order (PWO) application for the selected Production work order (PWO). Click on the View icon next to the Work order operations field to open the Work order operations (WOO) application.
The Work order operations field is found in the lower right corner in the Product units and current work order operation area.
Option 2: Click the Program field and type "WOO/ + Identifier" and press ENTER.
Example "WOO/123456"
Click here to read more about the user interface.
The Work order operations (WOO) application is used by the production personnel to monitor and interact with planned Production work orders (PWO). It is optimized for easy viewing.

The application is divided into two main areas, the work space on the left side and the details on the right side. Click and drag the Handle icon in between the two areas to resize the areas.
The work space includes informational fields, checkboxes and buttons used in the Work order operations (WOO). Version and operation notes are available in the lower part of the application. At the bottom the previous, current and future Work order operations (WOO) are displayed in a carousel. If there are multiple operations, the current operation is highlighted and centered and the arrows are used to scroll through preceding and following Work order operations (WOO).
Additional icons are placed on the operations buttons in the carousel, if the operation has one of the following statuses; high priority, on hold or paused.
The table below describes the fields and checkboxes available in the work space.
Fields and checkboxes | Description |
|---|---|
Production work order | An informational field that provides the name of the Production work order (PWO). To view details and open the Production work order (PWO) application, click the related View details icon. |
Product name | An informational field that provides the name of the Product (ART) being produced by the Work order operation (WOO). To view details and open the Product (ART) application, click the related View details icon. |
Product revision | An informational field that provides the number of the revision being produced. |
Product description | An informational field that provides the description related to the Product (ART) in production. Click here to read more about the Product (ART) application. |
Quantity | An informational field that provides the quantity being produced by Work order operations (WOO). |
Production resource | An informational field that provides the resource name assigned to this operation, where Product units received column may be activated and that it will display the progress of picking for external goods for each operation performed by this resource. To view details and open the Resource work order operations (RWOO) application, click the related View details icon. The details will include a list with all associated Work order operations (WOO) for this resource. Click here to read more about the Resource work order operations (RWOO) application. The user can also flag the Production resource (RESCONFIG) by clicking the Set production resource condition icon which will open the corresponding popup. This can be used to flag Production resources (RESCONFIG) for maintenance or inform the planner that the machine has stopped. Setting the resource condition will only visually flag, and not limit any functions of Production resource (RESCONFIG). Read more about the Set production resource condition in the section below. |
Operation | An informational field that provides the operation associated with the production resource. To view details and open the Production operation (OPR) application, click the related View details icon. Click here to read more about the Production operations (OPR) application. |
Customer reference number | An informational field that provides the customer's order reference, if the Production work order (PWO) is derived from a Sales order (COA). Typically a reference to an external system. |
Run group | An informational field that provides the group name of the Work order operation (WOO), if the Work order operation (WOO) is set to run with several other Work order operations (WOO). To view details and open the Group work order operations (GWOO) application, click the related View details icon. Click here to read more about the Group work order operations (GWOO). |
Service product unit | An informational field that provides the serial number of Product (ART), if the Production work order (PWO) is a service. To view details and open the Product unit (LCM) application, click the related View details icon. |
Operation on hold reason | An informational field that provides the reason for why a Work order operation (WOO) has been put on hold. The value is derived from the selected option in the drop-down menu Reason. The drop-down menu is available by clicking the On hold button in the Work order operations (WOO) application. The field is mirrored in the Production work order (PWO) application informing the planner that a started Work order operation (WOO) is on hold. |
Operation on hold description | An informational field that provides an additional description for why a Work order operation (WOO) has been put on hold. The value is derived from the On hold reason free-text field. The free-text field is available by clicking the On hold button in the Work order operations (WOO) application. The field is mirrored in the Production work order (PWO) application informing the planner that a started Work order operation (WOO) is on hold. |
Operation on hold to | An informational field that provides the date and time of when the operation will be available for production after being put on hold. The values are set in the On hold to field when clicking on the On hold button. The field is mirrored in the Production work order (PWO) application and is used to inform the production planner. |
Has priority | Checking this box sets a star icon in the colored band in the top left area of application indicating that the current Work order operation (WOO) has been prioritized. |
Work order on hold reason | An informational field that provides the reason for why a Work order operation (WOO) has been put on hold and by whom, either by the company or customer. The value is derived from the selected option in the drop-down menu Reason. The drop-down menu is available by clicking the On hold button in the Work order operation (WOO) application. The field is mirrored in the Production work order (PWO) application. The field is used to inform the planner or other operators why a started Work order operation (WOO) is on hold. The Work order on hold reason field will colored red, if the Work order operation (WOO) is put on hold. |
Work order on hold description | An informational field that provides an additional description for why a Work order operation (WOO) has been put on hold. The value is derived from the On hold reason free-text field. The free-text field is available by clicking the On hold button in the Production work order (PWO) application. The field is mirrored in the Production work order (PWO) application. The field is used to inform the resource why a started Work order operation (WOO) is on hold. |
Work order on hold to | An informational field that provides the date and time of when the work order operation will be available for production after being put on hold. The values are set in the On hold to field when clicking on the On hold button in the Production work order (PWO) application. The field is mirrored in the Production work order (PWO) application. The field is used to inform the resource. |
Previous operation product placement | An informational field that provides the location of Product (ART) during the previous operation. Examples are on a specific machine or in a production area. |
Product placement | An input field that can be used to provide the present location of the Product (ART). |
Operator | A drop-down menu where the current operator can be selected. This drop-down menu will only be available for Work order operations (WOO) where the Production resource (RESCONFIG) assigned is set to Allow multi operator. This is set in the Production resource (RESCONFIG) application, in the Settings area by selecting the Allow multi operator checkbox. When an operator is selected and the Work order operation (WOO) is started, an work log element starts counting worked time. If several operators have work log elements in Status 5 (Active), the Work order operation (WOO) can not be completed. The Operator drop-down menu will display date and time in the Work started at column, indicating that the work log element is started. All operators must pause their Work order operations (WOO) to allow completion of the Work order operation (WOO). |
Checkpoint | An informational field listing a checkpoint action, i.e. quality control. The Checkpoint field is related to the Approve button. If the actions taken in Work order operation (WOO) have met the requirements of the Checkpoint text, click the Approve button. The field is derived from the Production operation (OPR) application in the Settings area. Read more about the Production operations (OPR) application here. |
Version note | Displays the note attached to the version created in the Product (ART) by clicking the Structure button in the Production work order (PWO) application and opening the KITDOC application. Notes can be added to a version by clicking the Add info icon, next to the Version field, in the KITDOC application. To improve readability of the content, click the Open note in popup icon icon, at the top right corner of the Note area. |
Operation note | Displays the note attached to the operation added to the structure in the Product (ART) application. From the Production work order (PWO) application, by clicking the Structure button will open the KITDOC application. Operation note can be added to a version by clicking the Inspect info icon next to the listed operation. To improve readability of the content, click the Open note in popup icon icon, at the top right corner of the Note area. |
Note | An editable field where the operators can add and exchange relevant notes related to the current operation. The user can type directly into the Note area or open the Note popup. To improve readability of the content, click the Open note in popup icon icon, at the top right corner of the Note area. After adding intended input, click the Save and close button to save the changes. |
The user can flag the condition of the Production resources (RESCONFIG) by clicking the Set production resource condition icon next to the Production resource field, which will open the corresponding popup.

This can be used to flag Production resources (RESCONFIG) for maintenance or inform the planner that the machine has stopped. Setting the resource condition will only visually flag, and not limit any functions of the Production resource (RESCONFIG).
Fields/buttons | Description |
|---|---|
Production resource field | An informational field displaying the name of the Production resource (RESCONFIG). The name is set when creating a new resource in the Production resources (RESCONFIG). Read more about Production resources (RESCONFIG) here. |
Condition buttons |
|
The set resource condition will be displayed, with an icon or a banner with the optional note, in the following applications:
Distribute work order operations from resource group to member resources (DWOO) application - An icon in the Member resources area, in the Name column.
List of work order operations for production resource category (RECWOO) application - As an icon in the Resource column.
Operators list of production work order operations (RWOO) application - As a banner in the header.
Production resources (RESCONFIG) application - As a banner in the Production resource details area.
Production resource capacity and load overview (RCL) application - As an icon in the Name column.
The table below describes the functions in the work space.
Functions/Buttons | Description |
|---|---|
Material assignments | The Material assignments button is used to open the linked Production work order assignments (PWOSARLINKS) application. The Production work order assignments (PWOSARLINKS) application details the assigned links between the Production work order (PWO) and the stock or supplier backlog. |
PWO quality reports (#) | The PWO quality reports (#) button opens the Quality report archive (QAR) application. The Quality Assurance Report archive (QAR) contains reports on quality deviations and actions taken to improve the overall productivity and service quality. |
Product quality reports (#) | The Product quality reports (#) button opens the Quality report archive (QAR) application. The Quality Assurance Report archive (QAR) contains reports on quality deviations and actions taken to improve the overall production quality. Read more about the Quality report archive (QAR) here. The Quality report archive menu (QAR) - experience data provides information on whether a Quality report (QAR) has previously been created for the specific Product (ART). |
External work logistics | The External work logistics button opens the External work logistics (EXTWORKINFO) application. The External work logistics (EXTWORKINFO) application shows all the purchase and logistics details for the Operation (OPR), the Purchase Order (SPO), Supplier returns (SRT), the received quantity and information about the previous and next Operations (OPR) and the scheduled dates for those Operations (OPR). Read more about External work operation handling and logistics here. |
Set ready | The Set ready button is used when external work is involved in the Work order operation (WOO). When the external work has been completed, click the Set ready button. Read more about external work here. |
Pause | Clicking the Pause button will momentarily stop the Work order operation (WOO), including stopping counting of work time. This function is useful in case of machine breakdown or pending other unforeseen event or even a break. |
Start | Clicking the Start button will set the Work order operation (WOO) from Status 3 (ready to start) to Status 5 (Processing). The following functions will be available:
The work time will also start counting as evident in the Work time area in the lower right corner. |
Continue | Clicking the Continue button will continue the counting of work time and allow the same actions as starting the Work order operation (WOO). |
Complete | Clicking the Complete button will set the Work order operation (WOO) in Status 9 (Completed). The following functions will be available:
|
On hold | Clicking the On hold button will halt the Work order operation (WOO) and notify the planner via Production work order (PWO) application. The Work order operation (WOO) must first be paused, before it can be put On hold. The following fields will be available to detail the halt:
|
Undo | To undo an action, click the Undo button. If picking is initialized, the Undo button will generate an error message. To undo an action after picking is initialized, click the Pick button, and click the Undo initiate pick button. The Undo function will then be available. |
Reschedule | Clicking the Reschedule button will open a popup where the following fields can be used to reschedule the Work order operation (WOO):
Rescheduling a Work order operation (WOO) will generate a system notification in planners Product work order (PWO) application. |
Scan pick | Click the Scan pick button to pick parts for the Work order operation (WOO) by scanning using a handheld terminal. |
Pick | The Pick button will indicate the state of the picking:
Click the Pick button to open the Pick list details (PICK) application. From the Pick list details (PICK) application the following options are available from the header:
|
End wait time | Click the End wait time button, to end the current waiting period set in the KITDOCof the Product (ART), in the QueueTime field. This option is used for Products (ART) requiring wait time in Work order operation (WOO) process. Examples are drying of paint or glue. Click here to learn more about KITDOC and how production structures can be modified. |
Complete service | Click the Complete service button to complete Work order operations (WOO) with operation type service. The button is available when the Work order operation (WOO) is in Status 9 (Completed). Click there to learn more about service in RamBase. |
Approve | The Approve button is related to the Checkpoint field. If the actions taken in Work order operation (WOO) have met the requirements of the Checkpoint text, click the Approve button. The field is derived from the Production operation (OPR) application in the Settings area. Read more about the Production operations (OPR) application here. |
Forward to goods reception | Click the Forward to goods reception button to forward the completed Work order operations (WOO) to a stock location. To specify the stock location, click the Select stock location drop-down menu and select the intended location, then click the Forward to goods reception button.
|
Reopen | Click the Reopen button to open the Reopen work order operation popup. Select a reopen reason, either; Choose from existing or Create a reason. Selecting Choose from existing will display the Reopen reason drop-down menu. Select a reason from the list. Selecting the Create a reason option will display the New reopen reason field where the user can type a reason. Clicking the OK button to set the Work order operation (WOO) in Status 7.
|
The Work progress area gives a time and cost overview for the current Work order operation (WOO). The following fields and functions are available:
Today production resource usage - displays either today's resource usage based on turnover, or time. The information displayed can be edited in the Company settings (CSV) by the setting Resource usage gauge type in WOO application.
Total manhours - displays the total of manhours worked on the current Work order operation (WOO).
Worktime
The Worklog button - Opens the Work order operation worklog popup. Read more about the Production work order worklog (PWOWL) here.
The Product units tab displays the product units to be produced and relevant information for the Work order operation (WOO). The header displays a progress bar visualizing the progress of the completion of the Product units.
It also includes a Complete/Undo more button which is useful in handling the Product units (LCM) efficiently. Product units (LCM) can be selected or multi-selected for efficient picking. Additionally Product units (LCM) can be searched for by using the Enter your search here field.
Custom filters for searching, can also be built by clicking the Filter builder icon. To customize the viewed columns, click the Column settings icon and check the intended checkboxes.
Header
Header
Description
Completed quantity - progress bar
The progress of Work order operation (WOO) visualized by a progress bar. Completing a Product unit (LCM) can impact the progress bar differently as a batch Product unit (LCM) will have a different quantity than a unit Product unit (LCM), that will always be 1.
Complete/undo more - button
Clicking the Complete/undo more button will open the corresponding popup. Use it to efficiently switch between operators and handle multiple Product units (LCM) at once.
Product units tab - list
Column
Icon
Description


The status icon acts as an option to select or multi-select Product units (LCM) for picking.
When selected, the Pick for selected product units button will be available in the footer of the tab.
Click the Pick for selected product units to open the Product unit picking popup.
Detailed instructions and information on picking for production can be found here.

Displays an icon indicating that the Product unit (LCM) is in production.
Item
Displays the item number for the product unit. For example, if there are 10 units to be produced, there will be listed 10 product units with the Item numbers 1 to 10.
Product unit

Lists the Product unit (LCM) number for the individual product unit. Click the View icon to open the Product unit (LCM) application. Read more about Product unit (LCM) here.
Marking of a Product unit (LCM) is done by clicking the View icon and from the Product unit (LCM) application type the intended marking in the Marking input field in the header.
To view rules or templates for how a Product unit (LCM) should be marked, click on the Product marking option in the Context menu.
Serial number
Displays the serial number on the individual product unit. Editable via the Product unit (LCM) application.
Quantity
An informational field that displays the number of units being produced in that Product unit (LCM). For unit Production work orders (PWO) the quantity will always be 1, for each Product unit (LCM).
For batch productions, if the Is manufactured in batches option is checked in the Production work order (PWO) application, the quantity column will be relevant.
Complete
Click the Complete button to mark the individual product unit as complete.
Measures
Displays the available measurements to be checked for the individual product unit.
Dimension
PIF
Thread
Click the intended button to open the related application and add the relevant measurements.
Finished at
Displays the date and time the Product unit (LCM) was completed.
Finished by
Displays the name of the operator who finished the Product unit (LCM).
Pick
To efficiently pick traceable, and non-traceable material, for the Product units (LCM) in the Production work order (PWO), click the Pick icon.
Read more about the following popup and the Pick to production functionality.
From the Work order operation (WOO) application, click on the Complete/undo more button in the Product units tab to efficiently select and complete Product units (LCM). The tables below describe the popup in detail.

Header
Fields and columns
Description
Completed quantity - Progress bar
The progress of Work order operation (WOO) visualized by a progress bar. Completing a Product unit (LCM) can impact the progress bar differently as a batch Product unit (LCM) will have a different quantity than a unit Product unit (LCM), that will always be 1.
Operator - drop-down menu
Click the Operator drop-down menu to select which operator is completing the Product unit (LCM).
This drop-down menu will only be available for Work order operations (WOO) where the Production resource (RESCONFIG) assigned is set to Allow multi operator. This is set in the Production resource (RESCONFIG) application, in the Settings area by selecting the Allow multi operator checkbox.
Complete by units tab
Lists Product units (LCM) to be completed. Select or search for individual or multiple Product units (LCM) and efficiently complete them. Use the Column settings to select which columns are displayed in the list.
Icon
Fields, buttons and columns
Description
Remaining quantity field
An informational field that displays the total remaining quantity of the Work order operation (WOO).
Quantity to complete - field
The number of selected Product units (LCM) in the Complete by units list, by selecting all by clicking the top most checkbox or clicking the Status icon of the intended Product units (LCM).
Complete - button
Flag the selected Product units (LCM) as completed by clicking the Complete button. Note that the Quantity to complete field displays the quantity selected, and the Remaining quantity field reflects the completion by subtracting the completed Product units (LCM).

The Status icon indicates the status of Product unit (LCM). Click the intended Status icons to select one or several Product units (LCM). Click the checkbox in the top most column to select all Product units (LCM). Note that the Quantity to complete field lists the numbers of selected Product units (LCM).
After selecting the intended Product units (LCM), click the Complete button to flag the Product units (LCM) as completed. Note that the Remaining quantity field reflects the change by subtracting the completed Product units (LCM).
Product unit
Lists the Product unit (LCM) number for the individual product unit. Click the View icon to open the Product unit (LCM) application. Read more about Product unit (LCM) here.
Serial number
Displays the serial number on the individual product unit. Editable via the Product unit (LCM) application.
Quantity
An informational field that displays the number of units being produced. For unit Production work orders (PWO) the quantity will always be 1, for each Product unit (LCM). Therefore the quantity column is deselected in the Column settings by default for unit productions.
For batch productions, if the Is manufactured in batches option is checked in the Production work order (PWO) application, the quantity column will be relevant.

Radio buttons
Used to navigate the Product unit (LCM) list.
Complete by quantity tab
Used to input the intended quantity to be completed.
Fields and buttons
Description
Remaining quantity (max) - field
An informational field that displays the quantity yet to be completed. This the maximum quantity that can be typed in the Quantity to complete field.
Quantity to complete - field
An input field that is used to specify the quantity to be completed. Type the intended quantity to complete in the field or click the Arrows. Click the Complete button to flag the Product units (LCM) as completed. Note that the quantity in the Remaining quantity (max) field will decrease with the quantity being completed. The Product units (LCM) will be completed in the order of Item number displayed in the Product unit list.
Undo by units tab
Lists completed Product units (LCM). Used to flag completed Product units (LCM) as undone.
Icon
Fields, buttons and columns
Description
Completed quantity field
An informational field that displays the total quantity of the Work order operation (WOO), completed.
Quantity to undo - field
The number of selected Product units (LCM) in the Complete by units list, by selecting all by clicking the top most checkbox or clicking the Status icon of the intended Product units (LCM).
Undo - button
Flag the selected Product units (LCM) as completed by clicking the Complete button. Note that the Quantity to complete field displays the quantity selected, and the Remaining quantity field reflects the completion by subtracting the completed Product units (LCM).
The Status icon indicates the status of Product unit (LCM). Click the intended Status icons to select one or several Product units (LCM). Click the checkbox in the top most column to select all Product units (LCM) in the list. Note that the Quantity to undo field lists the numbers of selected Product units (LCM).
After selecting the intended Product units (LCM), click the Undo button to flag the Product units (LCM) as uncompleted. Note that the Completed quantity field reflects the change by subtracting the Product units (LCM) undone.
Product unit
Lists the Product unit (LCM) number for the individual product unit. Click the View icon to open the Product unit (LCM) application. Read more about Product unit (LCM) here.
Serial number
Displays the serial number on the individual product unit. Editable via the Product unit (LCM) application.
Quantity
An informational field that displays the number of units being produced in that Product unit (LCM). For unit Production work orders (PWO) the quantity will always be 1, for each Product unit (LCM).
For batch productions, if the Is manufactured in batches option is checked in the Production work order (PWO) application, the quantity column will be relevant.
Finished at
Displays the date and time the Product unit (LCM) was completed.
Finished by
Displays the name of the operator who finished the Product unit (LCM).
Radio buttons
Used to navigate the completed Product unit (LCM) list.
Undo by quantity tab
Used to input the intended quantity to be flagged as undone.
Fields and buttons
Description
Completed quantity (max) - field
An informational field that displays the quantity yet to be completed. This the maximum quantity that can be typed in the Quantity to undo field.
Quantity to undo - field
An input field that is used to specify the quantity to be undone. Type the intended quantity to be flagged as undone in the field, or click the Arrows. Click the Undone button to flag the Product units (LCM) as completed. Note that the quantity in the Completed quantity (max) field will decrease with the quantity being completed.
The Materials tab is an overview over the list of materials in the Production structure (KITDOC) of the Production work order (PWO). Products can be searched for by using the Enter your search criteria here field.
Functionality
Parts can be added to the Production structure (KITDOC) by using the Add new product button.
Parts can be added to the Production structure (KITDOC) by scanning the Goods reception item (SSAITEM).
Parts can be removed from the Production structure (KITDOC) by clicking the Remove icon in Actions column.
Custom filters for searching, can also be built by clicking the Filter builder icon. To customize the viewed columns, click the Column settings icon and check the intended checkboxes.
The Company setting (CSV), View Structure Tab in WOO app, must be turned on to be able to see the Materials tab in the Work order operation (WOO) application.
Header
Search field - The Search field can be used to search for specific materials, being used in the operation. Click the Search field and press SPACEBAR to list all the available parameters to search on, including, but not limited to PickStatus, ProductId, ProductName.
Filter builder icon - Click the filter builder to list the available standard filters Pick process completed, Pick process initialized and Pick process not started. The user can also Create custom filters by selecting Field + Operator + Value and clicking the Save filter button. The saved filter will be save in the My saved filters area in the Filter builder popup.
Column settings icon - To select which information is displayed, click on the Column settings icon and hover over Columns. Then select the intended columns. The selection of data can be exported to Excel via the Export to excel option in the Column settings. The Reset to default view is also useful in resetting column width and placement, since columns can be dragged and dropped to suit the user. A description of the columns are listed in the table below.
Columns | Icons | Description |
|---|---|---|
Item | Displays the identifier of the item in Production structure (KITDOC) | |
Product | Displays the name of the Product (ART) used as a material in the operation. Click the View icon to open the Product (ART) application to view and edit details. | |
ProductId | Displays the Product (ART) identifier. | |
Revision | If a Product structure (KITART) has multiple revisions, the name of the material revision will be displayed. | |
Type |
| Displays an icon indicating which type of material the Product (ART), is. Examples are P - part, M - material, K - Product structure. |
Assignments |
| The Assignments column displays the Stock assignments production order kit item (SARK) icon. Click the icon to view the linking of the material, or even relink. |
Unit qty | Material quantity to be used for each product unit. Specified by a number indicating the quantity along with the type of unit. | |
Total qty | The total/planned material quantity needed to perform the work order operation. | |
Used qty | The Used qty indicates the actually consumed quantity, as changed and specified by the operator. This column is used to make changes to the Production structure (KITODC) by changing the quantity used per part. This allows the operator flexibility when performing the Operation (OPR). To edit, click the Edit used qty icon in the Actions column. Edit Used qty when material is pickedIf the Used qty column has been changed, and part is picked, then RamBase will automatically try to adjust picking from existing links to Goods reception (SSA) and Stock location (STL). If that is not possible, an error message will be displayed and the user is advised to Undo picking, and then continue editing the Used qty. Traceability list on Product unit (LCM) may need to be adjusted, due to the change in Used qty | |
Picked qty | Quantity that has been picked by the operator. | |
Pick status |
| Picking completed - Will be displayed next to products where the Total qty has been picked |
| Picking not started - Will be displayed next to products where picking has not been initiated. | |
| Picking in progress - Will be displayed next to products where picking has been initiated, but not completed. | |
Actions |
| To set the quantity used, or edit the set quantity in the Used qty column, click the Edit used qty icon in the Actions column. Changes made here will update the Production structure (KITDOC) with the new material quantity. This will create an updated pick quantity requirement shown in the Pick status column. When finished editing, click the Save or Cancel icons. |
| Click the Pick icon to open the Pick (PICK) application where the user can pick materials for the listed Product (ART). NoteIf the product or material is only linked to one (1) Goods reception (SSA) and only one (1) Stock location (STL), the Goods reception (SSA) will be picked without forwarding the user to the Pick (PICK) application. If the product or material is linked to two (2) or more Goods receptions (SSA), or placed in two (2) or more Stock locations (STL), the user will be forwarded to the Pick (PICK) application to specify which Goods reception (SSA) to pick and/or which Stock location (STL) to pick from. | |
| Click the Remove icon to remove the product from the Production structure (KITDOC) before the Work order operation (WOO) is started. | |
| To undo picking, click the Undo picking |


Buttons
Add new product button - Click the Add new product button to open a popup with the following options:
Part dropdown - Click the Part dropdown to select a part to be added from the list. Click the Filter builder icon to list available predefined filters for quick filtering.
Add by goods reception item field - A Goods reception item (SSAITEM) can be scanned to add a part to the Production structure (KITDOC).
Note
This will only use the Goods reception item (SSAITEM) as a reference to identify the Product identifier (KITART). Parts will only be added to the Production structure (KITDOC).
Quantity per unit field - Type the quantity of parts to be added to each Product unit (LCM).
Create button - Click to create and add the selected part to the Production structure (KITDOC).
Cancel button - Click to cancel the addition of the part.
The Production tasks sub-tab displays all production tasks linked to the Work order operations (WOO) in the carousel.
Active and Detached production tasks
The Production tasks tab includes two standard filters. Note that detached production tasks will be listed, but with strike-through if the Standard filter, Detached tasks is selected. In example: "Detached task".
Active tasks - Displays all active production tasks in the Task process (TSP)
Detached tasks - Displays all production tasks which for various reasons are no longer attached to the Task process (TSP).
When are production tasks potentially detached from a Production work order (PWO)?
Changes to the Production structure (KITDOC)
Production work order (PWO) is cancelled
Production work order (PWO) is scrapped
Columns | Icons | Description |
|---|---|---|
Status |
| The icons indicates the status of the production task. To view the status description, hover over the icon. |
Title |
| Displays the title of the task. To change the status of the task, register time on the task or complete checklists, click the View icon to open the task in the Task (TASK) application. |
Production resource |
| Displays the name of the Production resource (RESCONFIG). To view and edit details, click the View icon to open the Production resource (RESCONFIG) application. |
Deadline at | Displays the deadline for the task in yyyy.MM.dd HH:MM format, set in the Task (TASK) application, or in the Task process (TSP) application if the task is a part of a process. | |
Assigned to |
| Displays the employee identifier of the task assignee. For further details on the employee, click the View icon to open the Personnel (PER) application. |
Started at | Displays the date the task was set in Status 4 - In progress. | |
Completed at | Displays the date the task was set in Status 8 - Done. | |
Process | If the task is a part of a Task process (TSP), the name of the task process will be displayed here. |
Displays all pre-production tasks linked to the Work order operation (WOO). Each task is represented by an icon, indicating its current progress.
Read more about Pre-production tasks and the application for assigning pre-production tasks to sales orders (PPTASKS).
Columns | Icons | Description |
|---|---|---|
Status |
| Displays an icon indicating the status of the pre-production task (TASK). |
Title |
| Displays the title of the task. To progress the status of the task, click the View icon to open the Task (TASK) application where the user can register time or complete checklists. |
Deadline at | Displays the date and time when this task must be completed, in yyyy.MM.dd HH:MM format. This is based on the deadline set in the Task (TASK) application. | |
Assigned to |
| Displays the name of the employee assigned to the task. To view or edit details, click the View icon to open the Personnel (PER) application. |
Started at | Displays the date the task was set in Status 4 - In progress. | |
Completed at | Displays the date the task was set in Status 8 - Done. |
There are two types of scheduled production tasks
There are two types of scheduled production tasks:
Columns | Icon | Description |
|---|---|---|
Status |
| Displays the status of the scheduled production task. |
Name | Displays the name of the scheduled production task. | |
Description | Displays the description of the scheduled task process. | |
Planned start date | Displays the planned start date of the Operation (OPR) triggering the scheduled production task, in yyyy.MM.dd format. | |
Deadline at | Displays the planned deadline date for a task triggered by the scheduled production task process, in yyyy.MM.dd format. | |
Created by |
| Displays the name of the person who activated the task process for customer notification, or started the task process on completion of operation. |
Product structure operation |
| Displays the name of the Production structure (KITDOC). To open the Structure operation item (KITDOCOPRITM) |
Type | A scheduled production task process can be triggered by either the type = event or type = date.
| |
Production work order |
| Displays the identifier of the Production work order (PWO) where the scheduled production task is triggered. To open the Production work order (PWO) application, click the View icon. |
Task process |
| Displays the identifier of the Task process (TSP) that is created when activated by the nightly batch. To open the Task process (TSP) application and view details, click the View icon. |
Assigned to |
| Displays the employee assigned to the task. To view details, click the View icon. |


The related files and notes for the Work order operation (WOO) are listed in the Attachments tab.
The use can click; the icons to preview or download attachments, the buttons to filter the list on their source, or hover over the Information icon to displays further file and source information.
Header buttons and dropdown to filter which files are displayed
To filter the list on a specific source, the user can click the buttons. The user can also filter the list on File types (FIT).
All button - The list will display all related attachments for the Work order operation (WOO).
Work order button - The list will be filtered on attachments from the Production work order (PWO).
Product unit button - The list will be filtered on attachments from the Product unit (LCM).
Product structure button - The list will be filtered on attachments from the Production structure (KITDOC).
Operation - The list will be filtered on attachments from the Operation (OPR).
Product button - The list will be filtered on attachments from the Product (ART).
Type dropdown menu - To filter the list on a File type (FIT), click the Type dropdown menu and select a file type.
Columns | Icons | Description |
|---|---|---|
| The icons represent the file extension. To preview the file, click the icon. If the attachment is a note created in RamBase, clicking the icon will open the note in the Note (NOTE) application where the user can create new notes, add tags or even delete notes. | |
To download a file locally, click the Download icon. | ||
Type | Displays the file type defined in the File types (FIT) application. Read more about the File types (FIT) application here. | |
Document | Displays the document name which is a combination of a text noting if it is uploaded or created in RamBase, and the file name. Examples: Filename: Drawing of kit.jpeg or Note: Setup note for the operator. | |
| An informational icon which can be hovered over to display further details on the attachment and its source, including the source identifier. Example: ART/#123456 | |
Rev | A file can be revised in the File manager (FILEMANAGERAPI). This column displays the current revision name. | |
Source | Displays the abbreviation of the application where the attachment was created or uploaded. Examples: ART, PWO, KIT |


The context menu options are found in the top right corner by clicking the Context menu icon. The available options are listed below.
Option | Description |
|---|---|
Click to open the Print popup where the user can view which documents can sent or printed. | |
View document requirements (F6) | This action will open the View document requirements popup where the user can view if there are document requirements for the Product unit (LCM). The popup will display:
|
Reassign and pick all on restricted stock location | This action will pick all needed parts from the Location (LOC). The result of the picking can be verified checking the color of the icon on the Pick button. |
Product marking specification | This action will open the Product marking specification popup where the user can enter Product marking rules or templates describing how the Product units (LCM) should be marked. Roles that allow editing this input are usually Production managers and Production planners. The Roles with this permission can be viewed in the Permissions (PRM) application. Related Permissions (PRM):
Note that the Product marking specification input field is mirrored in the Production work order (PWO) and the Work order operations (WOO) applications. Meaning that changing one, will update the other. |
Add measuring tool to dimensions MSR's | This action will open the Select measuring tool where the user can add measuring tool to be used for measuring the Product unit (LCM) from the Product unit tab. |
Set to wait | This action will change the Work order operation (WOO) from status 3 (Ready) back to status 2 (Wait). Note that this option will only appear for Work order operations (WOO) in Status 3. Work order operations (WOO) that are part of a group (GWOO) need to be removed from the group before this action can be done. |
View details | This option will open the Work order operation details (WOODETAILS) application where information on operation and resources, planned time, accrued time, planning and work progress can be viewed. |
Standard Work order operations (WOO) procedure
In the Work order operations (WOO) application.
Read the Version note, Operation note and relevant attachments.
Verify that all fields are as expected.
Click the Start button.
Perform the action according to the available information. And do the following actions if relevant for the intended operation:
Click the Pick button to pick the required parts.
Click the Complete button to finish the setup.
Click the Approve button to verify that the checkpoint has been met.
Click the Complete button to finish the production.
Click the Complete button to finish the cleanup.
Select a stock location from the Forward and move to stock location drop-down menu and click the Forward to goods reception button.
Click the Arrow icon in the lower right corner of the work space area to navigate to the next Work order operation (WOO).
A production resource can be tailored to the Production operation (OPR) being performed.
If a workstation comprised of either a person or machine, which is defined in the Production resource (RESCONFIG) application in the Type drop-down menu, has a standard Stock location (LOC), one or several restricted stock locations can be added so that picking can be done efficiently from the Context menu by selecting the Reassign and pick all on restricted stock location option.
This action will pick all needed parts from the Location (LOC). The result of the picking can be verified checking the color of the icon on the Pick button.
Read more here about setting up Restricted stock locations here.
Optional picking of customer owned material
If the settings, listed below, are set to 'ON', picking from restricted stock locations will also allow picking material which are customer owned, if customer ownership matches the Production work order (PWO).
Company and child settings (CSV):
Efficient Work order operations (WOO) procedure
Read the Version note, Operation note, Note and relevant attachments.
Verify that all fields are as expected.
Click the Start button.
Perform the action according to the available information. When it is time to pick the parts, Click on the Reassign and pick all on restricted stock locations option in the context menu.
The Pick button will indicate the state of the picking:
Pick button with green icon - Pick was initiated and all parts were picked.
Pick button with yellow icon - Pick was initiated and some parts were picked. Hover over the button to see a short description of what was picked.
Pick button with gray icon - Pick not started.
Perform the action according to the available information. And do the following actions if relevant for the intended operation:
Click the Approve button to verify that the checkpoint has been met.
Click the Complete button to finish the production.
Click the Complete button to finish the cleanup.
Select a stock location from the Forward and move to stock location drop-down menu and click the Forward to goods reception button.
The Forward and move to stock location drop-down menu and button is only available for Word order operation (WOO) in Status 9 (Completed).
Click the Arrow icon in the lower right corner of the work space area to navigate to the next Work order operation (WOO).
The Product Unit Picking popup is designed to enhance material tracking and traceability during production. This interface allows operators to efficiently pick materials per Product unit (LCM) by entering or scanning Goods receptions (SSA). This also includes automatic reassignment for traceable material, saving clicks and without having to use applications like the Stock assignment production order kit-item (SARK).
The key functionalities include:
Material Picking: Enables users to pick quantities from different Good receptions (SSA) without having to manually change assignments, ideal for dynamic production environments.
Traceability: Builds comprehensive traceability records for materials used in production.
User Navigation: Accessible via the Work Order Operation (WOO) application, with multiple navigation options for ease of use.
Pick for a single, or multiple Product units (LCM)
Only applies for traceable material and Production work orders (PWO) in Status 5 - In production
This functionality applies to Products (ART) used as parts in a Product structure (KITART) / Production structure (KITDOC), defined as Is traceable material of product unit in the Product (ART) application.
Picking can only be done on Production work orders (PWO) in Status 5 - In production.
Read more about "How to find duty and roles that include a specific permission".
ViewPicking - PRM/100597
UndoPickSingleProductionWorkOrder - PRM/103466
PickSingleProductionWorkOrder - PRM/103464
When it is time to pick, navigate to the popup by selecting one of the options below.
Navigate to the popup via the Work order operation (WOO) application.
Option 1:
To open the Production work order (PWO) application, find Production in the RamBase menu and then Production.
Click Production work orders to open the Production work orders (PWOMENU) application.
From the listed Production work orders (PWOMENU), click the intended Production work order (PWO) and press ENTER.
This opens the Production work order (PWO) application for the selected Production work order (PWO). Click on the View icon next to the Work order operations field to open the Work order operations (WOO) application.
The Work order operations field is found in the lower right corner in the Product units and current work order operation area.
To open the Product units picking popup, in the Work order operation (WOO) application, click the Product units tab, and then click the Pick icon in the Pick column.
Pick icon
Option 2:
Click the Program field and type "WOO/ + Identifier" and press ENTER. Then continue from step f. in the list above.
Example "WOO/123456"
Click here to read more about the user interface.
If Serial number template (SNT) is set up for any of the materials
When opening the popup in the context of a Production work order (PWO), as an operator performing a Work order operation (WOO), the fields in the header are already filled out.
There are multiple ways to pick for production. You may choose the picking route by selecting Material and then which Goods reception to pick from, or selecting or scanning a Goods reception item (SSAITEM), which will automatically select the material of the Goods reception item (SSAITEM).
Tip
When working with pallets that are set up with Goods reception (SSA), starting with the Goods reception field can the be the most efficient as it will detect the material of the scanned Goods reception item (SSAITEM).
Select Material → Select Goods reception → Decide Quantity → Click Pick button
Scan or type Goods reception → Decide Quantity → Click Pick button
Select Material serial number → Click Pick button → Decide Quantity → Click Pick button
Once the material(s) has been picked, it will populate the grid below.
When it is time to pick, navigate to the popup by selecting one of the options below.
Navigate to the popup via the Work order operation (WOO) application.
Option 1:
To open the Production work order (PWO) application, find Production in the RamBase menu and then Production.
Click Production work orders to open the Production work orders (PWOMENU) application.
From the listed Production work orders (PWOMENU), click the intended Production work order (PWO) and press ENTER.
This opens the Production work order (PWO) application for the selected Production work order (PWO). Click on the View icon next to the Work order operations field to open the Work order operations (WOO) application.
The Work order operations field is found in the lower right corner in the Product units and current work order operation area.
To open the Product units picking popup, in the Work order operation (WOO) application, click the Product units tab, and then click the Pick icon in the Pick column.
Pick icon
Option 2:
Click the Program field and type "WOO/ + Identifier" and press ENTER. Then continue from step f. in the list above.
Example "WOO/123456"
Click here to read more about the user interface.
If Serial number template (SNT) is set up for any of the materials
When opening the popup in the context of a Production work order (PWO), as an operator performing a Work order operation (WOO), the fields in the header are already filled out.
When the popup opens, you can pick for all selected product units.
To do so, click the Produced product unit id drop-down to expand the list of Product units (LCM). With the list expanded, clicking an element in the list will populate the area to the right with identifiers of the now selected Product units (LCM).
Picking will then apply to all Product units (LCM) which populates the area to the right of the Produced product unit id drop-down menu.
Note
Pick quantity is distributed across the selected units. The progress bar and traceability indicators update accordingly.
The column, Traceable material quantity, shows how much was picked per Product unit (LCM).
There are multiple ways to pick for production. You may choose the picking route by selecting Material and then which Goods reception to pick from, or selecting or scanning a Goods reception item (SSAITEM), which will automatically select the material of the Goods reception item (SSAITEM).
Tip
When working with pallets that are set up with Goods reception (SSA), starting with the Goods reception field can the be the most efficient as it will detect the material of the scanned Goods reception item (SSAITEM).
Select Material → Select Goods reception → Decide Quantity → Click Pick button
Scan or type Goods reception → Decide Quantity → Click Pick button
Select Material serial number → Click Pick button → Decide Quantity → Click Pick button
Once the material(s) have been picked, the grid below will show the picked quantity for each selected product unit.
Tip
The filter, Show only picks for traceable materials, allows you sort out the possibility to view picks for non-traceable materials. If not, these will appear with traceable quantity = 0, as well with a icon for easy identification.
| Non-traceable material icon |
Important
If you need to undo a pick that was performed for multiple units, the entire batch will be undone. A confirmation message will warn you before proceeding.
The interface is divided into five sections:
The header section provides information on the Production work order (PWO), Work order operation (WOO), and the current Product unit (LCM). It includes fields for viewing and editing details of the PWO, WOO, and LCM, with options to switch between different Product units (LCM). The serial number for the Product Unit is displayed, typically sourced by automation and set up in the Serial Number Templates (SNT) application.
Field | Icon | Description |
|---|---|---|
Production work order |
| An informational field displaying the identifier of the source Production work order (PWO). The Production work order (PWO) includes the Work order operation (WOO) where the picking can potentially be completed. To view and edit details, click the View icon to open the Production work order details (PWOD) application. |
Work order operation |
| An informational field display in the sequence number and name for the Operation (OPR) being worked on, as a Work order operation (WOO). To close the popup, and return to the Work order operation (WOO), click the View icon. |
Produced product unit id |
| Displays the identifier of the currently selected Product unit (LCM). To switch to another, click the Produced product unit id drop-down menu. Note that only Product units (LCM) included in the source Production work order (PWO) can be selected. To view and edit details on the Product unit (LCM) by opening the Life cycle management (LCM) application, click the View icon. |
Produced serial number | Displays the serial number for the Product unit (LCM). This is can typically be sourced by automation, set up in the Serial number templates (SNT) application. |
The List of materials allows the user to select a material to be picked. When a material has been clicked, highlighted by the color orange, the fields Goods reception and Stock location - will only list matches which include the selected part/material.
Note
The user can pick more than the planned quantity. If so, a Warning icon will be displayed next to the Material name.
| Warning icon |
Note
It is allowed to pick non-traceable materials. These will appear with traceable quantity = 0, as well as an icon for easy identification.
| Non-traceable material icon |
Tip
Icon/Button | Description |
|---|---|
| To apply a filter, click the Filter icon to select one of the available options. TipThe optional filters can be combined with the Filter by material name field. Optional filters
|
In this section, you can select or search for Goods reception (SSA) and Stock location (STL). If the material is chosen first, the Goods receptions (SSA) will be filtered accordingly, and selecting a Goods reception (SSA) will auto-fill the Stock location field. You can also search by serial number and decide the quantity to pick using the Arrow icons or by typing the numerical quantity.
Field/Drop-down | Icon | Description |
|---|---|---|
Goods reception |
| To select which Goods reception (SSA) to pick from, click to select or search. Note that if the material is selected first, the Goods receptions (SSA) will be filtered on those which contain the material. |
Stock location |
| To select which Stock location (STL) to pick from, click to select or search. Note that if Goods reception (SSA) is selected first, the Stock location (STL) of the Goods reception (SSA) will automatically fill in the Stock location field. To open the Stock location (STL) application, to view and edit details, click the View icon. Read more about Stock locations (STL). |
Material serial number filter | Search for a serial number for the potential serial number for the picked material. | |
Quantity |
| Decide the quantity to pick of the selected material, by clicking the Arrow icons or click the field and type the numerical quantity. |
This section provides details on the progress of picking materials for the current Product Unit (LCM). It includes an informational progress bar for the picked quantity and displays the total picked quantity for the whole Production Work Order (PWO).
The section also explains how to pick materials and the criteria required for picking.
Field/Button | Icon | Description |
|---|---|---|
Picked quantity |
| Informational progress bar indicating the progress of the potential picking quantity, for the current Product unit (LCM). The user can pick more than the planned quantity. If so, a Warning icon will be displayed next to the progress bar. ImportantIf the material is non-traceable, the progress bar will be grayed out to indicate that the selected material is non-traceable. |
Total picked quantity (work order) |
| Displays the total picked quantity of the selected material, for the whole Production work order (PWO). The user can pick more than the planned quantity. If so, a Warning icon will be displayed next to the progress bar. Examples Simple example: There is a total of 3 Product units (LCM) being produced by the Production work order (PWO). For each Product unit (LCM) there are 4 materials to be picked, with various required quantity. Below, the operator has selected Product unit 1 in the Produced product unit id drop-down menu.
Result: When material 2 is selected the Total picked quantity will display a green progress bar with 3 out of 3 picked for all the Product units (LCM) in the Production work order (PWO). A green dot will also mark the material in the Material list, indicating that the required material quantity has been picked for the current Product unit (LCM). When any other material is selected the Total picked quantity will display a gray progress bar with 0 out of 3 or 12 picked for the Product units (LCM) in the Production work order (PWO). A gray dot will also mark those materials in the Material list, indicating that the required material quantity has not been picked for the current Product unit (LCM). Common example: There is a total of 3 Product units (LCM) being produced by the Production work order (PWO). For each Product unit (LCM) there are 4 materials to be picked, with various required quantity. Below, the operator has selected Product unit 1 in the Produced product unit id drop-down menu.
Result: When material 1 is selected, the Total picked quantity will display an orange progress bar with 8 out of 12 picked, as it describes the progress for all the Product units (LCM) in the Production work order (PWO). A gray will also mark the material in the Material list, indicating that the required material quantity has not been picked for the current Product unit (LCM). When material 2 is selected the Total picked quantity will display a green progress bar with 3 out of 3 picked for all the Product units (LCM) in the Production work order (PWO). A green dot will also mark the material in the Material list, indicating that the required material quantity has been picked for the current Product unit (LCM). When material 3 is selected the Total picked quantity will display a gray progress bar with 0 out of 3 picked for all the Product units (LCM) in the Production work order (PWO). A gray dot will also mark the material in the Material list, indicating that the required material quantity has been picked for the current Product unit (LCM). When material 4 is selected the Total picked quantity will display an orange progress bar with 1 out of 3 picked, as it describes the progress for all the Product units (LCM) in the Production work order (PWO). An gray will also mark the material in the Material list, indicating that the required material quantity has been partially picked for the current Product unit (LCM). |
| To pick the material, click the Pick button. Criteria to pick
Criteria to pick:
If pick is performed, the grid below will populate with the material details. |
This section provides a detailed list of the selected materials that have been picked for the current Product unit (LCM). It includes information such as the operation sequence, product unit identifier, material name, serial numbers, and quantities picked. Additionally, it offers options to view and edit details for each item and undo picks if necessary.
Column | Icon | Description |
|---|---|---|
Operation |
| Displays the sequence number and Operation name (OPR). To view and edit details, click the View icon |
Product unit |
| Displays the Product unit identifier (LCM). To open the Life cycle management (LCM) application, to view and edit details, click the View icon. |
Product unit serial number | Displays the potential Serial number (SNO) of the Product unit (LCM). This is can typically be sourced by automation, set up in the Serial number templates (SNT). | |
Material |
| Displays the name of the material, which is maintained in the Product (ART) application. To view and edit details in the Product (ART) application, click the View icon. |
| Displays an icon indicating which type of material the Product (ART), is. An example is: M - Material. | |
Material serial number | Potential serial number for the picked material. | |
Picked quantity | Displays the quantity picked. | |
Picked by | Displays the user who initiated the picking. | |
Traceable material quantity | Traceable Material Quantity refers to the amount of a picked material that is specifically linked to one or more traceable Product Units (LCMs) during a production operation. This value represents how much of the picked quantity is assigned and recorded in the traceability structure of each product unit.
| |
Actions |
| To undo the pick, click the Pick icon. |
The Production work orders list (PWOLIST) application lists all Production work orders (PWO) in the system, and once a Production work order (PWO) has been selected, the critical information and actions linked to that Production work order (PWO), can be inspected and/or performed.
The main purpose is to have core functionality for Production work orders (PWO) compiled and therefore easily available, serving as an addition or alternative to using all the compiled applications separately.
Navigate to the application
Option 2: Click the Program field and type "PWOLIST" and press ENTER.
Click here to read more about the user interface.
Examples of the applications which Production work orders list (PWOLIST) compiles functionality from:
Production work orders (PWOMENU)
Planned operations for production work order (PWOPLO)
Production work order (PWOD)
Production work order assignments (PWOSARLINKS)
Production work order work log (PWOWL)
The application is divided into three main areas:

The Production work orders list (PWOLIST) application has extensive filtering options, so that users may easily customize the list of production work orders (PWO) according to their needs:
Status filters:
At the top of the application, there are boxes that represent each possible status of a production work order (PWO). It is possible to select multiple statuses at once, and to combine this filter with other filter types to customize the selection of Production work orders (PWO). Items and Qty are automatically refreshed to accurately represent the number of productions of the specified type in each of the statuses.
Quick search:
In the Quick search field, users may search for a Production work order (PWO) by Product name or Production work order identifier. Click the Quick search filter icon and select/deselect the check-boxes to customize if the search should be limited to Product name or Production work order identifier or include both (default).

Quick search filter icon
Extra filters:
The Extra filters button allows for an even granular search, providing the user separate production and service orders along with the option to further filter on:
All
On hold
Cancelled productions
Scrapped productions
Priority productions

Extra filters button
The list of Production work orders (PWO) is presented based on the selections made in the Header.
Notable functionality is the option to navigate to the Production work order (PWO) application by click to select and then press ENTER, or clicking the Right arrow icon.
Column | Icon | Description | ||||||||||||||||||||||||||||||||
|---|---|---|---|---|---|---|---|---|---|---|---|---|---|---|---|---|---|---|---|---|---|---|---|---|---|---|---|---|---|---|---|---|---|---|
| Displays the current status of the Production work order (PWO). Potential statuses for Production work orders (PWO)
| |||||||||||||||||||||||||||||||||
Work order id |
| Displays the Production work order (PWO) identifier number. For example 123456. To quickly access that Production work order (PWO), type "PWO/123456" in the Program field. Or click the View icon to open the Production work order details (PWOD) application. | ||||||||||||||||||||||||||||||||
Forwarded to |
| If a partial quantity of the initial Production work order (PWO) has been forwarded to stock, or split to a new Production work order (PWO), the new identifier will be displayed here. To open the "forwarded to" document (PWO/SSA), click the View icon to open the related application. Examples
| ||||||||||||||||||||||||||||||||
Info |
| Icons can potentially be displayed to inform the user on relevant information. Hover over the icon to displays detailed information.
| ||||||||||||||||||||||||||||||||
Product |
| The name and description of the product being produced which is defined in the Product (ART) application. Click the View icon to open the Product (ART) application. | ||||||||||||||||||||||||||||||||
Remaining quantity | If a quantity lower than the total quantity of the initial Production work order (PWO) was released, the remaining quantity of the products to produce is displayed here. NoteThis only applies to the initial Production work order (PWO). Released sub Production work orders (PWO) will display the quantity released to that sub Production work order (PWO), until production is completed. | |||||||||||||||||||||||||||||||||
Potential production quantity | Number of products possible to produce with the current stock. | |||||||||||||||||||||||||||||||||
Assignments |
| Displays the Inspect assignments icon. Click the Inspect assignments icon to open the Stock assignment registry (SARS) application to view and edit details. | ||||||||||||||||||||||||||||||||
Kit |
| Displays an icon indicating the type of the Product (ART). To open the Production structure (KITDOC) application to view details on the structure being produced, click the icon. | ||||||||||||||||||||||||||||||||
Revision | Displays the current Product (ART) revision in production. The revision will typically be a major change, as opposed to minor changes stored in the version of the Product structure (KITART). | |||||||||||||||||||||||||||||||||
Manufacturing area |
| Displays the Manufacturing area that the product is assigned to. The assigning is done in the Product (ART) application. To view which products are assigned to which Manufacturing areas (MAA), click the View icon to open the application. | ||||||||||||||||||||||||||||||||
Material delayed days | Displays information regarding the required materials of Operations (OPR) included in the Production work order (PWO). If the required materials have a confirmed delivery date earlier than the scheduled start date, a positive value will be displayed. If the required materials have a confirmed delivery date later than the scheduled start date, a negative value will be displayed. If the linked Purchase order (SPO) of the required materials are either pending purchase or unconfirmed, the Material delayed days column will be empty, as it is assumed that the delivery of materials will be as requested. | |||||||||||||||||||||||||||||||||
Available quantity | Displays the percentage which is not allocated, of the remaining quantity. | |||||||||||||||||||||||||||||||||
Planning category | Displays the planning category for the Product (ART). Planning categories are used to group different types of products. | |||||||||||||||||||||||||||||||||
Scheduled start at | The date on which the production is scheduled to start. | |||||||||||||||||||||||||||||||||
Requested completion date | The requested date of completion for the Production work order (PWO). | |||||||||||||||||||||||||||||||||
Confirmed completion date | The date on which completion of the production is confirmed. | |||||||||||||||||||||||||||||||||
Scheduled completion date | The date on which the production is scheduled to complete. | |||||||||||||||||||||||||||||||||
Confirmed delivery date | The confirmation date from the linked Sales order (COA). | |||||||||||||||||||||||||||||||||
Latest start at | The latest date by which production must start, to be able to meet the Scheduled completion date. | |||||||||||||||||||||||||||||||||
Customer | Displays the name of the customer (name of company or surname/familyname/lastname of a person). | |||||||||||||||||||||||||||||||||
Customer's reference number | Displays the Customer's (CUS) order reference. If the Production work order (PWO) is derived from a Sales order (COA), the customers order reference will be the same as in the Sales order COA). Usually used as a reference to an external system. | |||||||||||||||||||||||||||||||||
Finance project |
| If the Sales order (COA) is is linked to a Finance project (PRJ), this field will display the Finance project (PRJ) identifier. Click the View icon to open the Finance project (PRJ) application. | ||||||||||||||||||||||||||||||||
Delivery project | If the Production work order (PWO) is linked to a Delivery project (PRO), the name will be listed in this field. Click the View icon to open the Delivery project (PRO) application. The Delivery project (PRO) application is a useful application that binds together information from various sources to enhance cost and progress control. | |||||||||||||||||||||||||||||||||
Planner | Displays the name of the production planner. The planner is the one to oversee, release and split productions. The planner will also be notified on important actions taken by operators on Work order operations (WOO). | |||||||||||||||||||||||||||||||||
Production tasks | The Production tasks column displays all production tasks linked to the Work order operation (WOO). Each task is represented by an icon. These icons can be clicked to open the Task details (TASK) application to view and edit details. Note that all icons will also display the title. The user must therefore click the icon, and not the text to open the Task details (TASK) application. Production tasks icons
Active and Detached production tasksThe Production tasks tab includes two standard filters. Note that detached production tasks will be listed, but with strike-through if the Standard filter, Detached tasks is selected. In example: "Detached task".
When are production tasks potentially detached from a Production work order (PWO)?
NoteThe space in the Production tasks column is limited. Therefore only a limited number of tasks can be displayed, meaning others can be hidden. | |||||||||||||||||||||||||||||||||
Pre-production tasks | The Pre-production tasks column displays all pre-production tasks linked to the Work order operation (WOO). Each task is represented by an icon. These icons can be clicked to open the Task details (TASK) application to view and edit details. Pre-production tasks icons
NoteThe space in the Pre-production tasks column is limited. Therefore only a limited number of tasks can be displayed, meaning others can be hidden. | |||||||||||||||||||||||||||||||||
Scheduled production tasks |
The icon will be accompanied by a number. This number states the number of scheduled production tasks linked to the Work order operation (WOO). | |||||||||||||||||||||||||||||||||
Documentation |
| Click the Inspect document status overview icon to open the Manufacturing record book (MRB) application. The Manufacturing record book (MRB) application displays a graphical report and a document list of the required documents for the production. | ||||||||||||||||||||||||||||||||
| Click the View document requirements icon to open the Document requirements popup with the following options:
| |||||||||||||||||||||||||||||||||
Project leader | The name of the project leader. This value is inherited from the linked Sales order (COA) when creating a new Production work order (PWO). | |||||||||||||||||||||||||||||||||
Document controller | The name of the document controller. This value is inherited from the linked Sales order (COA) which triggered the creation of the Production work order (PWO). | |||||||||||||||||||||||||||||||||
Scheduled production jobs | The Scheduled production jobs column displays all Scheduled production jobs (SPJ)linked to the Production work order (PWO). Each icon represents a Scheduled production job (SPJ) associated with a specific production work order. Hover over the icons to view details such as job type and execution date. The icons are color-coded to indicate different statuses:
| |||||||||||||||||||||||||||||||||
| To open the Production work order (PWO) application, click the Right arrow icon. |
The Create new order button in the bottom left corner allows the user to create new Production work orders (PWO) for the selected product. Users may also add a Description and specify the Requested completion date and Quantity. Selecting the Create another checkbox will keep the popup open, to speed up the process of creating subsequent work orders.
To create a new Production work order (PWO) in Status 1 - Pending registration and open the Production work order (PWOD) application, click the +Create new order button.
In the following popup, the following options are available:
Product drop-down menu - Required
Description field
Location drop-down menu
Requested completion date field, and Calendar icon - Required
Quantity field with Increase/decrease icons
Manufacturing area drop-down menu
Create another checkbox
Create button
Close button
At a minimum select a Product and a Requested completion date.
To create a Production work order (PWO) in Status 1 - Pending registration and open the Production work order (PWO) application, click the Create button.
Result: The new Production work order (PWO) will be opened in the Production work order (PWOD) application.
The Planned and ongoing operations tab allows for inspection and change of planned operations for the selected Production work order (PWO).
Column | Icon | Description |
|---|---|---|
St |
| This column displays the current status of an operation. Available statuses are:
|
Id | Displays the identifier number of the Planned operation (PLO). | |
State | This column displays the state of the operation, a text extension of the St column. | |
Op No | Displays the operation sequence number in the Production structure (KITDOC). | |
Resource name |
| Displays name of the Production resource (RESCONFIG) or the Resource group (REGCONFIG) that is assigned to the Operation (OPR) included in the Production work order (PWO). |
Tasklist |
| Displays the Production resource (RESCONFIG) identifier. Click the View icon to view all tasks assigned to the Production resource in the Operators list of work order operations (RWOO) application. |
Operation | Displays the name of the Operation (OPR) set in the Product structure (KITART) or Production structure (KITDOC). | |
Planned | Displays the total planned time of Setup, Processing and Cleanup set in the Operation (OPR). Hover over to display details. | |
Logged | Displays the total logged time of Setup, Processing and Cleanup. The time is logged by the operator in the Work order operation worklog (WOO) application. | |
Remaining | Displays the difference between Planned and Logged time and is calculated as the remaining time. | |
Man hours | If Man hours is enabled on the Production resource (RESCONFIG), the logged time is displayed. | |
Time deviation |
| Displays the Time deviation in percent. The value is calculated: (Accrued time - Planned time) * 100/planned time. Click the View icon to open the Worklog Deviation Details popup where details are displayed. Deviations can also be inspected and/or approved by clicking Approve button in the popup. |
Cost deviation |
| Displays the Cost deviation in hours. Indicates that there is a deviation between accrued and planned cost and that the deviation is larger than the difference between approved cost value and planned cost. Click the View icon to open the Cost Deviation Approval popup where details are displayed. Deviations can also be inspected and/or approved by clicking Approve button in the popup. |
Planned start | The planned date of production start in the format YYYY.MM.DD. | |
Is operation locked | Will display either Yes or No, based on the selection made in the States area. | |
Critical date | Critical date is a latest possible start date of the operation to complete it by the planned end date. Is displayed in the format YYYY.MM.DD. | |
Estimated end | Displays the estimated end date of production in the format YYYY.MM.DD. | |
Ready | Displays the date of when the Work order operation (WOO) is set, by the operator, in Status 3 - Ready for start. The information is displayed in the format YYYY.MM.DD. | |
Started | Displays the date of when the operation is started in the Work order operation (WOO) application, by the operator, and set in either Status 4 - Changeover setup or Status 5 - Processing. | |
Finished | Displays the date of when the operation was finished. This is done by the operator in the Work order operation (WOO) application when the Work order operation (WOO) is set in Status 9 - Completed. | |
Delay | Displays delay. Can be negative if the operation has been finished ahead of time. Shows the difference between estimated end and critical date. | |
On hold to | Displays the date and time the operator has set the Work order operation (WOO) to be on hold to. The information is reflected from the On hold to field, which the operator has available by clicking the Hold button in the Work order operation (WOO) application. | |
On hold description | Displays the description the operator has set in the Work order operation (WOO). The information is reflected from the Work order on hold description field, which the operator has available by clicking the Hold button in the Work order operation (WOO) application. | |
On hold category | Displays the category the operator has set in the Work order operation (WOO). The information is reflected from the Work order on hold reason field, which the operator has available by clicking the Hold button in the Work order operation (WOO) application. | |
Latest operator | Displays the name of the last operator who performed a Work order operation (WOO) on the Production work order (PWO) | |
Is outsourced operation | Displays either Yes or No. | |
Outsourced purchase order item | Displays the identifier of the outsourced Purchase order item (SPOITEM). Example: "SPO/123456". Click the View icon to open the Purchase order item (SPOITEM) application. This link can be used to quickly verify the Requirements and attachments sent to the supplier, which can be found in the tab with same name, in the Purchase order item (SPOITEM) application. | |
Outsourced purchase order supplier | Displays the name of the Supplier (SUP) for the materials. Click the View icon to open the Suppliers (SUP) application to view details. | |
Worklog |
| Click the View icon to open the Work order operation worklog popup where the user can inspect worklog related information for the operation. The user can efficiently add worklog elements for the operation. |
Icon |
| Displays an icon that indicates the status of the production operation, if it is delayed or completed. |
Scheduled production task |
| Displays an icon and a number. To view all pre-production, production and scheduled production tasks for linked to the operation, click the Scheduled production task icon. The number indicates the total number of tasks associated with the operation. The tasks are available for the operator in the Work order operation (WOO) application, in the Tasks tab. |
| Click the Right arrow icon to open the Work order operation (WOO) application and to view details from the operator's perspective. |
The Assigned materials tab includes functionality related to the Production work order assignments (PWOSARLINKS) and Production work order (PWO) applications. Below the two main areas, Material deliveries area and Assigned materials list are detailed.
Column | Icon | Description |
|---|---|---|
Product |
| An informational field that provides the name and the description of the Product (ART) being produced by the Production work order (PWO). To open the Product (ART) application, click the View icon. |
Product description | An informational field that provides the description of the Product (ART) being produced. | |
Type |
| Displays an icon indicating which type of material is assigned in producing the Product (ART). Examples are P - part, M - material, K - Product structure. |
Assignments |
| The Assignments column displays the Stock assignments production order kit item (SARK) icon. Click the icon to view, or relink the linking of the material. |
Operation Sequence Number | Displays the operation sequence number in the Production structure (KITDOC). | |
Revision | If a Product structure (KITART) has multiple revisions, the requested revisio of the Product (ART), will be displayed. | |
Link quantity | Displays quantity of assigned material for the Production work order (PWO). | |
Unit | Displays the measurement unit identifier. The unit measurement unit identifier is set on the Product (ART) and, the available units are defined for the company in the Unit menu (UNI) application. | |
Link type | Displays the type of linking to the required material. Potential link types
| |
Best before | Goods received in this Goods reception item (SSAITEM) is best before this date. | |
Production date | The Production date is the date when the Product (ART) was manufactured. For purchased products (SPO) this date is informed about from the Supplier (SUP). For goods that are manufactured inhouse, this date is a date for when the Production work order (PWO) was set in Status 8 - Completed. | |
Linked to |
| The Status icon informs on the status of the Goods reception item (SSAITEM) of the assigned material for the Production work order (PWO). Potential Goods reception item (SSAITEM) statuses:
|
Manufacturer part name | Displays the Manufacturer part name (MPN), which is a unique identifier for a certain product. It differs from a serial number, which identifies the product model, as it also identifies the manufacturer behind the product. | |
Manufacturer name | Displays the short name of the Manufacturer (MFR). | |
Remaining quantity | The remaining quantity in stock of the Goods reception item (SSAITEM). This quantity will decrease when shipped to customer or supplier, or when consumed in a completed Production work order (PWO). | |
Available quantity | The available quantity to be assigned and free to use. The available quantity will decrease as quantity is assigned to Production work orders (PWO). | |
Requested delivery | The Requested delivery date is potentially retrieved from:
| |
Confirmed delivery | The confirmation date from the linked Sales order (COA) or Service order (CSO). | |
Price | Displays the final price per unit after deducting all discounts. | |
Supplier account | Displays the Supplier identifier (SUP). | |
Supplier name | Displays the name of the Supplier (SUP), a company or a surname/family name or last name of a person. |

The Work order operations tab includes functionality also available in the Production work order worklog (PWOWL) application.
The tab is used to log time manually for the Work order operations (WOO) in the selected Production work order (PWO).
Column | Icons | Description |
|---|---|---|
St |
| Displays a status icon indicating the status of the Work order operation (WOO). Potential statuses for Work order operations (WOO):
|
State | This column displays the state of the operation, a text extension of the St column. | |
Action |
| To complete a Work order operation (WOO), click the Complete icon. If picking is required, click the Pick button in the following popup to open the Pick (PICK) application. To reopen a Work order operation (WOO) in Status 9 - Completed, click the Reopen icon to open the Reopen work order operation popup. |
Op No | Displays the operation sequence number in the Production structure (KITDOC). | |
Operation |
| Displays the name of the Operation (OPR) set in the Product structure (KITART) or Production structure (KITDOC). To open the Operation (OPR) in the Work order operation (WOO) context and application, click the View icon. |
Worklog |
| Click the View icon to open the Work order operation worklog popup where the user can inspect worklog related information for the operation, in addition to adding and editing worklogs. |
Resource |
| Displays the Production resource (RESCONFIG) are performing the Work order operation (WOO). |
Operator | To select which operator to log time for, click the Operator drop-down menu. If no operator is selected, the current user logging the time will be set as operator for the work log. Restricted operatorsIf user(s) are added to the Restricted operators tab in the Production resource (RESCONFIG) application, these will be the only operators which can be selected. | |
Manhour rate | To set which Manhour rate is to be added to the potential worklog, click the Manhour rate drop-down menu. The rates for the different steps are defined the Production resource (RESCONFIG) application. | |
Step | Select which step of the Work order operation (WOO) to log time for. Potential steps:
| |
Start at |
| Provide a start at date and time in the yyyy.MM.dd HH:MM format, or use the Calendar and Clock icon. |
Add time |
| To add time to the Total manhours of the work order operation worklog, at a minimum provide Start at date and time and the hours to be added in the Add time column, then click the Add time icon. The added work log can be inspected in the Work logs tab. |


The Work logs tab provides all the worklogs for all the Work order operations (WOO) in the selected Production work order (PWO). In the context of the Production work orders list (PWOLIST) application, it can be an efficient tool to inspect added time.
Columns | Icons | Description |
|---|---|---|
St |
| Potential statuses for Work order operations (WOO):
|
Op No | Displays the operation sequence number in the Production structure (KITDOC). | |
Operation |
| Displays the name of the Operation (OPR) set in the Product structure (KITART) or Production structure (KITDOC). To open the Operation (OPR) in the Work order operation (WOO) context and application, click the View icon. |
Operator |
| Displays the name of the operator which has logged the work log. |
Started at | Displays the start at date and time presented in yyyy.MM.dd HH:MM format. | |
Ended at | Displays the ended at date and time presented in yyyy.MM.dd HH:MM format. | |
Total | Displays the total amount of logged work logs. | |
Step | Display on which step the time has been logged. Potential steps:
| |
Note |
| Displays notes added to the work order operation work log. |
Is manhour | Displays "Yes", if the Production resource (RESCONFIG) allows man hours and manhour rates have been added. | |
Manhour rate | Displays the type of the manhour rate, if added. | |
Is correction | If the Work order operation worklog entry has been corrected, "Yes" will be displayed. | |
Is split | If the Production work order (PWO) is split from an initial Production work order (PWO), "Yes" will be displayed. | |
Worklog type | If the Production work order (PWO) is split from an initial Production work order (PWO), "Yes" will be displayed. | |
Operation started at | Displays the date and time the Operation (OPR) started in yyyy.MM.dd HH:MM format. | |
Operation finished at | Displays the date and time the Operation (OPR) finished in yyyy.MM.dd HH:MM format. |
The Group Work Order Operations (GWOO) application is used to group multiple Work order operations (WOO) together.
The Work order operations (WOO) can be grouped in to either groups which are run Concurrently or Sequentially.
Important
Groups are not registered, nor forwarded or progressed in any way with actions performed in the Group work order operations (GWOO) application, but rather actions performed in the Aligned productions (RUNGROUPWORK) application for concurrent groups, and Work order operations (WOO) application for sequential groups.
Created groups are used as a single instance and can not be reused.
Concurrent grouping enables you to start, pause, stop or complete all the Work order operations (WOO) in the group simultaneously, via the Aligned productions (RUNGROUPWORK) application.
Sequential allows for one Work order operation (WOO) to be performed at a time, but in the same Work order operation (WOO) application context and instance.
Important
Grouping of Work order operations (WOO), only applies for Work order operations (WOO) without any parts.
In other words, the Group work order operations (GWOO) is only designed for Work order operations (WOO) with only Operations (OPR).
Examples of Work order operations (WOO) which can be grouped:
Assembly operations in discrete manufacturing without any parts.
Measuring and testing operations without any parts.
Note
Running Work order operations (WOO) concurrently from the Group work order operations (GWOO) application will block the same actions in the Work order operations (WOO) application.
Navigate to the Group work order operations (GWOO) application
Option 1: RamBase menu → Production → Production → Group jobs on resource
Option 2: Click the Program field and type "GWOO" and press ENTER.
Click here to read more about the user interface.
For documentation purposes the application is split into two main areas; left side and right side.

The Group work order operations area requires the selection of a Production resource (RESCONFIG) which allows grouping of Work order operations (WOO). The Work order operations (WOO) of that Production resource (RESCONFIG) will then potentially populate the list. The user then needs to create either Concurrent or Sequence groups on the right side, before potentially assigning Work order operations (WOO).
The header allows for selection of a Production resource (RESCONFIG) and filtering of the potential Work order operations (WOO), as well as assigning, via the Assign to group button.
Search field, filter builder and column settings
The header contains multiple options to filter the list:
Standard filters
Active
All
Can be grouped
My tasks
Not grouped
Production
Ready
Wait
Fields and drop-down menus
Production resource drop-down list - To select a Production resource (RESCONFIG) which has Work order operations (WOO) to assign, click the Production resource drop-down list.
View icon
Serial number (whole number) field - To search for Work order operations (WOO), for a specific Product unit (LCM), with a certain Serial number (SNO), provide it in the field and press ENTER. Note that the whole serial number must be provided.
Product name field - To search for Work order operations (WOO) for Products (ART) with certain names, provide it in the field and press ENTER. Note that partial input is allowed.
Customer reference number - To search for Work order operations (WOO) with a certain customer reference number, provide it in the field and press ENTER. Note that partial input is allowed.
Assign to group button - To assign a selected Work order operation (WOO) in the list to either a Concurrent or Sequence group, click the Assign to group button.
Note
The destination group must be in Status 1 - Pending registration.

Assign to group button
The list displays Work order operations (WOO), for the selected Production resource (RESCONFIG), for potential grouping.
Column | Icon | Description |
|---|---|---|
| Displays the status of the Work order operation (WOO). Relevant and potential statuses for Work order operations (WOO)
| |
Work order |
| Displays the Production work order (PWO) identifier. To open the Production work order (PWOD) application in the context of the displayed identifier, click the View icon. |
Quantity | Displays the quantity for the Work order operation (WOO). | |
Customer | If the Production work order (PWO) containing the Work order operations (WOO) is produced based on a Sales order (COA), the customer's name will be displayed. | |
Customer reference number | If the Production work order (PWO) containing the Work order operations (WOO) is produced based on a Sales order (COA), the customer's reference number will be displayed. | |
Product |
| Displays the name of the Product (ART) being produced by the Work order operation (WOO). To open the Product (ART) application in the context of the current product, click the View icon. |
Serial number | If the Product unit (LCM) being produced by the Work order operation (WOO) has a serial number, it will be displayed here. | |
Operation | Displays the name of the Operation (OPR) applying to the Production resource (RESCONFIG) performing the Work order operation (WOO). | |
Group |
| If the Work order operation (WOO) is assigned to a Group work order operation (GWOO) group, the name of the group will be displayed. To display the Group work order operations (GWOO) group, in the right side Tabs area, click the View icon. |

The right side contains the tabs; Concurrent groups and Sequence groups.
Important
Groups are not registered, nor forwarded or progressed in any way with actions performed in the Group work order operations (GWOO) application, but rather actions performed in the Aligned productions (RUNGROUPWORK) application for concurrent groups, and Work order operations (WOO) application for sequential groups.
Concurrent grouping enables you to start, pause, stop or complete all the Work order operations (WOO) in the group simultaneously, via the Aligned productions (RUNGROUPWORK) application.
Important
Work order operations (WOO) in Status 2 - In queue or Status 3 - Ready for start, can be added to a Group work order operations (GWOO) group in Status 1 - Pending registration.
Workflow:
Allow Work order operations (WOO) to be grouped in the Production resources (RESCONFIG) application.
Create a concurrent group in the Group work order operations (GWOO) application
Assign Work order operations (WOO) to a concurrent group in the Group work order operations (GWOO) application
Run and complete a concurrently Group work order operation (GWOO) group in the Aligned productions (RUNGROUPWORK) application.
Detailed procedure on "How to group and run Work order operations (WOO) concurrently in the Group work order operations (GWOO) application", can be found here.
The header includes the options of selecting, creating and running concurrent groups. There is also the option of removing Work order operations (WOO) from a group.
Fields, drop-downs and buttons
Work order operation group drop-down menu - To select a previously created concurrent group, click the Work order operation group drop-down menu. To change the name, click the Rename group icon.

Rename group icon
Description field - To add a description to the group, click, type and confirm by pressing ENTER.
Add new group button - To add a new group in Status 1 - Pending registration, click the Add new group button.

Add new group button
Run group button - To run a group via the Aligned Productions (RUNGROUPWORK) application, click the Run group button.

Run group button
Remove from group button - To remove selected Work order operations (WOO), click the Remove from group button.

Remove group button
Search field, filter builder and column settings
The header contains multiple options to filter the list:
The list in the Concurrent groups tab details the Work order operations (WOO) added to the concurrent group.
Column | Icons | Description |
|---|---|---|
| Displays the status of the assigned Work order operations (WOO). To select a single or multiple Work order operations (WOO), especially for removal, click the Status icon(s). The status description is also on display, next to the Status icon. | |
Work order |
| Displays the Production work order (PWO) identifier of the Work order operation (WOO). To open the Production work order (PWO), click the View icon. |
Quantity | Displays the quantity of the Work order operation (WOO). | |
Customer | If the Production work order (PWO) is a production need from a Sales order (COA), the name/company name of the Customer (CUS) is displayed here. | |
Customer reference number | If the Production work order (PWO) is a production need from a Sales order (COA), the customer reference number of the Customer (CUS) is displayed here. | |
Product |
| Displays the name of the Product (ART) being produced by the Work order operation (WOO). To open the Product (ART) application in the context of the current product, click the View icon. |
Serial number | If the Product unit (LCM) being produced by the Work order operation (WOO) has a serial number, it will be displayed here. | |
Operation | Displays the name of the Operation (OPR) applying to the Production resource (RESCONFIG) performing the Work order operation (WOO). |
The Sequence groups tab allows grouping of Work order operations (WOO) and then to run them one after another, sequentially.
The production planner may rename the Group work order operation (GWOO), add a Description, set a Priority for the whole sequence group and change the order of the Work order operations (WOO) inside the sequence by using drag and drop in the Sequence groups tab.
Note
The priority numbers that have already been taken will not show up in the Priority drop-down menu.
The group of Work order operations (WOO) can be viewed and run via the Operators list of production work order operations (RWOO) application by clicking the View group button. The order of the work order operations within the sequence can be seen in the Work order operations (WOO) application by selecting the Show sequence checkbox.
Important
Work order operations (WOO) in Status 2 - In queue or Status 3 - Ready for start, can be added to a Group work order operations (GWOO) group in Status 1 - Pending registration.
Workflow:
Allow Work order operations (WOO) to be grouped for Production resources (RESCONFIG)
Create a sequential group in the Group work order operations (GWOO) application
Assign Work order operations (WOO) to a sequential group in the Group work order operations (GWOO) application
Run and complete a sequence group in the Work order operation (WOO) application.
Detailed procedure on "How to group and run Work order operations (WOO) sequentially in the Group work order operations (GWOO) application", can be found here.
The header includes the options of selecting, creating and viewing sequential groups. There is also the option of removing Work order operations (WOO) from a group.
Fields, drop-downs and buttons
Work order operation group drop-down menu - To select a previously created sequence group, click the Work order operation group drop-down menu. To change the name, click the Rename group icon.
Rename group icon
Priority drop-down menu - Set a priority for the Work order operations (WOO) in the sequential group by clicking the Priority drop-down menu. Only available priority indexes are displayed.
Important
This is only relevant if the Company setting (CSV), Sort work order operations by group (GWOO) priority is enabled.
Description field - To add a description to the group, click, type and confirm by pressing ENTER.
Add new group button - To add a new group in Status 1 - Pending registration, click the Add new group button.
Add new group button
View group button - To view a group via the Operators list of production work order operations (RWOO) application, click the View group button.

View group button
Remove from group button - To remove selected Work order operations (WOO), click the Remove from group button.
Remove group button
Search field, filter builder and column settings
The header contains multiple options to filter the list:
The list in the Sequence groups tab details the Work order operations (WOO) added to the sequential group.
Column | Icons | Description |
|---|---|---|
| Decide the sequence for the Work order operations (WOO) by dragging and dropping via the Handlebar icon in the list. | |
| Displays the status of the assigned Work order operations (WOO). To select a single or multiple Work order operations (WOO), especially for removal, click the Status icon(s). The status description is also on display, next to the Status icon. | |
Work order |
| Displays the Production work order (PWO) identifier of the Work order operation (WOO). To open the Production work order (PWO), click the View icon. |
Quantity | Displays the quantity of the Work order operation (WOO). | |
Customer | If the Production work order (PWO) is a production need from a Sales order (COA), the name/company name of the Customer (CUS) is displayed here. | |
Customer reference number | If the Production work order (PWO) is a production need from a Sales order (COA), the customer reference number of the Customer (CUS) is displayed here. | |
Product | Displays the name of the Product (ART) being produced by the Work order operation (WOO). To open the Product (ART) application in the context of the current product, click the View icon. | |
Serial number | If the Product unit (LCM) being produced by the Work order operation (WOO) has a serial number, it will be displayed here. | |
Operation | Displays the name of the Operation (OPR) applying to the Production resource (RESCONFIG) performing the Work order operation (WOO). |
The Context menu options are available in the top right of the application by clicking the Context menu options icon.
| Context menu options icon |
Context menu option | Description |
|---|---|
Delete work order operation group | To delete a concurrent or sequential Group work order operation (GWOO) group, select the Delete work order operation group option. |
Navigate to the Company settings (CSV) application and the settings listed below
Option 1: RamBase menu → Admin → Overview → Settings → Company settings → Production → Production
Option 2: Click the Program field and type "CSV + name of setting" and press ENTER.
Click here to read more about the user interface.
Important
Starting Work order operations (WOO) via a concurrent group requires them to be completed in the same concurrent group.
Important
Work order operations (WOO) in Status 2 - In queue or Status 3 - Ready for start, can be added to a Group work order operations (GWOO) group in Status 1 - Pending registration.
Workflow:
Allow Work order operations (WOO) to be grouped in the Production resources (RESCONFIG) application.
Create a concurrent group in the Group work order operations (GWOO) application
Assign Work order operations (WOO) to a concurrent group in the Group work order operations (GWOO) application
Run and complete a concurrently Group work order operation (GWOO) group in the Aligned productions (RUNGROUPWORK) application.
A. Allow Work order operations (WOO) to be grouped for Production resources (RESCONFIG)
Setup in the Production resources (RESCONFIG) application
Navigate to the Production resources (RESCONFIG) application
Option 1: RamBase menu → Production → Resource management → Resource configuration
Option 2: Click the Program field and type "RESCONFIG" and press ENTER.
Click here to read more about the user interface.
From the list, select the Production resource (RESCONFIG) to be setup for grouped Work order operations (WOO).
In the Settings area, enable the Allow grouping work order operations checkbox.
If time logged on Work order operations (WOO) is to be distributed on all grouped Work order operations (WOO), enable the Distribute time on concurrent groups checkbox.
B. Create a concurrent group in the Group work order operations (GWOO) application
Navigate to the Group work order operations (GWOO) application.
Navigate to the Group work order operations (GWOO) application
Option 1: RamBase menu → Production → Production → Group jobs on resource
Option 2: Click the Program field and type "GWOO" and press ENTER.
Click here to read more about the user interface.
In the Group work order operations area, click the Production resource drop-down menu and select the Production resource (RESCONFIG), with Work order operations (WOO) to be grouped.
Click on the Concurrent groups tab and then click on the Add new group button.
Add new group button
The Work order operation group will be created in Status 1 - Pending registration. The group is named automatically in the format yyyy-MM-dd along with a name based on the type of group and its sequence.
Example:
If this is the first time creating a Concurrent group for this Production resource (RESCONFIG):
"2025-03-31 - Concurrent 1"
Important
The status of the concurrent will be progressed with the actions performed in Step C 6.
C. Assign Work order operations (WOO) to a concurrent group in the Group work order operations (GWOO) application
Navigate to the Group work order operations (GWOO) application.
Navigate to the Group work order operations (GWOO) application
Option 1: RamBase menu → Production → Production → Group jobs on resource
Option 2: Click the Program field and type "GWOO" and press ENTER.
Click here to read more about the user interface.
In the Group work order operations area, click the Production resource drop-down menu and select the Production resource (RESCONFIG), with Work order operations (WOO) to be grouped.
In the Concurrent groups tab, select a Work order operation group in the drop-down menu.
Note
The group must be in Status 1 - Pending registration for Work order operations (WOO) to potentially be assigned.
Assign the Work order operation (WOO) to the concurrent Work order operation group:
Assign a single Work order operation (WOO) from the Work order operations area by clicking the line and highlighting it, and then click the Assign to group button.
Alternatively, click the Status icon to select it, and then click the Assign to group button.
Assign multiple Work order operations (WOO) from the Work order operations area by clicking the Status icons to select multiple, and then click the Assign to group button.
To run the group, click the Run group button to open the Aligned productions (RUNGROUPWORK) application.
Note
When performing concurrent Work order operations (WOO), the Run group field in the Work order operation (WOO) application will describe the Group work order (GWOO) group, in addition to flagging it with the color "Blue".
Run group button
The Aligned productions (RUNGROUPWORK) application allows the user to perform the following actions on all Work order operations (WOO) in the group:
Work order operation (WOO) status variations
The available options will depend on the following setup for the Work order operation (WOO):
Is there a pre/post process in terms of setup or cleanup for the base Operation (OPR)?
Is there defined a default queue wait time in the Structure operation item (KITARTOPRITM)?
The example below is based on Work order operation (WOO) with a pre and post changeover, and no queue time.
Set ready and Start button - Will forward the Work order operations (WOO) in the group from Status 2 - In queue, to Status 3 - Ready
Start PRE process button - Will forward the Work order operations (WOO) in the group from Status 3 - Ready, to Status 4 - Changeover setup
Pause PRE Process button- Will pause the setup, and allow for Undo Last Op.
Consecutive options when pausing the pre process:
Undo Last Op button - To undo actions made, click Undo Last Op.
Continue PRE Process button - Will resume the setup.
PRE Process Completed - Will complete the setup, while remaining in Status 4 - Changeover setup.
Start PROD - Will start the production by forwarding the Work order operations (WOO) from Status 4 - Changeover setup to Status 5 - Processing.
PROD Completed button - Will complete the Work order operations (WOO).
Start POST process button - Will forward the Work order operations (WOO) from Status 5 - Processing to Status 7 - Changeover cleanup.
POST Process Completed button - Will forward the Work order operations (WOO) from Status 7 - Changeover cleanup to Status 9 - Completed.
Important
Work order operations (WOO) in Status 2 - In queue or Status 3 - Ready for start, can be added to a Group work order operations (GWOO) group in Status 1 - Pending registration.
Workflow:
Allow Work order operations (WOO) to be grouped for Production resources (RESCONFIG)
Create a sequential group in the Group work order operations (GWOO) application
Assign Work order operations (WOO) to a sequential group in the Group work order operations (GWOO) application
Run and complete a sequence group in the Work order operation (WOO) application.
A. Allow Work order operations (WOO) to be grouped for Production resources (RESCONFIG)
Setup in the Production resources (RESCONFIG) application
Navigate to the Production resources (RESCONFIG) application
Option 1: RamBase menu → Production → Resource management → Resource configuration
Option 2: Click the Program field and type "RESCONFIG" and press ENTER.
Click here to read more about the user interface.
From the list, select the Production resource (RESCONFIG) to be setup for grouped Work order operations (WOO).
In the Settings area, enable the Allow grouping work order operations checkbox.
If time logged on Work order operations (WOO) is to be distributed on all grouped Work order operations (WOO), enable the Distribute time on concurrent groups checkbox.
B. Create a sequential group in the Group work order operations (GWOO) application
Navigate to the Group work order operations (GWOO) application.
Navigate to the Group work order operations (GWOO) application
Option 1: RamBase menu → Production → Production → Group jobs on resource
Option 2: Click the Program field and type "GWOO" and press ENTER.
Click here to read more about the user interface.
In the Group work order operations area, click the Production resource drop-down menu and select the Production resource (RESCONFIG), with Work order operations (WOO) to be grouped.
Click on the Sequence groups tab and then click on the Add new group button.
Add new group button
The Work order operation group will be created in Status 1 - Pending registration. The group is named automatically in the format yyyy-MM-dd along with a name based on the type of group and its sequence.
Example:
If this is the first time creating a Sequence group for this Production resource (RESCONFIG):
"2025-03-31 - Sequence 1"
Important
The status of the concurrent will be progressed with the actions performed in Step C 8.
C. Assign Work order operations (WOO) to a sequential group in the Group work order operations (GWOO) application
Navigate to the Group work order operations (GWOO) application.
Navigate to the Group work order operations (GWOO) application
Option 1: RamBase menu → Production → Production → Group jobs on resource
Option 2: Click the Program field and type "GWOO" and press ENTER.
Click here to read more about the user interface.
In the Group work order operations area, click the Production resource drop-down menu and select the Production resource (RESCONFIG), with Work order operations (WOO) to be grouped.
In the Sequence groups tab, select a Work order operation group in the drop-down menu.
Note
The group must be in Status 1 - Pending registration for Work order operations (WOO) to be potentially assigned.
Set a priority for the Work order operations (WOO) in the sequential group by clicking the Priority drop-down menu. Only available priority indexes are displayed.
Important
This is only relevant if the Company setting (CSV), Sort work order operations by group (GWOO) priority is enabled.
Assign the Work order operation (WOO) to the sequential Work order operation group:
Assign a single Work order operation (WOO) by clicking the line, to highlight it, in the Work order operations area and then click the Assign to group button.
Alternatively, click the Status icon to select it, and then click the Assign to group button.
Assign multiple Work order operations (WOO) by clicking the Status icons to select multiple, in the Work order operations area, and then click the Assign to group button.
Decide the sequence for the Work order operations (WOO) by dragging and dropping via the Handlebar icon in the list.

Handlebar icon
When the sequence is set, click the View group button to open the Operators list of production work order operations (RWOO) application.
iView group button
To open the Work order operations (WOO) application and perform the Work order operations (WOO) in sequence, click the Right arrow icon in the Operators list of production work order operations (RWOO) application.
Note
In the Work order operations (WOO) application, the Show sequence checkbox will be enabled by default. When enabled, the Work order operations (WOO) grouped in the sequential Group work order operations (GWOO) group will be displayed in the carousel, sequentially. They can then efficiently be performed in the set sequence.
To view all the Work order operations (WOO) for the currently selected Production work order (PWO), which contains the currently selected Work order operation (WOO), uncheck the Show sequence checkbox.
WORKLOG enables you to manage the work log, which is created when you start any Work order operation (WOO). You can also manually add a worklog record.
Select Worklog in the Work order operation (WOO) application to open WORKLOG.

WORKLOG displays the operator name, start time and end time, if any operations are started, There are three types of Work step:
Setup. Status ST:4.
Processing. Status ST:5.
Cleanup. Status ST:7.
The Setup, Processing and Cleanup times must be specified in the Production Operations (OPR) application as shown below. The times are multiplied by the number of products to derive the total times. For example, if the Run time is one hour, and the Quantity is 10, then the total Run time for the production is 10 hours.

To manually add a worklog record, in Worklog, enter the Start at, Worked time, Operator, Work step, Manhour rate type and Note, then select Add.

To add a new Manhour rate type, open the Resources (RESCONFIG) application, in the Manhour types tab, select Add new manhour type. Enter the Manhour type and Rate and select Create.

Select
 to edit an existing worklog record. You can change the Operator and Hours. You must enter a note when you make any changes to a worklog record. You cannot save the changed record without entering a note. Select
  to save your changes.
Select the Revision history icon to see a history of changes to the worklog record.

Select
 to apply the following filters to the view. You can remove a filter by selecting X in the filter label.
Cleanup. See all the worklogs for clean up tasks in Status ST:7.
Machine. See all the worklogs that are logged by selecting the Start and Complete. these worklog hours are calculated separately from the Manhours worklogs.
Manhours. See all the worklogs for work hours added manually.
My worklogs. See all the worklogs related to me.
Processing. See all the worklogs in Status ST:5.
Setup. See all the worklogs in Status ST:4.
Started today. See all the worklogs that were started today.

The progress bar gives the Total hours worked. This does not include worklog hours entered manually. To enter manhours manually, the Allow man hours setting must be enabled in the Resources (RESCONFIG) application.
The upper area of the WORKLOG window gives the following information.
Operation name. the name of the operation is given here.
Sequence Number. The sequence number of the operation is given here.
Started at. The date and time of starting the operation is given here.
Finished at. The date and time of completion of the operation is given here.
Setup time. This progress bar show the logged setup time against the planned setup time. The progress bar is green If the setup time is less than planned, and red if the setup time exceeds the planned time.
Run time. This progress bar show the logged run time against the planned run time. The progress bar is green If the run time is less than planned, and red if the run time exceeds the planned time.
Cleanup time. This progress bar show the logged cleanup time against the planned cleanup time. The progress bar is green If the cleanup time is less than planned, and red if the cleanup time exceeds the planned time.
Total time. This progress bar show the automatically logged total operation times against the planned total operation time. The progress bar is green If the total time is less than planned, and red if the total time exceeds the planned time.
Total manhours. The total manually logged hours are given here.
Select the Copy entry icon
 to copy a manual entry. You can see the details in the Worklog pane. Change any information as necessary and select Add to create a new manual worklog record. This feature is useful when you want to create similar worklog records.
Select the Show revisions icon
 to view a history of the changes to the worklogs.
In the Production Work Order PWO) application, there is an option to split the Production work order (PWO). If you split a PWO, If the PWO is split, then the worklogs must also be split because hours already logged must be split between two worklogs. In the notes, you can see that the worklog was Transported from a PWO. The Show split worklogs icon is also visible for a split worklog. Select Show split worklogs to view the PWO to which the split worklogs are assigned.
Enable the Use legacy worklog setting in the CSV application if you want to use the legacy WORKLOG application, in case of issues when using the new WORKLOG application. This setting is automatically removed if you do not enable it for a certain period of time.

It is possible to force check that serial numbers have been assigned to parts related to a specific operation.
Enter the Kit Structure you want to have a serial number check on. This is available from Production Work Order (PWO) and Life Cycle Management (LCM) documents. Click the green Kit-icon to access KITDOC.
Highlight the operation in the item lines and press ENTER.
This opens a popup called Structure Operation item. Here you will find a checkbox called CheckSerialNoOnParts.
This checkbox may have been set to default in the actual Operation (OPR) document. If not, the checkbox is presently unchecked.
When this checkbox is selected, serial numbers must be added to the parts in the LCMs part list for the parts that are confirmed as picked, before the operation can be completed. You will receive an error message stating that All serial numbers are not entered.
If the checkbox has been selected by error, you can enter the PWO in question, click the Kit icon, select the operation on the item line and press ENTER. This opens a popup where you can uncheck the CheckSerialNoOnParts checkbox.
Enter the related LCM document(s), where you can set the serial numbers in the item lines.
The column serial numbers have a blank text field and a button called Select From SSA in the item lines. You can either enter a unique serial number in the free text field, or click the button and find a serial number from the Goods Reception (SSA) document.
Use the Worklog (PWOWL) for Production work order (PWO) to log time on operations done for a production work order. You can log time for the operations in the PWO after the PWO is completed. To log time on operations done for Work order operations (WOO) by using the Start and Stop buttons, use the Worklog for WOO application. Refer to The Worklog application (WORKLOG) for Work Order Operatins (WOO). There are two tabs in the workspace,
Enter PWOWL in the program field and select the Enter key to open the application.

The Work order operations tab
Select
 in Production Work Order to select the necessary PWO for which you want to log time. The default fiter is In production. Select X to clear the filter if necessary.
The Production work order details pane gives the details of the PWO such as the PWO number, Product in the PWO, and the Product description.
The progress bars pane on the right gives progress bars for Setup time, Run time, Cleanup time and Total time. If there are many Work order operations (WOO) in the PWO, the Total time shows the total time taken by all the operations in the PWO. These times are calculated from the automatically accrued time when selecting the Start and Stop buttons in the WOO and also any logged time from the PWOWL and WOOWL. The Total manhours progress bar displays the sum of the total man hours that are entered manually in WORKLOG for PWO. If the accrued time is within the planned hours, the progress bar is green. If the time exceeds the planned hours, the progress bar is red.
The Work order operations tab
To add work hours manually for a specific WOO in the PWO, select the WOO in the grid of the Work order operations tab. select
in Operator and select the operator name from the list. If you add an operator in the Restricted operator tab of RESCONFIG, The operator name becomes available in the list. If no Restricted operator is specified, you can select any employee in the company from the Operator list. If you do not select an operator in Operator, the time is logged against the employee or operator currently signed in .
In Manhour rate, select the manhour rate from the list. The manhour rates are defined in the Resource configuration (RESCONFIG) application. Manhours can only be added if the Allow man hours setting in RESCONFIG is enabled.
In Step, select the production step. The step can be Processing, Setup or Cleanup. The steps are defined in the Production operations (OPR) application. The default Step is Processing.
In Start at. select
to specify the start date and  to specify the start time.
In Add time, enter the work hours you want to add to the worklog and select
 or Ctrl+s. The specified work hours are added to the Total manhours.. To enable the icon, you must specify the Step, Start at and Add time
To clear all the fields except Step, select Ctrl+z.
Select
in Operation to inspect the Work order operation (WOO) in the Work order operation application.Select
in Worklog to inspect the Work order operation worklog for the Work order operation (WOO).Select
in Operation to inspect the resource in the Operators list of production work order operations application.Select
in the grid to set a Work order operation to Status ST:9 (Completed). In some cases, you may have to complete picking before completing the WOO. Select Pick and Pick all in the PICK application to complete the picking.


Select
 in the grid to reopen a Work order operation in Status ST:9. You must select a reason for reopening the WOO. If you specify a new reason that is not in the list, it is added to the list and is available when you next reopen a WOO:
The Worklogs tab
Worklogs gives all the worklogs for all the Work order operations (WOO) in the the Production work order (PWO) selected in Production work order. When you create worklogs, you can check if the worklog was created by viewing the Worklogs tab.

A dummy product can be used in situations where it is undecided which product is to be used in the final production.
Tip
The dummy Product (ART) is replaced before production starts.
A dummy Product (ART) must be of the type = Z - non stock materials.
A. Dummy product - Enable the Replace before production checkbox in Product (ART) application
In the Product (ART) application, select the dummy product, or create a new one.
Click on the Properties tab and then the Production tab.
Enable the Replace before production checkbox.
Using this Product (ART) in the production will prompt a warning on the Production Work Order (PWO), a yellow flag with the text: "Needs material replacement to release".
B. Replace the dummy product from the Production structure (KITDOC) in the Production work order (PWO) application
Select the Production work order (PWO) and press ENTER, or create the Production work order (PWO) from the Production work orders (PWOMENU) application.
In the Production work order (PWO) application, click on Structure button to open the Production structure (KITDOC) application.
In the Production structure (KITDOC) application, click on the dummy part to select it and press ENTER to open the PWO Structure Part Item popup.
Right click or press F12 and select the Replace product in structure option to open the Part select popup.
Either select or search for a part to replace the dummy product. When the part is selected, press ENTER.
Navigate back to the Production work order (PWO) application.
The dummy part with type = Z has now been replaced and the warning flag is gone. The Production work order (PWO) can now be released by clicking the Release button in the Actions area.
In the Production Work Order (PWO), when all the operations in the structure have been performed, the document will be set to Status 8.

To complete the production, click the Forward to Stock button at the bottom of the screen.
If the article has a Preferred Stock Location registered, you can use the Forward to Stock and Move To button. This will add the finished product to the preferred stock location.
The document will now receive Status 9.
A Goods Reception (SSA) with doctype Production will be created with the produced kit as item.
The planning method for products where the Production Work Order (PWO) is designed to run at a production line with a continuous flow is different from the method used for ‘station based’ production. Running a production work order at a production line means that the planned start time of operation number 2 should be equal to the end time of the first product (unit) at operation number 1.
Overlapping operations:

The total production time for the planned quantity will in this example be one week. If this product was set up with ‘station based’ planning the calculated total production time would be several weeks.
The line production method solves two issues:
The total production time for a PWO running on a line must be the time from the first product (unit) starts on the line till the last product leaves the line. This will give the correct load and period for the workload and capacity for the involved resources.
The material / parts requirement date is the start date of the operation that the material / parts are linked to. This has a direct influence on the required date for POs to supplier and the material/parts optimize processes. And these dates will not be correct when not using overlapping planning for a line production.
There are some criteria that must be followed to get the functions and planning method to run properly for a line production product:
All operations (OPR) must only have value in the ‘Time’ field (variable production time, production time per unit. They should never have ‘Pretime’ (setup time) or ‘Posttime’. That will not work, and the line is not flowing.
Queue time between operations must not be set, the process will not handle this. This is also a flow ‘blocker’.
A product is either set for running at a production line or for ordinary ‘station based’ planning. There is no option to combine these methods for one product by letting some work orders run at the line and some at stations.
The line production method is enabled / disabled at the product (ART), ‘Misc’ folder, field ‘Lineproduction’ in the ‘DATA’ box. Value ‘Yes’ (1) = the product is set to be planned by the line production method.
Permission is given to the duty ‘Prepare product for production’.
The planning for a line production batch – both for resource planning and purchase planning – will most probably work best when the planning is done for one work order that holds the total quantity to be produced within a production period of 1-2 weeks (or other company preferences). A large order for a batch that needs several weeks of production time should probably be split into some smaller batches to get appropriate dates for purchase and planning.
A planned batch is also often preferred to be split into very small batches (some time down to 1 pcs per work order) when the production is to be started.
There is now available a new multi split tool that simplifies these split processes. The function is available at production work orders (PWO) that are registered but not released for production, that is: PWOs with status = 2, 3, 4.
F12 – Multisplit Permission given to duty: Plan production work orders
There are two methods to build the split table before confirming and starting the action.
Build split table by manually given units and dates:

The quantity and date is specified as shown in the red dotted box, and the line is added to the table below by the
 sign.
sign.Build split table by work orders and units:

Set number of work orders or number of units per order (the other number is calculated), the production start date and days between each start date:

The
builds the split table:
The suggested lines in the table can be deleted and the operations repeated until the table is as required.
There are two selectable actions (buttons) at the footer of the application (bottom of the screen):
Split and confirm
This function will split the PWO according to the specified table and confirm the new PWOs that are created. The new PWOs will get status = 2 or 3 or 4 when the split jobs are done.
Split and release
This function will split the PWO according to the specified table and both confirm and release all the PWOs (including the source) for production. All PWOs will get status = 5.
The user will get a short notice on the screen when one of the actions is selected ‘Batch is started’ and the job is started. The involved PWOs are blocked for other actions while the batch job is running.
Please note that sub kits (sub PWOs) are not automatically split by the multisplit function even if the setting ProductionWorkOrderSplitSubOrder is set to ‘ON’. This is deactivated for line production products.
Products of Class = K/KA and their Production Work Orders (PWO) have Operations (OPR) and part/material/sub-products (ART) that defines the operation cost and the material cost for the product. In some cases there are also other costs that the users want to add to the structure. This is, for example, a cost added to cover for the administration cost for purchase or warehousing cost, typically a percentage added on top of the material cost. Or it can be a license cost that applies when running a specific work operation. These added costs are defined in the CST archive via the ADC application. All such added costs are direct costs, that means that they are part of the completed products stock value when included in a PWO.
Navigate to the application
Option 1: RamBase menu→Production→Cost and time→Additional costs
Option 2: Click the Program field and type "ADC" and press ENTER.
Click here to read more about the user interface.

The menu to the left lists all the ADCs based on the search criteria. New and active ADCs are displayed by default.
The area to the right displays the details of the selected ADC.
Name
The name of the additional production cost.
Cost Target
Displays if it is fixed or variable cost.
Fixed
ADC will be added only once for operation in calculations.
Variable
ADC will be added to each planned/produced article.
Classification
Additional Production Cost classification.
Value
The value of the ADC.
Currency
Displays the default currency.
Value type
Type of ADC value provided. Amount if value provided is fixed. Percent if provided value is percentage value.
Used in
This field shows how many Product Structures (KIT) and Operations (OPR) the ADC is used for. The arrow icon to the right also links directly to the KITs and OPRs where this ADC is active.
Write ADC in the program field and press ENTER.
Click the Create new additional production cost button in the lower left-hand corner.
This opens a new popup where you will need to add information:
Name
Give the ADC a descriptive name.
Cost target
Set if the ADC has Variable or Fixed cost.
Click the OK button to create an ADC in status 1.
Optional, add information in the Additional production costs data area.
Choose the Activate option in the context menu to activate the ACD.
The ADC is now in status 4 and can be used in KITs and OPRs.
Note: If you need to deactivate this ADC, choose the Deactivate option in the context menu.
The Product marking template (PMT) application is used as a tool to generate text to mark Product units (LCM) during production. The Product marking template (PMT) will automatically build a marking text for a product unit using the template, if the Product (ART) is added to the Applied products tab. The template has parameters, that if added, will include fields from the RamBase database.
The marking text created from template can be found as a Marking text in the Life cycle management (LCM) application. It can also be found in the Marking column in the Work order operation (WOO) application, here the users can view and edit Product marking text for selected product units and the whole template can be found in the Product marking specification context menu option.
The Product marking template (PMT) application can also be opened from the Product (ART) application. Select the product from the list, click the Properties tab and then the Production sub-tab. The Applies to product marking templates checkbox indicates if a template is relevant for the product. The user can also click the related View icon to open the specific product marking template.
Navigate to the application
Option 1: RamBase menu→Production→Life cycle management→Product marking templates
Option 2: Click the Program field and type "PMT" and press ENTER.
Click here to read more about the user interface.

The application is divided into:
The Product marking template list area
The Product marking template details area
Context menu options
The Product marking template area is filter based and can list all intended templates.
The header includes a search field, the Filter builder icon and the Column settings icon.
The list includes all filtered templates and is divided into columns. The user can create new product marking templates by clicking the Create new product marking template button in the footer.
The user can quickly search for a template. Click the Quick search icon to include or exclude the following in the search:
Product marking template name
Applied product name
Applied customer name
Applied customer first name
The Filter builder includes a set of predefined filters, listed below. A selected and active predefined filter will be placed underneath the search field and marked with color orange. A selected and inactive field will still be placed underneath the search field, but marked with color gray. Click the Remove icon to remove the predefined filter.
Active - This filter will list all Product marking template lists in Status 4 - Active.
New - This filter will list all Product marking template lists in Status 1 - Pending registration.
New and active - This filter will list all Product marking template lists in Status 1 - Pending registration and Status 4 - Active.
The user can also create saved filters by combining Field, Operator and Value in the Create custom filter area. Click the Save filter button to add the custom filter to the My saved filters area. A selected custom filter will be displayed underneath the search bar like a predefined filter.
Click the Column settings icon to open the column settings. Here the user can add and remove columns from the Product marking template list area, Export to excel, Reset to default view and Include custom fields.
The list includes all included columns and filtered templates. The user can create a new product marking template by clicking the Create new product marking template button.
Column/buttons | Description |
|---|---|
ST | Displays the status of the product marking template.
|
Name | Displays the Product marking template name. |
Create new product marking template button | Create a new product marking template manually, by clicking the Create new product marking template button. This will open a popup where the user can click the Name field and type the name of the template. A newly created product marking template will be set in Status 1 - Pending registration. |
The details area is used to handle the specific template, most notable building the template and applying products and customers to the template.
Priority - Applied customer over applied product
In situations where one template is applied to the customer and a different template is applied to the product, the Product marking template (PMT) applied to the customer will be prioritized over the Product marking template (PMT) applied to the product.
Header
Name field - Product marking template name. This can be edited.
Is default checkbox - To set the selected product marking template as default for all products, check the Is default checkbox.
Description free text field - Product marking template description.
Template field - Product marking template text. Type a number from 0 to 80 in curly brackets (e.g. {1}) to create an empty parameter. The parameter will be given a key, and this key can be given content in the Parameter tab.
To add content to a parameter, click the Parameters tab and then select a value from the dropdown menu list.
Under the Parameters tab, the data fields in RamBase are linked.
Fields | Description |
|---|---|
Key | Product marking template parameter key. The key references the value added to the Template field. |
Content | Under Content there is a dropdown menu that lists:
|
The Applied products tab allows users to Apply a product to the template manually by clicking the Add new product button.
Fields | Description |
|---|---|
Product Id | Displays the Product (ART) identifier. Click the View icon to open the Product (ART) application to view and edit details on the product. |
Product name | Displays the name of the Product (ART). |
| To remove a product from the template, click the Remove icon. Verify the choice in the popup by clicking OK or Cancel. |

The Applied customers tab allows users to apply a customer to the template manually by clicking the Add new customer button. This will open a popup where the user can select a customer from the Customer lookup dropdown menu, and click the Create button.
The template will be default for all Product units (LCM) delivered to the applied customer(s).
Column | Description |
|---|---|
Customer Id | Displays the Customer (CUS) identifier. Click the View icon to open the Customer (CUS) application to view and edit details on the customer. |
Customer name | Displays the customer's name, set in the Customer (CUS) application. |
| To remove a customer from the template, click the Remove icon. Verify the choice in the popup by clicking OK or Cancel. |
The context menu options are available from the header by clicking the Context menu options icon.
- - Context menu options icon. To view the context menu options, click the Context menu options icon.
Context menu options | Description |
|---|---|
Copy to new template | To copy a template to a new template in Status 1 - Pending registration, select the Copy to new template option. Available in the following statuses:
|
Delete | To delete a product marking template, select the Delete option. Available in the following status:
|
Reopen | To reopen an active product marking template and make changes, select the Reopen option. This will set the product marking template in Status 1 - Pending registration. Available in the following statuses:
|
Deactivate | To deactivate an active product marking template, select the Deactivate option. This will set the product marking template in Status 9 - Deactivated. Note that a deactivated product marking template can not be activated or reopened. Available in the following statuses:
|
Activate | To activate a product marking template in Status 1 - Pending registration, select the Activate option. This will set the product marking template in Status 4 - Active. Available in the following status:
|

The Template is later generated into a Marking text in the Life cycle management (LCM) application, in this example LCM/456264, because product 030113190007 is applied to the Template in the Product marking template details area in the Product marking template list (PMT) application, PMT/100041 in this case.
A Life cycle management (LCM) document may, in production, be defined as an informational card containing all key information regarding a product. A Life cycle management (LCM) document may be connected to a product using an identification process.
A Life cycle management (LCM) document connected to a purchased product.
A Life cycle management (LCM) document connected to a produced product.
A Life cycle management (LCM) document connected to several serial produced products.
The Life cycle management (LCM) document is unique for each unit, or batch of products. Since this document may contain a batch of products, it is not an identifier such as a serial number. A unique Life cycle management (LCM) document may contain 10 similar products, each with unique serial numbers. It shares similarities with the production number of the chassis of a car in production, while the serial number is the frame number of the car.
A Life cycle management (LCM) document will typically contain all historical data regarding the product and its production process. This includes the product origin, serial number, parts, deviation history, service history, rental history, service interval, measurement documents, certificates and other information.
In an identification process where a product is given a unique production number/Life cycle management (LCM) document you may choose it from a sequence.
Creating a Life cycle management (LCM) document
If a product is to be connected to a Life cycle management (LCM) document it needs to be manually labeled with this number, either if it is a produced or bought product.
Change product
If the Life cycle management (LCM) document is connected to the incorrect product it needs to be changed in the system, but all information needs to be retained.
Setting name | Description |
Set Owner on Product Unit when is shipped | If the setting is ON, the Owned by field is automatically populated with Customer information when the Product unit (LCM) is shipped out (CSA). This only applies if the Owned by field was previously empty. |
Auto create Quality Report when performing a part change on LifeCycle | If setting is 'On' - Quality Report (QAR) will be automatically created when replacing parts at LifeCycle (LCM). The Quality Report (QAR) will get key information from Life Cycle/ProductionWorkOrder (LCM/PWO) |
Auto Prefix on Serial Number | It the setting is 'ON', Prefix can be set. Serial numbers are then automatically generated for Purchase Orders (SPO) where the Product has 'Yes' in AutocreateSnoForSPO or Life Cycle's (LCM) where the Product (ART) has 'Yes' in AutocreateSnoForLCM. The setting 'ProductionSerialNumberCounter' must also be set if serial numbers should automatically be generated |
Automatic Serial Number Model | Value in this setting must be one of the following alternatives. Modelnr.1=Skipper's setup :: Serialnumber will be Life Cycle number (LCM) with or without 'ProductionSerialNumberPrefix' setting first. Modelnr.2=DISPLAY's setup. Modelnr.3=Not in use yet. For new customers, use Modelnr.1 |
Serial Number Counter | Value in this setting is a parameter that will automatically generate serial numbers for Purchase Orders (SPO) or Life Cycles (LCM), - if Products (ART) has AutocreateSnoForSPO=Yes. SNOCNT is a counter that will automatically be increased by 1 when a new serial number is generated. The serial number will consist of this parameter and CSV/AutoProductionSerialNumberPrefix concatinated (prefix first). Serialnumber generating will only happen for Productions with LCMDOC=UNIT. Functionality can't be used if CSV/ProductionSerialNumberModel is set to SerialModel=1. To edit the Serial counter, type 'SNO' in the program line and use the F12 option 'Edit Serial Number Settings' |
Serial Number Prefix | Value in this setting is a Prefix of serial numbers. The value will be set before Serial number counter or Serial number from Modelnr.1. Functionality doesn't work when using Serial number from Modelnr.2 |
Serial Number Prefix Field from Product (ART) | Value in this setting is GR1. Information from this field on Product (ART) will be used as prefix. Functionality is not valid for Serial number Model.2. If CSV/ProductionSerialNumberPrefix has a value, this setting will be overridden |
Serial Number Start for Pilot Product Productions | LifeCycle (LCM) serial sequence number for pilot series production (Product status=3). If value in the setting is '10', - LifeCycle (LCM) serial number after ""<part>-"" will start on '10' or last used above 10+1. This functionallity will only work if the setting ProductionSerialNumberModel has value=2 |
Serial Number Start for Prototype Product Productions | Value in this setting is a number. If value is '1', - LifeCycle (LCM) serial sequence number for prototype production (Product status=2 will get LifeCycle (LCM) serial number after "<part>-" start on '1'. This setting will only work if the setting ProductionSerialNumberModel has value=2 |
Serial Number Start for serial Productions | Value in this setting a number that is used when calculating Serial sequence number for serial production (Product in Status=4). If the value is '100' - LifeCycle serial number (after ""<part>-"") will start on '100' or last used above 100 + 1. This setting will only work if the setting ProductionSerialNumberModel has value '2' |
Life Cycle Management, (LCM), is a document which holds key details about each unit or batch to be produced. The document is created at production release, when the Production Work Orders (PWO) is set to Status 5 (In production). Details are recorded until the production ends. Depending on the value of ART.LCMDOC, LCM documents are created per unit or per batch. The following rules apply:
UNIT: One LCM document per unit.
BATCH: One LCM document per production series (PWO). Material supply from different sources may cause the original batch LCM to be split.
To open the Life Cycle Management (LCM) application, find Production in the RamBase menu and then Life cycle management. Click Life cycles to enter the LCM application.
Part List
The Part list folder lists any materials associated with a production for which there is a tracing requirement.
RMA Requests
The Return Material Authorization (RMA) folder is used to hold information about the return and repair or replacement or refund of defective goods.
Used in
For sub assemblies. Showing which production that the LCM is used within.
Service
Shows the service history.
Rental
Shows the rental history.
Project orders
Set owner for LCM
You can specify the owner of the LCM. The owner can be supplier or the customer. There are 2 ways to set the owner for an LCM.
If the CSV setting SetOwnerOnProductUnitWhenShipped is enabled, then the owner fields are updated with the customer information in the CSA, but only if the owner fields were previously empty. If the owner fields are not empty, these values are not overwritten. The CSA must already be linked to the LCM. Refer to Settings for Production - Life cycle management.
You can also specify the owner manually.
Select
 to the right of the Owned by label in LCM.
 In the Product Owner window that appears, select Customer or Supplier as the owner. If you selected Customer, the CUS icon is displayed. If you selected Supplier, the SUP icon is displayed.
Select the CUS icon to display the Select Customer (CUSSELECT) window where you can select the customer by double clicking the necessary Customer name.
Or select the SUP icon to display the Select Supplier (SUPSELECT), where you can select the necessary supplier by double clicking the Supplier name.
Select
 at the right side of the Owned by label to remove the owner information from the LCM.
There are four situations where a Life cycle management (LCM) document is/can be created:
Automatically created from a Production work order (PWO) by Release for Production Service
Manually created without a preceding production (for rental and service)
Imported into the system from OEM production
Manually created via the Life cycle management menu (LCM)
LCM documents are usually generated automatically, but may be created manually if needed. This may be the issue if a company buys kits it did not produce themselves and want to have a LCM document related for service reasons.
The requirement for creating an LCM is that the Goods reception (SSA) with the purchased kit is in Status 3 or Status 9.
Open the SSA and register it to Status 3 and enter the item.

Choose the Create product units (LCMs) and sub product units option in the Context menu.

To create LCMs for purchased products, choose the Create product units (LCMs) and sub product units option in the context menu.
In the SSA item view, select the View product unit (LCM) in the Context menu to inspect the LCM documents.
For users who do:
not use the Service order (CSO) service model that need to create Product units (LCM) for old Products (ART)
not run the Customer deviation (CDV) or Sales order (COA) repair model
want to have a Product unit (LCM) to link the sale of spare parts to
Requirements
Permission (PRM) - Create life cycles (LCM) - PRM/100715
Duty (DUTY) - Create service orders - DUTY/100414
From the Life cycle management menu (LCM) application
Select the Create LCM option available from either the Context menu, or by right clicking and selecting the option from the dropdown menu.
In the LCMNEW popup, provide the following:
Product by clicking the Right arrow icon and selecting, or type the Product (ART) name and press ENTER.
Optional Text as a description for the new Product unit (LCM).
SerialNo - Serial number must be provided.
Qty - Quantity
To confirm, click the Confirm button.
Product unit (s) (LCM) is now added to the Product (ART) in Status 9 - Processed.
Life Cycle Management (LCM) documents are used to track all changes in a product during its life cycle. There are situations where a kit needs to have one or several parts replaced, which needs to be registered in a LCM document for traceability and service reasons.
The qualifying criteria are:
The LCM must be in production,
or
There must be a service order for the LCM.
Open the related LCM document to the kit where you want to change a part.

Here you will see the Change icon to the right in the item line. The icon is two overlapping sheets of paper.
If the desired part you wish to change is not present in the document, click the Add Part from Structure if it is present in the structure, or Add Part from ART if you need to find it in the Product (ART) application.
Highlight the desired part and press ENTER.
Click the Change part icon to open the Change LCM Part popup.

The part will now be selected and you must now choose what to do with the replaced part. The options are:
Returned to Stock
The old part will be put back into stock. A return sheet is printed, part must be put back in stock. The cost is not added to production.
Returned to Supplier
This option returns the faulty part back to the supplier. This creates a Supplier Return (SRT) document with a reference to this change. The cost of the part will not be added to the production as the supplier will carry this cost.
Scrapped
This option creates a Stock Correction (SAW) document and the part is scrapped and a new part is substituted in the production.
Press ENTER on line to select Lot. This will add the part to the To be replaced with field.
Choose what to do with the replaced part in the Replaced part to be field. Below you are presented with four fields which requires information concerning the change, the reason for it and what to do with the replaced part.
The Create QAR-field ask you if a Quality Assurance Report (QAR) document is to be created with a reference to the change. You may choose YES or NO, based on your use of QAR documents.
The Caused By field gives you the option to point to where the fault lies, which is either with the supplier or the production.
The Reason for Change field is a freetext field where an explanation must be entered.
Choose if a QAR document is to be created in the Create QAR drop down menu.
Enter a Caused by option.
Add info on the reason for change.
Enter the destination stock location for the replaced part in the Stock Location field. This field will be pre-filled with a default destination if you have a Stock Location (STL) defined as default stock location when part is changed in LCM in the Stock Location Details area in the STL application.
Click the Confirm button to confirm part change. This takes you back to the LCM document and you will see the Part Change: Picking in progress icon. Information regarding the change can be seen in the Replacement column.
Click the Part Change: Picking in progress icon, which will take you to the Pick Goods application.
Proceed with the picking process by entering the desired quantity and click the Confirm button at the bottom. If you use the Pick All button you will not need to click Confirm.
Note: If you have made an error, you can click the Part Change: Picking Completed icon on the LCM to return to the Pick Goods application. Clear the filter if needed and press ENTER to view all picked items. Click the Undo Pick All button to restart the pick process.
When you create the LCM, RamBase builds the part list as follows.
Create items for 1 pcs as shown above for parts with unit = pcs and with both INCLUDEINLCMPARTLIST = Yes (1) and
REQUIRESERIALNOTOSHIP = Yes (1) . The last of these two fields is shown in ART as ‘RequireSnoToShip’. Exception from this rule: Always create items for 1 pcs for sub assemblies with unit = pcs.
Create items with total quantity for parts with unit = ‘pcs’ and only INCLUDEINLCMPARTLIST = Yes (1). The result of this for the example above is given in the figure below.

By opening the line to, for example, replace 2 of these 5 parts by first modifying the existing line to 3 pcs and then adding a new line for pcs of this part by the function Add part from Structure and modify the quantity to be added to 2 pcs.

In Add part from structure, select the quantity to be added (the quantity that was reduced at the existing line).

Select the part and change the quantity in Override KitQty. It is important to first reduce at existing line and then add correct quantity at the new line in order to not exceed the total quantity for the part.
The Service folder in the Life Cycle Management (LCM) document displays the service history of the product, and the related service jobs (ART with Class = KM) with service interval information.

The service kits and service operations are entered in the Product (ART class KM) application, and can also be added to the LCMs as standard service jobs/types for the product. Defining a service part/operation as main service must be done on the specific article (the LCMs product) using the Main Service checkbox in the service folder on the ART. Running a main service will automatically set the next service at the LCM based on the service interval defined by the service interval for the job.
The next service column states when the next planned service will be. This date is calculated when a service job/operation is completed based on its service interval. The service interval is defined in the Service Type (SVT) application and chosen on the specific article or operation in the SVTREF field.
The purpose of the function
To be used if a product that consists of parts and sub products should be dismantled to single parts or sub products. The original product will then be taken out of stock and the products LCM will be marked as dismantled.
Conditions for using the function
The product must have a serial number and a LCM document. The product can be built in house or a purchased product.
The LCM must be available (free) at stock, it can not be linked to any customer order, production order or shipping advice.
The LCM can not be linked to an active service job.
Permission
Description of the function
Duty: Perform dismantle product process.
The function is available at the LCM document – F12 ‘Dismantle Product’. This opens a window to start the process. One input is required before using the ‘Create’ button:
- The stock location where the product is taken from must be selected, picking is then done by the function when the PDI process is confirmed and closed.

- Creates the PDI (Product Dismantle).
- Sets the dismantle document id at the LCM and shows ‘DismantleDoc PDI/nnnnnn’ at the LCM.
- Creates a SAW (stock adjustment warehouse) document to take the product from stock. This has ST=0 and is registered to ST=9 when the dismantle process is completed.
The SAW has DOCTYPE = DISMANTLE and StockAdjustCode = 18 and YourItm = PDI/nnnnnn.
- The serial number at the SSA document is occupied by the SAW.
The PDI document presents the product, the LCM, the serial number, the product value from the SSA and a table of parts that is copied from the LCMs part list.

How to select which parts / sub products to come out of the dismantle process
- Enter the quantity in the Dismantled Qty column for the parts/products to be put to stock.
The Price is the original price from the parts SSA, but that can be modified by the user.
- If the part is not present in the table: Add Part and set requested Qty and Price.
The Amount column will show value for the parts/product that are selected and will be in local currency. The total sum for parts/modules going to stock is shown in the header as Sum disconnected value.
The dismantle document has status = 1 until either discarded or confirmed as completed. The PDI document can be opened from the LCM.
Sub modules has the sub LCM reference in the column ‘Product unit’. The  icon can be used to expand the sub module abd the part list from that will be added as extra lines to the PDI.
The button ‘Discard process’ will undo the PDI preparation. The SAW is canceled, the SSA and serial number (LCM) is freed and the PDI document is discarded.
The button ‘Confirm process’ will complete the dismantle process:
- The SAW is registered to ST=9 and the original product is taken out of stock and only exists as history. A PAT (product Account Transaction) document is created for the SAW, the product value is deducted from the stock value.
- The product LCM gets EndofLifeAt = date and time of confirm PDI process and EndofLifeReason = DISMANTLE.
- New SSAs are created for the parts and products that are coming out of the product and these are shown in the Destination goods reception column at the PDI.
Note
In order to use this functionality, the product must be picked from multiple Good reception items (SSAITEM).
Starting Point
From the Operators list of production work order operations (RWOO) application, search for the desired work order operation
Click the Arrow button to the most right hand column of the work order operation to open the Work order operation (WOO) application.
In the Work Order Operation (WOO) application
In the right side of the application, select the Product units tab.
Then find the Product unit column.
Click the Arrow icon to the right of the product unit identifier. The Life cycle management (LCM) application is opened.
In the Life cycle management (LCM) application, click the Part List tab.
In the Serialno column, type in the serial number for the selected part. Press Enter.
Alternatively, select a serial number by clicking the Select SerialNo icon.
The associated Good reception item (SSAITEM) is automatically selected in the Heatno/Quality column.
Required Company setting (CSV)
Company setting | Description |
|---|---|
Deactivate validation of serial numbers in LCM part list |
|
Cost and time is the base for calculating the production cost of a production order. Cost and time should be planned for each product to be produced. Cost of goods, resource use and time for work time and operation time. This process may be called the estimation process.
Cost and time estimated for a new product.
Cost and time estimated for a modified product.
Cost and time estimated for a special production.
If new products up for production is created and scheduled, new estimations regarding time and cost will need to be implemented. There might be requirements regarding time and cost re-estimation in connection with modifying an existing product or any customization, which can be re-estimated case by case. If estimated cost differs from the real cost, there is a cost deviation. These will, for example, occur in instances where the resource use related to an operation is higher or lower than estimated.
Accrued expenses will be calculated continuously throughout the processes in the production and it is possible to assess these in relation to the estimated cost. This enables you to reveal and trace any cost deviations.
Calculate estimated cost
Costs may be estimated based on experiences, drawings, user manuals, numbers from the purchase department and other indications.
Inspect real cost for active productions
By following up the status through reports and other tools, it is possible to follow the actual costs at any step in the production process.
Following up estimated cost related to real cost
By following up the status through reports and other tools, it is possible to find and fix any deviations and implement corrective measures.
Setting name | Description |
Cost deviation control in Production | Value in this setting is either Amount or PCT (percent). On complete operation - If total logged operation costs differs from Planned operation costs, - an alert will be set on the operation according to the percent or amount in the setting ProductionCostDeviationValue |
DayLimit for Recalculation of Work Order cost based on Changes | This setting sets the limit for which planned productions that should be recalculated when changes are done to materials that the production is linked to. The value in this setting is the max number of days ahead production is planned and still will be recalculated immediately when material cost is changed. Setting has a default value of 30 days. |
Value for cost deviation control in Production | Value in this setting is an Amount or a Percent. When operation is completed - If total logged operation cost differs from Planned operation cost, - an alert will be set on the operation according to the value in this setting |
Work Log Deviation Lower Limit Percentage | Value in this setting is a percentage. On complete operation - If total logged operation time differs from Planned operation time, an alert will be set on the operation according to the percentage in this setting |
Work Log Deviation Upper Limit Percentage | Value in this setting is a percentage. On complete operation - If total logged operation time differs from Planned operation time, an alert will be set on the operation according to the percentage set in this setting |
When running a production you might face a cost deviation due to incorrect time usage assumptions in the planning phase. This will be the case if an operation, which is defined to take a certain amount of time, spend less or more than the estimate. Every operation has a price related to the time usage, and this is calculated by how long the operation actually takes.
Cost deviations are flagged in the Production Work Order (PWO) by a yellow warning icon at the top left called Cost deviation.

There are two methods of handling a cost deviation, either by accepting the deviation or by updating the structure in the article archive to better estimate time usage in future productions.
Click the Cost deviation icon to view the deviation in question.

Click the warning icon on the operation containing the deviation to perform an action.

Here you may either update the structure or accept the deviation using the buttons at the bottom. Use the history seen in the item lines to get a better estimate for future productions.
Cost of productions are calculated throughout the production process. Production costs can be inspected from a Production Work Order (PWO) under the Cost folder.

Estimated cost is the estimated cost which is based on the kit and the related costs. There are both fixed and variable costs. Variable costs are often operations, as they may vary based on time usage.
The planned cost is one step further, when the articles to be used in the production have been linked to the PWO. The prices may differ from estimated cost as the articles used may in reality cost more than the initial estimate.
The application enables the user to view accumulated values for work logs per Production work order (PWO), either by accounting period or calendar period.
The application can be used as a standalone or as an extension of the Accumulated worklogs' total values grouped by periods (PERIODTOTALS) application, which provides the same information, but with a larger scope, providing the user with a yearly overview, totaling all Production work orders (PWO).
Navigate to the application
Option 1: Click the Program field and type "PERIODPWO" and press ENTER.
Click here to read more about the user interface.

Corrections, within the context of the Accumulated worklogs' total values grouped by periods (PERIODTOTALS) and Accumulated worklog's total values grouped by production work orders (PERIODPWO) applications, are all new worklogs, including manhours, and all worklog corrections are registered the after Production work orders (PWO) are set in Status 9 - Completed, and forwarded to stock (SSA).
The costs for corrections are calculated according to the resource hourly rate for the given period.
Having the previous information in mind, corrected hours and costs are worklogs registered for the current calendar / accounting period.
Example 1: A manhour registered in January 2025 for current date will be labeled as corrected hour.

Example 2: A worklog added through PWOWL in January 2025 for the current date will be labeled as corrected hour.

Corrected hours and costs for previous periods are worklogs registered for previous calendar / accounting periods. Adding a correction for the past period will update the accrued values for both Corrected hours/costs and Corrected hours/costs for previous periods.
Example 1: A manhour registered in January 2025 for the 15th of November 2024 will be labeled as both corrected hour and corrected hour for previous periods.
Example 2: A correction performed in January 2025 for a worklog which was registered on the 22nd of November 2024 will be labeled as both corrected hour and corrected hour for previous periods.

The Accumulated worklogs' total values grouped by periods (PERIODTOTALS) and Accumulated worklog's total values grouped by production work orders (PERIODPWO) applications do not include material costs, whether they are coming from the purchase orders or any additional material costs.
The Accounting periods tab includes a header with multiple ways of filtering the information provided on Production work orders (PWO) included in the accounting period.
Accounting period
The accounting period information, in the application, is defined in the Period account register (PAR) application.
Informational fields for the selected Accounting period
Total hours field - Displays the amount of hours for all logged work on the Production work orders (PWO) during the accounting period. Includes Regular hours and Correction hours.
Total cost field - Displays the total cost of the Production work orders (PWO) in the accounting period. This includes Regular cost and Correction cost.
Regular hours field- Displays the hours logged while the Production work orders (PWO) were open, with status being lower than 8 and no Goods reception item (SSAITEM) forwarded to stock.
Regular cost field - Displays the cost of the Regular hours for the Production work orders (PWO) in the selected accounting period.
Correction hours / For previous periods fields - Displays the corrected hours which have been added to work logs after the Production work orders (PWO) have been completed and forwarded to stock. The added hours can have been logged to work logs from previous accounting periods.
Correction cost / For previous periods field - Displays the corrected cost for the hours which have been added to work logs after the Production work orders (PWO) have been completed and forwarded to stock. The added cost can have been logged to work logs from previous accounting periods.
Filtering options | Icons | Description |
|---|---|---|
Accounting period drop-down menu |
| To select which accounting period the application is to be filtered on, click the Accounting period drop-down menu and select a period, or type to search and then press ENTER. To view details on the accounting period, click the View icon to open the Period account register (PAR) application. |
Quick search |
| To quick search, click, type and press ENTER. To select which parameters are to be used in the quick search, click the Quick search options icon. |
Product | To filter the List of Production work orders (PWO) on a specific Product (ART), click and select, or type and press ENTER. | |
Production work order | To filter the list on a specific Production work order (PWO), click and select, or type and press ENTER. | |
Reset all filters |
| To reset the Quick search, Product and Production work order drop-down menus and fields, click the Reset all filters button. |

Search field, Filter builder and Column settings according to standard RamBase functionality
The list contains multiple options for filtering.
Columns | Icons | Description |
|---|---|---|
Status |
| Displays an icon indicating the status of the Production work order (PWO). Potential statuses for a Production work order (PWO)
To open the Production work order (PWO) application, to view details, click the View icon. |
Work order |
| Displays the Production work order identifier (PWO). To view details on the Production work order (PWO), click the View icon to open the Production work order (PWO) application. |
Product | Displays the name of the Product (ART) that is or was being produced by the Production work order (PWO). | |
Total hours | Displays the amount of hours logged work on the Production work order (PWO) during the accounting period. This includes Regular hours and Correction hours. | |
Total cost | Displays the total cost of the Production work order (PWO) in the accounting period. This includes Regular cost and Correction cost. | |
Regular hours | Displays the hours logged while the Production work order (PWO) was open, with status being lower than 8 and no Goods reception item (SSAITEM) forwarded to stock. | |
Regular cost | Displays the cost of the Regular hours. | |
Correction hours | Displays the hours logged in the accounting period after the Production work order (PWO) was completed, with status being higher than 8 and Goods reception item (SSAITEM) forwarded to stock. | |
Correction hours for previous periods | Displays the hours logged outside the accounting period, after the Production work order (PWO) was completed, with status being higher than 8 and Goods reception item (SSAITEM) forwarded to stock. | |
Correction cost | Displays the cost for Correction hours added in the accounting period. | |
Correction cost for previous periods | Displays the cost for Correction hours added outside of the accounting period. |
The Calendar periods tab includes a header with multiple ways of filtering the information provided on Production work orders (PWO) included in the selected month.
Informational fields for the selected Calendar period
Total hours field - Displays the amount of hours for all logged work on the Production work orders (PWO) during the calendar period. Includes Regular hours and Correction hours.
Total cost field - Displays the total cost of the Production work orders (PWO) in the calendar period. This includes Regular cost and Correction cost.
Regular hours field- Displays the hours logged while the Production work orders (PWO) were open, with status being lower than 8 and no Goods reception item (SSAITEM) forwarded to stock.
Regular cost field - Displays the cost of the Regular hours for the Production work orders (PWO) in the selected calendar period.
Correction hours / For previous periods field - Displays the corrected hours which have been added to work logs after the Production work orders (PWO) have been completed and forwarded to stock. The added hours can have been logged to work logs from previous accounting periods.
Correction cost / For previous periods field - Displays the corrected cost for the hours which have been added to work logs after the Production work orders (PWO) have been completed and forwarded to stock. The added cost can have been logged to work logs from previous accounting periods.
Filtering options | Icons | Description |
|---|---|---|
Calendar period drop-down menu |
| To select which calendar period the application is to be filtered on, click the Calendar period drop-down menu and select a period, or type to search and then press ENTER. |
Quick search |
| To quick search, click, type and press ENTER. To select which parameters are to be used in the quick search, click the Quick search options icon. |
Product | To filter the List of Production work orders (PWO) on a specific Product (ART), click and select, or type and press ENTER. | |
Production work order | To filter the list on a specific Production work order (PWO), click and select, or type and press ENTER. | |
Reset all filters |
| To reset the Quick search, Product and Production work order drop-down menus and fields, click the Reset all filters button. |
Search field, Filter builder and Column settings according to standard RamBase functionality
The header contains multiple options to filter the list.
Columns | Icons | Description |
|---|---|---|
Status |
| Displays an icon indicating the status of the Production work order (PWO). Potential statuses for a Production work order (PWO)
To open the Production work order (PWO) application, to view details, click the View icon. |
Work order |
| Displays the Production work order identifier (PWO). To view details on the Production work order (PWO), click the View icon to open the Production work order (PWO) application. |
Product | Displays the name of the Product (ART) that is or was being produced by the Production work order (PWO). | |
Total hours | Displays the amount of hours logged work on the Production work order (PWO) during the calendar period. This includes Regular hours and Correction hours. | |
Total cost | Displays the total cost of the Production work order (PWO) in the calendar period. This includes Regular cost and Correction cost. | |
Regular hours | Displays the hours logged while the Production work order (PWO) was open, with status being lower than 8 and no Goods reception item (SSAITEM) forwarded to stock. | |
Regular cost | Displays the cost of the Regular hours. | |
Correction hours | Displays the hours logged in the calendar period after the Production work order (PWO) was completed, with status being higher than 8 and Goods reception item (SSAITEM) forwarded to stock. | |
Correction hours for previous periods | Displays the hours logged outside the calendar period, after the Production work order (PWO) was completed, with status being higher than 8 and Goods reception item (SSAITEM) forwarded to stock. | |
Correction cost | Displays the cost for Correction hours added in the calendar period. | |
Correction cost for previous periods | Displays the cost for Correction hours added outside of the calendar period. |
The application displays all hours added to production within the filtered time period, providing visibility into whether these hours have been allocated to work In Progress or elsewhere at the time of report generation.
The application is especially useful for controllers when there are changes in closed periods.
Navigate to the application
Option 1: Click the Program field and type "PERIODTOTALS" and press ENTER.
Click here to read more about the user interface.
Accounting period
The accounting period information, in this application, is defined in the Period account register (PAR) application.
The application enables the user to view accounting periods and calendar periods for the last five years.
The Accounting periods and Calendar periods tabs allow the user to inspect and verify labor hours, cost and corrections for either; user specified accounting periods, set up in the Period account register (PAR) application, or by standard calendar periods.
To view details about Production work orders (PWO) in a specific accounting period, click the Arrow icon on an accounting period in the Accounting periods tab.
Corrections, within the context of the Accumulated worklogs' total values grouped by periods (PERIODTOTALS) and Accumulated worklog's total values grouped by production work orders (PERIODPWO) applications, are all new worklogs, including manhours, and all worklog corrections are registered the after Production work orders (PWO) are set in Status 9 - Completed, and forwarded to stock (SSA).
The costs for corrections are calculated according to the resource hourly rate for the given period.
Having the previous information in mind, corrected hours and costs are worklogs registered for the current calendar / accounting period.
Example 1: A manhour registered in January 2025 for current date will be labeled as corrected hour.
Example 2: A worklog added through PWOWL in January 2025 for the current date will be labeled as corrected hour.
Corrected hours and costs for previous periods are worklogs registered for previous calendar / accounting periods. Adding a correction for the past period will update the accrued values for both Corrected hours/costs and Corrected hours/costs for previous periods.
Example 1: A manhour registered in January 2025 for the 15th of November 2024 will be labeled as both corrected hour and corrected hour for previous periods.
Example 2: A correction performed in January 2025 for a worklog which was registered on the 22nd of November 2024 will be labeled as both corrected hour and corrected hour for previous periods.
The Accumulated worklogs' total values grouped by periods (PERIODTOTALS) and Accumulated worklog's total values grouped by production work orders (PERIODPWO) applications do not include material costs, whether they are coming from the purchase orders or any additional material costs.
Groups Production work orders (PWO) by accounting periods for the year selected in the Header.
Search field, Filter builder and Column settings according to standard RamBase functionality
The header contains multiple options to filter the list.
The available columns are described in the table below.
Columns | Icons | Description |
|---|---|---|
Status |
| Displays the status of the accounting period.
|
Period | Displays the accounting period in yyyyMM format. | |
Name | Displays the name of the accounting period. | |
Start date | Displays the start date of the accounting period in yyyy.MM.dd format. | |
End date | Displays the end date of the accounting period in yyyy.MM.dd format. | |
Number of work orders | Displays the number of Production work orders (PWO) with work log elements, logged in the accounting period, which is counted from the Start date to the End date. The total for the selected year is summarized in the Footer. Production work order (PWO) criteria to be countedA minimum of one (1) Work log element (PWOWL) must have been created. In other words, work must have been logged on the Production work order (PWO). | |
Total hours | Displays the amount of hours for all logged work on the Production work orders (PWO) during the accounting period. This includes Regular hours and Correction hours. | |
Total cost | Displays the total cost of the logged work in the Production work orders (PWO) during the accounting period. This includes Regular cost and Correction cost. | |
Regular hours | Displays the hours logged while the Production work order (PWO) was open, with status being lower than 8 and no Goods reception item (SSAITEM) forwarded to stock. | |
Regular cost | Displays the cost of the Regular hours. | |
Correction hours | Displays the hours logged in the accounting period after the Production work order (PWO) was completed, with status being higher than 8 and Goods reception item (SSAITEM) forwarded to stock. | |
Correction hours for previous periods | Displays the hours logged outside the accounting period, after the Production work order (PWO) was completed, with status being higher than 8 and Goods reception item (SSAITEM) forwarded to stock. Allows the user to distinguish the corrected hours, and is especially useful in identifying deviations found in closed periods. | |
Correction cost | Displays the cost for Correction hours added in the accounting period. | |
Correction cost for previous periods | Displays the cost for Correction hours added outside of the accounting period. Allows the user to distinguish the correction cost, and is especially useful in identifying deviations found in closed periods. | |
| To view details on Production work orders (PWO) in an accounting period, click the Arrow icon to open the (PERIODPWO) application. The application allows for various filtering, including quick search, filtering on specific Products (ART) and/or Production work orders (PWO). |
Accounting periods totals - Footer
Columns which contain information on cost and hours are summarized in the footer.
Groups Production work orders (PWO) by calendar month for the year selected in the Header.
Search field, Filter builder and Column settings according to standard RamBase functionality
The header contains multiple options to filter the list.
The available columns are described in the table below.
Columns | Description |
|---|---|
Year | Displays the calendar year of the period. |
Month | Displays the calendar month of the period |
Number of work orders | Displays the number of Production work orders (PWO) with work log elements logged during the month. |
Total hours | Displays the amount of hours for all logged work on the Production work orders (PWO) during the calendar month. This includes Regular hours and Correction hours. |
Total cost | Displays the total cost of the logged work in the Production work orders (PWO) during the calendar month. This includes Regular hours and Correction hours. |
Regular hours | Displays the hours logged while the Production work order (PWO) was open, with status being lower than 8 and no Goods reception item (SSAITEM) forwarded to stock. |
Regular cost | Displays the cost of the Regular hours. |
Correction hours | Displays the hours logged after the Production work order (PWO) was completed, with status being higher than 8 and Goods reception item (SSAITEM) forwarded to stock. |
Correction hours for previous periods | Displays the hours logged outside the calendar month, after the Production work order (PWO) was completed, with status being higher than 8 and Goods reception item (SSAITEM) forwarded to stock. Allows the user to distinguish the corrected hours, and is especially useful in identifying deviations found in closed periods. |
Correction cost | Displays the cost for Correction hours added in the calendar month. |
Correction cost for previous periods | Displays the cost for Correction hours added outside of the calendar month. Allows the user to distinguish the correction cost, and is especially useful in identifying deviations found in closed periods. |
Calendar periods totals - Footer
Columns which contain information on cost and hours are summarized in the footer.
It is possible to generate a service report from a Customer Deviation (CDV) document using the F12 option Service Report. The criteria is that the CDV have been created with the Customer Deviation Code (CDC) Return Goods for Repair, or Repair and Return to Stock. The report can also be re-generated from the CDV using the F12 option Print Copy/Resend.
Enter the CDV in question. After opening the document, you will be able to see the field LcmDocid and the link to the specific Life Cycle Management (LCM) next to it. Click the link to open the LCM.
An alternative is to find the LCM using the Supplier Shipping Advice (SSA) from when the goods were received from customer.
In the LCM document you will see a set of folders. Click the folder called RMA Requests. This folder keeps a record of all the repairs performed on the product.

The item lines in this folder shows the different related CDV cases. Next to these is an icon. Click this to open a popup called Service Info. Enter the details regarding this situation and click Confirm when ready.

This information will now be available for the Service Report.
Cost may be inspected during production from the Cost folder in the Production Work Order (PWO).

The running cost may be inspected in the Accrued cost column.

When the production is complete, you will see the complete cost in the Price field located in the Part box.
The sales calculator tool is designed to allow the user to start building the product structure during the sales process and to calculate and specify cost estimates and sales estimates. This process can start at the sales request from the customer and will flow through the complete process from the request to the delivered product.
Copy an existing structure version from the product to the sales document item or create a structure from scratch.
Add/replace/delete material, parts, operations, sub structures.
Modify quantity and work time for each item in the structure.
Set/modify cost price for each element in the structure or sub structure.
Set sales price or gross margin at each element in the structure.
Select materials/parts where the supplier quote request is needed. A supplier quote can be selected as cost price for the actual element in the structure.
Any change to the sales items main structure (KIT) or one of its sub structures will result in a recalculation of the total cost and total sales price upwards through the structure and the calculated sales price may be selected as the valid price for the sales request/quote/order.
The product must exist in the product master (ART) and is selected to the sales request/quote/order.
An example article can be a Sales Quote Request (CRQ) item where the product and quantity is selected. There are two F12 options that can enable the sales calculator tool:
Copy Version from ART
User can select which version of the Product (ART) structure to copy from to the sales item.
Create Special Structure
Creates an empty structure to build from scratch, all operations and materials/parts must be added.

The result of these functions is that a structure (KIT) is assigned to the sales item and a yellow structure icon is available to work with the structure.

The tools are also available from the sales document item line(s):

The green icon called Inspect Special Structure starts the KIT designer tool.
The white and blue icon called Inspect Sales Calculator starts the sales calculator tool.
The designer tool is the same tool that is used for building product structures (at ART) and modifying Production Work Order (PWO) structures. There are three main differences when working with the tool at sales document items:
There is no versioning functionality, one is working at one edit-version belonging to the item. However, forwarding the sales document item to a new document, for example a CRQ to a new CRQ, copies the structure and creates a new structure for the destination document. Version control can be achieved by using that method.
There is drill down functionality to work with the sub structures.
Adding a part with Class = K/KA to one level will result in an automatic copy of that parts structure and sub structures to KITs that will be added to the actual structure. Changes to the contents of any level in the structure (adding parts/operations, changing hours/quantity, deleting operations/parts) will lead to a full recalculation of costs bottom up.
The calculator tool is also available when working with any of the structure levels via the View Calculator icon in the upper right corner of the designer tool (KITDOC) screen.
The KITDOC application will for these structures (KITs) belonging to a sales document item also show the calculated unit cost and total cost.
This tool is used to view/set/change the cost price and sales price per material/part/sub assembly/additional cost line within the main structure (KIT) or within a sub structure (KIT). There is no limitation of sub levels.
Each level shows information about cost per unit to be produced and the total cost of units needed to fulfill the requested quantity at the top level.

This example is for the top level, a product that has one assembly operation and two sub structures that have their own structure below this. The sales calculator tool for one of these is opened via the icon behind the Class icon at the line. Please note that the under laying structure is not available via the yellow class icon when in calculator view.
The product, the product description (Text) and the requested quantity at the sales document item shows at all levels. At the top level in upper left part as in picture above and at lower levels as in the picture below:

The product and requested quantity is shown at the top. The sub assembly product and quantity required for the top product quantity is shown below.
This is the total cost for one piece of the product/sub product that the structure level (KIT) represents. The details are:
Operation Fixed Cost
Sum of Fixed operation cost for all operations within this or under laying structures (KITs) per piece of this level.
Operation Variable Cost
Sum of Variable operation cost for all operations within this or under laying structures (KITs) per piece of this level.
Material Cost
Sum of Material cost for all materials/parts within this or under laying structures (KITs) per piece of this level.
Added Fixed Cost
Sum of Fixed additional cost for all added cost elements within this or under laying structures (KITs) per piece of this level.
Added Variable Cost
Sum of Variable additional cost for all added cost elements within this or under laying structures (KITs) per piece of this level.
The sum of these are shown as Total Cost (per piece).
NB ! The values are always shown in local currency, the home currency for the production company.
Total Cost/<cur>Cost details per piece multiplied with quantity of the product/sub product to be produced. In home currency.
Sales Price Per Piece

The CalculatedPrice is shown in the sales document item currency and is the calculated sales price based on the sales prices for the elements in the total structure. Current SalesPrice is the actual sales price at the sales document item. This is only shown at the top level. Clicking on the floppy-disk icon will store the calculated price to the sales document item. This is only available at the top level.
The table shows all elements (lines) for the current structure level. All operations, material/parts and added costs if this is used.
The columns are:
St
This is the status (St) of the operation (OPR) or material/part (ART) for the actual line.
Pos
When building a structure (KIT) there is a field Pos (KitPos) available to specify the parts position reference at e.g. the drawing, the customers BOM, the circuit board, etc.
Class
The operation or material/part Class.
OpNo
The operation number in the structure for the operation/material/cost.
Qty/Time
Operation time/quantity per piece for the product/sub product.For operations: Time per piece. PreTime and PostTime is not included.For material/part: Needed quantity for one piece of the structure’s product.
Part/Operation
Material/Part/Operation part number/operation name and description.
Hw
Not applicable. Will be removed later.
Pre/Post/Queue
PreTime, PostTime and queue time set for the operation.
ResTO/<cur>
A part of the operations sales price can be assigned as earned value for the resource that is used for the operation. Value is added to daily sales price value for the resource work log. Value is always in home currency.
NB ! Shall only be used if the company has a defined setup for this functionality.
Margin
Calculated margin for the line, based on the lines sales price and cost price.
SalesPrice/<cur>
The sales price for one line is in home currency and is the total sales price for the hours/quantity that is specified in the Qty/Time column.The price is automatically set by the following priority:
Agreed sales price for the customer.
Price set at the line in the product (ART) structure.
Standard sales price.
Calculated based on the company minimum gross margin setup.
Quote
A select quote icon will show if there exists one or more valid supplier quote for the material/part. If a quote is selected the quote reference, e.g. SQU/nnnnnn-n will show in the column, and the purchase will then be based on the selected quote.
Variable Cost
The variable cost for one line is in home currency and is the total variable cost for the hours/quantity that is specified in the Qty/Time column.
Fixed Cost
The fixed cost for one line is in home currency.
Cost/<cur>
Sum of the values in columns Variable Cost and Fixed Cost. Always in home currency.
The following columns in the table may be changed by the user:
Margin
Changing the margin will recalculate the SalesPrice based on the Cost and the given margin. The margin is not stored at the structure line, it is only a calculated value.
SalesPrice/<cur>
The sales price can be changed by the user at each line and the new value is stored for the line. The total calculated sales price is also recalculated.
Variable Cost
The variable cost can be changed for operations and material/part lines, but not for sub structure lines. The cost of a sub structure can only be changed via the table of the sub structure.
Fixed Cost
The fixed cost can be changed for operations belonging to the actual structure level.
Logging administrative hours on a Production Work Order (PWO) document before initiating the first operation is not possible in principle, but it is possible to add an operation where you may log administrative hours before initiating the first production operation.
The first step will be to create a new operation where the administrative hours can be logged. This operation may be called Hour Logging for example. This operation will be added to the kit later in the process. Remember that any cost set on this operation will be added to the stock value of the kit. Please see the documentation concerning creating operations. Also remember that the resource which will contain the administrative hours needs a price of 0, so the total cost will remain unaffected.
Create a Production Work Order (PWO) based on need or for stock increase.
Enter the PWO document by typing PWO in the program field and press ENTER. Highlight the desired document and press ENTER.

Click the green (or yellow for special structures) kit icon to the right in the window to enter the kit structure.
Click the Copy Version 1 icon in the upper right corner to make a new version of the current version.

You will now have a new version in ST:1, which is possible to edit. There will also be a new tab called Kit Designer. Click this tab and click the icon Switch view to operations in the upper right corner.
On the right you can see the parts and operations for the kit. You may now add the operation to log hours to log time. Drag the operation to the kit and drop it as the first operation in the structure. As long as this operation is active, the remaining operations will not be started.
Go back to the Kit Details tab and press the Activate Version icon at the top. This will set the document to ST:4.
Go back to the original PWO document and click the Release for Production icon at the bottom. This will set the document to ST:5 and a LCM document have been created.
Enter the LCM Documents tab in the PWO document and highlight the main LCM document (the first item line) and press ENTER.
You will now be in the Resource view where you must highlight the item line and press ENTER.

This will open the Machine hours view. Click the Start PROD button to start the operation and start logging hours.
Press the PROD Completed button when the planning, procurement or other pre-production work is done to proceed with the rest of the production as normal.
A production company needs some tools to be able to monitor the cost status for a production (project) and also deviations in logged vs planned operation time. Deviations can be caused by simple logging errors by the operator, not realistic planning or problems that occurs and delay processes. It is also important to be able to get alerts for operations where the accrued cost has passed the planned cost + a ‘warning limit’ to follow up possible problems.
Cost deviation control
There are two company settings that control the cost deviation limit and alert:

- ProductionCostDeviationLimitMethod : Selectable values: AMOUNT, PCT
One can choose if the cost deviation per operation is to be checked vs a value limit or a percentage limit. Deviation control will run per operation in the Production work order (PWO) Kit.
- ProductionCostDeviationValue : The limit before approval is needed, Amount (in local currency) or Percentage. Format: Decimal.
Each operation within the PWO Kit has a field CostDeviationAmount that is calculated to the operations Planned cost (fixed + variable) * -1 when the operation is started.
The accrued operation cost is increased for each pause of the operation (and by complete operation), and that also reduces the negative CostDeviationAmount.
The CostDeviationAmount is also recalculated if the PWO-Kit is changed (new version).
Formula for calculation: CostDeviationAmount = Accrued cost (Fixed + Variable) - Planned cost (Fixed + Variable).
Each operation within the PWO Kit also has a field CostApprovedValue that is calculated to be:
Planned cost (fixed + variable) + ProductionCostDeviationValue (calculated to amount if PCT is the selected method).
This CostApprovedValue is calculated (set) at the operation when CostDeviationAmount becomes a positive value, which means that accrued cost has become higher than the planned cost.
Formula for first time setting of CostApprovedValue: Planned cost + ProductionCostDeviationValue .
Each operation within the PWO Kit has a field CostDeviationAlert . This is a ‘boolean’ field, ‘0’ = false (no alert), ‘1’ = true (alert).
CostDeviationAlert is set to ‘1’ (alert) if CostDeviationAmount > CostApprovedValue - Planned cost.
The program will check if operation should be alerted by each pause/stop of operation and by making new version of the PWO Kit.
NB! Alert is not given if the ProductionCostDeviation*-settings are not used.
Operations that has CostDeviationAlert = ‘1’ should be checked by cost controller / manager / planner.
Such alerts can be found by / is visible / can be handled in the following applications/views:
PRODUCTION , the new production overview application:The ‘Deviations’ box will show if such alerts are set.

Click on the number for Cost deviation will open the report Production Cost Deviation Alert that gives cost values. Press ENTER on a line in the report opens the actual PWO where the alert can be handled.
At the production work order (PWO), behind the field ‘CriticalDate’:

The yellow alert icon and the text ‘Cost deviation’ will show if one of the PWOs operations has the alert set.
Clicking on the yellow alert icon opens the PWOCRITICALDATE window:
PWOCRITICALDATE (list of the PWOs operations):The column ‘CostDeviation’ shows the CostDeviationAmount and the yellow alert icon at the operation that has the alert set.

Click on the amount to handle the alert, the popup Cost Deviation Approval is opened.
OPRCOSTDEVIATION – popup for cost deviation approval:

Explanation using the above picture as example:
- the Planned cost for this operation was 800 (NOK).
- the ‘default’ CostApprovedValue was calculated to 880 (NOK) because of the ‘settings’ (PCT, 10).
- this operation has had an alert earlier because accrued cost passed the ‘default’ approved value, and the last approved value (Last CostApprovedValue) was set to 1000 by UserId 6610. The alert was then cleared. Each approval will create a record in the revision log at the actual Kit.
- the work is continued, accrued cost is now increased to 3200 (NOK) and new alert is set.
New CostApprovedValue should be set to a value that the operator and manager agree upon and button Approve will set this and clear the alert again.
The Approve button is limited to the permission ApproveProductionOperationCostDeviation and the duty Control and approve production cost.
The ‘shopfloor’ application ‘MACHINEHOURS’:
Cost deviation shows in the mid of the screen and the popup for viewing details / approve is opened by clicking on the amount.
Work log Deviation Control
The purpose of the work log deviation alert is to easily find and control completed operations (Status 9) where the difference between the planned work time and the total logged work time is below or above the decided thresholds. This makes it easier to find operations where the operator has forgotten to start / stop in time and where the actual work time differs much from the planned time.
The field WorkLogDeviationPct at each operation is calculated when the operation is completed (KITOPST =>9).
Formula: (logged time – planned time) * 100 / planned time.
So the WorkLogDeviationPct is the deviation time in percentage when comparing logged and planned time.
Examples:
- Planned 10 hours, worked 8.5 hours: WorkLogDeviationPct = - 15
- Planned 10 hours, worked 11.5 hours: WorkLogDeviationPct = 15
There are two company settings that control the work log deviation limit and alert:

- ProductionWorkLogDeviationLowerLimitPct: Should have a low negative value, e.g. - 15.
If the calculated WorkLogDeviationPct < this limit: work log alert will be set by complete operation, logged operation time is too low compared to planned time and below the limit for setting the alert.
- ProductionWorkLogDeviationUpperLimitPct: Should have a low positive value , e.g. 15.
If the calculated WorkLogDeviationPct > this limit: work log alert will be set by complete operation, logged operation time is too high compared to planned time and above the limit for setting the alert.
Each operation within the PWO Kit has a field WorkLogDeviationAlert . This is a ‘boolean’ field, ‘0’ = false (no alert), ‘1’ = true (alert).
WorkLogDeviationAlert is set to ‘1’ according to the rules and settings described above under ‘Calculation:’.
The program will check if the operation should be alerted by making new version of the PWO Kit and if logged operation time is adjusted manually by the available tool for this.
NB! Alert is not given if the ProductionWorkLogDeviation*-settings are not used.
Operations that has WorklogDeviationAlert = ‘1’ should be checked by cost controller / manager / planner.
Such alerts can be found by / is visible / can be handled in the following applications/views:
PRODUCTION , the new production overview application:The ‘Deviations’ box will show if such alerts are set.
Click on the number for ‘Work log deviation’ will open the report ‘Production Time Deviation Alert’ that gives some cost values and time values. Pressing ENTER on a line in the report opens the actual PWO where the alert can be handled.
At the Production work order (PWO), behind the field ‘CriticalDate’:

The yellow alert icon and the text ‘WorkLog deviation’ will show if one of the PWOs operations has the alert set. Clicking on the yellow alert icon opens the PWOCRITICALDATE window:
PWOCRITICALDATE (list of the PWOs operations):The column ‘TimeDeviation’ shows the WorkLogDeviationPct and the yellow alert icon at the operation that has the alert set.

Click on the value to handle the alert, the popup ‘Worklog Deviation Details’ is opened.
OPRWORKLOGDEVIATION – popup for worklog deviation details and approval:

Explanation using the above picture as example:
- the Planned time for this operation was 5 hours.
- the operation was completed and total logged time is 0.01 hours. WorkLogDeviationPct was calculated to -99.80 and that is lower than the ProductionWorkLogDeviationLowerLimitPct (-15).
- this operation has therefore WorklogDeviationAlert = ‘1’.
There are two options to handle this alert:
The deviation is ok, no need to adjust the logged operation time:
Click on the Approve button. The alert is switched off and will be logged in the KIT revision history. The Approve button is limited to the permission ApproveProductionOperationTimeDeviation and the duty Control and approve production cost.
The logged time should be changed (forgot to start or stop in due time):- Press ESCAPE from the popup, back to:
- Pressing ENTER on the line with the alert opens the worklog list for the operation:

- Press Enter on the line that should be adjusted:

Click on the Edit Worktime icon to adjust the logged time. This will recalculate total logged time, the WorkLogDeviationPct and the WorklogDeviationAlert.
The ‘shopfloor’ application ‘MACHINEHOURS’:
Worklog deviation shows in the mid of the screen and the popup for viewing details / approve is opened by clicking on the amount.
This procedure allows the user to add variable planned manhours to Operations (OPR) included in Product structures (KITART), that have Production resources (RESCONFIG) setup to log manhours.
The planned man hours are specified per unit produced, this means that if an Operation (OPR) has a planned manhours of one (1), setup in the Structure operation item (KITARTOPRITM), then the value will be 1*Net quantity of the Production work order (PWO) in the Structure operation item (KITDOCOPRITM).
Manhours can be only be added or edited while Product structures (KITART) and Production structures (KITDOC) are in Status 1 - Draft
Required setup in Production resource details (RESCONFIG)
To open the Production resource details (RESCONFIG) application from the RamBase menu, select Production, followed by Resource management and finally Resource configuration. Then verify that the listed options are taken into account:
In the Settings area
Allow man hours - Only Operations (OPR) using Production resources (RESCONFIG) which allow manhours can have manhours added to the Structure operation item (KITARTOPRITM).
In the Manhour rates tab
A Manhour rate of type Standard must apply to the Production resource (RESCONFIG).
Note that the Allow manhours checkbox can only be changed when the Production resources (RESCONFIG) is in Status 1 - Pending registration.
Navigate to the Structure operation item (KITARTOPRITM) application and add manhours in Product structures (KITART)
From the RamBase menu click Product, followed by Structures management and finally Structures management again to open the Kit menu (KIT) application.
Kit menu (KIT) application
The Kit menu (KIT) application allows efficient handling of product structures, and navigating via the RamBase menu option Structures management provides a filtered view, displaying all Product structures (KITART) of type K, KS and KA in Status 4 - Active or below.
To open the Product structure (KITART) application, first click to select and highlight the product structure where manhours are to be added, then press ENTER.
If not already selected, click the Kit Details tab. All Operations (OPR) and Products (ART) included in the Product structure (KITART) are listed here.
Identify which Operation(s) (OPR) are to be added manhours and click to highlight the Operation (OPR).
To open the Structure operation item (KITARTOPRITM) application, press ENTER on a highlighted Operation (OPR).
To add Manhours to the Structure operation item (KITARTOPRITM), the Operation (OPR) in the context of the Product structure (KITART), add decimal hours to the Manhours field in the Time area.
Navigate to and inspect planned manhours in Structure operation item (KITDOCOPRITM) for Production structure (KITDOC)
In the process of handling a Production work order (PWO), the user can inspect the planned manhours.
Open the Production work orders (PWOMENU) application from the RamBase menu by clicking Production, followed by Production and finally Production work orders.
Select or search for the Production work order (PWO) to be inspected, highlight it and press ENTER or alternatively, click the Right arrow icon to open the Production work order (PWO) application.
To open the Product structure (KITDOC) application, click the Structure button in the Links area.
To open the Structure operation item (KITDOCOPRITM) application, click and highlight the Operation (OPR) in the Kit details tab and press ENTER.
Inspect the Planned ManHours field in the Main tab.
Inspect the Planned ManHours and Manhourrate fields in the Cost tab.
Navigate to and edit manhours in Structure operation item (KITDOCOPRITM) for Production structure (KITDOC) by creating a new version
In the process of handling a Production work order (PWO), the user can edit the planned manhours.
As noted, Production structure (KITDOC) can only be edited in Status 1 - Draft. A new version must therefore be made.
Open the Production work orders (PWOMENU) application from the RamBase menu by clicking Production, followed by Production and finally Production work orders.
Select or search for the Production work order (PWO) to be inspected, highlight it and press ENTER or alternatively, click the Right arrow icon to open the Production work order (PWO) application.
Select or search for the Production work order (PWO) to be inspected, highlight it and press ENTER or alternatively, click the Right arrow icon to open the Production work order (PWO) application.
To open the Product structure (KITDOC) application, click the Structure button in the Links area.
As noted, Production structure (KITDOC) can only be edited in Status 1 - Draft. A new version must therefore be made.
To create a new version, click the Copy version icon in the Header.

Copy version icon
In the following popup, confirm the creation of the new version by clicking OK.
Result: A new version of the Production structure (KITDOC) is now created in Status 1 - Draft. Note that it is still a draft. Therefore after making the changes to the manhours, the version must be activated, set in Status 4 - Active.
To edit the manhours, open the Structure operation item (KITDOCOPRITM) application by clicking and highlight the Operation (OPR) in the Kit details tab and then press ENTER.
In the Structure operation item (KITDOCOPRITM) application, located the Planned manhours area, and then edit the Planned manhours field.
To confirm the change, click the Confirm button.
Deviation handling may be defined as the process where actions are performed based on deviations. This process have clearly defined rules for which actions are involved in the different deviation scenarios.
Scrapping of one or several products.
Part change on one or several products.
Modification of one or several products.
If deviations related to the production occur, which makes it impossible for the company to approve the result of the production, it must be handled by a set of specific actions. The production manager clarifies the situation with the second party to find a solution. The solution defines the deviation handling.
There are normally three methods of dealing with production deviation. The first is that the product is scrapped and written off as wastage, or dismantled and the parts are put back into stock.
If a raw material is incompatible, or suffers from faults, which has not affected the finished product, it may be changed. This method allows you to handle the defect material simultaneously as you finish the production after a successful part change.
If production deviations are discovered after the production is finished, and you would like to reproduce the finished product in a new production, it is called modification. This method is more time and resource consuming than scrapping, but it may be beneficial in certain situations.
Create a deviation document
Deviation documents to customers or internal can be made to handle a deviation.
Handling deviation based on actual factors
Deviation handling can be performed based on actual terms to satisfy both parties.
Completing deviation
After the deviation has been handled, it needs to be cleared with customer or internally.
Setting name | Description |
Default value NO for Warranty Conclusion in Deviation (CDV) | Defines default value for WarrantyConclusion field, when Warranty is 'No' in Deviation document (CDV) |
Default value YES for Warranty Conclusion in Deviation (CDV) | Defines default value for WarrantyConclusion field, when Warranty is 'Yes' in Deviation document (CDV) |
Use Warranty in Customer (CUS) Deviation (CDV) | If this setting is 'ON' - Company is using Warranty in Deviation (CDV), and WarrantyDate is transported to Sales Order (COA). If setting is 'OFF' - The field WarrantyDate is not showing in the Deviation screen |
In cases where you are working with articles which include sub assemblies, you might need to replace parts in completed sub assemblies during production. This is normally done to products when still in production or at service, but is also available at sub assembly included in an open PWO.
The first step will be to identify the part in the sub assembly that needs to be replaced or scrapped in the related Life Cycle Management (LCM) document to the Production Work Order (PWO).

One alternative is to replace the complete sub assembly, but if possible the following method must be used to change a part in the faulty sub assembly. Press the LCM link under the column Lot/HeatNo.

To the far right you will be able to see the Change Part icon which is two papers aligned. Press this to open the Change LCM Part popup. The Change LCM Part popup displays the warehouse stock of the replaceable parts. You may look through this list to see your options.
If the desired part you wish to change is not present in the document, click the Add Part from Structure if it is present in the structure, or Add Part from ART if you need to find it in the Article (ART) archive.
Highlight the desired part and press ENTER.
The part will now be selected and you must now choose what to do with the replaced part. The options are:
Returned to Stock
The old part will be put back into stock. A return sheet is printed, part must be put back instock. The cost is not added to production.
Returned to Supplier
This option returns the faulty part back to the supplier. This creates a Supplier Return (SRT) document with a reference to this change. The cost of the part will not be added to the production as the supplier will carry this cost.
Scrapped
This option creates a Stock Correction (SAW) document and the part is scrapped. The cost of the part being scrapped will be added to the cost of the production.
Click the Change part icon to open the Change LCM Part popup.

Press ENTER on line to select Lot. This will add the part to the To be replaced with field.
Choose what to do with the replaced part in the Replaced part to be field. Below you are presented with four fields which requires information concerning the change, the reason for it and what to do with the replaced part.
The Create QAR-field ask you if a Quality Assurance Report (QAR) document is to be created with a reference to the change. You may choose YES or NO, based on your use of QAR documents.
The Caused By field gives you the option to point to where the fault lies, which is either with the supplier or the production.
The Reason for Change field is a freetext field where an explanation must be entered.
Enter the destination stock location for the replaced part in the Stock Location field. This field will be pre-filled with a default destination if you have a stock location (STL) defined as default stock location when part is changed in LCM in the Stock Location Details area in the STL application.
Choose if a QAR document is to be created in the Create QAR drop down menu.
Enter a Caused by option.
Add info on the reason for change.
Click the Confirm button to confirm part change. This takes you back to the LCM document and you will see the Part Change: Picking in progress icon. Information regarding the change can be seen in the Replacement column.
Click the Part Change: Picking in progress icon, which will take you to the Pick Goods application.
Proceed with the picking process by entering the desired quantity and click the Confirm button at the bottom. If you use the Pick All button you will not need to click Confirm.
You will now return to the LCM document which is now updated with information regarding the change and who made it under the Replacement column. A deviation sheet is made in case of scrapping and a print list for the part to be replaced, which will be added to a pick list.
Press the Picking in Process icon (you must wait until this appears or refresh the window) to start the picking process to get the desired part from the warehouse. Press OK on the confirm picking window which will appear.
The radio button called History gives you the option to see the history of the part changes, with any changes entered.
Rework is used in situations where a Product (ART) or Product unit (LCM) needs to be modified. Rework may be performed on both purchased and produced parts, in addition to single part replacement in completed sub modules, Products (ART) of type K or KA.
About rework
Rework can be performed in the following ways:
From the Goods reception (SSA) application, by selecting the Rework option in the Context menu.
Applies for Production work orders (PWO) in Status 9 - Processed, where the produced units are forwarded to stock. Also applies for procured Products (ART) of type K or KA .
From the Production work order (PWO) application, by clicking on the Pie chart in the Material deliveries area, opening the Production work order assignments (PWOSARLINKS) application.
Applies for Production work orders (PWO) in Status 4 - Pending scheduled production start and Status 5 - In production, to rework all Product units (LCM) for a sub Production work order (PWO) that is linked and/or picked for the Production work order (PWO).
Define the cost for replacing part by rework in the Additional production costs (ADC) application. Required format: "CST/100000".
Specify the default Supplier (SUP) in the Company setting (CSV), Default Supplier when performing a Rework. Required format "SUP/100000".
Define which Operation (OPR) is default when performing rework in the Company settings (CSV), Operation ID used in Rework. Required format: "OPR/100000".
The Goods reception (SSA) to be reworked must be registered to stock and free* to be used in the rework process.
Note
*An assigned Goods reception (SSA) can be reworked with the procedure:
Rework Product unit(s) (LCM) while Production work order (PWO) is in Status 2, 3, 4 and 5
The Product (ART) of type K or KA, which is to be reworked, must have a Life cycle management (LCM) document. The Life cycle management (LCM) document must be a listed in the Product structure (KITART) part list.
Missing LCM for Goods reception item (SSAITEM)?
To create Product units (LCM) for a Goods reception item (SSAITEM), in the Goods reception item (SSAITEM) application, click the Context menu and select the Create product units (LCM's) option.
From the RamBase menu, click Logistics, followed by Reception and finally Goods reception.
Either search for, or select the Goods reception (SSA) with the Goods reception item (SSAITEM) to be reworked.
Open the Goods reception item (SSAITEM) application by clicking the Right arrow icon in the Items tab.
In the Stock location assignments tab, check the availability by verifying that there is Available quantity in the Reception area.
Open the Rework product popup by selecting the Rework option in the Context menu.
In the Rework product popup, select the revision in the Rework to Revision drop-down menu.
Revision
Revision should already be created in the Product structure (KITART) application.
In the Select column, check the Product units (LCM(s)) to be reworked and click the OK button to confirm.
A new Production work order (PWO) in Status 5 - In progress, is now available in the Production work orders (PWOMENU) application.
Follow the above steps 1-8 in the "Perform Rework with quantity more than 1, no parts to be changed".
Select or search for the Production work order (PWO), to be reworked with change of parts, in the Production work orders (PWOMENU) application. To open the Production work order (PWO), click the Right arrow icon, or select it and press ENTER.
Pick the parts from either the Links area by clicking the Pick button, or pick the parts from the Work order operations (WOO) application and continue the production as a normal production process.
Enter the related LCM from the PWO. Here you will find the original Product unit (LCM) in the part list as an item line.
To view the Product unit (LCM) part list level, in the Life cycle management (LCM) applicaiton, click the Right arrow icon for the Product units (LCM) in the Product units and current work order operation area.
A banner in the header will inform the user on which level currently is displayed:
Banner examples:
"Active rework 1 level up"
"Active rework"
To navigate to the next sub level, click the "LCM/000000" link in the Heatno/Quality column.
To replace a part, click the Replace part icon to open the Change LCM Part popup.
In the popup, the available Goods receptions (SSA) are listed for the current part.
Icon
Description

Change part
Select a new Product (ART) in the Part field, or use the existing Product (ART).
Select a Goods reception (SSA) from the list.
Add the following information:
Required - Replaced part to be
Returned to stock
Returned to supplier
Scrapped
Quality issue
NO
YES
Caused by
Production
Supplier
Required - Fill in Reason for change
Fill in Stock location
To confirm the part change, click the Confirm button.
To return to the Production work order (PWO), click the ProdOrder link in the header.
Continue and complete the Production work order (PWO).
Note
The newly replaced part is added to the rework Production structure (KITDOC) and the part must be picked before completing the rework order.
This will rework all Product units (LCM) for a selected sub product that is included in the Production work order (PWO). Meaning all sub Product units (LCM) that are linked to this specific Production work order (PWO), and all that are free in stock.
Note
If already handling the deviation in the Production work order (PWO) application, continue from step 4.
From the RamBase menu select Production and the Production again, followed by Production work orders to open the Production work orders (PWOMENU) application.
Select or search for the Production work order (PWO) with the Goods reception (SSA) to be reworked.
To open the Production work order (PWO) application, click the Right arrow icon, or select the Production work order (PWO) and press ENTER.
To open the Production work order assignments (PWOSARLINKS), in the Production work order (PWO) application, in the Material deliveries area, click the Pie chart if it is in Chart view or click the View icon, if in List view.
To select Product units (LCM) to rework, click the Rework icon in the Actions column. This will open the Select product units to rework popup.

Rework icon
Available units will be listed on the left, and the user can click the Right arrow icon to move these to the Units to rework area. The number of required LCMs will be noted in the Header on the right side.
To move available units, click the Right arrow icon until the units to rework requirement is fulfilled.
Select the revision to rework to, in the Rework to revision drop-down menu.
To create a new Production work order (PWO) with the new rework Product units (LCM), click the Rework button.
Read more about the Company settings (CSV) application.
Company settings (CSV) | Description |
|---|---|
Allow rework on produced goods | When this setting is turned on the user is allowed to rework on produced goods. |
Default cost element for part change on Rework | If this setting is 'ON' - Negative cost is added when a part change is performed on a Rework process. |
Default Supplier when performing a Rework | Value in this setting is a default Supplier (SUP) for creating Purchase order (SPO) for part change on LifeCycle (LCM) where product is purchased externally and not produced on a Production work order (PWO). |
Operation ID used in Rework | Value in this setting is a default Operation (OPR) needed to perform a Rework Production work order. Format: "OPR/100000". |
The Repair application is available in all Customer Deviation (CDV) documents where certain criteria is met, such as the correct Customer Deviation Code (CDC). The application is accessible through the repair icon in the top right corner. This application is used to keep track of the repairs performed, or to be performed, on a article in the deviation process.

This area, located in the top left, show all details regarding the article the deviation has been based on, including the customer and status.
This log is used to register all actions taken in the repair process. This field will also mirror all information entered into the Description field in the main CDV document, with identifier and time stamp (if the plus-icon is used).
This field is a free text field where entries will show up in the service report.
Below there are several fields where the error category is stated, in addition to repair date and an estimate on when the repair ends.
The Repair Document area contains information regarding the warranty of the article, which parts the article contains (if it is a kit) and the work performed in the Work and Extra costs area.
This area shows the LCM part list where parts can be changed and all information regarding the parts.
When the CDV has been created, with the proper deviation code(s), and in ST:1, you can enter a description of the deviation and the steps to be taken in correcting the deviation
Press F12 and choose the option Forward to Supplier.
Then press F12 and choose the option Goods Received from Customer when the goods have been received. Register the part received in the system.
Click the Repair App icon to enter the Repair view.
Press F12 and choose the Start Repair option. A repair COA (Sales Order - Customer Owned Returned Goods) will be created.
Make the necessary changes and repairs on the product. When the part has been changed, you will see the change in the Repair Document folder with all necessary information.
Press F12 and choose the option Goods Repaired. Confirm by clicking OK.
The CDV will move on to a further status based on the deviation code chosen.
If needed, you can press F12 and choose the option Service Report to get a complete report regarding the repair process.
Warranty is when a supplier or producer of an article agrees to repair or replace the article in case of breakage. The warranty is usually confined to a fixed period, such as 6 months or a year. Warranty may be set on Products (ART), Customers (CUS) and Shipping advices (CSA) items. The priority for which period is used in the Customer deviation (CDV) document is Shipping advice (CSA), Product (ART) and then Customer (CUS).
Locate the Product (ART) you want to add a warranty period to.
Click the Properties tab and then the Main data subtab. The Warranty period field is in the Sales area.

Enter the number of months you want the warranty to be active. This warranty period will now be active on the selected Product (ART).
Locate the Customer (CUS) you want to add a warranty period to.
Click the Settings tab and then the Sales and shipping subtab. The Warranty period (months) field is in the Warranty area.

Enter the number of months you want the warranty to be active. This warranty period will now be active on the selected Customer (CUS). This warranty period will be available to see in the Shipping advice (CSA) item using the Warranty date option in the context menu.
Warranty may be viewed, set or edited on the Shipping advice (CSA) item using the Warranty date option in the context menu. Using this option will open a popup where the end date of the warranty can be entered. This information is inherited to the Customer deviation (CDV) and sets the Warranty field to No or Yes. If no warranty is set on the customer document, the default in Customer deviation (CDV) will be No in the Warranty field. The warranty needs to be set manually in these instances.
If no warranty period has been set on the Product (ART) or Customer (CUS), or inherited from the Shipping advice (CSA), the warranty can be set manually on the Customer deviation (CDV) document in case of warranty repair or replacement. This is done after creating the initial document, in the Warranty field. Choose either Yes or No, and then who is responsible for cost in the Type of Repair field. A warning sign will appear if there is a discrepancy between the warranty period on the source document compared to the Customer devaition (CDV).

Requirements regarding the documentation are getting stricter and more comprehensive. The documentation process may be defined as the process where necessary documentation is retrieved throughout the life span of the production. This may be product approvals, certificates or user manuals.
Documentation administration.
Documentation is retrieved for internal purposes.
Documentation is retrieved for external purposes.
The requirements regarding documentation in production are strict, and one might say that one shipping container of goods creates two shipping containers of documents. Documentation needs to be managed during a production run, whether it be product approvals, certificates or user manuals. If a product is a structure of different parts, the different part will also need their own unique documentation. In addition to this you also have documentation relating to the different versions of products.
After documentation has been managed for the parts and products, the documentation for the operations and processes also needs to be managed. Operators need to document their skills, machines need documentation regarding certificates of approval and operations need to be documented with user manuals and operation routines.
When a production is finished it is also necessary with document management. The product needs documentation concerning testing and approval, serial numbers, measuring certificates and other relevant information.
Uploading documentation
Documentation following purchased, modified or produced goods need to be uploaded to the system.
Connecting documentation
Documentation uploaded to the system needs to be connected to a relevant element.
Print documentation
Documentation needed in print needs to be filtered and printed.
Selecting documentation
Documentation to be included in documentation packages needs to be selected.
Setting name | Description |
Activate Measure class "Dimension" | If setting is 'ON - Set Measure class "Dimension" active |
Activate the use of a measurement forms (MSR) | If setting is o'ON' - functionality for using Measurement Forms (MSR) is activated |
Required approval on Measure documents | If setting is 'ON' - New FAI/KCI Measure documents will need approval as default. |
Show Date Column on Measure documents | If setting is 'ON' - Date column will show on Measure Documents. |
Show Ref Column on Measure documents | If setting is 'ON' - Ref column shows on Measure Documents. |
Show Tool Column on Measure documents | If setting is 'ON' - Tool column shows on Measure Documents. |
Show Verified by Column on Measure documents | If setting is 'ON' - Verified by column shows on Measure Documents. |
Third Country Origin limit in percent | Value in this setting is the limit in percent for Third country origin parts value of a product. If the Third country origin product value is less than given percent of sales price in Shipping Advice (CSA), the product origin will be the same as country of the Company. By using the action 'Third Country Cost' on a Shipping Advice on a Product with Type= K*, you find the LimitPct from this settings. |
Automatic Measure Output | If the setting is ON - the automatic output will create a PDF file for the Measurements (MSR) documents and link the file to the Product unit (LCM). The automatic output will trigger: • By clicking the Approve icon, at the Measurements (MSR) documents header area. This is only if the template is set to that the Measurements (MSR) documents will be approved before output. • If approval required at Measurements (MSR) documents header is not set, and all measurement/check list items are checked/validated. |
It is possible to add project numbers on specific items in customer documents (COA / CSO). You may also set a project number for the entire item collection.
Enter the Project (PRJ) application and create a new project, if not already existing.
Enter the customer document of choice.
Press F12 to open the action menu and choose the option Update project on all Items.
This opens a popup where you may choose among the projects defined in the PRJ application. Choose the desired project and press ENTER.
All items will be updated with the project number
This may be inspected by entering the item in question and clicking the AccNo icon. The project number is found in the PrjNo field.
This project number will follow the order through the system.
This project number will be visible in Production Work Orders (PWO), inherited from the customer documents, under the Project field.
While in PWO / PRODSSA it is possible to change the PrjNo using the F12 option Update project on all Items. To delete the PrjNo, use the F12 option Remove project from all items.
The project number will also be visible in the different folders in the PRODPLAN application and can be filtered using the filter field.
The application Measuring Tools (MET) contains all measuring tools, including discontinued. This application enables you to create new measuring tools, create purchase orders for measuring tools, reporting or creating a service order for measuring tool service.

Write MET in the program field and press ENTER. This opens the Measuring Tool Menu, where all the different measuring tools are listed.

Click the Define New Tool Type button. This opens a popup where you can define your new tool. Class is pre-filled in with CLASS=WT, which is the measuring tool class. Fill in the necessary information:
Part: name of the measuring tool
Mfr: name of the manufacturer
ProdGroup: classification of the tool
Text: description of the tool (not mandatory)
Click the Submit button when finished. You will now see the measuring tool in ST:1.
When all information is registered on the tool, use the context menu item Set to ST:4 (Ordinary article).
To purchase measuring tools, it needs to be registered in RamBase, with CLASS=WT and in status 4. With these criteria filled, you can start the purchasing process from the Measuring Tools application. Click the Order new tool button and create a Supplier Purchase Order (SPO) as normal.
There are two methods of registering a measurement tool to stock. The first involves creating a goods reception on an ordered tool and the other is to create the the goods reception document manually (SSA). The document which represents the tool is a Life Cycle Management (LCM) document with DOCTYPE:MET. To create this document, it is the same procedure whether you are creating the goods reception document manually or through purchase.

A criteria for the creation of the goods reception document is that it has a serial number registered. To check this, enter the item and use the F12 menu option View Serial Numbers. If there are no serial number, it must be registered. This can be done either as a single update, or more common, by a multiple update.
When the serial number is registerd, return to the item view and use the F12 option Create LCMs based on SNO table, which will create LCM documents for the serial numbers on this item.
All these new LCM documents will receive DOCTYPE=MET and will not be listed in the LCM menu. These LCMs will be treated as MET, and will be available in the MET menu.
There is a button called View Report, visible in the top right corner of the Measuring Tools (MET) application. Clicking this will open the measuring tools report, with any restrictions set in the MET menu.

If you highlight one of the item lines and press ENTER, you will enter that specific measuring tool. This report can be scheduled to be delivered daily/weekly/monthly on either email or print.
Choose a measuring tool in the menu, or report, highlight the item line and press ENTER. This will take you to the specific measuring tool.

Here you can inspect or add information regarding the measuring tool:
QAR-quality document
Calibration reports/certificates (attachments in the Notes and Attachments function)
Option of creating a calibration job (CSO)
Information regarding the tool (MFR, prodgroup, etc.)
Serial number
Location
Past/next calibration date
Picture of the tool
The purpose of pre production tasks is the technical support and clearance of ready to go, before release of a Production work order (PWO).
Pre-production tasks are used in the planning process. They are created from a Sales order item (COAITEM), in the Sales orders (COA) application, or in the Sales order item (COAITEM) application. They can also be added to all levels of Product structure (KITART) in the Sales order items pre-production tasks (PPTASKS) application.
Purpose:
Distribute and follow up on questions and verifications that should be cleared before ready to go.
Manually added to the structure for Sales order items (COAITEM), also possible before Production work orders (PWO) are created.
Examples of use:
Are new tools required?
Is the risk acceptable?
Is quality control level set?
Any deviations related to the Product (ART) not cleared?
Functionality available/relevant in applications:
Tasks (TASKS)
Production work orders (PWOMENU)
Production work order (PWO)
Work order operation (WOO)
Assign pre-production tasks to orders (PPTASKS)
Operators list of production work order operations (RWOO)
List of work order operations for production resource category (RECWOO)
In the Sales orders (COA) application, there are two Context menu options to inspect and view pre-production tasks:
Pre-production tasks for selected sales order item: This option will take the user to the Task (TASK) application, with the selected Sales order item (COAITEM) as an active filter. This means that only pre-production tasks associated with the selected Sales order item (COAITEM) will be displayed.
Pre-production tasks for selected sales order. This option will take the user to the Task (TASK) application, with the selected Sales order (COA) as an active filter. This means that only pre-production tasks associated with the selected Sales order (COA) will be displayed.
In the Sales order item (COAITEM) application, there is one Context menu option to inspect and view pre-production tasks:
Pre-production tasks...: This option has the same functionality as the Pre-production tasks for selected sales order item option in the Sales orders (COA) application (described above).
A pre-production task can be created from the Sales orders (COA) application, or from the Sales order item (COAITEM) application and will be tied to the Sales order item (COAITEM).
Start in the Sales orders (COA) application. If the pre-production task needs to be associated with the Sales order (COA), proceed to the next step. However, if the task should be linked to a specific Sales order Item (COAITEM), navigate to the Sales order item (COAITEM) application.
Click on the Context menu icon and select the Create new pre-production task option.
Add relevant information in the fields in the pop-up.
The Task template field is mandatory, ensuring that the pre-production task is populated with information from the selected pre-existing task template. (Click the View icon to enter the Task template (TTT) application.)
After selecting a task template, the fields for Deadline, Responsible area, and Priority will be populated based on the information within the template. However, these fields remain editable. The Deadline field will display today's date plus the number of days specified in the Deadline offset field of the task template.
The Assigned to field will have the current user (creating the pre-production task) as default, but the field is editable.
The Source, Product, and Revision fields contain information inherited from the Sales order item (COAITEM) and are not editable.
Click the Create button.
Note
A pre-production task cannot be created without selecting a task template. These templates are created and managed within the Task Template (TTT) application. Read about the Task Template (TTT) application and find instructions on creating task templates here.
The roles available in the Responsible area field are added and managed in the Roles (ROLE) application. Read about roles and the Responsible area field here.
Pre-production tasks are restricted to the company of origin. Read more about database separation (the Restricted to companies field) here.
The Sales order items pre-production tasks (PPTASKS) allows users to filter Sales order items (COAITEM) with pre-production tasks, efficiently.
The user can also create new pre-production tasks directly from the list.
Add pre-production tasks on every level
The user can expand the Product name column to display every level of a structure, including sub-structures allowing the user to add pre-production task where they are needed.
Create new pre-production task popup
In the Sales order items pre-production tasks (PPTASKS) application, click the Create new pre-production task icon.

Create new pre-production task icon.
Task template dropdown menu with View icon
To select a predefined template for the task, click the Task template lookup field. To create or inspect templates, click the View icon to open the Task templates (TTT) application.
Deadline field with Calendar and Time icons
Type a deadline for the task in the YYYY.MM.DD hh:mm tt format. Optionally use the Calendar and Time icons to set a deadline for the task.
Responsible area dropdown menu with View icon
To set a role responsible for the task, click the Role lookup field and select a suitable role. The user may also use the View icon to view the defined Roles (ROLE) in the current system.
Assigned to dropdown menu with View icon
To change the assignee of the potential pre-production task, click the Assigned to field. The current user will be suggested assigned. The user may also click the View icon to open the Personnel (PER) application on the current selected assignee to view details.
Priority dropdown menu
To set the priority of the task, click the Priority dropdown menu. The user may set the priority to one of the following; Critical, High. Medium or Low.
Source field with View icon
The Source field displays the identifier of the Sales order (COA). Click the View icon to open the Sales order (COA) application.
Product field with View icon
Displays the name of the Product (ART) included in the Sales order item (COAITEM). To view and inspect details, click the View icon.
Product revision with View icon
Displays the name of the Product (ART) revision included in the Sales order item (COAITEM).
Create button
To create a new pre-production task, click the Create button. Note that a Task template must be selected before the user can create.
Cancel button
To cancel the addition of a new pre-production task, click the Cancel button.
Pre-production tasks closely resemble standard tasks and can be accessed within the Task (TASK) application. Within this application, users have the possibility to filter specifically on pre-production tasks, providing a clearer and more organized overview of tasks relevant to them.
To manage pre-production tasks in the Task (TASK) application, it is useful to have some pre-existing knowledge of the functionality of the application. Information about the application and its functionality may be found here.
To find pre-production tasks associated with a specific pre-production task within the Task (TASK) application, select the relevant pre-production task, then click on the Context menu icon and select the Associated pre-production tasks option.
To facilitate easy identification of pre-production tasks, they are marked with a clearly visible blue information note in the Task details area.
Pre-production have some specialized fields that are not found in standard tasks:
Product: The information in this field is inherited from the Sales order item (COAITEM) the pre-production task was created from.
Source: This field will show the identification number of the Sales order (COA) the pre-production task was created from.
Product revision: The information in this field is inherited from the Sales order item (COAITEM) the pre-production task was created from. If empty, there was no revision in the Sales order item (COAITEM).
Reviewer: In this field, the person responsible for doing the final check of the pre-production task is selected. When the pre-production task has been completed, it should be sent for review by clicking on the corresponding status.
When creating a pre-production task, default pre-production tags (Sales order, Product and Revision) are automatically added in the Tags tab. These pre-production tags appear in blue, ensuring they stand out from other added tags. They cannot be edited or deleted. The tags originate from the source Sales order (COA) and are applicable to all subsequent Sales orders (COA) sharing the same INITIALORDERNO. They ensure that the pre-production task is applied to all Sales order items (COAITEM) with matching product, product revision and initial sale order.
The statuses of pre-production tasks are different than in the rest of RamBase and somewhat different than for standard collaboration tasks.
To do. (Same as for standard tasks)
In progress. (Same as for standard tasks)
Completed/In review. The pre-production task is resolved but awaiting approval by reviewer.
Rejected. The pre-production task has been reviewed and rejected.
Done. The pre-production task has been reviewed and approved.
Note
The two final statuses are available only to users with a reviewer role.
In the Tasks (TASKS) application, users will get a list of the pre-production tasks in the Pre-production tasks tab. The application has extensive sorting and filtering possibilities, so users may customize the list of displayed tasks to their specific needs. More information about the filtering functionality is available here.
The status of the pre-production tasks may be changed by clicking on the Status icon of the specific tasks (located in the St column) and selecting the correct status.
To see further details of a specific pre-production task, users can click on the Context menu icon and select Show task details or open the task in question in the Task (TASK) application by clicking on the Arrow icon of the task.
The Sales order items pre-production tasks (PPTASKS) allows users to filter Sales order items (COAITEM) with pre-production tasks, efficiently.
The user can also create new pre-production tasks directly from the list.
Navigate to the application
Option 1: RamBase menu→Production→Planning→Assign pre-production tasks to order
Option 2: Click the Program field and type "PPTASKS" and press ENTER.
Click here to read more about the user interface.
Add pre-production tasks on every level
The user can expand the Product name column to display every level of a structure, including sub-structures allowing the user to add pre-production task where they are needed.
Read more about pre-production tasks here.
Filtering the listed Sales order items (COA) is done from the Header area. The available fields, dropdown menus, checkboxes and buttons are listed in the table below:
Fields, dropdown menus, checkboxes and buttons | Icon | Description |
|---|---|---|
Quick search |
| A free text search field. Click Filter icon to include or exclude; Sales order identifier and/or Product name. |
Location | Filtering on a specific Location (LOC) can be done by selecting a location from the drop-down menu. Only one location can be selected at a time. | |
Product | Filtering on a specific Product (ART) can be done by selecting a product from the dropdown menu. All products can be included in the search, or the user can select one specific product. | |
Seller | Filtering on a specific seller can be done by selecting a seller from the dropdown menu. All sellers can be included in the search, or the user can select one specific seller. | |
Customer | Filtering on a specific Customer (CUS) can be done by selecting a customer from the dropdown menu. All customers can be included in the search, or the user can select one specific customer. | |
Planner | Filtering on a specific production planner can be done by selecting a user from the dropdown menu. All production planners can be included in the search, or the user can select one specific production planner to filter on. | |
Assignee | Filtering on a specific assignee can be done by selecting a assignee from the dropdown menu. All assignee can be included in the search, or the user can select one specific assignee. | |
Only structures | To only list Sales order items (COAITEM) of Type = K, KS, KM or KA, check the Only structures checkbox. This also applies when expanding the Product name column. Only structures will be displayed. | |
Reset all filters | To reset the list, and remove all selected filter options, click the Reset all filters button. | |
Search field | Click the Search field and then press SPACEBAR. This will list all of the available fields to filter the list on. | |
Filter builder |
| Click the Filter builder icon to list all Standard filters, My saved filters or to Create custom filters. All custom filters can be saved and then added to the My saved filters area. |
Standard filters
|

The Sales order items pre-production tasks (PPTASKS) application has a locked set of columns. Notable functionality is the option of creating new pre-production tasks on every level, opening the Task (TASK) application and in general using the View and Collapse/Expand icons to quickly check included products, structures and the various sources of Sales order items (COAITEM).
The columns are described in the following table:
Column | Icon | Description |
|---|---|---|
Status |
| Displays the status of the Sales order item (COAITEM). Available statuses:
|
Sales order item |
| Displays the identifier of the Sales order item (COAITEM). Click the View icon to open the Sales order item (COAITEM) application to view and edit further details. |
Initial sales order |
| Displays the Sales order (COA) identifier number of the original Sales order (COA), which the listed Sales order item (COAITEM) was forwarded from. Click the View icon to open the Sales order (COA) application to view and edit further details. |
Customer |
| Displays the name of the Customer (CUS) linked to the Sales order item (COAITEM). Click the View icon to open the Customer (CUS) application. |
Planner |
| Lists the name of the employee set as planner in either the Sales order (COA) or Production work order (PWO) application. Click the View icon to open the Personnel (PER) application to view the user details. |
Qty | Displays the quantity of products included in the Sales order item (COAITEM). | |
Type |
| The Type column displays the type of the Product (ART) included in the Sales order item (COAITEM). This is visualized with a corresponding icon and abbreviation. Note that some icons, like the ones for structure (type = K, type = KA, and so on), can be clicked to open the Kitart (KITART) application to inspect the Product structure (KITART). |
Product name |
| Displays the name of the Product (ART) included in the Sales order item (COAITEM). Click the View icon to open the Product (ART) application to view and edit details on the product. Use the Collapse and Expand icons to display or hide the materials, parts etc. included in a structure. Expanding a structure allows the user to add pre-production tasks to every level, including sub-productions. |
| ||
Revision | Displays the product/part revision of Sales order item (COAITEM). Products/parts get a new revision number due to changes in materials/parts within the structure. | |
Pre-production tasks |
| The Pre-production tasks column displays all pre-production tasks linked to the Sales order item (COAITEM). Each task is represented by an icon. These icons can be clicked to open the Task details (TASK) application to view and edit details. Note that all icons will also display the title. The user must therefore click the icon, and not the text to open the Task details (TASK) application. |
| Click the Show all pre-production tasks to open a related popup listing all pre-production tasks. NoteThe space in the Pre-production tasks column is limited. Therefore only a limited number of tasks can be displayed, meaning others can be hidden. | |
| Click the Create new pre-production task icon to open the related popup. | |
Create new pre-production task popup
|


Technical support and clearance for ready to start for specific production Operations (OPR).
Operations (OPR) can require the preparation of tools or machine software. Ensuring availability when the Operation (OPR) is ready to start.
Templates and rules creates tasks for new or modified work orders (operations). Or manually created.
Examples of use:
Mastercam software for CNC
Technical drawing
Material sign-off
Welding procedure
An assortment of applications where the functionality available/relevant:
Tasks (TASKS)
Production work orders (PWOMENU)
Production work order (PWO)
Work order operations (WOO)
Following this setup from A. - D., will result in production tasks being created due to the Task process (TSP) being started when a Production work order (PWO) is confirmed, from Status 1 to Status 2, 3 or 4, based on the user's preferred Retrigger interval and Retrigger level.
Required setup not covered by this document:
Define Production resource (RESCONFIG)
In addition, defining a Production resource category (REC) can also useful, as it can be added to a Production task trigger (PTT)
Define an Operation (OPR) of type Production and that applies to the Resource above.
Include the Operation (OPR) in a Product structure (KITART) and Product (ART), both in Status 4 - Active.
Note
A Task process template (PTM) is used to define a process which can be started by a Production task trigger (PTT).
In the Task process templates (PTM) application, click the Create new template button.
Provide the following information:
Name
Description
Type - Select the Production option.
Click the Create button.
Result: A Task process template (PTM) in Status 4 - Active is created.
From the Task process template (PTM) application, in the Task templates tab, click the Add task to template button.
Provide the following information:
Title
Assigned to
Description
Deadline offset (days)
Priority
Click the Create button.
Result: A Task template (PTMD) in Status 4 - Active is created.
From the Task process template (PTM) application, click the Right arrow icon in the Task templates tab to open the Task templates details (PTMD) application.
In the Task template checklist tab, click the Add item button to start adding checklist items.
Provide the following information:
Text - What the checklist item should be labeled.
Type - Decide on how the checklist item is cleared by Checkbox or Yes/No option.
Required - Defines if the checklist item is mandatory to be checked.
Result: Checklist items are now created for the Task template (PTMD).
Note
A Production task trigger (PTT) is used to define when a Task process template (PTM) is triggered and Task template checklist items (PTMD) are generated for the Production work order (PWO).
Creating a Production task trigger (PTT) can be done in two ways:
Create a Production task trigger (PTT) in the Production task trigger (PTT) application
From the Production task trigger (PTT) application, click the Create new task trigger button.
Provide the following information:
Name - Provide a unique name. Can not be changed after creation.
Result: A Production task trigger (PTT) is created in Status 1 - Draft.
In the Production task trigger area, select a Process template created in A. Create and define Task process template (PTM), by clicking the drop-down menu.
Set the optional Retrigger interval days, Retrigger level and/or Check for quality issues.
Retrigger interval days - Used to avoid that new tasks are unnecessarily created for each new Production work order (PWO).
Set the interval of days to pass, since the previous production, before the Task process template (PTM) will be retriggered.
The retriggering is based on the selection in the Retrigger level dropdown menu. The trigger will be initiated (checked) by registering (confirming) a new Production work order (PWO) and when activating a new version of the Production work order structure (KITDOC).
Retrigger level - Degree of details. State if the task should be triggered based on only Product (ART) identifier or in addition one or more variables.
Available variables:
Product - A new Production work order (PWO) for a product will create production tasks if the last Production work order (PWO) for the product is from before today – the retrigger interval set at the Production task trigger (PTT).
Product, Sales order - A new Production work order (PWO) with the unique combination of product and Sales order (COA) will create production tasks if the last Production work order (PWO) for this product and Sales order (COA) is from before today - the trigger interval set at the Production task trigger (PTT).
Product, Revision - A new Production work order (PWO) with the unique combination of product and product revision will create production tasks if the last Production work order (PWO) for this product and revision is from before today - the trigger interval set at the Production task trigger (PTT).
Product, Revision, Sales order - A new Production work order (PWO) with the unique combination of product, product revision and Sales order (COA) will create production tasks if the last Production work order (PWO) for this product, revision and Sales order (COA), is from before today - the trigger interval set at the Production task trigger (PTT).
Product, Revision, Drawing - A new Production work order (PWO) with the unique combination of product, product revision and drawing will create production tasks if the last Production work order (PWO) for this product, revision and drawing is from before today - the trigger interval set at the Production task trigger (PTT).
Product, Revision, Drawing, Sales order - A new Production work order (PWO) with the unique combination of product, product revision, drawing and Sales order (COA) will create production tasks if the last Production work order (PWO) for this product, revision, drawing and Sales order (COA), is from before today - the trigger interval set at the Production task trigger (PTT).
Check for quality issues checkbox - Check for quality issues. If there are quality issue since last time the trigger was executed the Production task trigger (PTT) will be retriggered.
Note
Activating this checkbox will overrule the value in the Retrigger interval days, if any Quality issues (QIS) are found for the Product (ART) being produced.
It will also overrule product revision and drawing, Quality issue (QIS) refers only to the Product (ART).
Add a Production resource (RESCONFIG) or a Production resource category (REC) to generate Production tasks (TASK) for.
Single production resources - Click the Single production resources tab, and click the Add production resources button and select which Production resource (RESCONFIG) the trigger applies for.
Production resources categories - Click the Production resource categories tab, and click the Add production resource category and select which Production resource categories (REC) the trigger applies for.
Verify that all options are as intended, and click the Activate option in the Context menu to set the Production task trigger (PTT) in Status 4 - Active.
Context menu options
Create a Production task trigger (PTT) in the Task process templates (PTM) application
From the Task process templates (PTM) application, click the Production task triggers tab, and click the Create new task trigger button.
Provide the following information:
Name
Result: The new Production task trigger (PTT) will be listed in the Production task triggers tab, but in Status 1 - Draft.
To configure and activate, click the Right arrow icon to open the Production task trigger (PTT) application.
Continue as described in the procedure above.
The Task processes (TSP) application is useful in inspecting that all triggered production tasks are as they should be, including who has permissions to View, Edit, Delete and Assign tasks.
Most relevant for this procedure is the option to view all active and detached production tasks for Production work orders (PWO).
Production tasks are always a part of a production process, they cannot exist on their own. Both production processes and tasks are exclusively generated from predefined templates and cannot be manually created. Production process templates are established and managed within the Task Process Templates (PTM) application, with more information available here. Similarly, production task templates are created within the Task Process Template (PTMD) application, and additional information can be found here.
Production processes (along with their associated tasks) are started automatically through predefined triggers set within the Production Task Triggers (PTT) application.
There are three levels of dealing with production tasks:
Production processes (top level, consists of one, or (normally) more, production tasks)
Production tasks (can include checklist items)
Checklist items (the most detailed level of dealing with things that need to be done before production)
As a consequence of being system generated, editing possibilities are limited. In addition, it is not possible to delete production processes, production tasks or checklist items.
Production tasks can be accessed within the Task (TASK) application. Within this application, users have the possibility to filter specifically on production tasks, providing a clearer and more organized overview of tasks relevant to them.
To facilitate easy identification of production tasks, they are marked with a clearly visible blue Production task information note in the Task details area.
There is one Context menu option available for production tasks, namely Revision history.
The statuses/workflow of production tasks are the same as for standard collaboration tasks:
To do
In progress
Done
The status of a production task may be changed in the Task (TASK) application by:
Clicking on the Status icon of the task in the Task area (list view) and selecting the correct status option, or
Clicking on the correct Status icon at the top of the Task details area.
The Tasks (TASKS) application offers an easy overview of production processes in the Production processes tab. The application has extensive sorting and filtering possibilities, so users may customize the list of displayed processes to their specific needs. It features the following quick filters, in addition to the possibility to add custom filters:
Process id
Process name
Deadline on (and before)
Responsible area
Assigned to
Product
Production work order
Production tasks, along with their respective statuses, are listed within the process they belong to (in the Tasks column). Each task has a View icon, allowing for convenient inspection and management of the specific task within the Task (TASK) application. The status of a task could also be changed directly in the Tasks (TASKS) application by clicking on the status of the specific task and selecting the correct status.
In the Tasks (TASKS) application, production work orders are listed within the process they are associated with (in the Production work orders column). Each production work order has a View icon, allowing for convenient inspection and management of the specific work order within the Production work order (PWO) application.
Users can navigate to a specific production process in the Task processes (TSP) application by clicking on the Arrow icon of the relevant production process.
Production processes can be accessed within the Task processes (TSP) application. Within this application, users have the possibility to filter specifically on production processes, providing a clearer and more organized overview of processes relevant to them.
To facilitate easy identification of production processes, they are marked with a clearly visible blue Production process information note in the Task process details area.
There is one Context menu option available for production tasks, namely Revision history.
Production processes have a Production work orders tab, which displays a list of all production work orders the specific production process applies to.
Note
This is an informational topic describing the functionality of the Production task triggers (PTT) application.
The Production task triggers (PTT) application is used for creating production tasks automatically from actions connected to a Production work order (PWO).
Navigate to the application
Option 2: Click the Program field and type "PTT" and press ENTER.
Click here to read more about the user interface.
Production task triggers (PTT) are created by users so that the system automatically can add Task processes (TSP) - a set of tasks, to production Operations (OPR) in a Production work order (PWO). These Task processes (TSP) are reused for other production Operations (OPR) on other Production work orders (PWO) depending on the Production task trigger (PTT) re-trigger level.
The selected Retrigger level and Retrigger interval days defines when a Production task template (PTM) is initiated.

Areas as defined in this text
The Production task triggers list - Left side
The Production task trigger header - Right side
The Production task trigger tabs - Right side
The Context menu options - Top right corner
The list displays all Production task triggers (PTT) in:
Status 1 - Draft
Status 4 - Active
Status 9 - Deactivated
Header
The header includes a search field, the Filter builder icon and the Column settings icon.
Filter builder icon - The Filter builder includes a set of standard filters, which are listed below. A selected and active standard filter will be placed underneath the search field and marked with the color orange. A selected and inactive field will still be placed underneath the search field, but marked with the color gray. Click the Remove icon on the filter to remove a standard or saved filter.
Read more about Filtering in RamBase.
Standard filters
Active production task trigger - Will filter the list on all Production task triggers in Status 4 - Active.
New production task trigger - Will filter the list on all production task triggers in Status 1 - Draft.
New and active production task trigger - Will filter the list on all production task triggers in Status 1 - Draft and Status 4 - Active.
Column settings icon - The column settings are used to handle the information displayed in a list and the user can quickly select; which columns are to be displayed, to export the information displayed to Excel, or to even include custom fields, if the option is available.
Read more about Column settings.
Column | Icons | Description |
|---|---|---|
St |
| Displays an icon indicating the state of a Production task trigger (PTT). Available statuses are:
|
Id | Displays the Production task trigger identifier (PTT). For example: "123456". | |
Name | Displays the name of the Production task trigger (PTT). This is defined when creating using the Create new task trigger button to create a new Production task trigger (PTT) in Status 1 - Draft. Note that the name can only be set or edited when creating the task trigger. | |
PTM |
| Displays the unique Task process template identifier (PTM). For example: "123456". The Task process template (PTM) is triggered by the Production task trigger (PTT). Click the View icon to open the Task process templates (PTM) application to . The Task process templates (PTM) application is used for defining task process templates. |
ProcessTemplateName | Displays the name of the Task process template (PTM) which will be initiated by the Production task trigger (PTT). | |
Location |
| Displays the Location (LOC) three-letter abbreviation of the Production task trigger (PTT). |
| To delete a Production task trigger (PTT), click the Delete production task trigger icon. Note that only Production task triggers (PTT) in Status 1 - Deactivated, can be deleted. Deactivating a Production task trigger (PTT) can be done from Context menu by clicking the Deactivate option. This option only applies to Production task triggers (PTT) in Status 4 - Active. | |
Create new task trigger button |
| To create a new Production task trigger (PTT), click the Create new task trigger button to open a related popup. Add a name in the Name field and click the Create button to create a Production task trigger (PTT) in Status 1 - Draft. |


The Production task trigger header is used to define which Task process template (PTM) is triggered along with the specification of the Retrigger interval days, Retrigger level and if quality issues qualifies for a retrigger.
The options are described in the table below.
Fields, dropdown menus and checkboxes | Icons | Description |
|---|---|---|
Name field | Displays the name of the Production task trigger (PTT) which is defined when creating the Production task trigger (PTT), via the Create new task trigger button. | |
Process template dropdown menu |
| To select a Production task template (PTM) to be initiated by the Production task trigger (PTT), click the Process template dropdown menu. To view and edit the tasks included in the selected Task process template (PTM), click the View icon to open the Task process template (PTM) application. |
Location dropdown menu |
| Displays the three letter abbreviation of the Location (LOC) for the production process. To inspect Location (LOC) details, click the View icon to open the Location (LOC) application. |
Description textbox | Description field of the Production task trigger (PTT) which can be edited in Status 1 - Draft and Status 4 - Active. It can be beneficial to summarize the consequences of the Production task trigger (PTT), the selected Task process template (PTM) and the set Retrigger level. | |
Retrigger interval days field | Used to avoid that new tasks are unnecessarily created for each new Production work order (PWO). Set the interval of days to pass, since the previous production, before the Task process template (PTM) will be retriggered. The retriggering is based on the selection in the Retrigger level dropdown menu. The trigger will be initiated the first time the production is run. | |
Check for quality issues checkbox | Check for quality issues. If there are quality issue since last time the trigger was executed the Production task trigger (PTT) will be retriggered. Activating this checkbox will overrule the value in the Retrigger interval days, if any Quality issues (QIS) are found for the Product (ART) being produced. It will also overrule product revision and drawing, Quality issue (QIS) refers only to the Product (ART). | |
Retrigger level dropdown menu | Degree of details. State if the task should be triggered based on only Product (ART) identifier or in addition one or more variables. Available variables:
|
The production resources that the production tasks should apply for must be added to the Production task trigger (PTT), either by adding single resources or all resources that belongs to a resource category defined in the Production resource categories (REC) application. In addition the Task process log displays useful information to tune the Production task trigger (PTT).
To add a Production resource category, and its included Production resources (RESCONFIG), use the Production resource categories tab.
Column | Icons | Description |
|---|---|---|
St |
| Displays an icon indicating the status of the Production resource category (REC). Available status are:
|
Id | Displays the identifier of the Production resource category (REC). For example "123456". | |
Name |
| Displays the name of the Production resource category (REC). To open the Production resource categories (REC) application, click the View icon. Here the user can edit and view details on the Production resource category (REC). |
Full name | Displays the full name of the Production resource category (REC). The full name includes all parent categories and sub-categories. | |
Description | Displays the description set in the Production resource categories (REC) application. | |
| To remove the Production resource category (REC) from the Production task trigger (PTT), click the Remove production resource category icon. | |
Add production resource category button |
| To add Production resource categories (REC) to the Production task trigger (PTT), click the Add production resource category button. This will open a popup where the user can select a Production resource category (REC) from a dropdown menu. To efficiently add multiple Production resource categories (REC) to the Production task trigger (PTT), check the Create another checkbox. To finalize the adding, click the Create button. |

To add a single production Resource (RESCONFIG) to the Production task trigger (PTT), use the Single production resources tab.
Column | Icon | Description |
|---|---|---|
St |
| Displays an icon indicating the status of the Production resource (RESCONFIG). Available statuses are:
|
Id | Displays the Production resource (RESCONFIG) identifier. For example: "123456". | |
Name |
| Displays the name of the Production resource (RESCONFIG), set in the same application. To view and edit details, click the View icon. |
Short name | Displays the short name of the Production resource (RESCONFIG), if a Short name is defined for the Production resource (RESCONFIG). | |
Type | States the type of the Production resource (RESCONFIG). Available types are:
| |
Group | If the Production resource (RESCONFIG) is included in a Production resource group (GWOO), the name of the group will be displayed here. | |
| To remove a Production resource (RESCONFIG) from the Production task triggers (PTT), click the Remove production resource | |
Add production resource button |
| To add a Production resource (RESCONFIG) to the Production task trigger (PTT), click the Add production resource button. This will open a popup where the user can select a Production resource (RESCONFIG) from a dropdown menu. To efficiently add multiple Production resources (RESCONFIG) to the Production task trigger (PTT), check the Create another checkbox. To finalize the addition, click the Create button. |

The Task process log displays useful logged information to further tune the Production task trigger (PTT). In addition, the Right arrow icon on each item can be used to quickly navigate to the Task process details (TSP) application.
Column | Icon | Description |
|---|---|---|
St |
| Displays an icon indicating the status of the Task process (TSP). Available statuses:
|
Id | Displays the identifier of the Task process (TSP) that has been trigger by the Production task trigger (PTT). | |
Name | Displays the name of the Task process (TSP) that has been triggered by the Production task trigger (PTT). | |
ProductId | Displays the Product (ART) identifier that triggered the Task process (TSP). | |
Product |
| To view and/or edit details on the Product (ART), click the View icon to open the Product (ART) application. |
Product revision | Displays the name of the potential Product (ART) revision the generated task applies to. | |
Drawing id | Displays the drawing id of the file which has been added to the Product structure (KITART). | |
Drawing | Filename to display for the file version. Will be used when downloading the file. | |
Drawing version | Displays the version number of the uploaded file. | |
Drawing revision | Displays the name of the drawing revision. Set when uploading the revised drawing in the Product structure (KITART). | |
Initial sales order | Displays the initial Sales order identifier (COA). | |
Generated at | Displays the time the Task process (TSP) was generated in yyyy.MM.dd HH:MM format. | |
Completed at | Displays the time all tasks in the Tasks list tab of the Task process (TSP) application was marked as Donein a yyyy.MM.dd HH:MM format. | |
| To open the Task process (TSP) application and inspect details, click the Right arrow. The Task process (TSP) application may be used for the following:
|
Read more about the Context menu.
Option | Description |
|---|---|
Activate | To activate a Production task trigger (PTT) in Status 1 - Draft, select the Activate option. NoteNote that a Production task trigger (PTT) can also be created in the Task process templates (PTM) application, in the Production task triggers tab. These will be in Status 1 - Draft, and therefore not displayed in the tab until they have been activated via this option in the Production task trigger (PTT) application. |
Deactivate | Deactivating a Production task trigger (PTT) can be done from Context menu by clicking the Deactivate option. This will set the Production task trigger (PTT) in Status 9 - Deactivated. This option only applies to Production task triggers (PTT) in Status 4 - Active. |
The purpose of the scheduled production tasks is to create either time (date) driven tasks connected to Operations (OPR) or event driven tasks connected to the completion of specific Operations (OPR).
Inform customer/other about planned start for a specific operation or when an operation is completed.
Inform internally when an operation is completed to efficiently initiate parallel processes.
Scheduled tasks can be initiated manually at the operation elements of the Production structure (KITDOC).
Examples of use:
Notify customer/other for inspection time.
Notify internally that the Production work order (PWO) has reached a point where the customer can be invoiced.
Assortment of applications where the functionality is available/relevant:
Planned operations for production work order (PWOPLO)
Orders overview (OOV)
Structure operation item (KITDOCOPRITM)
This topic describes the steps necessary to start a Task process (TSP) on completion of an Operation (OPR).
What
Start a Task process (TSP) on completion of an Operation (OPR).
Why
Inform internally when an operation is completed to efficiently initiate parallel processes, for example a predetermined invoicing point in the production process..
Who
The project leader or production planner.
How
The project leader or production planner activates the task on the operation in the Production structure (KITDOC). When the operation is completed the Task process (TSP) is activated along with the included Tasks (TASK).
Create a Task process template (PTM) for type = Production in the Task process template (PTM) application.
To open the Task process template (PTM) application from the RamBase menu, select Collaboration and then Task, finally select Task process template.
To create a new template, click the Create new template button in the lower left corner to open the related popup.
In the Name field, type a suitable name, for example "Reset CNC Machine after operation" and add a helpful description in the Description field.
In the Type dropdown, select the Production option.
To create the Task process template (PTM) in Status 4 - Active, click the Create button.
Tip
Note the identifier of the Task process template (PTM) for later: Example "PTM/123456"
Add a minimum of one Task template to the Task process template (PTM).
To add a task to the template, click the Task template tab and then the Add task to template button in the footer.
Add details by typing a title in the Title field, and set a helpful description in the Description field. Select an assignee in the Assigned to dropdown menu and decide on the offset days in the Deadline offset (days) field. The user can also set the priority in the Priority dropdown menu.
When all details are added, click the Create button.
Note
The details typed in the Title, field along with the details typed in the Description field, will be the information that is set on the created task.
Find the correct Production work order (PWO) by navigating via the Production work orders (PWOMENU) application to access the Production structure (KITDOC) application.
From the RamBase menu select Production and then Production again, finally select Production work orders to open the Production work orders (PWOMENU) application.
Enable the Kit column, by clicking the Column settings icon, hover over Columns and enable the Kit column.
Search for, or find the Production work order (PWO) with the operation which should start the task process.
To open the Production structure (KITDOC) for the Production work order (PWO), find the Kit column and click the KA, K or KM icon. Alternatively the user can click the Structure button in the Production work order (PWO) application.
Start task process on the completion of an operation in the KITDOCOPRITM application.
To open the KITDOCOPRITM application from the Production structure (KITDOC) application, click the Kit Details tab select the operation item and press ENTER.

Operation item icon
In the KITDOCOPRITM application, Right-click and select the Start task process on completion of operation option.

In the popup, add the Deadline offset, which is the number of days after the completion of the operation that the deadline of the task(s) will be set.
In the popup, select a Task process template to be started on completion of the Operation (OPR).
Click the OK button.
The KITDOCOPRITM will now have a new tab titled Scheduled task processes where all scheduled task processes can be viewed.
This topic describes the steps necessary to add notification tasks to Operations (OPR) of Production work orders (PWO).
What
Notify about planned start time for a Work order operation (WOO) that needs to be observed or controlled by the customer, or other external contacts.
Who
The project leader or production planner.
How
The project leader or production planner activates the notification task on the operation in the Production work order (PWO) structure.
The project leader/production planner selects the offset days for when the notification is to be triggered. The system has an overnight job which looks for scheduled operation notifications where the operation planned start date – offset days is reached, resulting in the waiting notification being activated and creating a task as a reminder to notify the contact.
Further handling
The recipient contact is not automatically notified. The task owner or assignee must notify the contact with an external program. When this is done, the task must be set as completed.
A notification task will lock the Planned operation for production work order (PWOPLO). This means that the external planner system or internal planner is not allowed to move the operation in time, but it can, if needed, be unlocked manually.
The task process is assigned to the project leader for the Production work order (PWO), and will be tagged with Production work order (PWO) identifier and name. An overview of a users tasks can be viewed in the Task (TASK) application.
The scheduled production task will be closed and set in Status 9 - Archived.
Relevant changes to Production work order (PWO)
If the Production work order (PWO) is split, the Scheduled task processes are copied to the Production structure (KITDOC) of the new Production work order (PWO).
If a new version is made of the Production work order (PWO), the Scheduled task processes are moved to the operations in the new Product structure (KITART).
Setup - Task process template (PTM) and Company settings (CSV)
Create a Task process template (PTM) for type = Production in the Task process template (PTM) application.
To open the Task process template (PTM) application from the RamBase menu, select Collaboration and then Task, finally select Task process template.
To create a new template, click the Create new template button in the lower left corner to open the related popup.
In the Name field, type a suitable name, for example "Customer notification" and add a helpful description in the Description field.
In the Type dropdown, select the Production option.
To create the Task process template (PTM) in Status 4 - Active, click the Create button.
Tip
Note the identifier of the Task process template (PTM) for later: Example "PTM/123456"
Add a minimum of one Task template to the Task process template (PTM).
To add a task to the template, click the Task template tab and then the Add task to template button in the footer.
Add details by typing a title in the Title field, and set a helpful description in the Description field. Select an assignee in the Assigned to dropdown menu and decide on the offset days in the Deadline offset (days) field. The user can also set the priority in the Priority dropdown menu.
When all details are added, click the Create button.
Note
The details typed in the Title field along with the details typed in the Description field will be the information that is set on the task that will be created as a reminder to notify the customer or contact.
Enable the Company setting (CSV), "(PTM) Task process template to be used for customer notification", allowing customer notification in the production operation planning.
To open the Company settings (CSV) application from the RamBase menu, select Admin and the Overview. Click on the Settings tile followed by Company settings tile.
In the Search field, search for "(PTM) Task process template to be used for customer notification".
Toggle the settings from OFF to ON by clicking the OFF icon. In the Value field, provide the identifier of the Task process template to be used for customer notification. Example: "123456".
Add notification to operation
A notification is added manually to a selected operation item in the KITDOCOPRITM application. The application is accessed from the Production work order (PWO) application.
Find the correct Production work order (PWO) by navigating via the Production work orders (PWOMENU) application to access the KITDOC application.
From the RamBase menu select Production and then Production again, finally select Production work orders to open the Production work orders (PWOMENU) application.
Enable the Kit column, by clicking the Column settings icon, hover over Columns and enable the Kit column.
Search for, or find the Production work order (PWO) where customer notification is to be added.
To open the Production structure (KITDOC) for the Production work order (PWO), find the Kit column and click the KA, K or KM icon. Alternatively the user can click the Structure button in the Production work order (PWO) application.
Activate task process for customer notification in the KITDOCOPRITM application.
To open the KITDOCOPRITM application from the Production structure (KITDOC) application, click the Kit Details tab, select the operation item and press ENTER.
Operation item icon
In the KITDOCOPRITM application, Right-click and select the Activate task process for customer notification option.

In the popup, add the Deadline offset, which is the number of days before the planned operation start the customer should be notified.
Click the OK button.
The KITDOCOPRITM will now have a new tab titled Scheduled task processes where all scheduled task processes can be viewed.
Trace material usage (REPORT/117852)
The Trace material usage report allows you to input the Good reception (SSAITEM) id of a specific part, batch, material, or sub product for a goods reception item to identify which products the items are used in.
Important
The report will be completely empty until a Goods reception (SSAITEM) id is added and the Apply changes button is clicked.
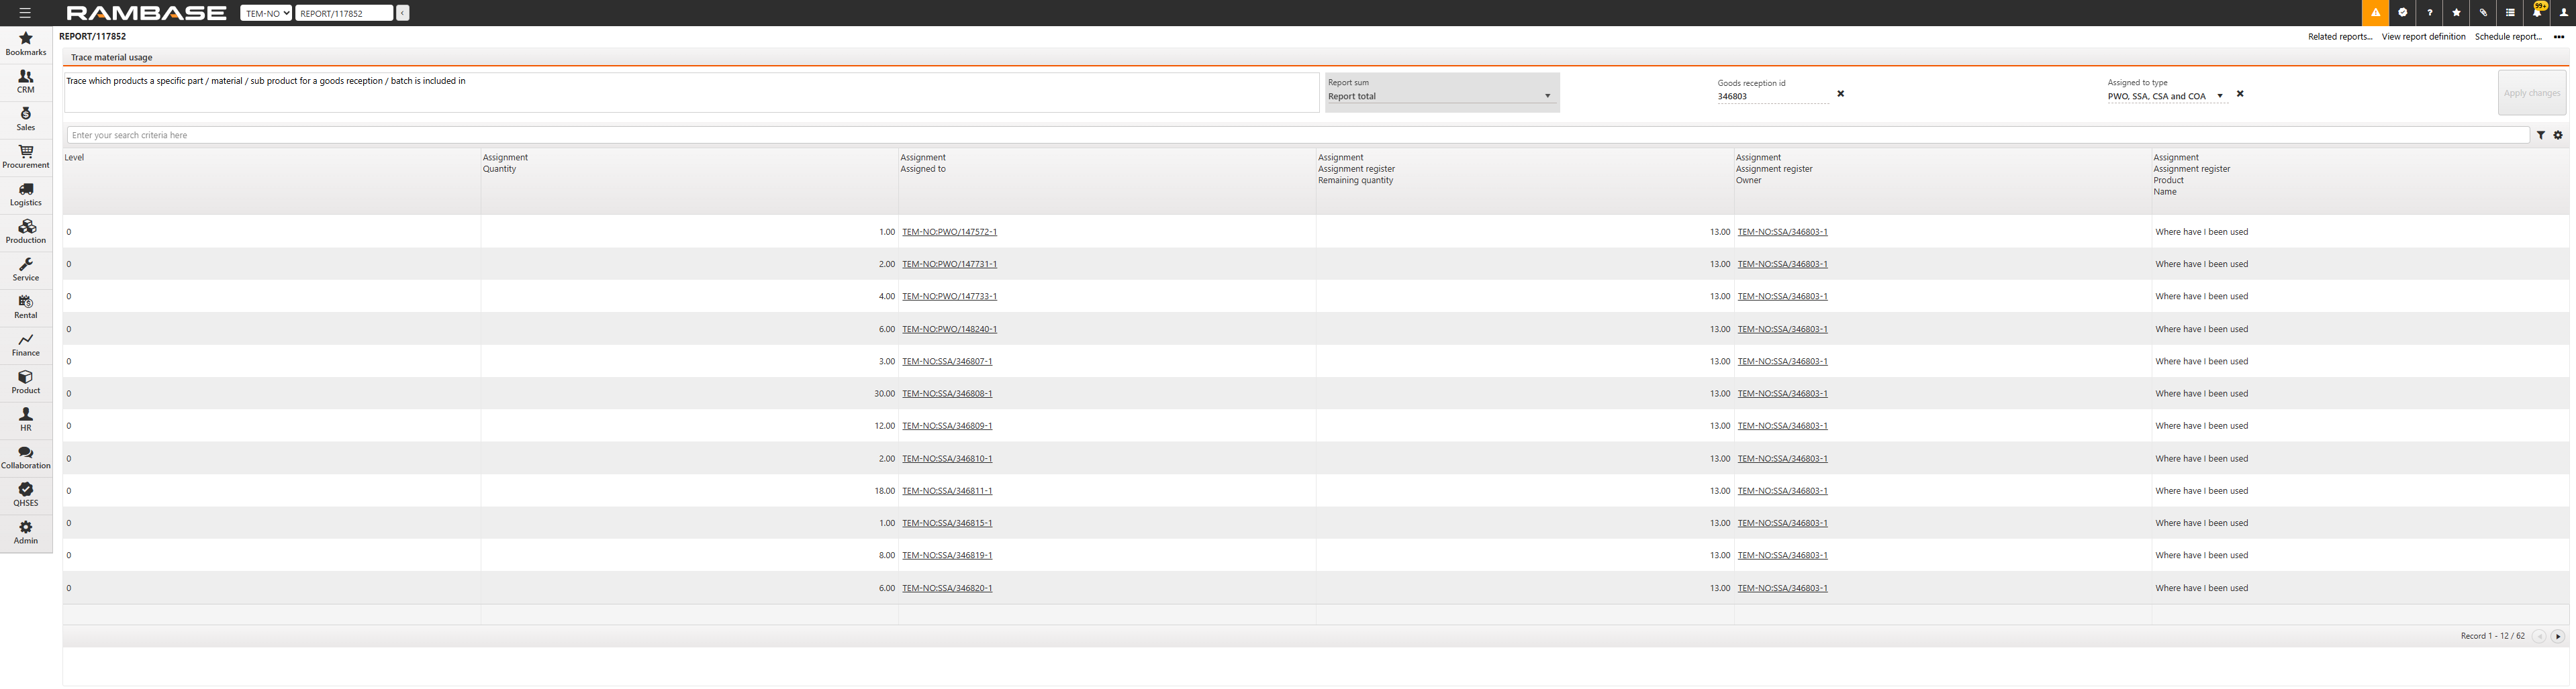
Header
In the header or the Trace material usage report, there is a description of the reports function. [WHAT IS THE FUNCTION OF REPORT SUM].
Enter the Goods reception id (SSAITEM) of an item. Use the Assigned to type dropdown menu to choose the desired link identifier. The following combination of types are available from the dropdown menu:
Production work order (PWO)
Goods reception item (SSAITEM)
Production work order (PWO) and Goods reception item (SSAITEM)
Production work order (PWO), Goods reception item (SSAITEM), Shipping advice (CSA), and Sales order (COA)
Goods reception item (SSAITEM), Shipping advice (CSA), and Sales order (COA)
Production work order (PWO), Goods reception item (SSAITEM), Shipping advice (CSA), Sales order (COA), and Stock correction (SAW)
Main content
Column | Description |
|---|---|
Level | Displays the tree level of the part. |
Assignment Quantity | Displays the quantity of the part. |
Assignment Assigned to | Displays the document type the part is assigned to. |
Assignment Assignment register Remaining quantity | Displays the remaining quantity of the part. If the part is of object type purchase order, purchase order response, or production work order, the remaining quantity will decrease when is forwarded from the object. If the part is of object type goods reception, the remaining quantity will be decreased when goods from this object is shipped |
Assignment Assignment register Owner | Displays the part. |
Assignment Assignment register Product Name | Displays the name of the part |
In order to use alternative materials, the user needs to first define the materials. This is done from the Production structure (KITDOC) application. Defining an alternative material means that when a base material is out of stock or generally unavailable, it can be replaced by a different material of the same type.
Accessing the Production Structure (KITDOC) application is done from the Production work order (PWO) application.
Tip
Define alternative materials
To open the Production work order (PWO) application, find Production in the RamBase menu then Production.
Click Production work orders to open the Production work orders (PWOMENU) application.
From the listed Production work orders (PWOMENU), click the intended Production work order (PWO) and press ENTER.
This opens the Production work order (PWO) application for the selected Production work order (PWO). Click on the Structure button under the Links area to open the Production structure (KITDOC) application.
Double click any column in the material row to open the PWO Structure Part Item popup. Click the Alternative materials tab to add new alternative materials to the production structure.
Click the Add new material button to open the Part Select popup. In this new window, select the part(s) to be used in place of the base material.
Double click the part to add it to the Alternative materials list in the PWO Structure Part Item popup. To delete a part, click the Delete alternative material icon in the Delete column.
Click the Confirm button to confirm the changes.
Allocate alternative materials to stock with the Production work order assignments (PWOSARLINKS) application
From the Production work order (PWO) application, select the Pending purchase section of the pie chart in the Material deliveries pie chart to open the Production work order assignments (PWOSARLINKS) application.
Click the Use alternative materials icon to open the Alternative materials popup.

Here you will see the alternative materials that were defined in the Production Structure (KITDOC) application. Select the alternative material you want to use and edit the assignment quantity by clicking the Edit icon in the Actions column.
From the Actions column you can either:
a. click the Assign all icon to replace the entire assignment quantity of the base material with the selected alternative material or
b. click the Edit icon to manually adjust the assignment quantity, in case you only want to replace some of the base material with the selected alternative material.
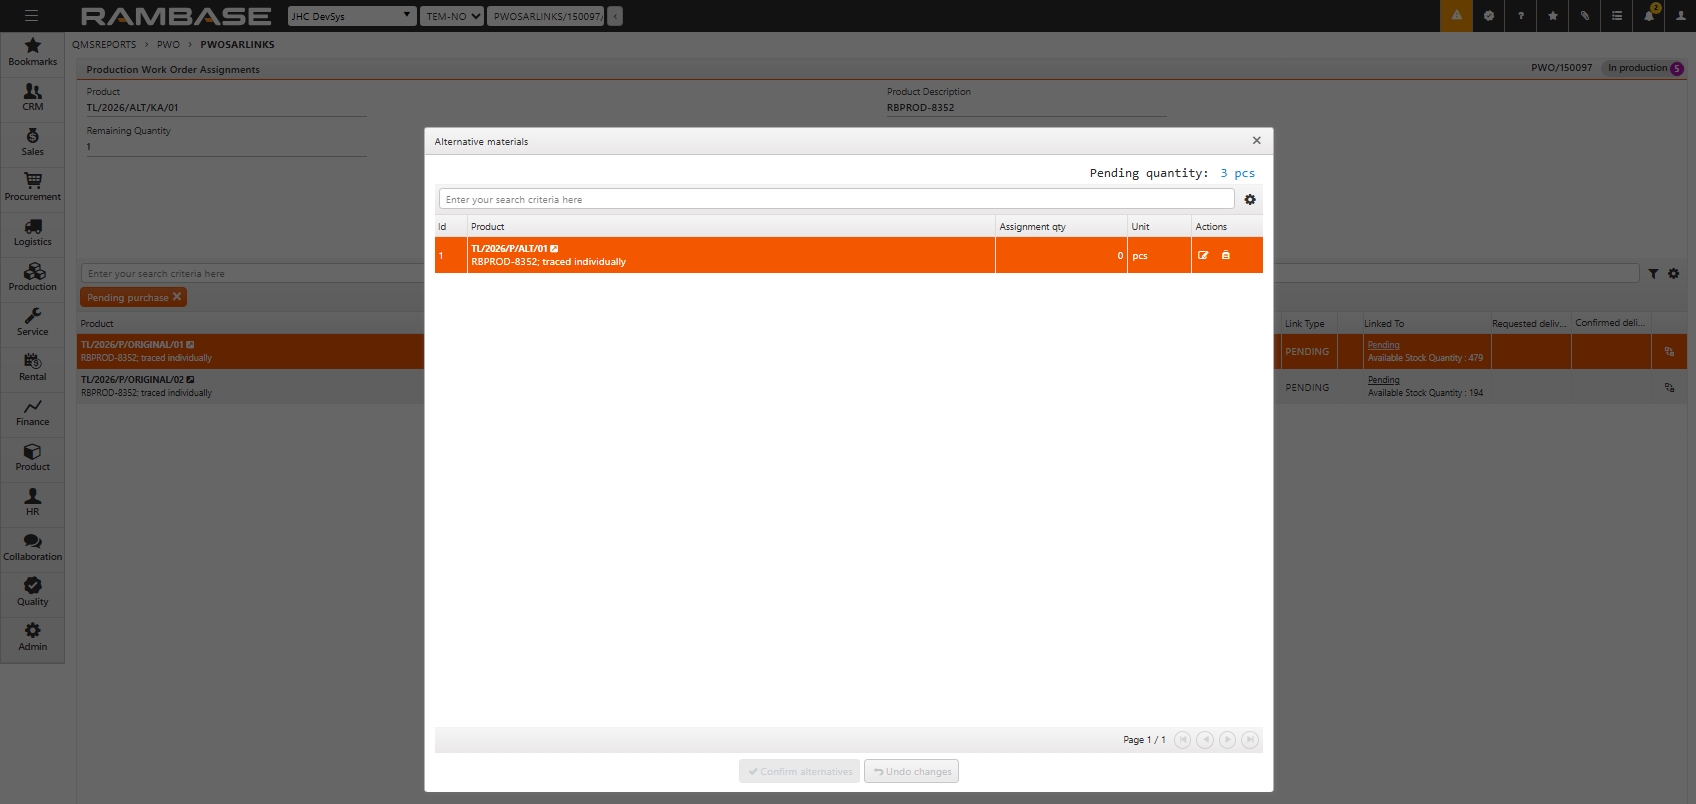
Click the Remove assignment icon to undo the changes. Alternatively, click the Undo changes button at the bottom of the popup.
Click the Confirm alternatives button to add the selected alternative materials.
Click OK to confirm the changes.
The selected part is added with a label displaying the base material that it is replacing in the product.
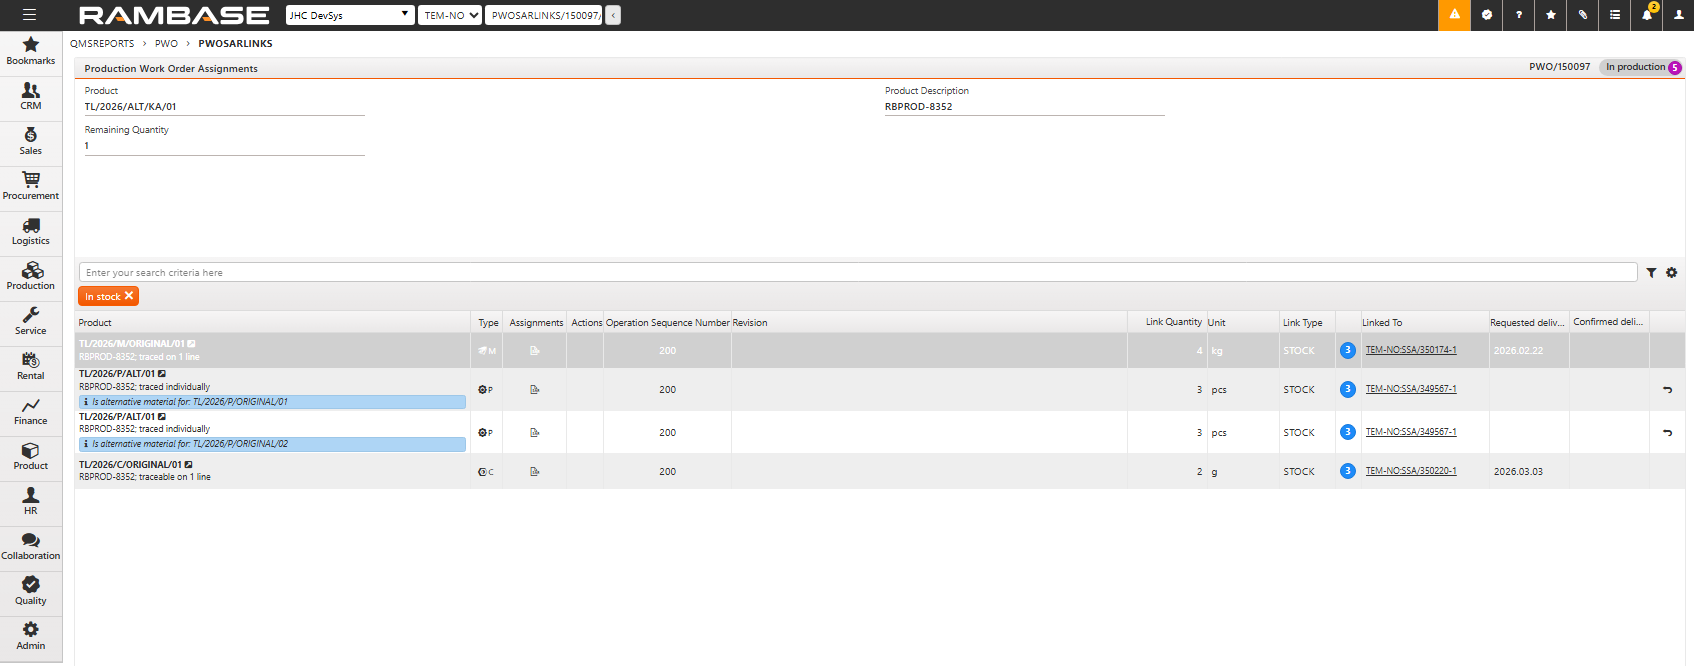
Allocate and pick alternative materials to stock via the Product unit picking popup
From the Work order operations (WOO) application, click the Product unit picking icon under the Pick column.
In the List of materials, base materials with alternative materials attached to them are marked by the Has alternative materials icon. The attached alternative material(s) are listed directly below the base material.
Select the alternative materials to be picked for the production work order by opening the Goods reception drop down menu, finding, and selecting the alternative material's goods reception item.
Open the Material serial number drop down menu to add the serial number of the alternative material.
Create and modify alternative materials with the Life Cycle Management (LCM) application
From the Production work order details (PWOD) or the Work order operations (WOO) applications, navigate to Product units and click the Product unit icon to open the Life Cycle Management (LCM) application.
Click the Add Part from Structure button.
In the Select Part and Lot popup window double click the part you want to add. Alternative materials are identified by the Alternative material icon next to the part name.
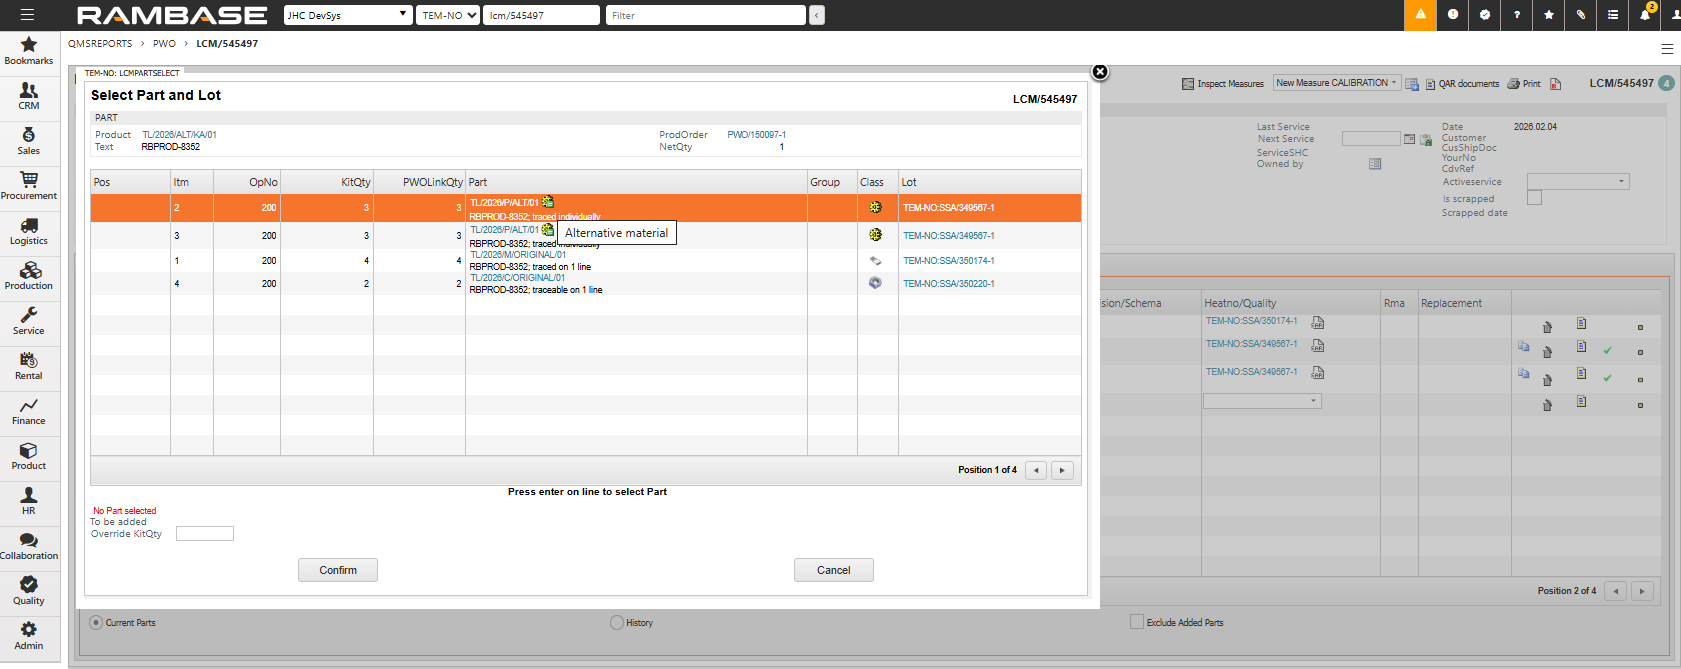
Adjust the quantity in the Override KitQty box in the bottom left corner, if necessary.
Click the Confirm button to add the part to the Life Cycle Management (LCM) Part list.
From the Part List tab in the Life Cycle Management (LCM) application, click the drop down in the Alt column to select either an alternative material or the base material.
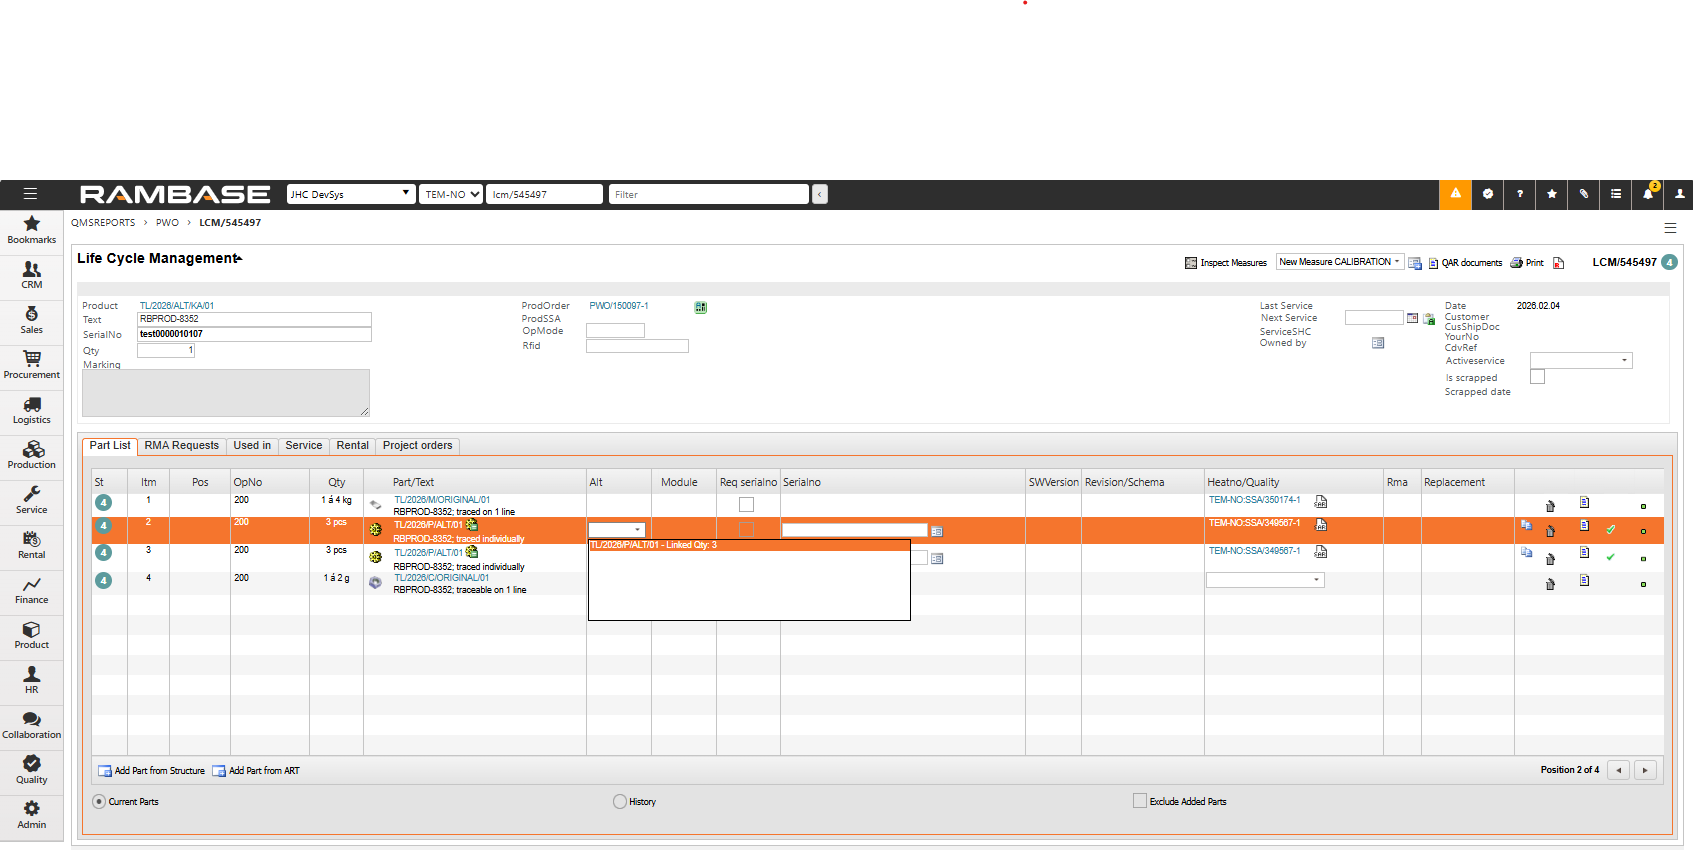
In the Serialno column, use the drop down menu to select the alternative material's serial number.