The financial processes within a company results in financial information that is used both internally and externally. The processes are subject to rules and regulations which can be changed by the authorities.
The financial processes must be handled with care so that the board, the shareholders, the banks and the authorities receive sufficient information, and are well informed about the company’s financial status.
A correct picture of the company’s economy and value-added statements for the given fiscal period.
A solid foundation for historic and future analysis of the company, useful to both internal and external stake holders.
The most important function within a company is its core activity. Next to that you will find the financial management. All companies, no matter size and industry, are dependent on a healthy financial management.
The finance department has the daily responsibility to follow up on the financial transactions with customers and suppliers. Monitoring and reconciliation of the general ledger postings are other important, daily tasks. Account receivables and account payables aging reports will form the basis for financial statements, reports and analysis that help the board make appropriate short- and long-term decisions.
Base registers - Set-up and maintenance of the Chart of accounts, account defaults, and account groups are examples of the tasks involved in this process.
General ledger - The General ledger (GL) is used to monitor the company’s financial status. This is where you handle the fiscal period closures, VAT calculation and reconciliation, and where you keep track of the stock value. Deviations and errors are detected through the reconciliation of the GL.
Receivables - Handling of payments from the customers, reminders, customer balances and due amounts are examples of the tasks involved in this process.
Payables - Handling of payments to the suppliers, due amount balances, and future deliveries are examples of the tasks involved in this process.
Liquidity - Handling of incoming and outgoing payments from the bank is central in the liquidity management. There are solutions for both manual and electronically handling of payments. Setup, maintenance, and monitoring the bank accounts are included in this process.
Assets - Registration of investments is a part of this process. The fixed asset register provides a detailed overview of the monthly depreciation. There are tools for life cycle management of every single asset.
Budget - Budgeting is essential for analyzing numbers and planning the future by comparison of historic and real values. It is possible to group the general ledger accounts to make the comparison easier.
To open the Finance Workspace (FINANCE) application, find Finance in the RamBase menu and then Overview. Click Overview to enter the FINANCE application.
The workspace gives you a great overview of the finance business area. The workspace is separated into two parts. The left part consists of three sections where the data is set by the program. In the right part, the sections displayed depend on the business area you are working in. In some of the sections you have the possibility to influence the data displayed.

Key figures - This section contains the most important financial key figures. The key figures are updated once an hour, but may be refreshed at any time by using the refresh button.
Actions and links - This section contains links to easily access the most relevant menus and programs. You will not initiate any actions by clicking the action buttons, it will only take you to the screen where you can initiate it from.
Reports - This section lists the most relevant and often used reports for the specific business area. Clicking any of the reports will generate an updated version of the report.
Data filter and mode - In this section you have the possibility to set or delete the selected filter. This filter applies to the whole workspace, if the function or action uses filtering. When filtering on customers/suppliers, the filter will apply to both the Key figures-section and the Data information-section. The specific customer's/supplier's name will be displayed on top of the page.It is also possible to select a mode. A mode is a different view of the workspace data. If the mode is changed, a data table or a workspace overview page will be shown in the Data information-section.
Data information - This section will show different kind of information based on parameters set in the Data filter and mode- section. It can be a data table or a workspace overview. What is displayed in the data table in the Data information-section depends on the filter built in the Data filter and mode-section. For the workspace overview mode, only the account filter parameter will apply.
Workspaces - In this section you will find shortcuts to other workspaces which are related to finance. When working in one of the sub-workspaces you can click on the icon on the upper right to go back to the FINANCE workspace.
The base registers consist of several archives which are used to ensure that the accounting and the finance module are in accordance with the current rules and regulations.
The base registers must be updated when changes are required by the authorities. The company’s need for information is of great importance when setting up the base registers in the finance module. Changes in the company’s processes and routines may also require changes in the base registers.
Rules and regulations are followed
The company’s information needs are covered
The finance module works as planned
The base registers, and the setup of the finance module, must be finished before the accounting personnel start using the system. Then it will be possible to filter the finance data for reporting and analytics.
Grouping the accounts and the financial statements simplify the compilation of the budget and the accounts. It is advisable to plan and define what information you need before you set up the base registers. Using dimensions may be helpful.
Chart of Accounts (ACC) - The Chart of Accounts is central in the finance structure. Every company has their own, unique Chart of Accounts. As companies often follow the same national or international standard, there tends to be similarities between them.
Account definitions (ACD) - A ledger account may have a specific function. Bank, inventory, agio/forex, accounts receivable and accounts payable are examples of accounts that must be set up with certain definitions to interact with the finance module and the rest of the modules in the system.
Report Account Groups (ACG) - The report account grouping functionality is flexible to meet different needs. Grouping the accounts makes it possible to compile the budget and the accounts. This is a great advantage when it comes to reporting and analytics.
General ledger Account Groups (AGC) – Set up in this archive is mandatory for Polish companies to secure correct reporting to the authorities. The set up is mandatory for Polish companies due to JPK reporting. However, there are also templates for Norwegian and Swedish companies.
Value added tax (VAT) – The different VAT codes are set up and maintained in the VAT register. Transactions can be posted with or without tax. Based on the finance module setup, the system will provide a posting suggestion. The VAT register forms the basis for tax reporting and settlement. In RamBase it is possible with multinational tax reporting.
Dimensions (DIM) - There may be needs for dimensions that somehow overlap each other. Several departments connected to the same project is an example. Other dimensions can be cost unit, geographic district or personnel. You can connect several dimensions to one ledger account.
Department (DEP) - The dimension Department is used for isolating costs for activities connected to a specific department. Each department must be clearly defined if the book values are going to be used in reports and analytics. A department can have a budget to enable comparison of the budget and the actual costs. The dimension Department is solely an accounting dimension.
Project (PRJ) - A project is usually an activity that extends over a period. It often includes many processes. The dimension Project is used for isolating costs for a specific activity. A project can have a plan and a budget to enable comparison of the budget and the actual costs. If the numbers are going to be reliable, it is very important to clearly define each project before the accounting personnel start using it. The system setup ensures that the project includes all the relevant posts. The dimension Project is solely an accounting dimension.
Assets (AST) - The dimension Assets is used for keeping track of revenues and expenses connected to a single asset. The dimension Assets is solely an accounting dimension. The depreciation plan and history of previous depreciations are held in the Fixed Assets Register (FAR).
Banks (BANK) – In the BANK archive, a company’s bank accounts are set up. It can be different types of accounts such as operational account, factoring accounts and a tax account. Customers using RamBase will also need a clearing account which is used for countering.
Intercompany register (ICR) – If the company using Rambase is part of a company group, you can set up the other companies in the company group in the ICR archive. The companies set up in ICR does not have to use Rambase. The value set up in ICR consists of three letters as an abbreviation for the company and then 2 letters for the country where that internal company is situated. For example XXX-NO for a Norwegian company. The value set up in ICR is then chosen for the CUS/SUPs (field Intercompany code) that are set up for the internal companies. Documents such as orders/invoices for these internal CUS/SUPs will be marked with the respective Intercompany code. If relevant GL accounts are set up with Intercompany code = Required/Optional this value will be brought into the General ledger (GL) and the user will be able to pull up reports based on intercompany code. Also, in the Period closure register (PAR), there will be a reconciliation between the internal companies.
Inter Company Trading (ICT) – If the company using Rambase is part of a company group, it is possible to set up that outgoing cost invoices, created in one company, should be created as an ingoing invoice in the other company. Companies set up in the ICT archive must use Rambase.
Company settings (CSV) – The archive Company settings is divided by module and sub module. Here, the customer using RamBase, can activate/deactivate and customize several settings to ensure RamBase is working according to the company’s request.
The chart of accounts provides the structure for the general ledger. Adapting of the chart of accounts is necessary to make the book-keeping system fit the economic activity of the business. The chart of accounts is unique for each company, but there are substantial similarities, so it is possible to import a standard chart of accounts when starting up your business accounting. A chart of accounts contains an overview of your ledger accounts.
The Chart of accounts (ACC) application can be used to both adapting the chart of accounts, and to examine the values and underlying transactions posted to each account.
Together with a very flexible use of Account groups (ACG), a RamBase Chart of accounts (ACC) fits into most fiscal structures.

To the left of the application is a list of all the accounts in the selected database. The period selected in the Period field will guide the amount displayed in the list. Use the Search field and/or the Filter builder icon above the list to filter the accounts.
To the right is a more detailed information about the selected account. In the Account info area are some general information about the account.
Account Number - The account number.
Name - Name of the account.
Type - Define if the account is going to be a Result, Profit and Loss (P&L) or Off-balance account.
Category - Bank is mandatory for Bank accounts. Provisions and Prepayments is mandatory if you would like to use more accounts for provisions and prepayments then the one which is set up in ACD/SPATOT (supplier period adjustments total) or ACD/CPATOT (customer period adjustments total). Other values are optional.
SAF-T code - Set the standard account in the SAF-T code field if your company uses SAF-T financial for exchanging accounting data. The SAF-T code field is the basis for the account number reported in the SAF-T file.
Default VAT code - Select the correct VAT code.
Account group - The general ledger account group identifier.
Agio calculation - Use the checkbox if the balances posted to this account should be agio calculated.
Parent account number - Add the parent account in this field. This setting will only be shown if your company has activated a Company setting (CSV) for using the chart of account’s tree structure.
Control account - Use the checkbox if the account is a control account. This setting will only be shown if your company has activated a Company setting (CSV) for using the chart of account’s tree structure.
The Balances tab will display the balance of the selected account. To improve the view, use the Group by field. The transactions can be grouped by:
Period
Department
Finance project
Asset
VAT code
Transaction type
Transaction date
Currency, amounts in local currency
Currency, amounts in foreign currency
Intercompany code
Warehouse location
Year
It is also possible to filter by custom dimensions (DIM4-10) in the Group by field.
Use the Include budget checkbox if you have uploaded a budget to the database and want to see the budget numbers in the Balances tab.
The Dimensions tab defines the dimension parameters to be required, not used or optional. In addition to the dimensions set in the Dimensions (DIM) application, Location (LOC) and InterCompany Database (ICTDB) are also used as dimensions. LOC refers to different warehouse/stock locations, ICTDB refers to transactions between companies within a corporation.
LOC - The parameter is set (Required) for accounts regarding flow of goods, if you want to differentiate the expenses of stock for various stock locations. The values of the LOC dimension are fetched from the LOC application in RamBase.
ICTDB - The parameter is set (Required) for accounts regarding Sale, Purchase and other financial transactions between internal companies. If not set, the accounts receivable and accounts payable will show incorrect values from a corporate point of view.
DEPNO - The parameter is set if you want to connect postings on the account to a certain department. If set to Optional or Required, there is a possibility to set a default department for the general ledger account.
PRJNO - The parameter is set if you want to connect postings on the account to a certain project.
ASTNO - The parameter is set if you want to connect postings on the account to a certain asset (for example a building or a truck).
Other dimensions - The parameter is set if you want to connect postings on the account to other dimensions created in the Dimensions (DIM) application.
The accounts belongs to certain Report account groups (ACG). The use of account groups is usually governed by a set of rules and standards in accordance with financial statement reporting. This tab is used to connect the account to one or more account groups. Note that report account groups are usually managed from the Report account group (ACG) application.
Use this tab to set up and inspect Report account groups (ACG) linked to this account. Use the Link to report account group button to link the account to a new account group.
The settings tab displays general settings for the selected account. Click on the name of the fields to see a description about that field.
Department - The possibility to set a default department.
Effective period - The accounting period for the account to be valid from.
Expiration period - The accounting period for the account to be valid to.
Last GL posting period - The accounting period for the last posting period of the account.
Budget account - The possibility to set the budget account to be compared with the account.
Use the blocking checkboxes to prevent transactions being posted from different registers and/or documents. For example, you can prevent postings to a sales account from the General ledger (ATR) to ensure postings is generated from invoices only. It is possible to block the account from postings generated by:
Sales invoices
Sales credit notes
Sales posting adjustments
Supplier invoices
Supplier credit notes
Supplier posting adjustments
Payments
Manual GL postings
If the account is used for a Fixed assets document (FAR), it will be visible here. The balance account, depreciation account and amounts connected to the fixed asset will be shown.
Use the Forward to fixed asset field to specify how investments should be transferred into the fixed assets register.
When the Chart of accounts is to be setup for the first time, you may do this by importing the customers current chart of account by a file import. The chart of accounts set up can also be done based on a template where you import a template and select the preferred accounts. When the base of the chart of account is a template, the accounts will inherit the account details from the template.
Note
Currently, only templates for a Norwegian or a Swedish Chart of Accounts are available.
Importing a chart of accounts by file import is typically done when the company already has a chart of accounts used in a previous system which they would like to continue using in RamBase.
Information regarding the content and lay out can be found here.
When the file is prepared properly and saved in CSV format, upload can be made from the IO archive (INP/13911). Control of the load can be made by checking the import job in the IOL archive.
Please read about the Load procedure .
When the accounts are imported, they can be found in the ACC archive in Status 4.
To open the Chart of account (ACC) application, find Finance in the RamBase menu and then Base registers. Click Accounts to enter the ACC application.
Click the Create new from template button.
In the new Chart of Account Setup popup, select the country and then select the template from the dropdown menu in the Source field. A table with a tree structure will appear.
From the dropdown menu in the Root Node field, select the group of accounts you want to be displayed.
From the tree structure you select the accounts by use of the checkboxes. If you check an accounting group, all accounts in this group will automatically be selected, but you can deselect any of the accounts.
Click the Select Action button. A popup is opened. Verify that everything is OK before you click the Create button.
In the new popup, that is opened, there are two checkboxes.
Use the checkbox Use agio settings from templates if you want agio settings to be copied from the template for each chosen account.
Use the input field FromPeriod to set the accounting period from which the accounts should be valid. No postings can be made to the account(s) before this period.
Click the Start button and then the OK button to create the accounts. The accounts will now be listed in the Chart of accounts (ACC) application.
If you want to add an account to the Chart of Accounts (ACC), you can create this from a template or manually.
Use the Copy account option in the context field to create a duplicate in Status 1, with the same information as the selected account.
It is possible to create a single or multiple accounts at the same time from a template.
To open the Chart of Account (ACC) application, find Finance in the RamBase menu and then Base registers. Click Chart of Accounts to enter the ACC application.
Click the Create new from template button.
Select which template you want to use in the Source field. A tree structure will appear.
Filter on the account groups in the Root Node field. The accounts with a check-box can be selected. The accounts without check-boxes are already implemented in your Chart of Accounts.

Click the Select Action button. A popup is opened. Verify that everything is OK before you click the Create button.
In the new pop up that is opened there are two checkboxes.
Use the checkbox Use agio settings from templates if you want agio settings to be copied from the template for each chosen account.
Use the input field FromPeriod to set the accounting period from which the accounts should be valid. No postings can be made to the account(s) before this period.
Click the Start Actionbutton and then the OK button the accounts. The accounts will now be listed in the Chart of accounts (ACC) application.
The imported account(s) will have a standard setup, but it is possible to alter and add more information to the account when the account is in Status 1. For more details, please read point 5, 6, 7, 8 and 9 in the chapter Create a new ledger account manually below.
Start from the Chart of Accounts (ACC) application.
Click the Create new account button.

Insert values in the fields:
Account Number - The account number. Maximum 50 characters and possible characters are:
0-9
a-z, A-Z
Symbols (.,_-)
Name - Name of the account.
Type - Define if the account is going to be a Result, Profit and Loss (P&L) or Off-balance account.
Default VAT code - Select the correct VAT code.
Effective period - The accounting period for the account to be valid from.
Parent account number - Add the parent account in this field. This setting will only be shown if your company has activated a Company setting (CSV) for using the chart of account’s tree structure.
Click the Create button to create the account to Status 1. You will now see the account details and it is possible to add more information.
To open the Chart of Account (ACC) application, find Finance in the RamBase menu and then Base registers. Click Chart of Accounts to enter the ACC application.
Highlight the specific account which in not activated. The account will be in Status 1.
Select the Activate account option in the context menu.
The account is now activated to Status 4 in the Chart of Accounts (ACC) application.
All new accounts that are not activated in the Chart of Accounts yet will be set to Status 1. If you want to list these accounts, use the filter field to filter the list of accounts to accounts with Status 1. You have to activate the accounts one by one when they are ready to be activated.
To open the Chart of Account (ACC) application, find Finance in the RamBase menu and then Base registers. Click Accounts to enter the ACC application.
Highlight the specific account.
Optionally, use the Search field or click on the Filter builder icon above the list to filter the accounts.

To open the Chart of account (ACC) application, find Finance in the RamBase menu and then Base registers. Click Accounts to enter the ACC application.
Highlight the relevant account. The Balances tab is the main working area to inspect the transactions posted to an account.

To improve the view, use the Group by field. The transactions can be grouped by:
Period
Department
Finance project
Asset
VAT code
Transaction type
Currency, amounts in local currency
Currency, amounts in foreign currency
Intercompany database
Warehouse location
Year
It is also possible to filter by custom dimensions (DIM4-10) in the Group by field.
Use the Include budget checkbox if you have uploaded a budget to the database and want to see the budget numbers in the Balances tab.
Click the icon next to the transaction value in the Balances tab to open the general ledger journal. This will show the postings from general ledger and payable / receivable account specifications.
The Off-balance account is a third type off General ledger account, in addition to Balance and Result. To activate this functionality, enter the Company settings (CSV) application and select Finance -> GeneralLedger. Here you can find the setting: Activate Off-balance account functionality. When this setting is activated, user will be able to choose Off-balance as account type on general ledger accounts. If you do not have access to the CSV application, please send in a request to your partner, or directly to RamBase if you are not connected through a partner.
All general ledger postings must balance out for result accounts and balance accounts and off-balance accounts separately. This is because the off-balance accounts are not included in the standard balance sheet of the company. Therefore, a posting to an off-balance account must always be balanced out by another off-balance account.
When creating ingoing balance to a new fiscal year, balance from off-balance accounts will be cleared and not added to the new year. If you want to bring the balance from last year to the new year, this must be done by a manual general ledger posting.
Off-balance accounts will not be shown in any reports as a default. If you want to include off-balance accounts in your account reports this can be done by entering the report parameter before opening the report:
Here, you can find Include off-balance accounts. Check this box if you want to include the off-balance accounts in the given report.

A Report account group (ACG) is composed of a certain number of accounts with similarities. The purpose of grouping accounts is to comply with accounting standards due to financial statement requirements, but it could also play a part in proper financial management and control. Grouping of accounts gives you an improved financial outline in reports
1xxx Assets
2xxx Equity and liabilities
3xxx Sales and operating revenues
4xxx Purchasing costs
5xxx Wages
6xxx Operating costs
7xxx Operating costs
8xxx Financial revenues and costs
In RamBase it is possible to customize account groups. For example, if the standard ACGs do not meet your report requirements, you may create a new ACG for this purpose, and map it to a report.
It is possible to inspect an accounting group or create a new group from the Report account groups (ACG) application.
The Report account groups (ACG) application menu is a simple report in itself. If there are posted ATR documents to the accounts in an account group, the group totals will show up in this window from a two-column view showing selected (period and/or year to date (YTD)) values.

To examine the postings or edit an ACG, select the ACG and press ENTER.

The Period From field holds information about the first valid accounting period for the ACG.
The Range and Selected Accounts fields is the key fields to build an ACG. To tie accounts to a group, you could either enter a range of accounts or select single accounts. It is only possible to use one of the methods. It is faster to enter a range of accounts than to pick a group of single accounts. However, a range of accounts will include all accounts in the range, so if one or more accounts should not be a part of the ACG, the select account method must be used instead.
If the select method is use when setting up an ACG, the user must remember to add accounts to the ACG when new accounts are created, otherwise the new accounts will not be included in the ACG and also not included in any reports where the ACG is included.
Click on the magnifier icon to tie accounts to an ACG. ACG are not exclusive. An account could be connected to several ACG.
Create a new account group
In addition to the standard Report account groups (ACG), it is possible to create customized report account groups. For example, if the standard ACG do not meet your report requirements, you may create a new ACG for this purpose, and map it to a report. Another situation is if you want an overview of the balance of several accounts, create a new group based on these accounts.
To open the Report Account Groups (ACG) application, find Finance in the RamBase menu and then Base registers. Click Report account groups to enter the ACG application.
Click the Create ACG/.. icon.
Give the report group a name and set the first period it is going to be used in the FromPeriod field. This will be the first valid accounting period for the ACG.
Connect general ledger accounts to the group. There are two methods for picking the accounts, and these two methods can not be combined.
Select a range of accounts:
Click the magnifier icon next to the Range field.
In the Account group subselect popup, set the first and the last account in the range of accounts you want to connect to the group.
Click the OK button. The accounts will be listed in the Accounts section.
Pick single accounts:
Click the magnifier icon next to the Selected Accounts field.
In the Select Account popup, use the checkboxes to select the accounts. It is possible to search for accounts or name of an account.
If a range already is selected, this range will be overruled by the changes you make in this popup.
On the top of the popup you will see the name of the account group and the number of accounts connected to it.
Click the OK button. The accounts will be listed in the Accounts section.
When all accounts are connected to the group, register the ACG to Status 4 by using the menu option Register Account Group.
In addition to the standard Report account groups (ACG), it is possible to create customized report account groups. For example, if the standard ACG do not meet your report requirements, you may create a new ACG for this purpose, and map it to a report. Another situation is if you want an overview of the balance of several accounts, create a new group based on these accounts.
To open the Account Groups (ACG) application, find Finance in the RamBase menu and then Base registers. Click Report account groups to enter the ACG application.
Click the Create ACG/.. icon.
Give the group a name and set the first period it is going to be used in the FromPeriod field.
Connect ledger accounts to the group. There are two methods for picking the accounts, and these two methods can not be combined:
Select a range of accounts:
Click the magnifier icon next to the Range field.
In the Account group subselect popup, set the first and the last account in the range of accounts you want to connect to the group.
Click the OK button. The accounts will be listed in the Accounts section.
Pick single accounts:
Click the magnifier icon next to the Selected Accounts field.
In the Select Account popup, use the check-boxes to select the accounts.
If a range already is selected, this range will be overruled by the changes you make in this popup.
On the top of the popup you will see the name of the account group and the number of accounts connected to it.
Click the OK button. The accounts will be listed in the Accounts section.
When all accounts are connected to the group, press F12, to open the action menu and choose the Register Account Group option to activate the ACG.
The Account defaults (ACD) setup is done to automate the book-keeping to a certain extent. In RamBase some Account defaults (ACD) are mandatory, but most are optional. The Account defaults (ACD) setup in RamBase can be quite extensive, but will ensure efficiency and control of the ledger postings. The Account defaults (ACD) can be set up module by module for improved overview.

The Account defaults (ACD) application lists all General ledger default accounts (ADD) available for default account settings. You may filter the most relevant default accounts by using the drop-down menu in the Module field.
Click the Edit icon and use the drop-down menu to set or change default accounts.

In RamBase, department, projects and assets are dimensions available by default. It is also possible to generate up to seven individually adapted dimensions. The dimensions are listed in, and can be maintained, from the Accounting dimensions (DIM) application.

Default dimensions are set to Status 8. The individually adapted dimensions are set to Status 4, and the dimensions being created are set to Status 1.
To inspect values of a dimension, click on the specific dimension.
Dimension values can be retrieved in three different ways:
From other base registers in RamBase (per now limited to the Personnel (PER) application).
Entered manually in the DIM application as custom value list.
Field values from transaction documents could be linked to a dimension.
Dimensions can be allocated to each account with the settings:
Not Used (inaccessible).
Required (mandatory).
Optional (optional).
The use of dimensions should be well considered. Your company's need for financial reporting and control should decide the use of dimensions. It will make you able to achieve financial reports on each dimension, but excessive use of dimensions will require some more work for the accountants when account dimensions should be updated on invoices, credits and other finance transactions.
To open the Dimension (DIM) application, find Finance in the RamBase menu and then Base registers. Click Dimensions to enter the DIM application.
To create a new Dimension (DIM), it must exist less than ten dimensions as ten dimensions are the maximum numbers of dimensions possible to use.
Click the Create new dimension button.
Enter a name in the Name field and click the OK button to create a Dimension (DIM) in Status 1.

Select one of the options in the Setup field.
From archive field values - When you select this option, it is required to select archive in the Archive field. Use the dropdown menu in the Archive field and select the archive you want to use for the dimension. For example the Personnel (PER) application.
From object/document - When you select this option, it is required to select field in the Field field. Use the dropdown menu in the Field field and select the field you want to use for the dimension. These fields are retrieved from transaction documents like Invoices (CIN / SIN), Credit Notes (CCN / SCN) and Payment (PAY). The values from these fields will automatically be posted in the dimension, when the transactions are posted to the GL.
From user defined values - It is possible to create your own dimension codes. For example, make dimensions for more detailed overview of costs and revenues on specific business areas, consulting, or research-/ test-/ planning activities. To add a new dimension code:
Click the Add value button in the Values folder.
Add information in the popup.
Click the OK button.
When all values are added to the Dimension (DIM), click the Activate Account Dimension Definition option in the context menu. It is now ready for use.
It is possible to see the general ledger accounts in the General ledger accounts folder and set if the Accounts (ACC) is Not Used, Required or Optional to use for the Dimension (DIM)
You may filter the result using the filter field in the top of the folder.

The button Apply requirement for all filtered accounts is implemented to simplify the update of the requirement for all GL accounts, based on the Enter your search criteria here field. This button can be found under the General ledger accounts tab in the Dimensions area.
In this example, all account starting with 37 is filtered. They are set up with the requirement Not used for dimension=DEP. After having filtered the desired accounts, click the button Apply requirement for all filtered accounts. In the pop up, the user can set the new requirement to be applied for all selected accounts and press Apply. Now all the selected accounts are updated to the new requirement.
The Department (DEP) application holds information about the departments in the company. The purpose of the DEP application as an account dimension, is to be able to pull up income statements, cost specifications and other financial reports from the various departments. In RamBase, the DEP is also used to connect assets to certain departments.
To open the Department (DEP) application, find Finance in the RamBase menu and then Base registers. Click Departments to enter the DEP application.
Click the Create new department button in the lower left-hand corner of the application.

In the popup, insert values in the fields:
Id - The id of the Department.
Name - The name of the Department.
Effective period - The period for the Department to be valid from (YYYYMM).
Click the OK button. The Department will now be set to status 1. It is still editable, and needs to be activated in order to enable it for use.
Click the Activate department option in the context menu. The Department will be set to status 4 and is ready to be used.
The transactions posted to a distinct Department (DEP) can be examined in the General Ledger Balances area. Use the Department and General Ledger Balances areas to follow up on the Department.

In the Department area it is possible to add optional information:
Description - Description of Department.
Responsible - Set the Employee (PER) responsible for the Department in this field.
Expiration period - Expiration period of the Department.
In the General Ledger Balances tab it is possible to check ledger entries posted against a specific Department. The values in the chart are period year to date amounts:
Accounting period - Set the wanted accounting period (YYYYMM). Only last 2 years are allowed.
Choose between Balance and Result - See the totals from the balance or the result accounts.
Line chart with totals from balance/result accounts - To see the account details, click on one of the circles in the line chart to open the popup General ledger accounts results/balances from the selected period.

The Period Amounts tab shows all historic period amounts and year to date amounts for the selected department, both for the balance side and the result side. The period amounts and year to date amounts has 2 links:
Click on the number to inspect the detailed Ledger Specifications (CAS & SAS items).
Click on the icon behind the amount to inspect the General Ledger Postings (ATR items).
The Project (PRJ) application lists and holds information about all projects in the company. The purpose of the PRJ application as a account dimension, is to be able to pull up income statements, cost specifications and other financial reports from the various projects. In RamBase, the PRJ is also used to connect assets to certain projects.
Examples where the project dimension may be beneficial are when you need to calculate the actual profit from a large delivery where the income is given from a tender, or when you want to keep an eye on the development costs in a development project.
To open the Project (PRJ) application, find Finance in the RamBase menu and then Base register. Click Finance projects to enter the PRJ application.
Click the Create new finance project button in the lower left hand corner of the application.

In the popup, insert values in the fields:
Id - The id of the Project.
Name - The name of the Project.
Effective period - The period for the Project to be valid from (YYYYMM).
Click the OK button. The Project will now be set to status 1. It is still editable and needs to be activated in order to enable it for use.
Click the Activate project option in the context menu. The Project will now be set to status 4 and is ready to be used.
The transactions posted against a specific Project (PRJ) can be examined in the General Ledger Balances tab. Use the Finance projects area and the General Ledger Balances tab to follow up on the Project.

In the Finance project area it is possible to add optional information:
Description - Description of Finance Project.
Responsible - Set the Employee (PER) responsible for the Project in this field.
Expiration period - Expiration period of the Finance Project.
In the General Ledger Balances tab it is possible to check ledger entries posted against a specific Project. The values in the chart are period year to date amounts:
Accounting period - Set the wanted accounting period (YYYYMM). Only last 2 years are allowed.
Choose between Balance and Result - See the totals from the balance or the result accounts.
Line chart with totals from balance/result accounts - To see the account details, click on one of the circles in the line chart to open the popup General ledger accounts results/balances from the selected period.

The Period Amounts tab shows all historic period amounts and year to date amounts for the selected project, both for the balance side and the result side. The period amounts and year to date amounts has 2 links:
Click on the number to inspect the detailed Ledger Specifications (CAS & SAS items).
Click on the icon behind the amount to inspect the General Ledger Postings (ATR items).
The Assets (AST) application holds information about your investments. The AST application is used to group depreciation, costs or possible revenues from an asset together, in order to report the accounts for this specific investment.
The purpose of the AST application as an account dimension, is to be able to draw income statements, cost specifications and other financial reports, such as overviews of planned and performed depreciation, from the various assets.
For every new investment it is recommended to register the investment in the AST application.
It is recommended to register every investment to an Asset (AST). Then it is possible to monitor costs, depreciations and revenues for the specific item. An AST can also be created for groups of assets. Typically for smaller investments. (It would be reasonable to have an AST for 'Servers', but maybe not for 'Dell XPG356 Server')
To open the Assets (AST) application, find Finance in the RamBase menu and then Base registers. Click Assets to enter the AST application.
Click the Create new asset icon in the bottom of the application.

In the Create new asset popup, insert values in the fields:
Id - The id of the AST.
Name - The name of the AST.
Effective period - The accounting period for the ASTs to be valid from (YYYYMM).
Click the OK button. The AST will now be set to status 1. It is still editable and needs to be activated in order to enable it for use.
Add relevant information.
Click the Activate finance asset option in the context menu. The AST will now be set to status 4 and is ready to be used.
The transactions posted against a specific Asset (AST) can be examined in the General Ledger Balances tab. Use the Asset area and the General Ledger Balances, Period Amounts and Fixed Assets tabs to follow up on the ASTs.

In the Asset area it is possible to add optional information:
Description - Description of the AST.
Expiration period - Expiration period of the AST.
In the General Ledger Balances tab it is possible to check ledger entries posted against a specific AST. The values in the chart are period year to date amounts:
Accounting period - Set the wanted accounting period (YYYYMM). Only last 2 years are allowed.
Choose between Balance and Result - See the totals from the balance or the result accounts.
Line chart with totals from balance/result accounts - To see the account details, click on one of the circles in the line chart to open the popup General ledger accounts results/balances from the selected period.

The Period Amounts tab shows all historic period amounts and year to date amounts for the selected AST, both for the balance side and the result side. The period amounts and year to date amounts has 2 links:
Click on the number to inspect the detailed Ledger Specifications (CAS & SAS items).
Click on the icon behind the amount to inspect the General Ledger Postings (ATR items).
The General ledger (GL) is a complete record of all financial transactions in a company. The general ledger holds account information that is needed to prepare financial statements, and it includes accounts for assets, liabilities, owners' equity, revenues and expenses.
All transactions are posted to the general ledger, either manually, or automatically by the system.
An accurate financial statement.
Consistency between the general ledger postings and the "real world".
Traceability and documentation of the postings.
An advanced interface between the transactions and the ledgers, will provide you with tools for reconciliation and quality assurance, which makes it possible to do a traceable and high-quality year-end closing on a month by month basis.
Make posting adjustments.
Make period adjustments.
Reconcile ledger accounts, VAT and the bank accounts.
Close the fiscal period.
Agio calculation.
Inspect balance sheet values.
Deviation handling.
Setting name | Description |
Activate Off-balance account functionality | Used to activate off-balance accounts as an account type on General Ledger accounts. |
Activate tree structure functionality on GL accounts | Used to activate tree structure functionality on General Ledger accounts. In the chart of accounts, the possibility to define control accounts and to select a parent account is available. |
Automatically create VAT posting when manual GL postings are registered | If this setting is "ON" - VAT posting will be automatically created when manual general ledger postings are registered. |
Creating accounting years manually | Setting to define if the accounting periods are created manually by the user. If the setting is not activated, the periods will be created by the system automatically. In this case the system handles 12 posting periods from January to December. If your company is running January to December, do not turn on this setting! |
First period in General ledger | First period the company should have postings to the Finance system in rambase. Format: YYYYMM |
Import of work in progress to general ledger | Used to activate functionality that will calculate total value of ongoing, open Product Work Orders (PWO), so that accrued cost from these work orders (work in progress) could be posted to General Ledger (ATR). |
Import wages to general ledger accounting dimension mapping | Used to map the RamBase accounting dimensions (DIM) with the fields from the import file "Visma wages". Only the fields ELEMENT1 to ELEMENT5 from the file format and only the Rambase accounting dimensions DIM4 to DIM10 can be used for the mapping and only RamBase dimensions which are defined with user defined values. The value must be a comma-separated list, where each element follows this format: <Field from the file>:<RamBase accounting dimension> If no value is defined in this setting, the upload logic tries to find an employee in all ELEMENT fields if a dimension is defined for archive PER. Otherwise this logic will be deactivated. Example: ELEMENT2:DIM3,ELEMENT3:DIM4 |
Notification PIDs for general ledger account issues | Comma list of PIDs that will get a notification by IMS for finance issues related to general ledger accounts. |
Notification PIDs for general ledger issues | Comma list of PIDs that will get a notification by IMS for finance issues related to general ledger. |
Planned import for inventory balance to General ledger | Value in this setting determines Daily (D) or Monthly (M) automatic import of Inventory balance to General Ledger Postings (ATR) |
Planned import for product balance to General ledger | Value in this setting determines Daily (D) or Monthly (M) automatic import of Product balance to General Ledger Postings (ATR) |
Rate for importing inventory balance to general ledger (Do not update manually !) | Specifies which rate should be used when inventory balance is imported to General Ledger. "PERIODIC" means rate from last day of Period. "HISTORIC" means rate from transaction date of inventory reception. ****** This setting should NOT be updated manually, as value in this setting is automatically updated based on Companies GM model, updated in COM. ***** |
Rate for importing product balance to general ledger (Do not update manually !) | Specifies which rate should be used when product balance is imported to General Ledger. "PERIODIC" means rate from last day of Period. "HISTORIC" means rate from transaction date of transaction document. ****** This setting should NOT be updated manually, as value in this setting is automatically updated based on Companies GM model, updated in COM. ***** |
Agio calculation reevaluates the book value on the balance accounts by upgrading the values from historic rate to period rate. All transactions will be posted with the currency rate on the date of registration (historic rate), but by the end of the month all transactions will be calculated with the same currency rate (period rate).
The agio calculations in RamBase are based on the rates in the Currency (CUR) application. The rates in the CUR application are yesterday's currency rates, and they are daily updated.
Agio calculation is optional. Only balance accounts can be agio calculated. Each of the accounts that one wishes to be agio calculated must be defined in the Agio field in the Chart of accounts (ACC).
https://help.rambase.net/en/finance/general-ledger/agio.html
GL account used when agio is created during period closure in PAR. Used as an offset account. RamBase has two processes for calculation of agio, both are described below. The first process is done during period closure by the user. The second one is done automatically by RamBase when registering customer and supplier payments.
Agio calculation in PAR will create 3 ATR documents:
CUSBAL - Agio on Account Receivable (AR).
SUPBAL - Agio on Account Payables (AP).
ACCBAL - Agio on all other GL accounts (Not AR & AP).
General ledger postings (ATR) documents for CUSBAL and SUPBAL will be calculated based on customer and supplier balances in foreign currencies. Each ATR item will have a reference to a Customer / Supplier Account and currency. The amount will be calculated based on:
For all transactions (CAT & SAT) that are open by the end of current period, but registered in earlier periods. Agio will be calculated based on change in exchange rate from last period to current period (Rate at the last day of the period), as these transactions already have had agio calculated last period.
For all transactions (CAT & SAT) that are open by the end of current period and also registered in current period. Agio will be calculated based on change in exchange rate from the transaction document to current period (Rate at the last day of the period).
ATR document with transaction type ACCBAL will handle all other GL accounts (Not AR & AP) and agio will be calculated this way:
For all transactions (ATR items) that are registered in earlier periods. Agio will be calculated based on change in exchange rate from last period to current period (Rate at the last day of the period), as these transactions already have had agio calculated last period.
For all transactions (ATR items) that are registered in current period. Agio will be calculated based on change in exchange rate from ATR item that are registered to current period (Rate at the last day of the period).
Your system currency is USD.
You have a CIN for 100 EUR.
The day the CIN was registered (St:4) the rate was 1,1.This means that the value of this CIN in your system currency is (100*1,1) = 110 USD.
The registration of the CIN generates an open post in the Accounts receivable ledger for 110 USD.
On the last day of the month the rate was 1,2 (Period rate).
By the end of the month the open post was agio calculated based on the period rate and the transaction rate (rate on the date of registration). (100*1,2) - (100*1,1) = 10. This means an agio profit of 10 USD.
If the CIN is not paid by end of next month, the unrealized agio for the previous month will be reversed and the open post (CIN) will be agio calculated based on the new period rate and the transaction rate.
The new period rate is 1,4.
(100*1,4) - (100*1,1) = 30. This means an agio profit of 30 USD.
Relevant report: FRP > ACCBAL > GL Account Balances, from AGIO calculations.
Agio calculated during period closure in PAR (tab:agio) is posted to the general ledger account set up in the archive Account Defaults (ACD): Period Closure Agio.

If agio setting is activated on GL Account for Account Receivables and Account Payables, exchange rate on payments will be handled this way
For all invoices or credit notes that are linked to a payment and where the invoice or credit note is registered in an earlier period than the payment, exchange rate from the end of last period will be used to calculate the value in local currency, as these transactions already have had agio calculated last period during the period closure agio calculation.
For all invoices or credit notes that are linked to a payment and where the invoice or credit note is registered in the same period as the payment, exchange rate from the transaction document will be used to calculate the value in local currency.
If agio setting is not activated on GL Account for Account Receivables and Account Payables, exchange rate on payments will be handled this way:
Regardless of if the invoice or credit note that is linked to a payment, is registered in an earlier period or in the same period as the payment, exchange rate from the transaction document will be used to calculate the value in local currency.
GL account for Currency Deviations on Payments.
Scenario Example:
Payment Currency: NOK (Norwegian Krone)
Invoice Currency: EUR (Euro)
In this example:
The sales invoice is for 12,500 EUR, registered on 2023.04.12 with an exchange rate (RATE) of 11.5435.
The payment has a CURDATE of 2023.10.04, with a RATE of 11.4258.
The exchange rate from the end of the previous period (2023.09.30) was 11.2535.


The CurAdj field reflects the currency deviation, calculated as follows:
Determine the Payment Value in Local Currency (NOK): 12,500 EUR * 11.4258 (CURDATE RATE) = 142 822.50 NOK
Determine the Invoice Value in Local Currency (NOK) Based on Previous Period RATE: 12,500 EUR * 11.2535 (2023.09.30 RATE) = 140 668.75 NOK
Calculate the Currency Adjustment: 142 822.50 NOK – 140 668.75 NOK = -2 153.75 NOK
The resulting currency adjustment of -2,153.75 NOK reflects the loss (or gain) due to exchange rate fluctuations between the invoice registration and payment dates.
Agio gain or loss in payments is posted to the general ledger account set up in the archive Account Defaults (ACD): ACD/REALIZEDGAINS and ACD/REALISEDLOSSES - Currency deviations on payments.

Differences due to different exchange rate in bank and RamBase. This is the difference between the value of the invoice based on RATE of the CURDATE and what is received in bank. This deviation in «DevAmt» could also contain of for example bank fees.
Example Calculation:
Invoice amount: 12 500
Exchange rate on CURDATE: 11.4258
Invoice value in base currency: 12 500 ×11.4258 = 142 822.50
Amount received in the bank: 142,570.50
Difference (DevAmt): 142,570.50−142,822.50=−252
The user must decide how to post this deviation to the General Ledger (GL). This process is performed manually. The accounting for the above payment will look like this:

GL account used when payments in foreign currency is posted to General Ledger:
When payment and invoices/credit notes have different currencies, additional posting is made to balance out the GL postings.
When a payment has many invoices and credits with different exchange rates, GL postings may not balance because of round offs on calculated average exchange rates. Additional posting for exchange rate difference is then made, if this difference is less than given in CompanySetting "MaxPaymentCurrencyDeviationOnLedgerSpecification".
Scenario: Currency Deviations on Payments
Calculate the invoice value from USD to the base currency (NOK):
Based on the last day of the previous month: 6,600 USD×10.9139=72 031.74 NOK
Based on CURDATE: 6,600 USD×10.6225=70 108.50 NOK, Difference: 72,031.74−70,108.50=1 923.24 NOK
Convert the NOK difference to EUR (PAY is for a Euro bank account): 1,923.24 NOK÷11.4258=168.32


When the amounts in USD and EUR are exchanged to NOK, two EUR postings are created because of the currency posting.
Typically, only minor round-offs are posted to this account due to rounding of exchange rates and two-decimal resolution in GL.
The effect on ACC/8060 for this payment will be:

This GL account is used when VAT adjustments are needed due to differences between the VAT rate and the exchange rate on invoices or credit notes.
Example Scenario:
An inbound invoice (SIN) has a VAT rate (VATRATE) that differs from the exchange rate (RATE):
RATE: 11.4258
VATRATE: 11.2535
VAT amount: 250 EUR
Calculation:
Convert VAT amount using RATE: 250 EUR×11.4258=2 856.45 NOK
Convert VAT amount using VATRATE: 250 EUR×11.2535=2 813.375 NOK
Difference: 2,856.45−2,813.375=43.08
Accounting Impact:
This difference of 43.08 NOK is posted to ACD/VATRATEADJ.


The accounting will look like this:

The system tracks agio as either unrealised or realised. Unrealised agio is calculated at period end for unpaid foreign currency items. Realised agio is recorded when payments are made, moving amounts from unrealised to realised and posting against the actual payment.
The behaviour of splitting agio into unrealised and realised is controlled by a system-level setting. Once activated, all foreign currency transactions follow this model, ensuring consistent accounting treatment of gains and losses.
The company setting is called First accounting period for the realized agio model.

RamBase has two processes for calculation of agio, both are described below. The first process is done during period closure by the user. The second one is done automatically by RamBase when registering customer and supplier payments.
The calculation of the unrealized agio is performed in the Period Account Register (PAR). One of the procedures during period closure is to import the unrealized gain and losses to the general ledger.
When closing an accounting period, the closing period's opening balance must be reversed, and the current period's balance must be imported. The import job will automatically split the unrealized gains and losses.
General ledger accounts set up in Account Defaults (ACD) for Unrealized gains and Unrealized losses are used when agio is created during period closure in PAR.
ACD/UNREALIZEDGAINS and ACD/UNREALISEDLOSSES

Reverse the last period’s inventory balances and import the current inventory balances
To open the Period Account Register (PAR) application, find Finance in the RamBase menu and then General ledger. Click Accounting periods to enter the PAR application.
Highlight the relevant period and press ENTER.
Select the Agio folder.
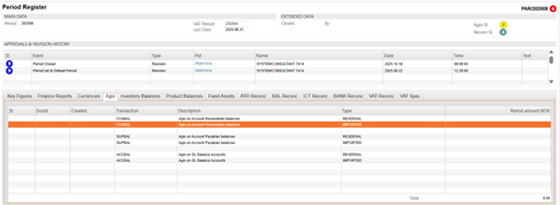
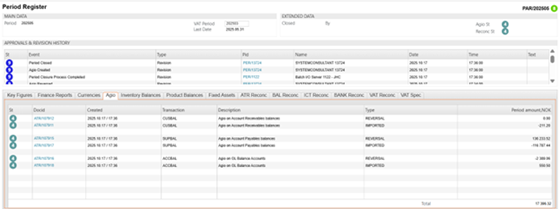
Right click and choose menu option Create reverse and import agio.
If everything is correct, the lines will now be marked with Status 4 with reference to a general ledger entry. Agio status in the upper right corner will be Status 4.
Agio calculation in PAR will create 3 sets of documents:
CUSBAL - Agio on Account Receivable (AR).
SUPBAL - Agio on Account Payables (AP).
ACCBAL - Agio on all other GL accounts (Not AR & AP).
General ledger postings (ATR) documents for CUSBAL and SUPBAL will be calculated based on customer and supplier balances in foreign currencies. Each ATR item will have a reference to a Customer / Supplier Account and currency. The amount will be calculated based on:
For all transactions (CAT & SAT) that are open by the end of current period but registered in an earlier or in the current period: Agio will be calculated using the transaction rate and the current period-end rate.
ATR document with transaction type ACCBAL will handle all other GL accounts (Not AR & AP) and agio will be calculated this way:
For all transactions (ATR items) that are registered in earlier or current period: Agio will be calculated using the transaction rate and the current period-end rate.
Your system currency is USD.
You have a CIN for 100 EUR.
The day the CIN was registered (St:4) the rate was 1,1.This means that the value of this CIN in your system currency is (100*1,1) = 110 USD.
The registration of the CIN generates an open post in the Accounts receivable ledger for 110 USD.
On the last day of the month the rate was 1,2 (Period rate).
By the end of the month the open post was agio calculated based on the period rate and the currency rate on the date of registration.(100*1,2) - (100*1,1) = 10. This means an agio profit of 10 USD.
If the CIN is not paid by end of next month, the unrealized agio for the previous month will be reversed and the open post (CIN) will be agio calculated based on the new period rate and the transaction rate.
The new period rate is 1,4.
(100*1,4) - (100*1,1) = 30. This means an agio profit of 30 USD.
When payment occurs, any unrealised agio is moved to realised agio. For example, if the invoice is paid at a rate of 1,5 EUR/USD, the difference between the payment rate and transaction rate is posted as realized agio on the payment.
Relevant report: FRP > ACCBAL > GL Account Balances, from AGIO calculations.
For all invoices or credit notes linked to a payment, realized agio will be calculated using the transaction rate and the payment rate. This applies to all invoices or credit notes regardless of whether they are registered in an earlier period or in the same period as the payment. The realized agio is presented in the field Currency Adjustment on the payment.
GL accounts set up in Account Defaults (ACD) for Realized gains and Realized losses are used when agio is created during registration of PAY.
ACD/REALIZEDGAINS and ACD/REALISEDLOSSES - Currency deviations on payments.
GL account for Currency Deviations on Payments.
Scenario Example:
Payment Currency: NOK (Norwegian Krone)
Invoice Currency: EUR (Euro)
In this example:
The sales invoice is for 1,250 EUR, registered on 2025.09.18 with an exchange rate (RATE) of 11.626.
The payment has a CURDATE of 2025.10.18, with a RATE of 11.7293.
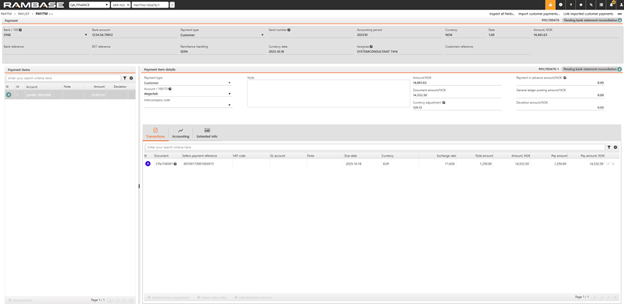
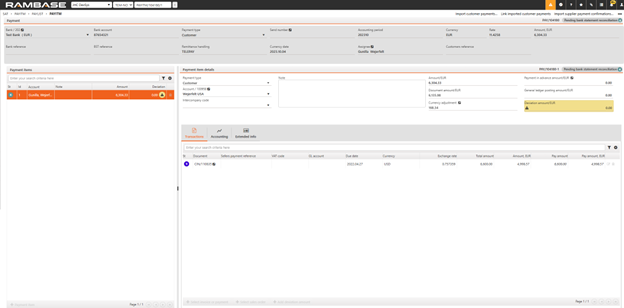
The Currency adjustment field reflects the currency deviation, calculated as follows:
Determine the Payment Value in Local Currency (NOK): 1,250 EUR * 11.7293 (CURDATE RATE) = 14 661,63 NOK
Determine the Invoice Value in Local Currency (NOK) Based on RATE from invoice: 1,250 EUR * 11.626 (2025.09.18 RATE) = 14 532,50 NOK
Calculate the Currency Adjustment: 14 661,63 NOK – 14 532,50 NOK = 129,13 NOK
The resulting currency adjustment of 129,13 NOK reflects the gain (or loss) due to exchange rate fluctuations between the invoice registration and payment dates.
When payments are processed, unrealized agio from previous periods is automatically transitioned to realised agio and posted to the appropriate gain or loss account.
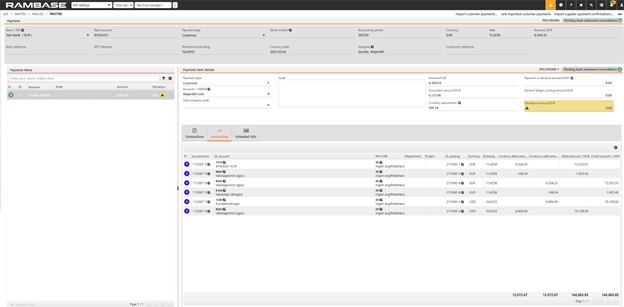
The Currency Adjustment field includes an Inspect feature:
Clicking this allows you to view a detailed report of the currency loss or gain for the selected invoice and any credit notes linked to the payment.
This report helps trace and verify how the deviation was calculated.

Differences due to different exchange rate in bank and RamBase. This is the difference between the value of the invoice based on RATE of the Currency date of the payment and what is received in bank. This deviation in «Deviation amount» could also contain of for example bank fees.
Example Calculation:
Invoice amount: 1 250 EUR
Exchange rate on Currency date: 11.7293
Invoice value in base currency: 1250 ×11.7293 = 14 661.63
Amount received in the bank: 14 531
Difference (Deviation Amount): 14 661.63−14 531=−130,63
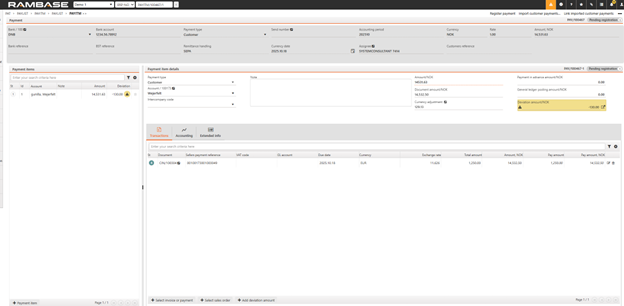
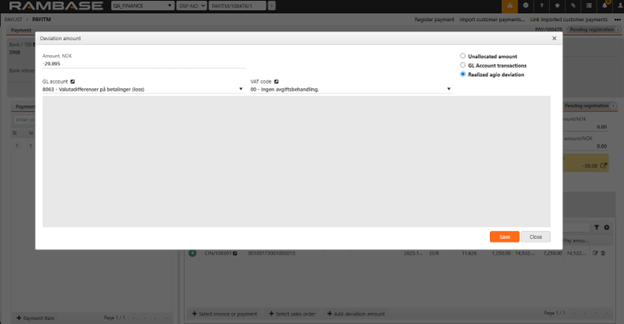
The user can decide how to post this deviation to the General Ledger (GL). This process is performed manually.
To simplify reconciliation between system-calculated and bank-applied exchange rates, the user will also have the option to allocate these differences more directly.
This option allows users to post remaining exchange rate differences to the realized exchange gain/loss account.
The functionality mirrors the layout of the GL Account transactions pop-up, but only allows editing of the amount field (and, if needed, dimensions).
The general ledger account is automatically selected based on the company’s exchange gain/loss configuration.

GL account used when:
When payment and invoices/credit notes have different currencies, additional posting is made to balance out the GL postings.
When a payment has many invoices and credits with different exchange rates, GL postings may not balance because of round offs on calculated average exchange rates. Additional posting for exchange rate difference is then made, if this difference is less than given in CompanySetting "MaxPaymentCurrencyDeviationOnLedgerSpecification".
When the amounts in USD and EUR are exchanged to NOK, two EUR postings are created because of the currency posting.
Typically, only minor round-offs are posted to this account due to rounding of exchange rates and two-decimal resolutions in GL.
The effect on ACC/8060 for this payment will be:
This GL account is used when VAT adjustments are needed due to differences between the VAT rate and the exchange rate on invoices or credit notes.
Example Scenario:
An inbound invoice (SIN) has a VAT rate (VATRATE) that differs from the exchange rate (RATE):
RATE: 11.4258
VATRATE: 11.2535
VAT amount: 250 EUR
Calculation:
Convert VAT amount using RATE: 250 EUR×11.4258=2 856.45 NOK
Convert VAT amount using VATRATE: 250 EUR×11.2535=2 813.375 NOK
Difference: 2,856.45−2,813.375=43.08
Accounting Impact:
This difference of 43.08 NOK is posted to ACD/VATRATEADJ.
The accounting will look like this:
Accounting period closure is performed in the Period account register (PAR) application in RamBase. The different tabs for one accounting period in PAR will give you an overview of various types of reconciliations such as inventory, work in progress, VAT and bank. Deviations should be followed up and the user will be able to approve the different reconciliations from the PAR application.
To open the Period account register (PAR) application, find Finance in the RamBase menu and then General ledger. Click Accounting periods to enter the Period account register (PAR) application. As a default, you will enter the year with the latest active period.
Status 1 - Future period not activated. It is possible to post to it.
Status 4 - Active period for posting.
Status 6 - Period closure is ongoing. Only selected roles are allowed to post.
Status 8 - Period closing approved, ready to be closed.
Status 9 - Period closing finished.

Make sure to keep the closing account period in an editable mode (status 6) until all reconciliations and inspections are completed, then confirm the period closure (status 9) to close the period in the Period account register (PAR) application.
Click on the year you want to view.
Use the Open, Active, Closing not approved, Closing approved and Closed boxes to filter the selected accounting year and make the accounting period closure easier.
Click the cogwheel to the right in the application to add or remove columns.
Start in the Period account register (PAR) application.
Highlight the period after the one which is going to be closed and press ENTER.
Use menu option Set this period to: Default period.
The new default period will be listed in the Period account register (PAR) application marked with status 4, which indicates that this is an open accounting period. When to change the default period depends on your company's routines, but is often to be done either the first day of the new period or at the time you are to perform period closure.
Start in the Period account register (PAR) application.
Highlight the actual period which is going to be closed and press ENTER.
Use the menu option Set this period to: Closed period.
The period to be closed will be listed in the Period account register (PAR) application marked with Status 6, which indicates that this period is no longer open for entries and only authorized accounting personnel may continue working on this period.
The period to be re-open will be listed in the Period account register (PAR) application marked with Status 6. Set the period previous to the period you want to re-open as closed.
Start in the Period account register (PAR) application.
Highlight the period previous to the period you want to re-open and press ENTER.
Use menu option Set this period to: Closed Period.
The period to be re-opened is now in Status 4. Re-opened period will have agio reversed.
The period to be open will be listed in the Period account register (PAR) application marked with Status 9. Only the last period that was closed can be opened.
Start in the Period account register (PAR) application.
Highlight the period which is going to be opened and press ENTER.
Use menu option Open period.
The period to be re-opened is now in Status 6.
Firstly, a company setting (CSV) called Creating accounting years manually must be activated. NB! Do not use this functionality if your company’s accounting year runs January to December.
When the above company setting is activated, you will see a + icon at the latest year in the top of the PAR menu.

When clicking this icon, the popup Create accounting year appears. Here you enter a value in the fields Count of periods, Start date, End date.

Press Create and the periods appears and you must fill in Start date and End date for each accounting period. It is possible to add a description for the periods. Then press Create.

The accounting periods are created in Status 0.

If the accounting year created is wrong, it can be deleted as long as the periods are in Status 0 by using the menu option Delete accounting year.
Use menu option Activate accounting year to set the accounting periods to Status 1.

Period- and posting adjustments are posted from transaction documents, and it is crucial to the general ledger to make the income and costs for a period or dimension as accurate as possible.
Period adjustments is done to distribute the costs or incomes to several accounting periods if an invoice is created for a certain time span.
Posting adjustments is done to distribute costs or incomes to several dimensions (department, project etc). While period adjustments are crucial to make the profit and loss report as accurate as possible, posting adjustments points towards cost accounting.
In the default account archive (ACD), set up of general ledger accounts for period adjustments can be made. You can set up one GL account for customer period adjustments and one GL account for supplier period adjustments.

It is possible to set up additional general ledger accounts to be used when performing a period adjustment. Enter the preferred general ledger account and select Provisions & Prepayments from the Category dropdown menu in the Account information area. Once categorized, these accounts will be available to choose in the Period Adjustment plan, providing enhanced flexibility and efficiency in managing period adjustments.
Only invoices for costs may be accrued. The invoice must be registered and ready to be paid (status 4) to be accrued.
To open the Supplier invoices (SIN) application, find Finance in the RamBase menu and then Payables. Click Supplier invoices to enter the SIN application.
Select the invoice and click on the Accounting tab.
Click first on Adjustments and then click on the + icon next to the Period adjustment plan field. This will open the Item period adjustment plan popup.
To accrue several items on the document with different period adjustment plans or only one of the items:
Highlight the specific item in the Items tab and press ENTER to open the Supplier invoice item (SINITEM) application.
Click on the + icon nest to the Period adjustment plan field and continue the process from step 5.
Repeat the procedure for each item to be accrued.
In the Adj.% field the percentage of the total amount to be accrued may be edited. The value in this field calculates the value in the Adj.amount field.
Enter the amount to be accrued in the Ajd.amount field. The value in this field calculates the value in the Adj.% field.
In the FromPeriod field, enter the preferred period to start with.
In the ToPeriod field, enter the last period.
Press ENTER. The periods and their amount will be listed below.
Press F12 and choose the Register Account Adjustment Plan option.
The period adjustment is completed and the invoice is now accrued.
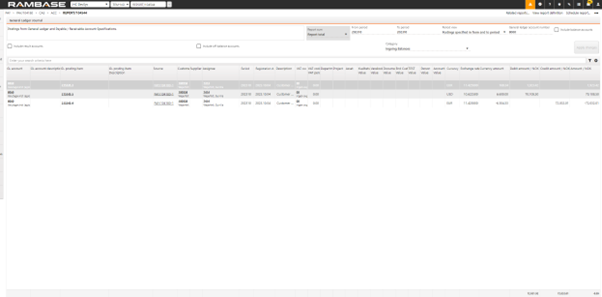
REP/101166 shows the value after accrual for the respective month. It shows the remaining amount for the period in question. (In other words, the amount that is left after this period's reversal.) This means that the total amount must correspond to the balance in the general ledger.
The report includes Sales Posting Adjustment (CPA) and Supplier Posting Adjustment (SPA) documents. It also has sub-reports, in which it is possible to filter on either CPA documents or SPA documents. To specify additional eligible accounts, just select Provisions & Prepayments from the Category dropdown menu in the Account information area of the Chart of accounts (ACC) application. Once categorized, these accounts will be available in the Period Adjustment plan, providing enhanced flexibility and efficiency in managing period adjustments. The report uses current period for the company as default filter, but it is also possible to filter on a different period. The filter should then be REP/101166;YYYYMM. Period adjustment balances (REP/101166) also offers a filtering option for the General ledger account (ACCCODE).
Filter by invoice: To filter by invoice, type OURNO="*XXXXXX", where XXXXXX should be replaced by the specific invoice number. The invoice number could be found in the OurNo field on Supplier Posting Adjustment (SPA) and Sales Posting Adjustment (CPA) documents.
When making posting adjustments you allocate the costs on account dimensions like department and project. Posting adjustments will make the cost accounting as accurate as possible.
Posting adjustments may be performed on both Supplier Invoices (SIN) and Sales Invoices (CIN).
Posting adjustments are to be performed on item level. Only items with a set account can be posting adjusted.
To open the Supplier invoices (SIN) application, find Finance in the RamBase menu and then Payables. Click Supplier invoices to enter the SIN application
To make a posting adjustment on one item:
Highlight the specific item in the Items tab and press ENTER to open the Supplier invoice item (SINITEM) application.
Click on the + icon nest to the Posting adjustment plan field.
Repeat the procedure for each item.
In the Adj.% field the percentage of the total amount to be adjusted may be edited. The value in this field calculates the value in the Adj.amount field.
Enter the amount to be adjusted in the Ajd.amount field. The value in this field calculates the value in the Adj.% field.
In the Split field, enter how many splits the invoice item should be split into.
Press ENTER. The splits and their amount will be listed below.
Press the magnifying glass for each split to enter dimension(s).
Use menu option Register Account Adjustment Plan to register it.
The period adjustment plan is forwarded to Status 4 if the invoice is not registered or Status 8 if the invoice is registered.
An overview of the GL posting appears on the invoice under the Accounting tab and the Adjustments sub-tab.
Open the Period adjustment plan popup for the chosen invoice. The invoice must be registered. Press the magnifying glass in the upper right corner. The pop-up Supplier/Customer Posting Adjustment menu opens and displays the period adjustment documents (SPA/CPA) for the chosen invoice.
REP/100951 with filter on the SIN/CIN can be used for follow-up/control. The filter should then be REP/100951;CIN/XXXXXX or REP/100951;SIN/XXXXXX

Use the Make period adjustments option in the action menu on a manually created General ledger (ATR) posting in Status 4. This will give you the possibility to make a period adjustment to a cost without an invoice.
Select the period in the FromPeriod and ToPeriod fields and click the OK button to make the period adjustments.
For an overview of the period adjustments, use the menu option and select the Show period adjustments option.
Use the Make period adjustments option in the action menu on a manually created General ledger (ATR) posting in Status 4. This will give you the possibility to make a period adjustment to a cost without an invoice.

Select the period in the FromPeriod and ToPeriod fields and click the OK button to make the period adjustments.

For an overview of the period adjustments, use the menu option and select the Show period adjustments option.

Accounting period closure is a predefined procedure in RamBase which is mandatory to work through for each accounting period.
To gain a more correct statement of expenditures and revenues in the period.
To control that there are consistency between the general ledger postings and the "real world" (reconciliations).
To a certain extent, the procedures are to be carried out in a specific order and approved by a financial manager.
If needed and desired, period adjustments of supplier invoices and sales invoices are created.
Correct cost of goods is calculated by transferring the inventory and product transaction values to the ledger. The calculation also considers the measurement problems according to which period transactions can be counted as stock value.
Several reconciliations must be approved.
Agio for foreign currency balance sheet entries are calculated.
Customer Billing (CUSBILL) is an application used to view, search, filter, and analyze sales invoices and credit notes. It provides financial KPIs such as landed cost, gross margin percentage, and aggregated billing metrics by day, week, month, and year.
Navigate to the application
Option 1: RamBase menu→Finance→Receivables→Customer billing
Option 2: Click the Program field and type "CUSBILL" and press ENTER.
Click here to read more about the user interface.
The following areas are described in the sections below:
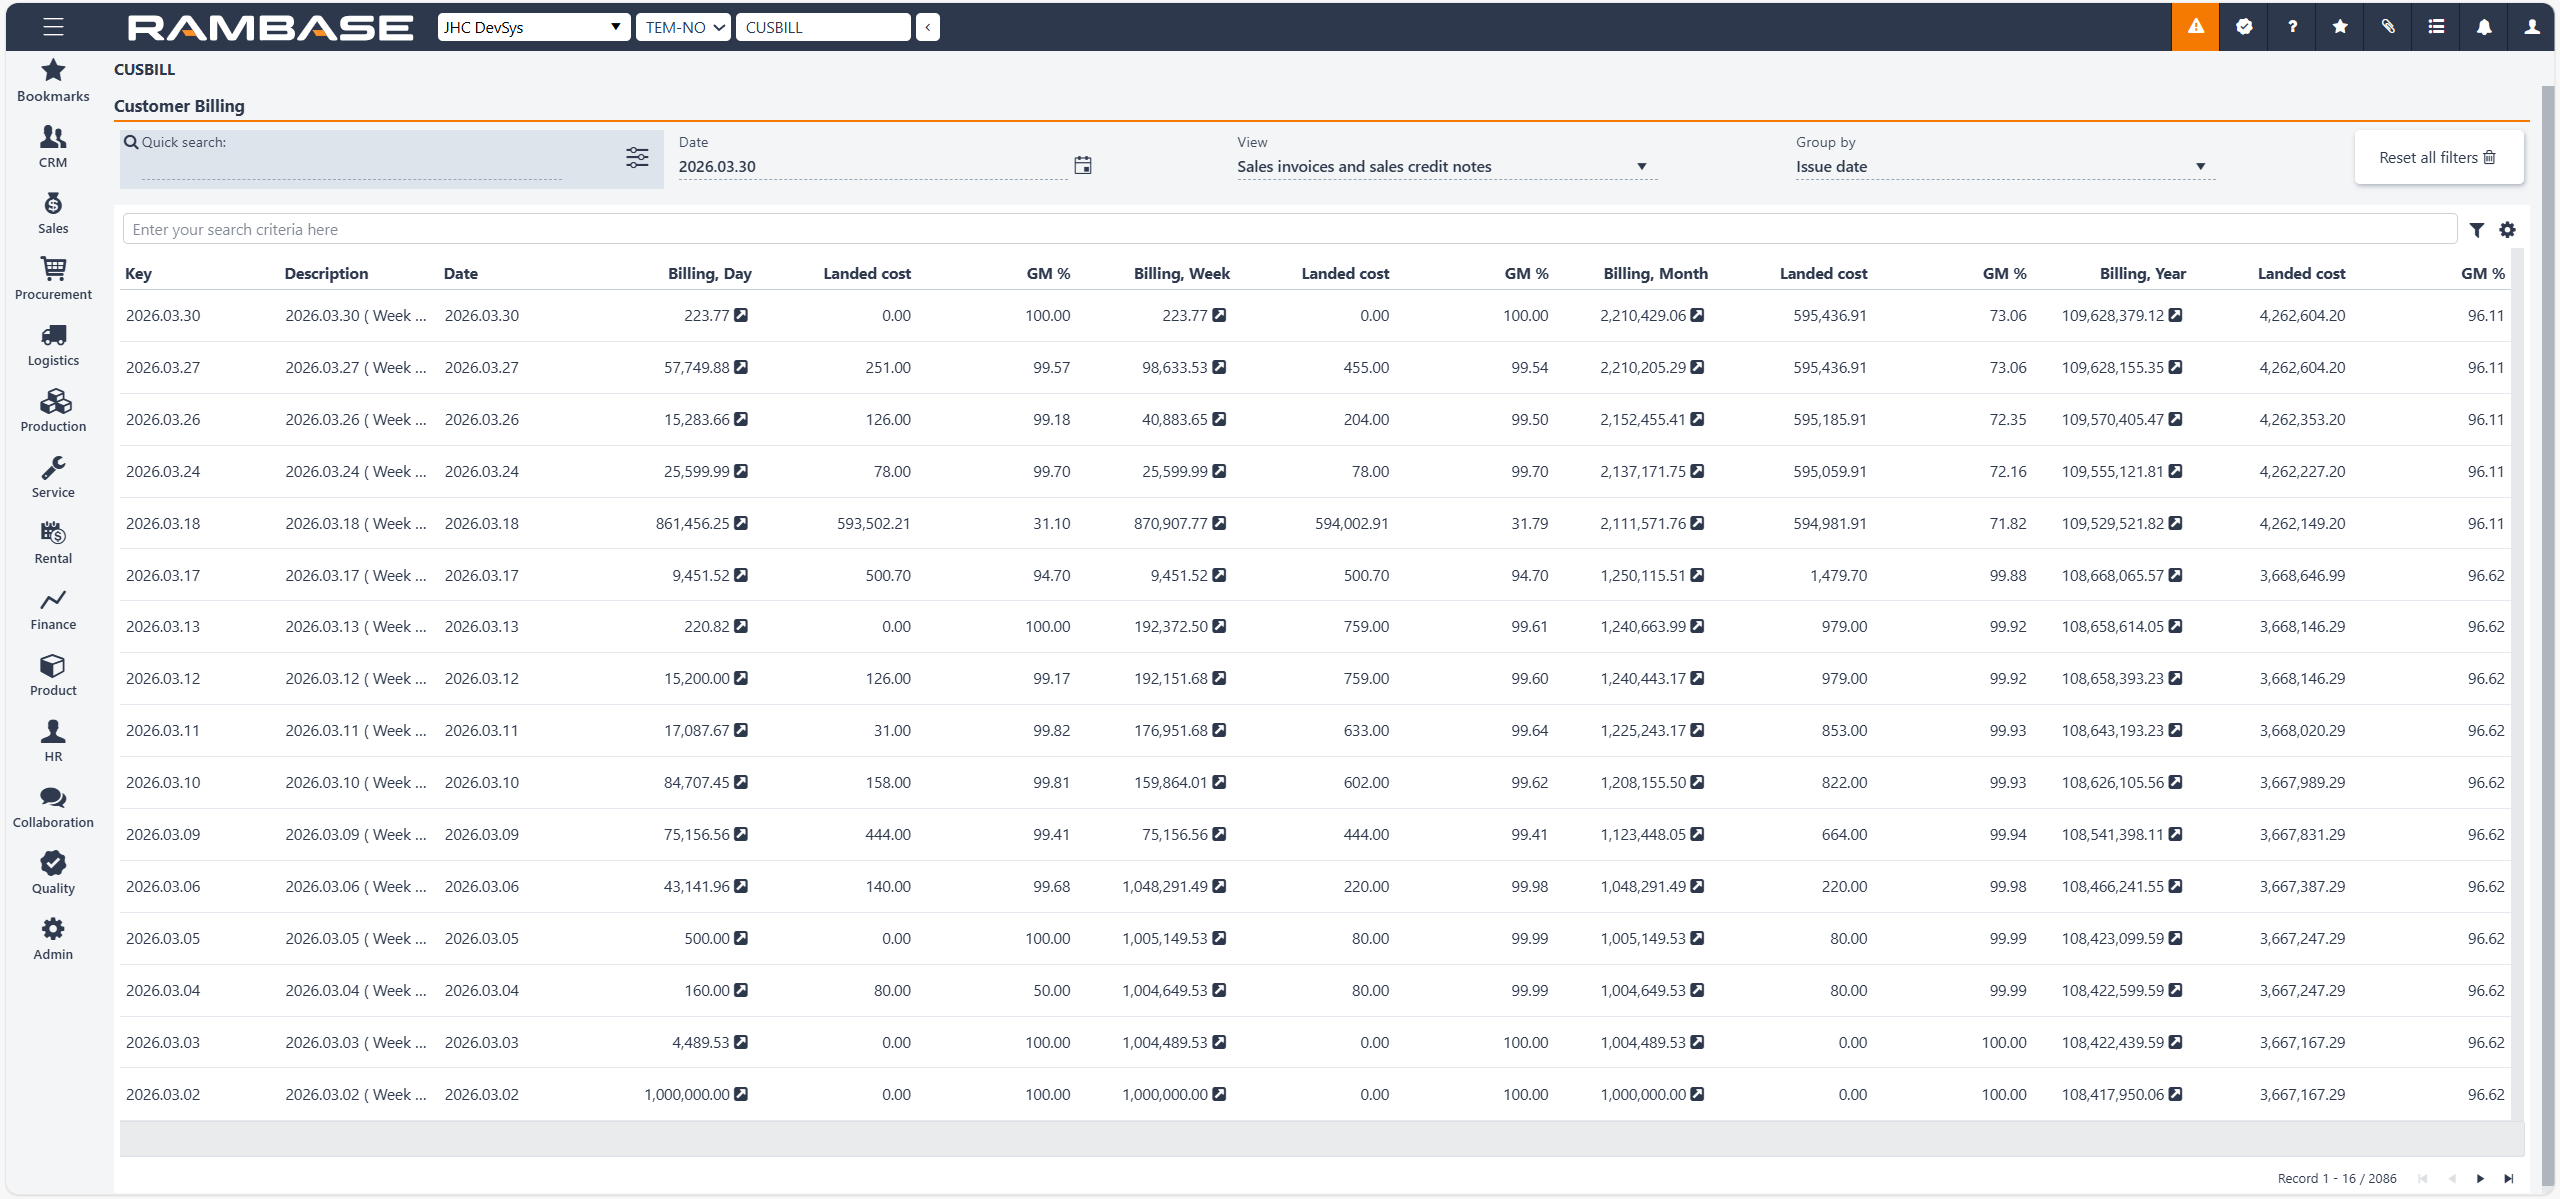
The Customer billing header
The Customer billing list
The Customer billing header contains fields which are used to filter the list below.
Fields and buttons | Description |
|---|---|
Quick search field | Click on the Search field to look up a specific Customer billing (CUSBILL). Click on the Quick search filter icon to select which of the following options are to be included in the search:
|
Date field | Click on the Date field to filter the Customer billing (CUSBILL) up to a specified date. Click on the Calendar icon to select, or search for, a date from the Calendar popup. |
View field | Click on the View field to filter the Customer billing (CUSBILL) list on a specific sales invoice or credit note. Click on the Arrow down icon to select which of the following options are to be included in the search:
|
Group by field | Click on the Group by field to filter the Customer billing (CUSBILL) list to select which of the following options are to be included in the search:
|
Reset all filters button | Click the Reset all filters button to remove all filters and show all Customer billing (CUSBILL) in the list. |
The displayed Customer billing (CUSBILL) are based on the selections made in the Customer billing fields area.
The Customer billing list includes a search field. In addition to the fields and variables in the header, the scope of the search can be further filtered by clicking the Filter builder icon to the right of the search field.
Clicking the Filter builder icon will display a popup with the options to add a Standard filter and/or Create custom filters. All custom filters can be saved and then added to the My saved filters area.
The user can customize the order of the columns by drag and drop, in addition to hover over icons and columns for further descriptions.
Columns | Description |
|---|---|
Key | GroupBy key for the customer billing. |
Description | Description of the key. |
Date | Date which is used for the calculations. |
Billing, Day | Billing amount of the day. |
Landed cost | Landed cost of the day. |
GM% | Gross margin of the day. |
Billing, week | Billing amount of the week. |
Landed cost | Landed cost of the week. |
GM% | Gross margin of the week. |
Billing, month | Billing amount of the month. |
Landed cost | Landed cost of the month. |
GM% | Gross margin of the month. |
Billing, year | Billing amount of the year. |
Landed cost | Landed cost of the year. |
GM% | Gross margin of the year. |
Prior to period closure all postings like supplier invoices, sales invoices, and payments etc., for the relevant period must be completed.
In addition, you ought to perform the following reconciliations:
Reconciliation of the fixed assets register.
VAT reconciliation.
Bank reconciliation.
Inspect period adjustments.
To open the Fixed assets (FAR) application, find Finance in the RamBase menu and then Asset management. Click Fixed assets to enter the FAR application.

Press F12 to open the action menu and choose the option Forward new Investments to Fixed Assets Register. You will see Supplier invoices (SIN) registered against the investment ledger accounts.
By clicking the + icon to the left on the item line, you will create a Fixed asset (FAR) document which will hold all details about the investment. When the + icon has been clicked, the item will disappear from the popup.
Press Esc to return to the fixed assets menu. The new Fixed asset (FAR) document will be listed on top of the table. They are not yet activated (Status 1).
Highlight the desired document (Status 1) and press ENTER.
Press F12 to open the action menu and choose the Activate Fixed Asset (St=2) option.
In the new popup, set the period from when the asset shall be activated and click the OK button. The value of the asset is now debited into a balance account.
Press F12 and choose the Register & Create Depreciation Plan option. The asset is now booked in your balance and a depreciation plan is made, but the depreciation is not initiated. The Fixed asset (FAR) document is in Status 3.
It is possible to use the F12 option: Reopen & Delete Depreciation Plan on a Fixed asset (FAR) in Status 3.
Press Esc to return to the Fixed Assets Menu.
Repeat from step 5 for all Fixed asset (FAR) documents in Status 1 in the Fixed asset (FAR) application.
Press F12 and choose the option Make Depreciations to Fixed Assets.
Choose period for the depreciation.
Press the + icon to the right of each line. Press Esc to return to the Fixed Assets Menu. When the Fixed asset (FAR) document is depreciated for the first time, it will be forwarded to Status 4.
To perform VAT reconciliation you need to inspect the VAT codes and their connection to the relevant general ledger accounts. Make sure that no sales invoices are booked against an inbound VAT code, and that no supplier invoices are booked against an outbound VAT code.
To open the Finance Workspace (FINANCE) application, find Finance in the RamBase menu and then Overview. Click Overview to enter the FINANCE application.

Click on the VAT Reconciliation link in the Reports section to generate the VAT report.

This report gives an overview of VAT codes, where postings have been made for the chosen period.
Highlight the specific VAT code and press ENTER to inspect the underlying data.

If any mistakes are discovered, highlight the incorrect line and press ENTER to find the documents the postings are based on.
Make corrections.
Before starting a bank reconciliation, the bank statements have to be imported from the bank into RamBase. When bank statements are imported, the transactions are matched with Payment (PAY) documents recorded in the cash management module in RamBase.
The reconciliation job can be initiated manually or carried out automatically on a regular basis to your company's setup. Regardless of how the reconciliation job is initiated, the reconciliations must be inspected and confirmed manually.
Bank reconciliation must be done prior to period closure.
The Bank statements (BST) application list all transactions for a account over a set period. The statement includes deposits, charges, withdrawals. as well as the beginning and ending balance for the period, along with any interests.
The filtering options allow for easy organizing to the users' need.
The following areas are described in the sections below:
Bank statement area - Header right side
Bank transaction items area - Right side
The Bank statement area contains fields to help the user list only the intended Bank statement (BST).
Field | Icon | Description |
|---|---|---|
Bank field |
| Displays the Bank (BANK) identifier. |
Bank account field | Bank account number | |
Currency field | Displays the currency selected for the bank account in the Bank (BANK) application. | |
Internal bank reference field | Sorting index of bank statement | |
External bank reference | ||
GL Account |
| Displays the name of General ledger account name |

Icon | ||
|---|---|---|
Booking date field | Displays the date the transaction was booked into the system. | |
Created by field | Either displays the identifier of the system batch job or the the Personnel (PER) identifier of the user who created the bank statement, including first and last name. | |
Created at field |
| Displays the date and time of creation |
| ||
Booked payments | Booked payments are figures which are imported from the Bank (BANK) application. After reconciling payments or confirming Bank statement (BST) items (when Bank statement (BST) goes to Status 8) these amounts are imported to Bank statement (BST). When status is < 8, Opening balance and Closing balance equals 0. | |
Opening balance | Balance at the beginning of the day, before Bank statement (BST) was created (it should equal Closing balance from the last day). | |
Linked payments | Sum of payments linked to Bank statement (BST). | |
Closing balance | Total amount of transactions for this bank, including created Bank statement (BST) - (Opening balance + Linked payments). | |
Bank transaction | Bank transaction shows amounts which are given when creating new Bank statement (BST), when Bank statement (BST) was created manually or imported from a file. When Bank statement (BST) is created using the Import bank statements from bank integration…operation, Bank statement (BST) is created automatically and amounts are imported from bank integration. They are visible when Bank statement (BST) < 8 and they are compared to Booked payments figures. | |
Opening balance | Balance at the beginning of the day, before Bank statement (BST) was created (it should equal Closing balance from the last day) | |
Movement | Sum of transactions in Bank statement (BST). | |
Closing balance | Total amount of transactions for this bank, including created Bank statement (BST) - (Opening balance + Movement). | |
Deviation | Booked payments – Bank transaction. |


Columns | Description |
|---|---|
St | Status of bank statement |
Item | Transaction identifier of the bank statement |
Created at | Date and time of creation |
Currency date | Currency date of the bank statement transaction |
Booking date | Booking date of the bank statement transaction |
Payments | Displays the related payment document with a navigation link. If there is more than 1 PAY document related with current transaction, then clickable money bag icon is displayed with all related payment documents list. |
Bank reference | Reference from the bank |
Internal message | Internal message from the system |
Transaction reference | Our internal reference |
Payment message | Message from the payment |
Reconciliation Id | Reconciliation identifier of the bank statement |
Reconciliation method | Method of reconciliation |
Approved by | User identifier |
Currency | Currency used for the bank account |
Payment amount | Payment amount |
Deviation amount | Deviation amount |
Bank amount | Transaction amount |
The Bank statement (BST) application lists all bank statement documents. These documents are based on the files imported from the bank(s).
From the Bank statement (BST) application, you may import bank statement files from a bank and initiate an automated bank reconciliation. The reconciliation will be performed automatically on a regular basis if the Company setting (CSV) ‘Reconcile bank statement automatic’ is activated. Manual bank reconciliation can be initiated from each Bank statements (BST) document in Status 2 or from the Bank statement (BST) menu.
To go to Bank statement (BST) enter Finance, then Cash management and then Bank statements.
Start in the Bank statement (BST) application.
Click the Import bank statement... option in the Context menu.
Choose a format.
Click the Next button
Click the Select file button and browse to the bank statement file. Click the Upload button and a progress bar will appear.
When the import is finished, one or several Bank statement (BST) documents are created One Bank statement (BST) document is created for each transaction date. All transactions on the same date will appear as items on the relevant Bank statement (BST) document. The generated Bank statement (BST) documents will be listed in Status 2. This means that is and are ready for reconciliation. If the Bank statement (BST) document is listed in Status 1, there is a deviation. The deviation is typically between closing and opening balance between two dates or if the sum of Bank statement (BST) item does not match the sum of opening balance - closing balance for that specific Bank statement (BST).
The company using RamBase must have the bank integration active to import bank statements from bank integration manually.
Click the Import bank statement from bank integration... option in the Context menu.
Fill out Bank account, From date, To date fields in the popup.
Click Confirm. When import job is finished, one or several Bank statements (BST) in Status 1 is created.
When the import is finished, one or several Bank statement (BST) documents are created in Status 1. One Bank statement (BST) document is made for each transaction date. All transactions on the same date will appear as items on the relevant Bank statement (BST) document. The generated Bank statement (BST) documents will be listed in Status 1 until the opening and closing balance for the Bank statement (BST) is imported. When the opening and closing balance are imported, the Bank statement (BST) will be listed in Status 2. Bank statement (BST) in Status 2 means that it is ready for reconciliation. If the Bank statements (BST) documents remain in Status 1 after having imported the opening and closing balance, there is a deviation. The deviation is typically between closing and opening balance between two dates or if the sum of Bank statement (BST) item does not match the sum of opening balance-closing balance for that specific Bank statement (BST).
The company using RamBase must have the bank integration active to import bank balances from bank integration manually.
This will happen automatically, but it is possible to trigger it if you want to start the job manually.
Start in the Bank statement (BST) application
Mark the Bank statement (BST) in Status 1 and click the Context menu and choose the Import bank balances from bank integration option.
The Bank statement (BST) document will be listed with Status 2 after the import is done. Bank statement (BST) in Status 2 means that it is ready for reconciliation. If the Bank statements (BST) document remains in Status 1 after having imported the opening and closing balance, there is a deviation. The deviation is typically between closing and opening balance between two dates or if the sum of Bank statement (BST) item does not match the sum of opening balance-closing balance for that specific Bank statement (BST).
From the Bank statement (BST) application, you may initiate a bank reconciliation. The reconciliation will be performed automatically on a regular basis if the Company setting (CSV) ‘Reconcile bank statement automatic’ is activated.
Manual bank reconciliation can be triggered from each Bank statements (BST) document in Status 2 by clicking the Reconcile this bank statement… option or from the Bank statement (BST) menu.
Start in the Bank statement (BST) application.
Open the Context menu and click on the Start bank statement reconciliation job option. The reconciliation tries to match the bank transactions in the Bank statement (BST) against the Payment (PAY) documents registered in RamBase.
If RamBase finds a match between a Bank statement (BST) item and a Payment (PAY) document, the Bank statement (BST) item will be put to Status 8. When all Bank statement (BST) items in one BST have a match against a Payment (PAY) document, the Bank statement (BST) will be set to Status 8. A Bank statement (BST) document in Status 8 can be confirmed as reconciled to Status 9 which is typically done at month end.
If RamBase finds a partial match, that is a match with minor deviations, the Bank statement (BST) item is put to Status 3.
If RamBase does not find a match, the Bank statement (BST) item is put to Status 2.
Bank statement (BST) documents in Status 1 indicates a deviation. The deviation is typically between closing and opening balance between two dates or if the sum of Bank statement (BST) item does not match the sum of opening balance-closing balance for that specific Bank statement (BST).
Start in the Bank statement (BST) application.
Select a Bank statement (BST) document in Status 2.

On the Bank Transaction item lines, all transactions for that specific date Bank statement (BST) items will be listed. The list is sorted by status code, putting transactions with Status 2 on top.
Select an unmatched transaction Status 2.
Click on the Arrow symbol. The Bank Statement Line popup will appear.

The Linked Payments section displays Payment (PAY) documents that correspond to the Bank statement (BST) item.
In the Select Payments section, users have two options:
Users can initiate the selection process by clicking on the relevant status symbol associated with each Payment (PAY) document and then click on Link selected to BST item.
Alternatively, users can utilize the filter options to refine their search, and then click on Link filtered payments to BST item to link all displayed payments to the Bank statement (BST) item. It opens a popup with the numbers of Payment (PAY) that will be linked.
Note the default value in the Date from and Date to fields. Change them if necessary. Users may also use the Amount (minimum) and Amount (maximum) fields to limit the number of possible documents.
If no Payment (PAY) document matches, a payment has not been registered yet. If so, you can create a payment manually or follow this procedure:
Click on the Arrow icon in the Bank statement (BST) item and select the Select payment tab.
Click the Create new Payment button. A Payment (PAY) document in Status 1 is created.
Check the payment information and make necessary changes.
Use the Context menu on the Payment (PAY) and click on the Register Payment option.
Start in the Bank statement (BST) application.
Select a Bank statement (BST) document in Status 3.
Press ENTER. All transactions for that specific date will be listed. The list is sorted by status code, putting transactions with Status 3 on top.
Select a partial matched transaction.
Click on the Arrow symbol. The Bank Statement reconciliation popup will appear.
Inspect the invoice, the bank statement, and the Payment (PAY) document, and compare the amounts.
If the deviation is due to errors when entering the Payment (PAY) document manually, do as follow:
Click on the Unlink this payment button on the line of the incorrect Payment (PAY) document/documents. The Payment (PAY) is no longer linked to the BST.
Make corrections on the Payment (PAY) and make sure to register the Payment (PAY) to Status 4 after the correction.
Go back to the Bank statement (BST) and enter the BST item. Link the corrected Payment (PAY) to the BST item manually or use the menu option Reconcile this bank statement for linking the corrected Payment (PAY) to the Bank statement (BST) item.
If there exists a deviation between the Bank statement (BST) item and the Payment (PAY) and if it’s not possible to correct the Payment (PAY), the Bank statement (BST) item remains in Status 3. The Bank statement (BST) item then must be approved. By highlighting the Bank statement (BST) item, using the Context menu and clicking on the Approve bank statement item option, the Bank statement (BST) item will be forwarded from Status 3 to Status 4.
If there are more Bank statement (BST) items in Status 3 on the same BST, the Bank statement (BST) remains in Status 3. Repeat the procedure until all Bank statement (BST) items in Status 3 are reconciled. All Bank statements (BST) items and the Bank statements (BST) document will be put to Status 8 when the last Bank statement (BST) item is reconciled.
To complete the bank reconciliation, the Bank statements (BST) must be confirmed to Status 9. There are two ways of doing it; either confirming all Bank statements (BST) for one bank at the same time or confirming each Bank statement (BST) document individually.
Before confirming the Bank statements (BST) to Status 9, the closing balance of the Bank statement (BST) of the last day of the month should be reconciled against the balance of the connected General Ledger account (ACC) for that specific accounting period.
Also, it is recommended to make sure that there are no unreconciled Payments (PAY) in Status 4, for the given accounting period and for the given bank account which is not linked to a Bank statement (BST). If there exists such a Payment (PAY), investigate why it is not linked to a Bank statement (BST) and/or if it is a duplicate.
Start in the Bank statement (BST) application.
Select a Bank statement (BST) document in Status 8.
Click on the Context menu and choose the Confirm Bank Statement option.
Start in the Bank statement (BST) application.
Click on the Context menu and choose the Confirm Bank Statements based on bank account and date option to confirm multiple bank statements for one bank with the To date field filled.
When a Bank statement (BST) document is confirmed to Status 9, the connected Payment (PAY) document will be put to Status 9. This indicates that it is reconciled and there is no need for further handling.
If there is a deviation between the value in the Movement field in the Bank transaction-section and the total amount of the item lines, the Bank statement (BST) document will be in Status 1, and you will not be allowed to proceed.
If this deviation depends on a BST item missing on the Bank statement (BST) compared to the bank statement in the online bank, Click the Context menu and select the Create new item from deviation amount option.
A new Bank statement (BST) item line with the amount of the deviation will be created. The Bank statement (BST) document will be in Status 2, and you can continue the bank reconciliation procedure.
Period adjustments will usually be made to the Supplier Invoices (SIN) and Sales Invoices (CIN) when they are added to the accounting. However, prior to every period closure you should still check that everything that has been period adjusted will be reversed later. This means that the sum of the general ledger accounts that the automatic period adjustments are connected to, must be zero (0).
In addition, it may be advisable to check each account's period amount to make sure that there are no large deviations.
To open the Finance Workspace (FINANCE) application, find Finance in the RamBase menu and then Overview. Click Overview to enter the FINANCE application.

In the Reports section, select the Account Balances per Period report.
Press ENTER. This report lists general ledger accounts sorted by account number, displaying period 00-12 and year ending periods + Balance Out. For every account, inspect the balances for each period.

If there are large deviations from one period to another, highlight the specific account, press ENTER and inspect the underlying information.
Accounting period closure is carried out from the Period Account Register (PAR) application in RamBase. Reconciliations during period closure is about approval or rejecting. No reconciliations are done from the PAR application, but reconciliations are to be approved from PAR.
To open the Period Account Register (PAR) application, find Finance in the RamBase menu and then General ledger. Click Accounting periods to enter the PAR application.

Make sure to keep the closing account period in an editable mode (status 8) until all reconciliations and inspections are completed. Then confirm the period closure (status 9) to close the period in the PAR application.
To close an accounting period, you must set the new default period for the system.
To open the Period Account Register (PAR) application, find Finance in the RamBase menu and then General ledger. Click Accounting periods to enter the PAR application.
Highlight the period after the one which is going to be closed and press ENTER.
Press F12 to open the action menu and choose the Set this period to: Default period option.
The new default period will be listed in the PAR marked with status 4, which indicates that this is an open accounting period. When the default period should be changed depends on your company's routines. Often it is done either the first day of the new period or at the time you are to perform period closure.
To perform period closure, the current period must be set to closed.
To open the Period Account Register (PAR) application, find Finance in the RamBase menu and then General ledger. Click Accounting periods to enter the PAR application.
Highlight the actual period which is going to be closed and press ENTER.
Press F12 to open the action menu and choose the Set this period to : Closed period option.
The period to be closed will be listed in the PAR application marked with status 6, which indicates that this period is no longer open for entries and only authorized accounting personnel may continue working on this period.
The period to be re-open will be listed in the PAR application marked with status 6. To re-open a period in status 6, you need to mark the previous period as closed.
To open the Period Account Register (PAR) application, find Finance in the RamBase menu and then General ledger. Click Accounting periods to enter the PAR application.
Highlight the period prior to the period which is going to be re-opened and press ENTER.
Press F12 to open the action menu and choose the Set this period to : Closed Period option.
When a Sales Order (COA) is created during an auction settlement, a Supplier Invoice (SIN) is created simultaneously. The item(s) on this invoice will be reckoned as a cost in the GL. To ensure that the financial report is as accurate as possible it is necessary to make provisions for the future income by importing the customer backlog.
Transfer of the provisions for future income may be done in either one operation (a) or two operations (b+c).
Import and reverse the provisions for future income in one operation.
Reverse the last period's balances.
Import the balances for the current period.
To open the Period Account Register (PAR) application, find Finance in the RamBase menu and then General ledger. Click Accounting periods to enter the PAR application.
Select the Customer Backlog folder.

Highlight one of the lines.
Press F12 to open the action menu and choose the option Start all import/reversal jobs. A progress bar will appear.
If everything is correct, the line will now be marked with status 4 with a reference to general ledger entry.
Alternatively, you may perform the reversal- and import jobs separately:
To open the Period Account Register (PAR) application, find Finance in the RamBase menu and then General ledger. Click Accounting periods to enter the PAR application.
Select the Customer Backlog folder.
Click on the + icon on the line marked with Reversal in the Type column. A progress bar appears.
If everything is correct, the line will now be marked with status 4 with a reference to a general ledger entry.
To open the Period Account Register (PAR) application, find Finance in the RamBase menu and then General ledger. Click Accounting periods to enter the PAR application.
Select the Customer Backlog folder.
Click on the + icon on the line marked with Import in the Type column. A progress bar appears.
If everything is correct, the line will now be marked with status 4 with a reference to a general ledger entry.
Inventory accounting is a separate application in RamBase.
Value of goods in stock (StockAmt).
Value of goods in production (ProdAmt) - only relevant for the Production module.
Value of goods on order (BacklogAmt) - only relevant for the Auction module.
One of the procedures during period closure is to import the inventory balance to the general ledger. A decrease in stock value gives an increase in cost of goods, which again has a negative impact of this periods net margin.
When closing an accounting period, the closing period's opening balance must be reversed, and the current period's balance must be imported.
Based on your company's setup, it is possible to import inventory balances automatically on a nightly or monthly basis. This can also be done manually.
Also based on your company’s setup, it is possible to split the import of inventory balance into Finished products and raw material. This is done by entering general ledger accounts in the Account Defaults (ACD):
INVENTORYKIT - GL Account used when Inventory Balance is imported to General Ledger. Finished Products.
INVENTORYKITCHG - GL Account for change in Inventory Balance. Finished Products.
INVENTORYPART - GL Account used when Inventory Balance is imported to General Ledger. Parts.
INVENTORYPARTCHG - GL Account for change in Inventory Balance. Parts.
By adding a General ledger account to these settings, the import will automatically split the inventory the next time the import is completed. The ACD for finished goods are based on all class KIT, while the raw material ACD is based on the other classes (Part, Material etc.).
Account Defaults (ACD) for inventory (INVENTORY & INVENTORYCHG) will be used as default if ACDs for finished goods and raw material is not set up with a general ledger account.
To open the Period Account Register (PAR) application, find Finance in the RamBase menu and then General ledger. Click Accounting periods to enter the PAR application.
Highlight the relevant period and press ENTER.
Select the Inventory Balances folder.

Highlight one of the lines.
Press F12 to open action menu and choose the Create ATR documents for Inventory Balances option. A progress bar will appear.
If everything is correct, the lines will now be marked with Status 4 with a reference to a general ledger entry.
Alternatively, you may perform the reversal- and import jobs separately:
Click on the + icon on the line marked with Invent in the Transaction column and Reversal in the Type column. A progress bar appears.
If everything is correct, the lines will now be marked with Status 4 with a reference to a general ledger entry.
Click on the + icon on the line marked with Invent in the Trans column and Import in the Type column. A progress bar appears.
If everything is correct, the lines will now be marked with Status 4 with a reference to a general ledger entry.
When the inventory balances are imported there will be an amount showing on the right side on the imported line. This is the new balance and shows the impact on the balance account. On the bottom right corner there will be an amount on the Change in period line, this balance shows the impact on the cost account.
Note the amount showing on the Imported line. Click the numbers and you will be redirected to the Inventory Balances (INVBAL). The amount in the Inventory Balance-column on the bottom right corner of INVBAL should be equal to the amount on the Imported line in the (PAR) application.
For manufacturing companies, the amount in the Picked to Productions- column is included in work in progress.
Product accounting handles balance sheet allocations for accrued, not billed, costs from purchase or goods returned. It also handles balance sheet allocations for billed costs where the goods are not yet received.
Such alterations can be:
Product claims (PROCLA): Faulty or wrong deliveries pending for crediting or re-delivery.
Goods received, no invoice (PROGNI): Goods received to stock where no invoice is received.
Invoiced Received, no goods (PROING): Supplier invoice received where no goods are received.
Transfer product balances manually
To open the Period Account Register (PAR) application, find Finance in the RamBase menu and then General ledger. Click Accounting periods to enter the PAR application.
Highlight the relevant period and press ENTER.
Select the Product Balances folder.

Highlight one of the lines.
Press F12 to open the action menu and choose the Import product balances to General Ledger option. A progress bar will appear. Running this import job, will import new balance to the period where this F12 choice is initiated. It will also import new balances to later periods up to the current period. This will reverse old postings and import a new.
In addition to this, product values may be transferred automatically on a daily or monthly basis.
If everything is correct, the lines will now be marked with Status 4 with a reference to a general ledger entry.
When the product values are imported, you will see the total Product balance in the upper left corner with a link to the PROBAL application. This Product Balance amount should be equal to the amount at the bottom of the Balance Total column in the PROBAL application and the total GL account balance in the Product Balance folder.
Next to the right, you will find the General Ledger account balance. This is a sum of all GL balance accounts used for product balance import.
In the bottom right, you will also see the sum of the total balance. This is the new balance and shows the impact on the balance account.
You will also see the sum of all period’s amounts from product balance. This balance shows the impact on the cost account.
Users will also get a warning if the sum of the total balance deviates from the total product balance. This probably indicate that you must import product balance again, because there has been changes since the last import. The second warning you will get is that the product balance deviates from the total GL account balance.
In the fixed assets folder, make sure all balance accounts have been depreciated. If a balance account has not be depreciated, the +-icon will show to the right in the GL Posting column. When depreciated you will have a link to a general ledger entry.

In RamBase there is usually one entry in the General Ledger (ATR) per transaction type per day. New or altered documents are accumulated on the same ATR.
For example, all Sales Invoices (CIN) registered on the same date will be entered in the general ledger as one entry (one ATR document). The CIN will be registered in both the customer ledger (CAT document) and as a post in the customer account specification (CAS document). The entry in the general ledger (ATR document) consists of all CAS documents registered on that specific date. The CAS documents holds the details about all CINs registered on that specific date and forms the basis for the general ledger entry.
The general ledger reconciliation verifies that all three types of documents are created, and that the quantity and amount are equal on all of them.
If there is any deviation, it means that there are errors that make your accounting not updated properly.
To open the Period Account Register (PAR) application, find Finance in the RamBase menu and then General ledger. Click Accounting periods to enter the PAR application.
Highlight the relevant period and press ENTER.
Select the ATR Reconc folder.

This folder lists all entries in the general ledger with corresponding entries in the subledgers in the period to be closed.
Press F12 to open the action menu and choose the option Start job: Load General Ledger (ATR) for Period.
All lines should be marked with status 4.
If not, either click on the ATR/xxxxxx link to the right on the specific item line to get more information about the entries. Or highlight the line and press enter. You are redirected to Finance Reconciliation (FIR) where you get more information about the entries. Make corrections.
When all lines, for all options in the dropdown, are marked with status 4, press F12 to open the action menu and choose the Approve ATR Reconciliation option.
Optionally, write a comment.
Click the OK button.
Note the Reconc St icon in the Extended data section to the upper right of the screen. The Status 4 icon indicates that there are no deviations in the ATR reconciliation folder.
Reconciliation of intercompany transactions only apply for companies in a corporate group.
This reconciliation validates that an entry in one company equals an entry in another company when it comes to intercompany transactions. The reconciliation is updated in real-time, and it is approved during the period closure. Note that the reconciliation must be approved even though there are no intercompany transactions.
To open the Period Account Register (PAR) application, find Finance in the RamBase menu and then General ledger. Click Accounting periods to enter the PAR application.
Highlight the relevant period and press ENTER.
Select the ICT Reconc folder.

This folder lists all intercompany transactions made in the period to be closed. If there is a deviation between entries within the group, this will show in the Deviation column.
Make sure that the transaction is entered in both companies' books. If you do not have access to the relevant company, contact their accounting responsible.
When all deviations are reconciled, press F12 to open the action menu and choose the option Approve ICT Reconciliation.
Optionally, make a comment.
Click the OK button.
As a part of the preparation for period closure, a bank reconciliation must be performed either automated via BST. A bank reconciliation performed prior to period closure matches the bank transactions with the Payment (PAY) documents recorded in the cash management module in RamBase. A bank reconciliation performed during the period closure (Bank Reconc folder in PAR) validates that all PAYs are registered in the general ledger.
It is important that the bank reconciliation from BST are performed prior to period closure in PAR to avoid major deviations.
To open the Period Account Register (PAR) application, find Finance in the RamBase menu and then General ledger. Click Accounting periods to enter the PAR application.
Highlight the relevant period and press ENTER.
Select the BANK Reconc folder.

This folder lists the recorded balances for the bank accounts in the General Ledger, the balances for PAYs reconciled with the bank statements. These two balances should match for each account, if not, the deviation will be displayed in the Deviation,YearToDate column to the very right of the table.
If there is a value in the Deviation,YearToDate column, it must be reconciled.
Highlight the line for the account with deviation and press ENTER to see more details about the deviation.
Identify the problem and correct it.
When all deviations are reconciled, press F12 to open the action menu and choose the option Approve Bank Reconciliation.
Optionally, make a comment.
Click the OK button.
The VAT reconciliation validates that the VAT calculated from goods and services purchased and sold is identical to the VAT amount entered to the general ledger. Deviations are found when a calculated VAT amount (sales * VAT%) differs from the amount posted on the VAT accounts.
Manual entries made directly to the general ledger account linked to a VAT code will generate a deviation.
To open the Period Account Register (PAR) application, find Finance in the RamBase menu and then General ledger. Click Accounting periods to enter the PAR application.
Highlight the relevant period and press ENTER.
Select the VAT Reconc folder.

If there is any value in the Deviation column, highlight the line and press ENTER to view more details about the deviation.
It there is no deviation, press F12 to open the action menu and choose the Approve VAT Reconciliation option.
Optionally, make a comment.
Click the OK button.
A company is obligated to do a VAT settlement and report their VAT balance to the authorities.
A company must pay outbound VAT. The outbound VAT amount can be seen upon as a tax collected on behalf of the authorities. Inbound VAT is deducted from the outbound VAT amount. The inbound VAT can be seen upon as a tax the company has to pay, but this amount is reckoned as collected on behalf of the authorities by one of the suppliers.
To open the Period Account Register (PAR) application, find Finance in the RamBase menu and then General ledger. Click Accounting periods to enter the PAR application.
Highlight the relevant period and press ENTER.
Select the Vat Spec folder.

In accordance with national Accounting Acts, a VAT period consists of one or more accounting periods. At the end of every VAT period, you must calculate the VAT settlement. The VAT settlement shows the liability or the claim between the company and the authorities.
To calculate the VAT settlement, click the + icon to the mid right. The system transfers the balances from the respective VAT accounts to the VAT settlement account.
Verify that the new balances on the VAT accounts are zero and that the balance on the VAT settlement account is equal to the amount at the bottom of the VatAmt column.
The agio calculation computes the impact of currency changes on the different balances. The agio calculation is put almost at the end of the period closure procedure. The reason for this is to include possible adjustments done through the previous reconciliations. After the agio has been calculated no changes are allowed.
Agio calculation in PAR will create 3 ATR documents:
CUSBAL - Agio on Account Receivable (AR)
SUPBAL - Agio on Account Payables (AP)
ACCBAL - Agio on all other GL accounts (Not AR & AP)
General ledger postings (ATR) documents for CUSBAL and SUPBAL will be calculated based on customer and supplier balances in foreign currencies. Each ATR item will have a reference to a Customer / Supplier Account and currency. The amount will be calculated based on:
For all transactions (CAT & SAT) that are open by the end of current period but registered in earlier periods. Agio will be calculated based on change in exchange rate from last period to current period (Rate at the last day of the period), as these transactions already have had agio calculated last period.
For all transactions (CAT & SAT) that are open by the end of current period and registered in current period. Agio will be calculated based on change in exchange rate from the transaction document to current period (Rate at the last day of the period).
ATR document with transaction type ACCBAL will handle all other GL accounts (Not AR & AP) and agio will be calculated this way:
For all transactions (ATR items) that are registered in earlier periods. Agio will be calculated based on change in exchange rate from last period to current period (Rate at the last day of the period), as these transactions already have had agio calculated last period.
For all transactions (ATR items) that are registered in current period. Agio will be calculated based on change in exchange rate from ATR item that are registered to current period (Rate at the last day of the period).
To open the Period Account Register (PAR) application, find Finance in the RamBase menu and then General ledger. Click Accounting periods to enter the PAR application.
Highlight the relevant period and press ENTER.
Select the Agio folder.

Press F12 to open the action menu and choose the option Create Agio. The system calculates the agio to the respective balance sheet accounts, and Agio Status in the Extended data section changes to 4. Ledger entries are generated, one for each transaction type.
Entries in the subledgers (accounts receivable and accounts payable) give a detailed view of claims against customers and debts against suppliers. Invoices, credit notes, reminders, interest invoices and payment documents are posted against the subledgers. As the actual accounts are held in the general ledger, similar posting must be drawn against the subledger as well. The BAL Reconc folder verifies that these postings are even.
To open the Period Account Register (PAR) application, find Finance in the RamBase menu and then General ledger. Click Accounting periods to enter the PAR application.
Make sure that the agio has been calculated prior to this reconciliation.
Highlight the relevant period and press ENTER.
Select the BAL Reconc folder.

Pay attention to the View field situated on the top left of the table in this folder. The information displayed in the table depends on the view selected. Make sure to inspect all views. It is normal that there are minor deviations. You may inspect the balances in foreign or local currency.
View:
CUS by CUR: Reconciles the currency recorded in the general ledger and the currency recorded in the accounts receivable ledger.
To inspect the underlying data; Click on the links in the CAT Balance, Local Cur and ATR Balance, Local Cur columns.
SUP by CUR: Reconciles the currency recorded in the general ledger and the currency recorded in the accounts payable ledger.
To inspect the underlying data; Click on the links in the SAT Balance, Local Cur and ATR Balance, Local Cur columns.
View:
CUS by ICTDB: Reconciles the intercompany balances in the general ledger and the balance in the accounts receivables ledger.
To inspect the underlying data, click the Bal,CAT and ATR Balance links.
SUP by ICTDB: Reconciles the intercompany balances in the general ledger and the balance in the accounts payables ledger.
To inspect the underlying data; Click on the link in the Bal.SAT and ATR Balance links.
When all deviations are reconciled, press F12 to open the action menu and choose the Approve Balance Reconciliation option.
Optionally, make a comment.
Click the OK button.
The PAR will be put to status 8, which means that the agio is calculated and all reconciliations are conducted. It is now recommended to inspect the reconciliations. Note that only authorized accounting personnel have access to make any changes to a period in Status 8.
When all the various balance accounts have been reconciled and have got their new opening balances, it is recommended to inspect the reconciliations to make sure that everything is correct.
See separate topics for deviation handling.
Make sure that:
The balance of the inventory balance report is equal to the inventory GL account(s).
The balance of the account(s) is 0 (zero).
During period closure, the account(s) connected to inventory is automatically reversed in the correct period which means that the balance of the account(s) shall be 0 (zero).
Write INVBAL and the current period in the program field (INVBAL/YYYYMM) and press ENTER. Or enter INVBAL included with period filter directly from PAR by pressing the amount in the Balance column for transaction named INVENT in the Inventory Balances folder.
Note the amount on the bottom of the Inventory Balance column. This amount is to be compared with the balance of the inventory account(s) in the general ledger. For manufacturing companies, the amount in the Picked to Production column is included in the Work in Progress.
Note that it is possible to set up separate GL accounts for Finished Products and Material instead of having all inventory imported to one GL account. You could then change the value in the Group by filed to CLASS in INVBAL.
Please also note that it is possible to set a inventory GL account on each ART as well. That is done by choosing the menu option “Finance account settings” on ART. There you click on the create new icon for “Inventory balance account” and enter the account.
Write ACC/XXXX (XXXX being the Inventory GL account) in the program field and press ENTER or enter the GL account(s) directly from PAR by clicking on the link in the GL Account column in the Inventory Balances folder.
Highlight the item line presenting the correct period.
Note the amount in the Total, YTD column on this item line
Compare this amount(s) to the amount(s) from the value of stock report (INVBAL).
If any deviation, see several possible scenarios under the topic: Deviation between the value of the inventory subledger and the GL inventory balances.
Make sure that:
The balance of the value of WIP report is equal to the WIP account(s) in the general ledger.
The balance of the appropriation account(s) is 0 (zero).
During period closure, the account(s) connected to WIP is automatically reversed in the correct period which means that the balance of the appropriation account(s) shall be 0 (zero).
Write PWBAL and the current period in the program field (PWBAL/YYYYMM) and press ENTER. Or enter PWBAL included with period filter directly from PAR by pressing the amount in the Balance column for transaction named INVPRO in the Inventory Balances folder.
Note the amount of the last day in the Accrued Total Cost column. This amount is to be compared with the balance of the WIP account(s) in the general ledger.
Note that it is possible to set up separate GL accounts for Material, Operations and Extra Cost instead of having all work in progress imported to one GL account. You could then reconcile by comparing the amounts in the columns Accrued Mat.Cost, Accrued Opr.Cost and Accrued Extra Cost in PWBAL.
Write ACC/XXXX (XXXX being the Work in progress GL account) in the program field and press ENTER or enter the GL account(s) directly from PAR by clicking on the link in the GL Account column in the Inventory Balances folder.
Highlight the item line presenting the correct period.
Note the amount in the Total, YTD column on this item line.
Compare this amount(s) to the amount(s) from the value of stock report (PWBAL).
If any deviation, see several possible scenarios under the topic: Deviation between the value of the inventory subledger and the GL inventory balances.
Make sure that:
The total product balance is equal to the balance on the appropriation GL account(s) for product.
The balance of the appropriation account(s) is 0 (zero).
During period closure, the account(s) connected to provision for liabilities is automatically reversed in the correct period which means that the balance of the appropriation account(s) shall be 0 (zero).
Write PROBAL and the current period in the program field (PROBAL/YYYYMM) and press ENTER. Or enter PROBAL included with period filter directly from PAR by pressing the total amount in the Change column in the Product Balances folder.
In the Group by field, select the DOCTYPE option.
Note the amount on the bottom in the Balance, Total column. This amount is to be compared to the amount of the appropriation account(s) for product for the same period.
Write ACC/XXXX (XXXX being the provision for liabilities GL account) in the program field and press ENTER or enter the GL account(s) directly from PAR by clicking on the link in the GL Account column in the Product Balances folder.
Highlight the item line presenting the correct period.
Note the amount in the Total, YTD column on this item line.
Compare this amount to the amount from the PROBAL application.
If any deviation, see the topic: Deviation between the product balance report and the GL product balances.
Make sure that:
The balance of the fixed assets report is equal to sum of all fixed asset GL accounts.
Write FAR in the program field and press ENTER.
Press F12 to open the action menu and choose the option Report: Fixed Assets. Reconcile to ATR, Detailed (REP/101155;YYYYMM).
Possible reason for deviation is manual posting directly against GL asset accounts.
Write BANK in the program field and press ENTER. Or enter each BANK from PAR by pressing the link in the bank column in the BANK Reconc folder.
Do the following steps for each of the bank overviews.
Note the amount in the Balance column on the item line for the current period.
The amount in the GL postings, YearToDate column in the PAR application for the current period should be equal to the amount in the Balance column in the BANK application.
Compare this amount with the balance from the bank statement (BST).
Make sure to repeat this procedure for all bank overviews / GL bank accounts.
There may be some deviations even though the bank reconciliation has been done, because reconciliation does not pay attention to any manual entries in the GL. If any deviation, see several possible scenarios under the topic: Deviation between the cash management module and the GL.
Note that the Agio reconciliation must be complete prior to this control.
Make sure that:
The balance of the customers' ledger is equal to the accounts receivable in the general ledger.
Write CUSBAL and the current period in the program field (CUSBAL/YYYYMM) and press ENTER. Or enter CUSBAL included with period filter directly from PAR by pressing the total amount in the column CAT Balance, Local Cur in the BAL Recon folder.
If many lines in the CUSBAL application, you could select the CUR option in the Group by field.
Make sure that the value in the Date/Period field reflects the correct period.
Note the amount on the bottom in the Balance, NOK column. This amount is to be compared to the amount on the accounts receivables for the same period.
Write ACC/XXXX (XXXX being the A/R GL account) in the program field and press ENTER or enter the account receivables GL account directly from the PAR application by clicking on the link in the GL Account column in the BAL Recon folder.
Enter the Balance tab to see the balances for the GL account.
Note the amount in the Total YTD column for the given accounting period.
Compare this amount to the amount from the CUSBAL application.
If any deviation, see the topic: Deviation between the GL and the subledgers.
Note that the Agio reconciliation must be complete prior to this control.
Make sure that:
The balance of the suppliers' ledger is equal to the accounts payable in the general ledger.
Write SUPBAL and the current period in the program field (SUPBAL/YYYYMM) and press ENTER. Or enter SUPBAL included with period filter directly from PAR by pressing the total amount in the column SAT Balance, Local Cur in the BAL Recon folder.
If many lines in the SUPBAL application, you could select the CUR option in the Group by field.
Make sure that the value in the Date/Period field reflects the correct period.
Note the amount on the bottom in the Balance, NOK column. This amount is to be compared to the amount on the accounts payable for the same period.
Write ACC/XXXX (XXXX being the A/P GL account) in the program field and press ENTER or enter the account payables GL account directly from PAR by clicking on the link in the GL Account column in the BAL Recon folder.
Enter the Balance tab to see the balances for the GL account.
Note the amount in the Total, YTD column for the given accounting period.
Compare this amount to the amount from the SUPBAL application.
If any deviation, see the topic: Deviation between the GL and the subledgers.
Make sure that:
The gross margin (GM) in the customer billing report is equal to the result calculated in the general ledger.
Reconciliation of the GM is recommended for companies involved in selling of goods.
Write CUSBILL in the program field and press ENTER.
Write PERIOD:YYYYMM in the filter field and press ENTER.
Make sure to use Date as the value in the Group By field on the upper right side of the window.
Click on the link in the Billing, Year column on the item line with the most recent date, or the last date for the specific period.
Note the amount on the bottom of the Landedcost column. This is to be compared to the balance of costs of goods sold in the financial report.
Note the amount on the bottom of the Amount/nok column. This is to be compared to the balance of income in the financial report.
Write FRP in the program field and press ENTER to open the financial reports. Enter the Profit & Loss report.
Compare the cost of goods sold (COGS) to the amount on the bottom of the Landedcost column in CUSBILL.
Compare the sales income to the amount on the bottom of the Amount/nok column in CUSBILL.
The customer billing report (CUSBILL) shows the total sale and cost of goods sold, based on invoices/credit notes and related shipping advice.
It is normal that there are minor deviations due to agio. Any manual entries to COGS-accounts in the GL will also generate deviations between the billing report and the GL.
If any deviation, see several possible scenarios under the topic: Deviation between gross margin calculations.
ATRLIST
REP/100436 Entries per GL account per period - accumulated.
REP/100433 Entries per GL account per period - not accumulated.
REP/100128 Supplier invoices (SIN) / Supplier credit notes (SCN).
REP/100392 Supplier Account Transactions.
REP/100105 Sales invoices (CIN) and sales credit notes (CCN).
REP/100393 Customer Account Transactions.
Write FRP in the program field and press ENTER.
Highlight the preferred report and press ENTER to open it.
Write FINANCE in the program field and press ENTER to open the Finance workspace.
In the lower left corner of the workspace, click on the link Show all reports.
To filter the finance reports, select the preferred category from the dropdown menu in the empty field in the upper left corner of the window.
Highlight the preferred report and press ENTER to open it.
Note that the Agio reconciliation must be complete prior to this control!
Make sure that:
The balance of the customers' ledger is equal to the accounts receivable in the general ledger.
Write CUSBAL and the current period in the program field (CUSBAL/YYYYMM) and press ENTER. Or enter CUSBAL included with period filter directly from PAR by pressing the total amount in the column CAT Balance, Local Cur in the BAL Recon folder.

If many lines in the CUSBAL application, you could select the CUR option in the Group by field.
Make sure that the value in the Date/Period field reflects the correct period.
Note the amount on the bottom in the Balance,NOK column. This amount is to be compared to the amount on the accounts receivables for the same period.
Write ACC/1xxx in the program field and press ENTER. or enter the account receivables GL account directly from the PAR application by clicking on the link in the GL Account column in the BAL Recon folder.

Highlight the item line presenting the relevant period.
Note the amount in the Total YTD column on this item line.
Compare this amount to the amount from the CUSBAL application.
If any deviation, see the topic: Deviation between the GL and the subledgers
Note that the Agio reconciliation has to be complete prior to this control!
Make sure that:
The balance of the suppliers' ledger is equal to the accounts payable in the general ledger.
Write SUPBAL and the current period in the program field (SUPBAL/YYYYMM) and press ENTER. Or enter SUPBAL included with period filter directly from PAR by pressing the total amount in the column SAT Balance, Local Cur in the BAL Recon folder.

If many lines in the SUPBAL application, you could select the CUR option in the Group by field.
Make sure that the value in the Date/Period field reflects the correct period.
Note the amount on the bottom in the Balance, NOK column. This amount is to be compared to the amount on the accounts payable for the same period.
Write ACC/2XXX in the program field and press ENTER or enter the account payables GL account directly from PAR by clicking on the link in the GL Account column in the BAL Recon folder.

Highlight the item line presenting the relevant period.
Note the amount in the Total, YTD column on this item line.
Compare this amount to the amount from the SUPBAL application.
If any deviation, see the topic: Deviation between the GL and the subledgers
Make sure that:
The balance of the value of stock report is equal to the inventory account(s) in the general ledger.
The balance of the appropriation account(s) is 0 (zero).
During period closure, the account(s) connected to inventory is automatically reversed in the correct period which means that the balance of the appropriation account(s) shall be 0 (zero).
NetAmount is used in the Inventory balances (INVBAL) application.
Write INVBAL and the current period in the program field (INVBAL/YYYYMM) and press ENTER. Or enter INVBAL included with period filter directly from PAR by pressing the amount in the Balance column for transaction named INVENT in the Inventory Balances folder.

Verify that the Rate field value (current/historic) is correct according to your system setup.
Note the amount on the bottom of the Inventory Balance column. This amount is to be compared with the balance of the inventory account in the general ledger. For manufacturing companies, the amount in the Picked to Production column is included in the Work in Progress.
Note that it is possible to set up separate GL accounts for Finished Products and Material instead of having all inventory imported to one GL account. You could then change the value in the Group by filed to CLASS in INVBAL.

Write ACC/1xxx in the program field and press ENTER or enter the GL account(s) directly from PAR by clicking on the link in the GL Account column in the Inventory Balances folder.

Highlight the item line presenting the correct period.
Note the amount in the Total, YTD column on this item line.
Compare this amount(s) to the amount(s) from the value of stock report (INVBAL).
If any deviation, see several possible scenarios under the topic: Deviation between the value of the inventory subledger and the GL inventory balances.
Make sure that:
The balance of the value of WIP report is equal to the WIP account(s) in the general ledger.
The balance of the appropriation account(s) is 0 (zero).
During period closure, the account(s) connected to WIP is automatically reversed in the correct period which means that the balance of the appropriation account(s) shall be 0 (zero).
Write PWBAL and the current period in the program field (PWBAL/YYYYMM) and press ENTER. Or enter PWBAL included with period filter directly from PAR by pressing the amount in the Balance column for transaction named INVPRO in the Inventory Balances folder.

Note the amount of the last day in the Accrued Total Cost column. This amount is to be compared with the balance of the WIP account(s) in the general ledger.
Note that it is possible to set up separate GL accounts for Material, Operations and Extra Cost instead of having all work in progress imported to one GL account. You could then reconcile by comparing the amounts in the columns Accrued Mat.Cost, Accrued Opr.Cost and Accrued Extra Cost in PWBAL.
Write ACC/1xxx in the program field and press ENTER or enter the GL account(s) directly from PAR by clicking on the link in the GL Account column in the Inventory Balances folder.

Highlight the item line presenting the correct period.
Note the amount in the Total, YTD column on this item line.
Compare this amount(s) to the amount(s) from the value of stock report (PWBAL).
If any deviation, see several possible scenarios under the topic: Deviation between the value of the inventory subledger and the GL inventory balances.
Make sure that:
The total product balance is equal to the balance on the appropriation GL account(s) for product.
The balance of the appropriation account(s) is 0 (zero).
During period closure, the account(s) connected to provision for liabilities is automatically reversed in the correct period which means that the balance of the appropriation account(s) shall be 0 (zero).
Write PROBAL and the current period in the program field (PROBAL/YYYYMM) and press ENTER. Or enter PROBAL included with period filter directly from PAR by pressing the total amount in the Change column in the Product Balances folder.

In the Group by field, select the DOCTYPE option.
Verify that the Rate field value (current/historic) is correct according to your system setup.
Note the amount on the bottom in the Balance, Total column. This amount is to be compared to the amount of the appropriation account(s) for product for the same period.
Write ACC/2XXX (ACC/1XXX) in the program field and press ENTER or enter the GL account(s) directly from PAR by clicking on the link in the GL Account column in the Product Balances folder.

Highlight the item line presenting the correct period.
Note the amount in the Total, YTD column on this item line.
Compare this amount to the amount from the PROBAL application.
If any deviation, see the topic: Deviation between the product balance report and the GL product balances
Inspect the balance on each BANK overview
Write BANK in the program field and press ENTER. Or enter each BANK from PAR by pressing the link in the bank column in the BANK Reconc folder.

Do the following steps for each of the bank overviews.
Highlight the item line and press ENTER to open the Bank Account Info window.
Note the amount in the Balance, NOK column on the item line for the current period.
Click on the magnifier icon in the Miscellaneous section to inspect the GL account info.
The amount in the Total, YTD column for the current period should be equal to the amount in the Balance, NOK column in the BANK application.
Compare this amount to the balance from the bank statement and the BANK Reconc folder in PAR.
Make sure to repeat this procedure for all bank overviews / GL bank accounts.
There may be some deviations even though the bank reconciliation has been done in PAR, because that reconciliation does not pay attention to any manual entries in the GL.
If any deviation, see several possible scenarios under the topic: Deviation between the cash management module and the GL.
Make sure that:
The balance of the fixed assets report is equal to sum of all fixed asset GL accounts.
Write FAR in the program field and press ENTER.
Press F12 to open the action menu and choose the option Report: Fixed Assets. Reconcile to ATR, Detailed (REP/101155;YYYYMM.

Possible reason for deviation is manual posting directly against GL asset accounts.
Make sure that:
The gross margin (GM) in the customer billing report is equal to the result calculated in the general ledger.
Reconciliation of the GM is recommended for companies involved in selling of goods.
Write CUSBILL in the program field and press ENTER.
Write PERIOD:YYYYMM in the filter field and press ENTER.

Make sure to use Date as the value in the Group By field on the upper right side of the window.
Click on the link in the Billing, Year column on the item line with the most recent date, or the last date for the specific period.

Note the amount on the bottom of the Landedcost column. This is to be compared to the balance of costs of goods sold in the financial report.
Note the amount on the bottom of the Amount/nok column. This is to be compared to the balance of income in the financial report.
Automated period adjustments (ASA) will not show in CUSBILL, this may be a reason for deviations.
Write FRP in the program field and press ENTER to open the financial reports. Enter the Profit & Loss report.
Compare the cost of goods sold (COGS) to the amount on the bottom of the Landedcost column in CUSBILL.
Compare the sales income to the amount on the bottom of the Amount/nok column in CUSBILL.
The customer billing report (CUSBILL) shows the total sale and cost of goods sold, based on invoices/credit notes and related shipping advice.
It is normal that there are minor deviations due to agio. Any manual entries to COGS-accounts in the GL will also generate deviations between the billing report and the GL.
If any deviation, see several possible scenarios under the topic: Deviation between gross margin calculations.
ATRLIST
REP/100436 Entries per GL account per period - accumulated.
REP/100433 Entries per GL account per period - not accumulated.
REP/100128 Supplier invoices (SIN) / Supplier credit notes (SCN).
REP/100392 Supplier Account Transactions.
REP/100105 Sales invoices (CIN) and sales credit notes (CCN).
REP/100393 Customer Account Transactions.
Write FRP in the program field and press ENTER.
Highlight the preferred report and press ENTER to open it.
Write FINANCE in the program field and press ENTER to open the Finance workspace.
In the lower left corner of the workspace, click on the link Show all reports.
To filter the finance reports, select the preferred category from the dropdown menu in the empty field in the upper left corner of the window.
Highlight the preferred report and press ENTER to open it.
During period closure there have been many reconciliations and inspections. Some deviations may be detected and there are many possible reasons for these deviations. Some of the most frequent scenarios are described in separate topics.
The Agio calculation has not been done prior to the reconciliation.
The GL account is not updated prior to reconciliation. Control that all invoices/credit notes and Payments are loaded to the general ledger. The application FIR can be used for this purpose by clicking the radio button attention.

Using date instead of period in the Balance by field when calling the report.
Using incorrect value in the Rate field (periodic/transaction).
Transactions posted manually against the accounts receivable in the general ledger.
Check this by writing ATRLIST/1xxx in the program field to list the GL entries for this specific account.
To filter the list to a specific period and to manual postings, write this command in the filter field: PERIOD="YYYYMM",TRANS="*MAN*"
Transactions posted manually against the accounts payable in the general ledger.
Check this by writing ATRLIST/2xxx in the program field to list the GL entries for this specific account.
To filter the list to a specific period and to manual postings, write this command in the filter field: PERIOD="YYYYMM",TRANS="*MAN*"
Using date instead of period in the Balance by field when calling the report.
Using incorrect value in the Rate field (current/historic).
The inventory balance has not been transferred in the Period account register (PAR).
Transactions posted manually against the inventory accounts in the general ledger.
Check this by writing ATRLIST/1xxx in the program field to list the GL entries for this specific account.
To filter the list to a specific period and to manual postings, write this command in the filter field: PERIOD="YYYYMM",TRANS="*MAN*"
Minor deviations may be caused by agio.
Before looking into deviations between PROBAL and GL account, press F12 and click on PAR_product balance: Import Product balance to General ledger. The deviation can disappear after the import action.
Cause: New transactions have occurred for this particular period since the previous time this action has been run. If the deviation is still there after the import, further investigation is required.
Using date in stead of period in the Date/period field when calling the report.
Using incorrect value in the Rate field (current/historic).
The product balance has not been transferred in the Period account register (PAR).
Transactions posted manually against the product accounts in the general ledger.
Check this by writing ATRLIST/2xxx in the program field to list the GL entries for this specific account.
To filter the list to a specific period and to manual postings, write this command in the filter field: PERIOD="YYYYMM",TRANS="*MAN*"
Minor deviations may be caused by agio.
The Bank reconciliation has not been done; this must be done prior to closing the period (PAR Status 6)
A PAY document in the period that has not been reconciled, which means that it is still in Status 4. Pay documents in Status 4 have been posted against the general ledger, but not reconciled.
Check this by writing PAY in the program field and press ENTER to list all payment documents.
To filter the list to a specific status and period, write this command in the filter field: ST=4,PERIOD="YYYYMM".
Loading PAY to the general ledger has been interrupted. See the topic: Deviation in general ledger entries.
A PAY document is reconciled, but in an incorrect period. Check this by writing PAY in the program field and press ENTER to list all payment documents.
To filter the list to a specific status, period and omit the bank reconciliation for the current period, write this command in the filter field: ST=9, PERIOD=YYYYMM,BANKREF<>"YYYYMM*".
The opening balance for the specific bank account has not been entered or is incorrect.
Check this by writing BANK and the number for the specific bank (for example BANK/101).
Click the magnifier icon in the Key figures section.
Make sure that the opening balance is correct for the current year.
It is normal to have some minor deviations due to agio, but other deviations should be reconciled.
Start by comparing the sales amount per ledger account in the customer billing report (CUSBILL) and the amount on each GL sales account.
Not all sales accounts are included in the sales report. Inspect the postings against these accounts to make sure that they are correct.
When deviation in the sales amount/-accounts are reconciled, inspect the cost of goods sold (COGS).
Manual stock corrections.
Write REP/100172 in the program field.
Write PERIOD:YYYYMM in the filter field.
Press ENTER. In this report you can see if there has been any Stock value adjustments or Stock quantity adjustments for the given period. When pressing enter on row for more details, you will be redirected to REP/100171. For even more details press enter on row and you are redirected to REP/100104.
This report lists documents where manual stock corrections have been made. The Amount column shows the impact these corrections have on the stock value.
In cases where goods have been registered into stock with another price than the price on the invoice, normally the Goods Reception (SSA) price will be corrected when the SSA is transferred to an invoice (SIN). The correction will show in the Supgniamount column. If the amount in the Amount column and the Supgniamount column for this item line are equal, it will not generate a deviation in the report. All posting of the type STOCKQTYADJ and STOCKVALADJ will generate a deviation.
Invoices (SIN) without any connection to a stock transaction document posted against COGS accounts.
Write SINITEM in the program field.
Write LegacyFilter('SOURCE<>"*SSA*",ACCNO="4*"') in the filter field to list invoices not connected to a shipping advice posted on GL accounts starting with 4.
Press ENTER.
Credit notes (SCN) without any connection to a stock transaction document posted against COGS-accounts.
Write ITM/SCN in the program field.
Write SOURCE<>"*SCC*",SOURCE<>"*SRT*",ACCNO="4*" in the filter field to list credit notes not connected to a shipping advice posted on GL accounts starting with 4.
Press ENTER.
Supplier invoices that have been credited, where the invoice (SIN) and the credit note (SCN) are posted in separate periods.
Manual GL entries not in the default flow of goods.
Write ATRLIST/4* in the program field.
Write TYPE="MAN*" in the filter field to list manual GL entries not connected to normal flow of goods posted on GL accounts.
Press ENTER.
CUSBILL will only include documents like sales invoices (CIN) and sales credit notes (CCN). Any other documents (for example SIN and PAY) posted against any of the GL sales account will generate a deviation between CUSBILL and the financial report. To inspect possible other documents posted on sales ledger accounts:
Write CASLIST in the program field.
Write ACCCODE="3*",PERIOD:YYYYMM,DOC<>"C*" in the filter field.
Goods transferred from one location to another, where the goods are not confirmed as received at the new location.
Manually closed liabilities on the product balance where you have made changes to the provision for liabilities/claims without making equivalent changes in the GL.
Write PROBAL/YYYYMM in the program field.
Write CLOSEDOC="MAN*" in the filter field to list manually closed liabilities on the product balance.
Press ENTER.
Shipping advices (CSA) that are not transferred to a sales invoice (CIN). It is the CSA that reduces the value of stock. If the period is closed without the CSA being transferred to a CIN, only the cost of goods sold will registered, not the income.
Sales invoices that have been credited, where the sales invoice (CIN) and the sales credit note (CCN) are posted in separate periods.
Documents posted against the GL in a specific period after the period has been closed (PAR Status 6).
Project number missing on entries for accounts where project is required. The document’s posting needs to be updated with value in the project dimension.
Department missing on entries for accounts where department is required. The document’s posting needs to be updated with value in the department dimension.
Use of accounts, projects, departments, and other dimensions that are no longer valid.
Write ATR in the program field.
Write ST<4,PERIOD:YYYYMM in the filter field to list GL entries in need of correction and press ENTER.
On each item line, highlight it and press ENTER, and read the error message in the Msg field.
Make corrections.
When all deviations are reconciled, go back to the Period account register (PAR) and enter on the line for this closing period (PAR Status 6, possibly Status 8).
Select the ATR Reconc folder.
Press F12 to open the action menu and choose the option Start job: Finance Reconciliation.
The transaction is not booked in both companies' GL.
The transaction is booked in different periods.
Some of the supplier invoices and sales invoices are still in Status 1 in one of the companies.
Some of the credit notes and payment documents are still in Status 1 in one of the companies.
Compare the postings accounts payable for one company vs. accounts receivable in the other company. If you do not have access to the other company's GL, contact their accounting responsible to reconcile the deviations.
Manual entries posted directly to a VAT account will generate a deviation in the VAT rec folder in PAR.
Highlight the item line with deviation and press ENTER.
Click on the numbers in the Direct VAT posting, Doc column.
Inspect the information and verify that the direct posting is correct.
Any deviation here indicates that the VAT report does not mirror what have been registered into the VAT accounts in the general ledger.
Note that the VAT report is based on amounts in the vat posting (VAP) documents. The VAT settlement is based on amount on the GL VAT accounts. To reconcile VAP against the general ledger, you can use REP/102356;YYYYMM where this filter refers to the VATperiod (not the accounting period).
Previous VAT-period not reconciled. Compare the total amount on the VAT spec folder (PAR) to the balance of the VAT closing account. The deviation is most likely equal to the previous VAT period's VAT return.
No VAP posting have been triggered for a GL entry (ATR) with postings against a GL VAT account.
Make sure that the amounts per period on the VAT specification report are equal to the amounts in the VAT reconc folder.
If there are deviations between these amounts, search for manual entries in the respective GL account and reconcile VAP against general ledger in REP/102356. One can for example compare REP/102356 with ATRLIST;VATCODE:XX,PERIOD:YYYYMM in order to compare amounts in VAP with amounts in ATR.
Make sure that all reconciliations and inspections are completed prior to confirming the period closure. Note that only authorized accounting personnel have access to make any changes to a period in Status 8.
To open the Period account register (PAR) application, find Finance in the RamBase menu and then General ledger. Click Accounting periods to enter the PAR application. The current accounting period will now be listed with Status 8.

Highlight the period and press ENTER.
When you have completed the period closure procedure, press F12 to open the action menu and choose the option Close period in PAR (St=9).
It cannot be done any changes to this period anymore.
Note! Before importing the ingoing balances, make sure that the annual result has been posted in period YYYY14.
To open the Period Account Register (PAR) application, find Finance in the RamBase menu and then General ledger. Click Accounting periods to enter the PAR application.
Open the period YYYY00 in PAR.
Click on the folder IB 20xx.
Click on the + icons to import the balances.
Make sure that the total amount summed in the lower right corner is zero (0). If it is not, a possible reason can be that the annual result has not been posted before importing the IB.
Inspect the import:
Highlight the relevant import.
Press F12 to open the action menu and choose the option Report: Ingoing Bal. vs Outgoing.
Identify and handle possible deviations.
Close period 00 in accordance with the standard procedure for period closure.
To open the Period Account Register (PAR) application, find Finance in the RamBase menu and then General ledger. Click Accounting periods to enter the PAR application.
Open the period YYYY00 in PAR.
Click on the folder IB 20xx.
Highlight one of the lines presenting the imported the balances.
Press F12 to open the action menu and choose the option Reverse Ingoing Balance.
To update the General ledger with new IB, follow the procedure for importing the ingoing balances.
To open the General ledger postings (ATR) application, find Finance in the RamBase menu and then General ledger. Click General ledger postings to enter the General ledger postings (ATR) application.
Click the Create new general ledger posting icon in the lower left hand corner.
Fill in the following fields in the popup:
Transaction date - Select the transaction date for the posting.
Period - Select the period for the posting.
Category- Select the category for the posting.
Note- Optional, add a note.
Click the Create button to create a general ledger posting document in Status 1.
Add a posting on both the debit and credit account or only on the debit or credit account in the popup.
Click the Create new general ledger posting item icon in the lower left hand corner to open the popup.
Add Account(s), amount and dimension(s).
Check Create another option to leave the popup open.

Click the Create button when finished to create new item.
After you have added all the general ledger entries, open the menu and click on the Register General Ledger Posting option.
If you add a general ledger entry with a VAT code, then you also need to add a separate line of entry to the VAT account. The cost account must be entered with the correct VAT code and the net amount in the Amount field.
After registration, click on the Create VAT Posting from General Ledger Posting option. This is necessary in order for the VAT postings to be registered in the VAT return. This will give the ATR document a VAP document that is the basis for the VAT return.
The VAP document is visible in the upper right corner.

The reason why the VAP document is not created automatically, is that it allows you to create manual ledger entries where you can make corrections to the VAT accounts without affecting the VAT return. For example, in the case of differences between the general ledger and the VAT return.
Each ATR must have postings on both the debit and credit side.
You normally post with positive sign on both side.
For some countries it may be required to post with negative amount on the debit or credit side to keep all postings on one account on the same side. In RamBase it is possible to post negative numbers on both the debit and credit side. Please note that if you post an negative amount on the debit side, this will result in the same result as if you had done positive posting on the credit side and the other way around.
If an ATR only consists of debit postings or only of credit postings, the user will not be able to register to ATR. To be able to register to ATR, both a debit and a credit posting need to be added for the GL account set up in ACD/DEBITCREDITCLEARINGACCOUNT. The sum of the postings for ACD/DEBITCREDITCLEARINGACCOUNT will be 0.
The General ledger postings (ATR) is a complete record of all financial transactions in the company. The general ledger postings (ATR) holds information that is needed to prepare a general ledger account.
To open the General ledger postings (ATR) application, navigate to the RamBase menu and select Finance then General ledger, finally select General ledger postings.


The receivables are the company’s unrealized claim to the customers or the debtors. The receivables are accrued when goods or services are delivered, and a sales invoice has been issued. The receivables are connected to the General Ledger via a sub ledger called Accounts receivable. Accounts receivable gives an overview of all transactions between your own company and each customer and is used for keeping track of the settlement of open and closed posts in the General Ledger.
An updated overview of what the customers owe you.
An age distributed overview of the receivables.
Actions for settlement of the claims.
Sales invoicing - There are many ways to create an invoice, and it can be based on goods, costs, rental, contracts and subscription. Great tools will handle both yours and the customers’ preferences related to the transaction documents. Invoice consolidation and cash payments are other processes that are well cared for in the system.
Payments in advance and Advance Invoice Plans - Payment in advance is a common pay term for large orders because of the time span between ordering and delivery. It is also possible to create Advance Invoice Plans for milestone invoicing.
Follow up the receivables ledger - Follow up the receivables ledger is one of the most important finance processes. To get an overview of the customer's open posts and the customer cash flow help you to see if there is a need for resending invoices, sending a statement of account, sending dunning letters, or calculate interests. The information will help you decide if the customer should be allowed to place new orders before old orders are paid. It can be advisable to set a credit limit for a customer to decrease the risk of loss if the customer does not pay.
Credit handling - Sometimes you must credit a sales invoice. This can be because of damaged goods, disagreements about the price or terms of delivery.
Setting name | Description |
Amount limit on document for creating interest invoice | Limit to tell when interest invocies should be produced from 1 invoice. No interest invoice is produced from 1 invoice if the interest amount is less then the value in this parameter. In addition no interests is produced if the total interest amount is less than the value in the parameter CusInterestInvoiceAmountLimit |
Attach files when sending documents by email | Decide if emails sent from sales invoice documents should attach the attached files or not. If value is "ON" - Only selected attachment will be sent. If value is "OFF" - Send automatically all attached files. If settings has no value - Attachments will not be sent |
Automatic registration of invoice plan and invoice | Value "AUTO" in this setting will automatically create Advance Invoice Plan (CIP) & Proforma Invoice (CIN) when COA is registered. Takes 100% of the sales amount |
Clearing of Customer balance | Used to trigger scheduled batchjobs that will clear Sales Invoices that are credited, or Clear all open posts if Customer Balance is "0.00" |
Credit control off Customer | Used to tell if the RamBase should run creditcontrol on customers based on limits in Customer (CUS) or Customer Group or (CGR). Customer is default |
Customer Interest invoice Percent | Value in this setting is the Interest percent that should be used when interest invoices are created to customers from the INT program. (Morarente) |
Day limit for Dunning Batch | Number of days that duedate should be adjusted, back in time, when Dunning Batches (RMR) are created. For example: if today is the 10th of Mai, only invoices with duedate up to the 5th of Mai will be included when creating reminders |
Days ahead of duedate present in payables folder in Pay management (PAM) | Value in this setting (number of days) specifies if Pay management (PAM) ('Payables' tab) should have a default filter on DUEDATE, and how many days ahead it should be filtered by, where 0 will indicate todays date. E.g. if todays date is 2018.01.01 and 3 is specified here, PAM will get a default filter of 'DUEDATE<=2018.01.04' |
Deactivate KID | KID will not be generated for sales invoices. OFF=KID will be generated for sales invoices. ON= KID will not ge generated for customer invoices |
Due amounts over this limit must be approved | If customer has a due amount higher than the amount in this parameter, next Customer Shipping Advice (CSA) must be approved before sending goods to customer |
Due amounts over this limit must be approved | If customer has a due amount that is higher than the amount in CusDueAmountLimit, and due amount is due more days than number of days in this parameter, next Customer Shipping Advice (CSA) need to be approved before sending goods to customer |
DueDate on Dunning Batch | Number of days, ahead, that should be used to calculate duedate on Dunning Batches (RMR) that are sent to customers |
Fee on Dunning Batch | Fee that should be added to reminders that are sent to customers. Fee amount should be updated like this : fee1;fee2;fee3;fee4. Fee on first reminder : fee1. Fee on second reminder : fee1+fee2. Fee on third reminder : fee1+fee2+fee3. Fee on fourth reminder : fee1+fee2+fee3+fee4 |
Fee on interest invoice | Fee amount that should be updated on Customer Interest invoices. Fee in this parameter is overruled on Interest invoice for a specific customer if value for Interest Invoice fee is set up for that customer (CUS) |
Fee on invoice to EU country | Fee percentage that is added to sales invoice (CIN) when sale to EU country, VATREF="EUSALE". The invoice is updated with fee when registrated to ST=4 |
KID modulus | This setting specifies the algorithm (MODULUS) that should be used when the KID controldigit (last digit) should be created |
Last Dunning Batch only once | Last/max reminder for an invoice will be produced only once |
Limit on due amount for creating Dunning Batch | Limit to tell when reminders should be produced for 1 customer. No reminders is produced if due amount is less than the value in this parameter |
Mix of periods on Shipping Advice | This setting allows mix of perioder when transporting from Shipping advice (CSA) to sales invoice (CIN) |
Notification PIDs for accounts receivable issues | Comma list of PIDs that will get a notification by IMS for finance issues related to accounts receivable. |
Number of days limit for creating interest invoice | Number of days that will reduce interest days when interest invoices to customer are produced |
Number of days since last Dunning Batch | Minimum number of days days since last reminder. No Reminders is produced if last reminder is within these number of days |
Number of times Dunning Batch can be created for an invoice | Max. number of reminders that should be produced for an invoice. Legal values : 1 - 4. Value must be set |
OCR agreement number | Setting used for adding the company's OCR agreement number in the bank. This agreement number is needed to be able to import OCR files (Customer payments) received from BBS to RamBase |
Old KID Modulus | This setting specifies KID format for old, converted Account Receivables Transaction (CAT) posts. Format : NN,CC,II NN : Total number of digits in KID, CC : Number of digits from Customer Account II : Number of digits from Invoiceno |
Product (ART) for Interest invoice | Value in this setting is a Product (ART) that should be used for interest invoices (INT). This product has to be set up in every new system and added to this setting. Format: ART/#NNNNNN (N for numbers) |
Shipping Advice to Sales Invoice with mix of Location | If this setting is 'ON' - Allow mix of locations when transporting from Shipping Advice (CSA) to Sales Invoice (CIN) |
Total amount limit for creating interest invoice | Used when interest invoices to customers are produced. No interest invoice is produced if the total amount of the interest invoice is less than the value in this parameter |
Use advance invoice plans for sales orders | Used to activate functionality that will allow company to create Advance Invoice Plan (CIP) from Sales Orders (COA) |
To open the Receivables Workspace (RECEIVABLES), find Finance in the RamBase menu and then Receivables. Click Receivables overview to enter the RECEIVABLES application.
This workspace gives you a great overview of your receivables. The workspace overview gives a graphic presentation of the different stages in the receivables process. To go back to the overall finance workspace, click on the document icon at the upper right corner of the window.

The workspace is separated into two parts. The left part consists of three sections where the data is set by the program. In the right part, the sections displayed depend on the mode you select in the Data filter and mode-section.
Key Figures - This section contains the most important financial key figures. The key figures are updated once an hour, but may be refreshed at any time by using the refresh button.
Actions and Links - This section contains links to easily access the most relevant menus and programs. You will not initiate any actions by clicking the action buttons, it will only take you to the screen where you can initiate it from.
Reports - This section lists the most relevant and often used reports for receivables. Clicking any of the reports will generate an updated version of the report.
Data Filter and Mode
In this section you have the possibility to set or delete the selected filter. This filter applies to the whole workspace, if the function or action uses filtering. When filtering on customers, the filter will apply to both the Key figures section and the Data information section. The specific customer's name will be displayed on top of the page.
It is also possible to select a mode. A mode is a different view of the workspace data. If the mode is changed, a data table or a workspace overview page will be shown in the Data information section.
Workspace Overview
This section will show different kind of information based on parameters set in the Data Filter and Mode section. It can be a data table or a workspace overview. What is displayed in the data table in the Data information section depends on the filter built in the Data filter and mode section. For the workspace overview mode, only the account filter parameter will apply.
There are many ways to create an invoice, and it can be based on goods, costs, rental, contracts and subscription. Great tools will handle both yours and the customers' preferences related to the transaction documents. Invoice consolidation and cash payments are other processes that are well cared for in the system.
Fee and freight will be able to be copied with the Forward all items to sales credit note option in the Sales invoice (CIN) and Sales credit note (CCN) applications.
We have the forward operation on the main and item level in the Sales invoice (CIN) and Sales credit note (CCN) applications and the new checkboxes are only available when a new document is created. You can copy fee and freight from a Sales invoice (CIN) to a Sales credit note (CCN), and from a Sales credit note (CCN) to a Sales invoice (CIN).
The checkboxes for fee and freight can be found in the popup by using the Forward all items to sales credit option in the context menu. The Copy freight and Copy fee checkboxes will be selected by default on main level, but not on item level. Checkboxes will be displayed depending on whether they have a value or not.
Main level:
Forward to new = Shows the checkboxes and is selected by default.
Forward to existing = No checkboxes will be shown.
Item level:
Forward to new = Shows the checkboxes and will not be selected by default.
Forward to existing = No checkboxes will be shown.
Forward selected:
Forward to new = Shows the checkboxes and will not be selected by default.
Forward to existing = No checkboxes will be shown.
If you credit a sales invoice to a Sales credit note, then RamBase uses the same rate to avoid differences. If you create a new invoice based on a credit note, then this will be handled as a new invoice, also meaning a new rate. The rate will thus not be copied when forwarding a Sales credit note to a Sales invoice.
A Sales Invoice (CIN) for goods is based on the connected Shipping Advice (CSA) in status 4, which means that the goods are shipped, but not invoiced yet.
To open the Shipping Advice (CSA) application, find Logistics in the RamBase menu and then Shipping. Click Shipping advices to enter the CSA application.
Select the desired CSA in the Shipping advices area.

There are three alternatives for generating the invoice:
Transport all items on one CSA to a CIN.
Click the Forward all items to sales invoice option in the context menu.
In the popup, select forward to new or existing sales invoice.
Click the Forward button to confirm the transport.

Transport a single CSA item to a CIN.
Highlight the specific item line and press ENTER.
Click the Forward item to sales invoice option in the context menu.
In the popup, select forward to new or existing sales invoice. It is possible to split up the item if the CSAITEM quantity is higher then one.
Click the Forward button to confirm transport.

Create a CIN based on multiple shipments.
To open the Customer Invoice Management (CIM) application, find Finance in the RamBase menu and then Receivables. Click Sales invoice management to enter the CIM application.
Click the magnifying glass icon in the Shipments folder.
Narrow the result by adding parameters to the filter and click OK.

You now may create one CIN for all the items in the listed shipments.
In the Context menu, select Transport All Items to CIN.
A progress bar will appear and when the process is complete the list of shipments will disappear and the new CIN will be listed in the Sales Invoice (CIN) application.
The new CIN is editable (Status 1) and information like Customers reference number and other terms may be added/edited.
In the Context menu, select Register Sales Invoice. The CIN is now registered (Status 4) .
Invoicing may be done automatically due to the value in the InvCons field in the Handling folder in the Customer account (CUS).
In cases where there always will be created one CIN for all items on a CSA, this option may be recommended.
In cases where there is a need to post the shipping advice items into several invoices, invoices have to be created manually from a CSA document in status 4.
When a Sales invoice (CIN) is registered in RamBase, it will always be updated with today's date. However, sometimes the goods are shipped in one period, and the sales invoice registered in the following period. If there is a need for backdating the invoice before sending it to the customer, this is possible for employees with the correct permission.
Note that it is not allowed to make changes to an invoice after it has been sent to the customer.
When the Sales invoice (CIN) is still in Status 1, change the Issue date to the desired date. Period is updated accordingly. Note that the number of days an invoice may be backdated has to be within the limit set in the Company Setting (CSV) Number of days back a customer invoice or credit note can be dated.
When an invoice is registered, the field FinDelDate (finance delivery date) on item level is updated with the date the goods were shipped (CSA in Status 4). The date is inherited from the shipping advice (CSA). Using this date in a filter makes it possible to list invoices that are posted in one period where the goods have been shipped in another.
Use the following search string in the filter field to list customer shipments, not invoiced. Remember to enter the correct period.
ITM/CIN;FINDELDATE="2018*","PERIOD="2019*"
In a billing report:
CUSBILL;FINDELDATE="2018*",PERIOD="2019*)
Sales invoices (CIN), can be created automatically in RamBase.
A CIN can be created for each order delivered to a certain customer.
A CIN can be created for all orders on a day to a certain customer.
A CIN can be created for all orders in a week to a certain customer.
A CIN can be created for all orders in a month to a certain customer.
The automation/consolidation can be turned off for manual control of the billing process. The configuration on how to invoice is set on each customer.
Sales invoices based on goods are mostly created automatically by the system. Certain parameters in the customer account details controls the automated batch process of invoicing. The system use the Shipping Advices (CSA) to produce sales invoices.
The fields to detail the information needed in the invoicing process are located in the Customers (CUS) application, Settings tab, Finance subtab and finally Invoice area.
The Invoice area has the following fields:
Sales invoice consolidation: Specifies whether or how often shipping advice will be consolidated when creating sales invoices. It has the following options:
Auto fwd no cons- Generates the sales invoice as soon as the customer shipment advice (CSA) is registered.
Manually fwd to invoice- Excludes the sales invoice to be generated automatically, causing it to be handled manually.
Auto fwd daily cons- Generates the sales invoices by a batch job on a daily basis, usually around midnight.
Auto fwd weekly cons- Generates the sales invoices by a batch job on a weekly basis, usually during the weekend.
Auto fwd monthly cons- Generates the sales invoices by a batch job once a month, usually on the last day of the month.
Sales invoice consolidation field: Field name to group by when consolidating shipping advice items into sales invoices.
Sales invoice item sort by: Field name to sort by when creating sales invoice items.
Costs can not be stored in a warehouse. Costs are generated and consumed at the same time. It is therefore impossible to automate the invoicing for costs as for goods. Sales invoices (CIN) created from costs, need to be entered manually in the CIN application.
CINs for costs will always have location XXX and this can not be changed. This means that no items on an invoice for costs can be connected to a warehouse.
You can only select costs (articles with class X) and/or services (articles with class V) when adding items to an invoice for costs. No goods can be invoiced on a sales invoice for costs.
To open the Sales Invoice (CIN) application, find Finance in the RamBase menu and then Receivables. Click Sales invoices to enter the CIN application.
Click Create CIN/.. icon in the lower left-hand corner of the window to create a new Sales Invoice (CIN).
Enter the customer account name, or click on the arrow icon next to the Account Name field to bring up the customer list. From the customer list, choose the desired customer and press ENTER.
Choose currency and click OK if the customer use several currencies.
Add data in the YourNo field and the YourRef field. Notice that most of the fields in the invoice heading are set automatically, due to strict supplementing of customer details in the CUS application.
Check that the information is sufficient.
Click on the Create new Item icon to bring up the Sales Invoice item window.
Add quantity in the Qty field.
Click on the arrow icon next to the Part field to bring up the Select Part popup.
Highlight the desired part and press ENTER.
It is possible to add a description in the Text field and a unit price for the Sales Invoice Item in the Price fields.
Optionally, click on the magnifier icon next to the AccNo field to enter the account number (AccNo), the department (DepNo), the VAT code and other relevant dimensions. This may be filled out by the system based on info set for the specific article.
If account number, department and other dimension are edited, click the OK button to return to the CIN Item popup.
If more articles are to be added to this invoice, press Page Down and repeat the procedure until the invoice is complete.
Press ESC to return to the CIN window.
Press F12 to open the action menu and choose the Register Sales Invoice option.
The CIN has now been registered in the accounting, been sent to the customer either printed or by e-mail and awaits payment.
A contract is a written agreement between the company and a customer regarding deliveries on a recurring basis. Sales invoices can be created as contracts to ensure that the invoices are being sent in time according to the terms of the contract. In RamBase, contracts must be invoiced manually.
When creating a sales invoice for contracts, it is possible to add a free text in the fields YourNo and YourRef on the document level, and in the Text-field in the Part section on the item level.
If you add %TXT% in any of these fields, this text string will be replaced with a text defined in the Customer Contracts Management (CCM) application. The replacement takes place when creating a new sales invoice (CTRINVOICE) based on the contract. For example: "…if a monthly contract that has the text Rent for %TXT% in the YourRef field, and you type December 2014 in the Month field in CCM, the Sales Invoice (CIN) created from the contract will get the text Rent for December 2014 in the YourRef field.
Create a new CIN from the CIN application by using the same procedure as for creating invoice for costs, but do not forward it to the customer.
Make sure the actual CIN is in an editable mode (St:1).
Optionally, add free text to the YourNo and the YourRef fields. Make sure to add %TXT% if you want to paste a variable text.
Press the F12 to open the action menu and choose the option Register as Contract (St=5). This will bring up the Register as Contract popup.

Select the contract type. Options are WEEK, MONTH, QUARTER, YEAR, GENERAL and SPECIAL.
Click the OK button to confirm and return to the invoice window.
The status code of the sales invoice is now altered to 5, and CONTRACT is added to the title line.
Current contracts are held by the CCM application. To open the CCM application, find Finance in the RamBase menu and then Receivables. Click Contract invoicing to enter the CCM application.

Here you may view all contracts. Sales invoices from contracts are made from this program.
Click on the magnifier icon in the upper right corner to open the Customer Contract Text popup.

Add text to the fields. The text replacing the %TXT% string is depending on the Contract type.
There are two ways to create a sales invoice from a contract:
Start in the Customer Contract Management (CCM) application. To open the CCM application, find Finance in the RamBase menu and then Receivables. Click Contract invoicing to enter the CCM application.
Highlight the actual contract in the list and press ENTER.
Optionally add details or just to check that the contract is ready to be invoiced.
Press ESC.
Make sure that the highlighted item line is the correct contract.
Press the F12 to open the action menu and choose the option Create Invoice from 1 Contract.
The CIN will then appear in the Sales Invoice (CIN) application in editable mode (St:1). Please note that it has only been created, and have to be registered and sent to the customer.
Start in the Customer Contract Management (CCM) application. To open the CCM application, find Finance in the RamBase menu and then Receivables. Click Contract invoicing to enter the CCM application.
Work through and check the contracts to make sure that all contracts are ready to be invoiced.
In the CCM application, press F12 to open the action menu and choose the option Create Invoices from All Contracts.
The invoices will then appear in the CIN application in editable mode (St:1). Please note that they have only been created, and have to be registered and sent to the customer.
To open the Customer Contract Management (CCM) application, find Finance in the RamBase menu and then Receivables. Click Contract invoicing to enter the CCM application.
Click on the number in the Open invoices column in the list of contracts (CCM).
Highlight the actual Sales Invoice (CIN) and press ENTER.
Press F12 to open the action menu and choose the Register Sales Invoice option.
The CIN will be registered (St:4) and sent to the customer either printed or by e-mail.
An invoice derived from a contract has the term CTRINVOICE added to the title line. Notice that the invoice holds a reference to the contract in the OurNo field.
The purpose of factoring is to improve cash flow by using your sales invoices (accounts receivable) as collateral for cash provided by a factor in a short-term loan.
Set up the Bank (BANK) which will be used for factoring.
To open the Bank Accounts (BANK) application, find Finance in the RamBase menu and then Cash management. Click Banks to enter the BANK application.
Highlight the bank which will be used for factoring and press ENTER.
In the Bank Account Info, select Factoring in the PayBy field.
There are six settings about factoring in the Company Setting Values (CSV). Turn on this setting:
Use of Factoring - Used to activate functionality that will allow company to send Sales Invoices (CIN) to factoring.
Optionally, turn on this setting:
Factoring Invoice journal - This setting determines if the company should produce invoice journal (PDF) as an overview of invoices sent to the factoring company.
Only turn these four settings on, if your company uses SG Finance.
Customer file for SgFinance - This setting should be activated only if the customers uses SG Finance as factoring company. This setting allows the customer to create a customer file according to SG Finans'es file format.
Customer number at factoring company - Customer number. Used in the files to the factor to identify the sender.
Invoice file for SgFinance - This setting should be activated only if the customer uses SG Finance as factoring company. This setting allows the customer to create a invoice file according to SG Finans'es file format.
KID Format - KID format for Sales Invoices that should be sent to Factoring Company.
The recipient of the factoring files should be set up in the output Output settings (OOS):
From the RamBase menu select Admin and then Print / email administration.. Click on the Output settings option to open the Output settings (OOS) application.
In the Output settings (OOS) application, click on the Output tab.
Click on the Select sub tab.
Click on the Finance drop-down menu and select CashManagement.
From here the user can setup all, or individually, the following options:
Factoring: Send payments file 1 - Invoices
Factoring: Send payments file 2 - Factoring Journal PDF (invoices)
Factoring: Send payments file 3 - Customers.
To open the Pay Management (PAM) application, find Finance in the RamBase menu and then Cash management. Click Inbound payments to enter the PAM application.
Select the Receivables folder.

Sales Invoices (CIN) and Sales Credit Notes (CCN) which are sent to factoring disappear from the list in the Receivables folder, but appear in the Sent to factoring folder for further handling. Invoice journal (PDF) will be generated and sent on mail to the person who initiated the process. If your company uses SG Finance, you will receive a customer file and a invoice file as well.
These files may be sent to the factoring company. The information within these files forms the basis for the factoring company's further actions.
If you have invoices in more than one currency, select one currency at a time. You have specific factoring banks for each currency.
Select CIN(s) for action.
It is possible to mark one, some or all of the CINs by using the check-boxes.
To view selected CIN(s), use the radio button. The CIN(s) may be un-checked if needed.
Click the Select Action button below the document list.
Verify that there is no extra CIN which might have been accidentally selected.
Click the Send to factoring button.

Click the Start Action button.
A progress bar appears. The Payments (PAY) will be set to St=3 and can be found in the Payments folder in PAM. The CIN will be set to St=8 and can be found in the Sent to factoring folder in PAM.
When the process is complete, a new window with information about the result of the process pops up and a PDF file are sent to you by email.
Send the file(s) to the factoring bank.
Register the first payment from the factoring bank when you receive it. In this example it will be 80%.
To open the Bank Accounts (BANK) application, find Finance in the RamBase menu and then Cash management. Click Banks to enter the BANK application.
Press F12 to open the action menu and choose the Bank Transfer option.
In the Bank Transfer popup, make a bank transfer from the factoring bank to the bank for the respective currency and click the OK button.
The percentage must be calculated manually.

You will receive equivalent 80% of the invoice amount in debit on the cashier, and correspondingly 80% of the invoice amount in credit on the account of short term loan from the factoring bank.
If your company is running SG Finance, you may receive a file from them. Otherwise, you have to register it manually.
Register the PAY when it is confirmed that the customer has paid the CIN(s) to the factoring bank. It is easiest to do it in PAM.
To open the Pay Management (PAM) application, find Finance in the RamBase menu and then Cash management. Click Inbound payments to enter the PAM application.
Select the Sent to factoring folder.
Use the checkboxes to select the CIN(s) that you want to confirm payment on.
Click the Select Action button.
In the popup, click the Confirm Payment button.
Verify valuation date in the CurDate field.
Click the Start Action button.
The PAY documents is now in ST=4. The balance in the factoring bank account will be the remaining 20% of the invoice amount.
When you receive the payment for the remaining 20% from the factoring bank, use the bank transfer option to register the payment.
To open the Bank Accounts (BANK) application, find Finance in the RamBase menu and then Cash management. Click Banks to enter the BANK application.
Press F12 to open the Action menu and choose the Bank Transfer option.
In the Bank Transfer popup, make a bank transfer from the factoring bank to the bank for the respective currency and click the OK button.
The percentage must be calculated manually.

The balance of the factoring bank account is now 0% of the invoice amount. Balance on the main account for the regular bank is now equivalent to 100% of the invoice amount.
Check the PAYs that are waiting to be confirmed in BANK. You will get a report on PAYs in ST=3.
To open the Bank Accounts (BANK) application, find Finance in the RamBase menu and then Cash management. Click Banks to enter the BANK application.
Highlight the factoring bank and press ENTER.
Click the link for Payments, Waiting to be Confirmed.

When a customer buys products from your store, it is possible to create a cash payment.
To open the Sales Order (COA) application, find Sales in the RamBase menu and then Order handling. Click Sales orders to enter the COA application.
Click on the option Create sales invoice and payment in the context menu.This option is available for COAs in status 0, 1 and 8.
In the new popup, select the payment bank in the Select bank field. If the Customer (CUS) of the COA has a bank accounts setup in the Finance Data folder in the CUS account, this bank will be selected as default when you enter the popup. It is however possible to select another bank listed in the drop down menu.
Click OK. A process will start. The COA will automatically be closed, a Shipping Advice (CSA) will be created and then closed as an invoice is created. A Payment (PAY) will automatically be registered, and the invoice will be registered as paid (st:9). The transaction will be posted in the accounting.
The relevant COA, CSA, Sales Invoice (CIN) and PAY document can be inspected from their respective application.
To get started sending outbound invoices and credit notes electronically in PEPPOL 3.0 format, follow this procedure to activate the functionality in your company. NB! Your campany must have an accesspoint at our third party supplier Amili, to be able to send outbound invoices and credit notes electronically in PEPPOL 3.0 format. Please contact your RamBase support if your company does not have an accesspoint.
Enter the Marketplace (MARKETPLACE) application. This application is available for all super users, and partners.
Enter the Send PEPPOL billing files via ftp extension.
Click on the Activate button in the top right corner.
You must confirm that you have read and accepted the product terms before you are allowed to activate the extension.
By activating the extension, a batch job running at 06:00, 09:00, 12:40, 16:00 and 20:00 will activate 10 Select output (OOS) jobs required to send invoices electronically and to be able to set it up on customers. In case it is needed faster, it is possible to activate these OOS jobs manually.
Enter the Select output (OOS) application and click on the Search tab.
Write in the Search field: Name Contains peppol
Activate all 10 jobs.
If your company is not Norwegian or Swedish, the following settings must be activated and filled out in the Company settings (CSV) application:
Peppol party endpoint ID: This is the sellers electronic PEPPOL address.
Peppol party endpoint scheme ID: This is the identification scheme of the sellers electronic PEPPOL address.
These two fields can be seen as an electronic postal address. This is not necessary for Norwegian and Swedish customers as these are fixed (e.g. PEPPOL party endpoint id is always the enterprise number). The country code which comes first in the address has to have big letters e.g. DK12345678
The solution is now ready and sending of outbound electronic invoice can be set up on your customers by following the instructions below.
When the service is activated in RamBase, it is possible to set up electronic invoicing as a standard way of sending invoices to your customers.
Follow this procedure on all Customers (CUS) that should receive electronic invoices.
Open the Customer (CUS) application, find Sales in the RamBase menu and then Customer management. Click Customers to enter the CUS application.
Highlight the specific CUS and press ENTER.
Enter the Output control tab, in the Settings tab.
Click the Add document to send button. Enter the following in the popup:
Send by - Select the Print option.
Documents to send - Select the following five options:
Peppol by FTP: Sales invoice upon registration
Peppol by FTP: Sales invoice service upon registration
Peppol by FTP: Sales invoice rental upon registration
Peppol by FTP: Sales credit note rental upon registration
Peppol by FTP: Sales credit note standard upon registration
Mandatory to always send – Optional
By activating these, the different document types will be sent electronically when the invoice is registered.

We recommend removing sending of CIN and CCN by EMAIL in the Output control tab, if this is set up. This is to not send electronic invoices and invoices by email of the same invoice to the CUS.
It will also be possible to resend already registered invoices/credit notes electronically. This can be done by:
Enter the Sales invoice (CIN) or Sales credit note (CCN) you want to resend.
Press F12 to open the action menu and choose the Print copy / resend option.
Double click on the line called Create sales invoice pdf and trigger PEPPOL file by FTP.
If the Customer (CUS) is not Norwegian or Swedish, the following information must be filled in on the customer card by selecting the Configure PEPPOL address option in the context menu:
Party endpoint scheme identifier: This is the identification scheme of the customers electronic PEPPOL address.
Party endpoint identifier: This is the customers electronic PEPPOL address.

These two fields can be seen as an electronic postal address. This is not necessary for Norwegian and Swedish customers as these are hard-coded in RamBase since they are fixed (e.g. PEPPOL party endpoint id is always enterprise number).
Advance invoicing is used to create a Sales Invoice (CIN) based on a Sales Order (COA), before the goods is shipped to the customer. This could be done when there is an agreement with the customer that parts of the COA will be invoiced before the goods is shipped, depending on events instead of on delivery of goods. This could be agreements on specific dates, or based on a specific process that is completed. In RamBase, advance invoices could be produced from an Advance Invoice Plan (CIP) that is created from the COA.
When advance invoicing is done, delivery dates for the goods will be scheduled on the COA items, as normal. The Shipping Advice (CSA) that is used to ship the goods to the customer will also be created as normal, but the final CIN created from the CSA will be adjusted so that the advance invoices will be credited. This means that the final CIN created from the CSA will be adjusted with the totals that is invoiced from the invoice plan. Each CIN item from the advance invoices will appear on the final CIN, but with a credit amount. The final CIN will then be for the total of the COA, adjusted by the credit amount from the advance invoices.
It is also possible to issue a final invoice after the delivery of goods without creating a new order line. When such a final invoice is created, the VAT for this invoice is calculated independently of the goods delivery, ensuring correct VAT handling for invoices issued after shipment.
To be able to produce advance invoices before goods is shipped from a COA, an invoice plan has to be created from the COA. An invoice plan can be created from all items on the COA, but it is also possible to create an invoice plan from some selected items. A COA item can be scheduled to create one or more advance invoices from the invoice plan, based on a fixed amount or a percentage of the amount on the COA item. The invoice plan consists of one or more Advance Invoice Plan Element (CIP) documents, and all CIP documents created from the same COA will be the invoice plan for that COA.
Advance invoices created from the invoice plans will have 100% gross margin and there will be no cost of goods. The final CIN created from the CSA will have the real cost from the goods that are shipped, while the items made to credit advance invoices will have no cost of goods.
For Customer invoice plans (CIP), a separate General Ledger default account assignment (ACD), Total amount from Advance Invoice Plan after shipment, is used for CIP invoice amounts that should not be included in the settlement upon delivery. CIP amounts created after shipment are posted to this account together with Accounts receivable, and the final invoice re-posts these values from the CIP account to the relevant sales account.
Both the CIN created from the invoice plan and the CIN created from the CSA will be posted to Account Receivables in General Ledger. The final CIN for the CSA will be posted to a sales account, while the advance invoice will be posted to a settlement account that could be set up by the user.
Invoicing plans also indicate which invoices are tied to delivery, and users can filter or report on invoices issued before, at, or after delivery. Full audit trails track all CIP stages and VAT handling for improved transparency.
A Sales Order (COA) is created.
Since there can be quite an extensive period of time between ordering and delivering goods on manufacturing orders, RamBase has a possibility to create Advance Invoice Plans (CIP) from a COA. When there are created Advance Invoice Plans from a COA, the COA is flagged as CIPORDER. There is no calculation of VAT on a Sales Invoice (CIN) made from a CIP document.
A CIN is produced from each CIP document. This is done manually.
Upon time of delivery, a Shipping Advice (CSA) is issued.
The final CIN is created based on the CSA issued upon time of delivery. When the CIN is made from a COA marked with CIPORDER, there is a settlement between the final CIN and the CINs made from the CIP documents. The final CIN always holds the VAT outgoing tax for the total COA amount.

In RamBase, a Sales Invoice (CIN) for payment in advance is created in an application called Advance Invoice Plans (CIP), and the CIN is marked as a CIPINVOICE. A forwarded Sales Order (COA), status greater then 1, forms the basis for an Advance Invoice Plan creation.
To open the Sales Order (COA) application, find Sales in the RamBase menu and then Order Handling. Click Sales orders to enter the COA application.
Highlight the specific COA.
In the context menu, choose the Advance invoice plan.. option to enter the Advance Invoice Plan for Sales Order window.

Click on the Add invoice plan element icon in the lower left corner to open the Advance Invoice Plan Element popup.
Use the calender icon to set the invoice date in the Invoice Date field.
The Intern field can be used to set an internal message about the Advance Invoice Plan (CIP)
The Remark field can be used to set a message that will be visible for the customer on the Sales Invoice (CIN).
Click on the Select sales order items for invoice plan icon.
In the popup, select the item(s) for the Advance Invoice Plan Element in the Select column.
A specific amount, or a percentage share of each COA item can be transferred to the invoice plan. Alter the Amount,XXX or Pct field according to the wanted pre-invoiced amount in the This invoice plan element column.
Press ESC twice to go back to the Advance Invoice Plan for Sales Order window.
Click on the Register Invoice Plan Element icon on each line to register the CIP (Status 4) and make it ready to be invoiced.
The CIP document can be edited as long as no invoice has been produced from this document.
Repeat step 4-12 for as many Advance Invoice Plan Element as necessary.
Start from a registered Advance Invoice Plan document (CIP) set to status 4.
Click on the Create invoice for invoice plan element icon in the Invoice column.
A Sales Invoice (CIN), flagged with Invoice Plan is created. It is still editable (status 1).
To inspect the invoice, click on the Sales Invoice link (CIN/xxxxxx) in the Invoice column.
Press F12 and choose the option Register Sales Invoice to issue the invoice.
Based on the system setup you might need to select the recipient(s) in the Document Send Alternatives popup.
Click the Forward button.
The invoice is issued (Status 4), and the related CIP document will be closed (Status 9).
The Advance Invoice Plan (CIP) application is used the follow up on the Advance Invoice Plans. To open the Advance Invoice Plan (CIP) application, find Finance in the RamBase menu and then Recievables. Click Advance Invoice Plans to enter the CIP application.

It is possible to filter the COA documents by using the COA number field, by clicking the CUS Customer icon or by using the radio buttons.
To open the Advance Invoice Plan (CIP) application, find Finance in the RamBase menu and then Recievables. Click Advance Invoice Plans to enter the CIP application.
Filter by using the COA number field, filter by customer or use the radio buttons to narrow the search.
Highlight the specific COA document and press ENTER.

Sales Order : Total ( excl. Freight & Fee ) - The total amount of the Sales Order (COA) except freight and other fees.
Sales Order : Backlog - The amount of the COA not delivered.
Invoice Plan - The amount and percent of the COA planned in the Advance Invoice Plan (CIP).
Invoiced - The amount and percent of the COA that has been invoiced.
When advance invoicing is done, delivery dates for the goods will be scheduled on the Sales Order (COA) items, as normal. The Shipping Advice (CSA) that is used to ship the goods to the customer will also be created as normal, but there is a settlement between the final Sales Invoice (CIN) and the CINs made from the Advance Invoice Plan (CIP) documents. This means that the final CIN created from the CSA will be adjusted with the totals that is invoiced from the invoice plan. Each CIN item from the advance invoices will appear on the final CIN, but with a credit amount. The final CIN will then be for the total of the COA, adjusted by the credit amount from the advance invoices.

Create and register a Sales order (COA) and select Payment in advance in the Payment terms field.

In the Notes tab on the Sales order (COA) item, there is a note that you cannot forward the Sales order (COA) to a Shipping advice (CSA) until a payment is registered.

You can trigger a proforma invoice that you can send to the customer, when the Sales order (COA) is in Status 8. Make sure that the invoice is triggered from the Sales order (COA).
Use the context menu option, Create payment..., available on the Sales order (COA) when you receive the Payment (PAY). This is to bind the Sales order (COA) and Payment (PAY) together.

Or you can create a Payment (PAY) directly in the Payment (PAY) application. Enter the Payment (PAY) item and click on the OrderRef field and press ENTER.
Select the Sales order (COA) in the popup and click the OK button. Sales orders (COA) that are waiting for payments are listed in the popup.

Reference to the Payment (PAY) is shown in the Finance area on the Sales order (COA).

The link to the Sales order (COA) and that it is a payment in advance is visible on the Payment (PAY) item.

An Account receivable transaction (CAT) post is created in Status 6, holding the payment in advance. This is used to clear the invoice later.

When the Payment (PAY) is registered and goes to Status 4, the note that you cannot forward the Sales order (COA) disappears, and the Sales order (COA) can be forwarded to a Shipping advice (CSA).

Forward the Shipping advice (CSA) to a Sales invoice (CIN) after the goods are shipped. The Sales invoice (CIN) will go to Status 9 with a reference to the Payment (PAY).

The Payment (PAY) shows the clearing of the payment in advance and the Sales invoice (CIN).

Follow up the receivables ledger is one of the most important finance processes. To get an overview of the customers' open posts and the customer cash flow help you to see if there is a need for resending invoices, sending a statement of account, sending dunning letters, or calculate interests. The information will help you decide if the customer should be allowed to place new orders before old orders are paid. It can be advisable to set a credit limit for a customer to decrease the risk of loss if the customer does not pay.
Customer balance (CUSBAL) is an application used to reconcile accounts receivable and to follow up on outstanding customer balances.
Navigate to the application
Option 1: RamBase menu→Finance→Receivables→Customer balance
Option 2: Click the Program field and type "CUSBAL" and press ENTER.
Click here to read more about the user interface.
The following areas are described in the sections below:
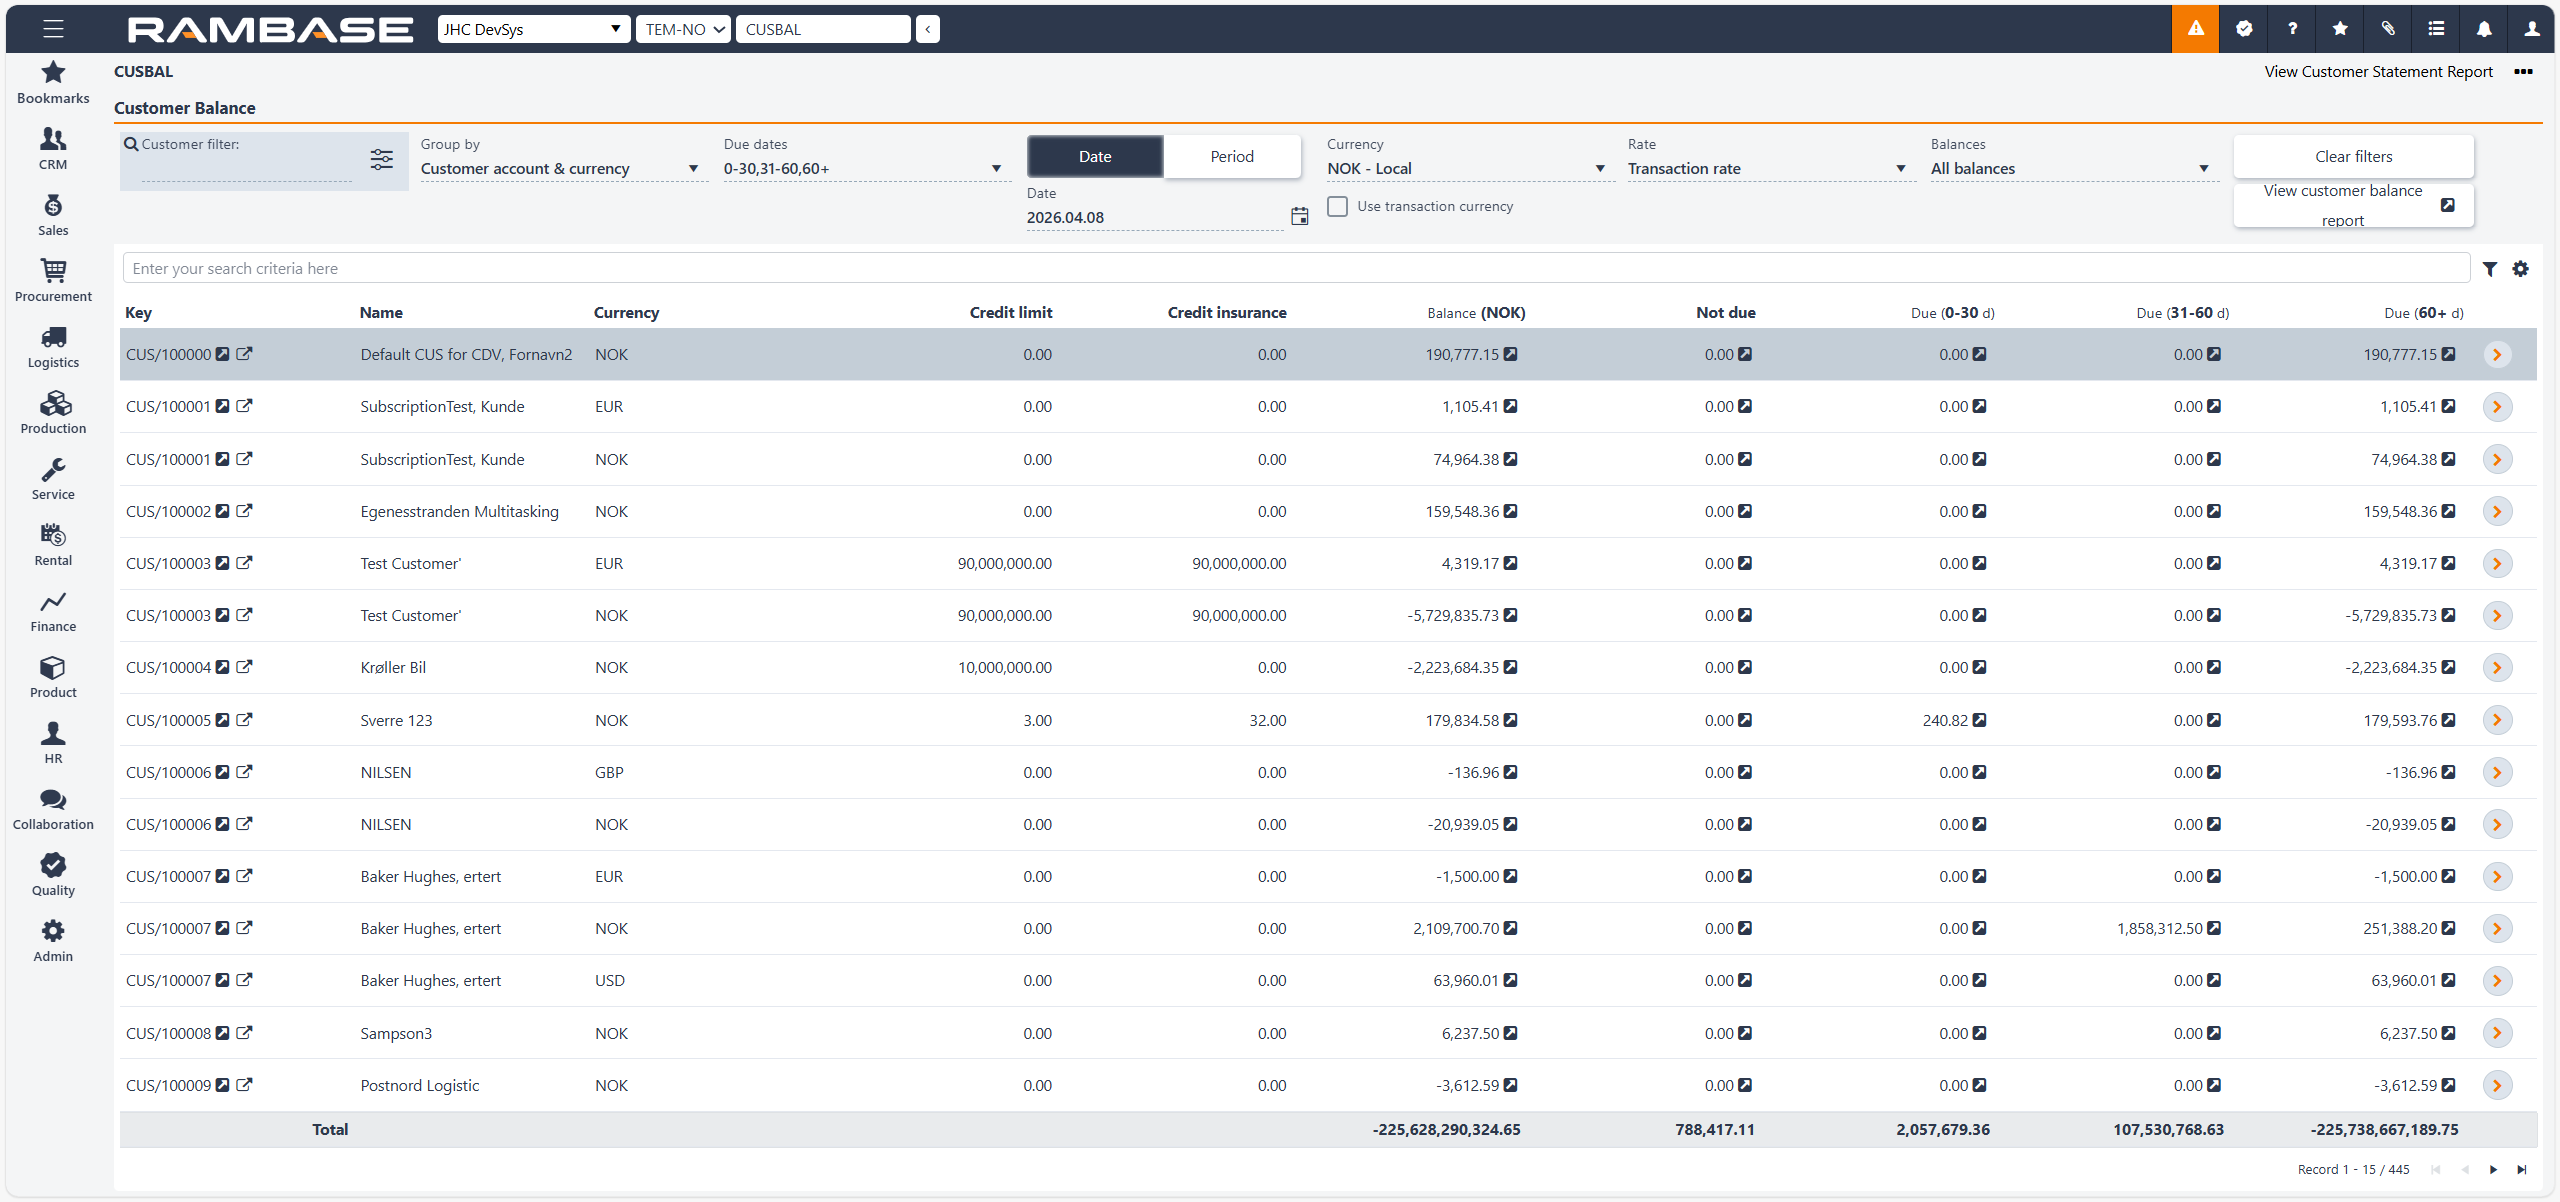
The Customer balance header
The Customer balance list
The Customer balance header contains fields which are used to filter the list below.
Fields and buttons | Description |
|---|---|
Customer filter field | Click on the Customer filter field to look up a specific Customer balance (CUSBAL). Click on the Filter icon to select which of the following options are to be included in the search:
|
Group by field | Click on the Group by field to filter the Customer balance (CUSBAL) list to select which of the following options are to be included in the search:
|
Due dates field | Filter the balance amounts which are due within the next:
|
Date button | Click on the Date button to filter the Customer balance (CUSBAL) by a specified date. |
Period button | Click on the Period button to filter the Customer balance (CUSBAL) by a specified period. |
Currency field | Customer balance (CUSBAL) can be displayed in any available currency. This is useful when the local currency differs from the reporting currency. |
Use transaction currency checkbox | If the Transaction currency option is selected, the amounts will be shown in the original currency of the invoices, rather than being converted using an exchange rate. |
Rate field | Here, you can choose whether to view the transaction rate (the original exchange rate at the time the invoice was registered) or the rate recalculated based on the date specified in the Rate Date field. |
Balances field | Filter the balances by choosing All balances, All overdue balances or Max overdue balances. |
Clear filters button | Click the Clear filters button to remove all filters and show all Customer balance (CUSBAL) in the list. |
View customer balance report button | This link opens the Customer balance (CUSBAL) report filtered according to the selections you have made in the application. |
The displayed Customer balance (CUSBAL) are based on the selections made in the Customer balance fields area.
The Customer balance list includes a Search field. In addition to the fields and variables in the header, the scope of the search can be further filtered by clicking the Filter builder icon to the right of the search field.
Clicking the Filter builder icon will display a popup with the options to add a Standard filter and/or Create custom filters. All custom filters can be saved and then added to the My saved filters area.
The user can customize the order of the columns by drag and drop, in addition to hover over icons and columns for further descriptions.
Columns | Description |
|---|---|
Key | GroupBy key for the customer balance. |
Name | Description of the key. |
Currency | Secondary grouping key for the customer balance. |
Credit limit | Billing amount of the day. |
Credit insurance | Credit amount insured for the customer. |
Balance (NOK) | Balance amount. |
Not due | Balance amount which is not due. |
Due (0-30 d) | Balance amount which is due within the next 0-30 days. |
Due (31-60 d) | Balance amount which is due within the next 31-60 days. |
Due (60+ d) | Balance amount which is due within the next 60+ days. |
You may inspect the customer cash flow by using the Customer Due Amount (CUSDUE) application. The application presents the account receivables from a financial point of view. Here it is not the state of customer accounts that matters, but the account receivables' impact on the company's liquidity.
To open the Customer Due Amounts (CUSDUE) application, find Finance in the RamBase menu and then Cash management. Click Customer due amounts to enter the CUSDUE application.

Click on the blue numbers to inspect the underlying data and the relevant customers.
The application presents the due amounts chronologically. The empty line in the middle represents today. Above the empty line are the overdue amounts, below are the due amounts. The records close to the empty line have the heaviest impact on the company's liquidity. These are the amounts soon to be payed by the customer.
The due and overdue amounts can be presented in three different currencies (and a composite account for other currencies). The "today" line can be altered by entering another date in the Date field in the header, and the DueDate Step can be set to a fixed number of days, different from the default 7.
There are several documents connected to a specific Customer (CUS) that can be blocked for further handling. These blockings are set in the Main Data folder in the CUS application.
One of the options is to block a Sales Invoice (CIN). There can be several reasons for blocking an invoice, for example when the CUS is new and is under credit rating.
It is possible to use a company setting where all new CUSs by default will be blocked for invoicing.
To open the Customer (CUS) application, find Sales in the RamBase menu and then Customer management. Click Customers to enter the CUS application.
Highlight the specific CUS and press ENTER.
In the Main Data folder there is a field called InvoiceBlocking. Click on the dropdown menu.
Select the option Yes.
The invoice is now blocked for further handling.
To open the Customer (CUS) application, find Sales in the RamBase menu and then Customer management. Click Customers to enter the CUS application.
Highlight the specific CUS and press ENTER.
In the Main Data folder there is a field called InvoiceBlocking. Click on the dropdown menu.
Select the option No.
The invoice is now ready for further handling.
To open the Customer (CUS) application, find Sales in the RamBase menu and then Customer management. Click Customers to enter the CUS application.
Highlight the line representing the specific customer.
Open one of the Finance folders.
Press F12 to open the action menu and choose the option Send Statement of Account.
In the Customer Account Report popup, select from the drop down menu which report to be sent.
In the Date field, select the date you want the customer account balances by.
Verify that selected customer is correct.
Select the currency.
Click the Next>> button.
In the Print/Send document popup, click on the PDF icon to preview the document.
To change printer, click the pencil icon on the PRINT line.
To customize the e-mail, or change the recipient email address, click the pencil icon the EMAIL line. Click the Add button.
Highlight the line representing the format you prefer (Print/Email).
Press ENTER.
The documents to be sent will be listed.
Click the Send button.
To open the Customer Balance (CUSBAL) application, find Finance in the RamBase menu and then Receivables. Click Customer balances to enter the CUSBAL application.
Use the customer filter or the radio buttons to filter open posts.
Highlight the relevant item line.
Press F12 and choose the option Send Statement of Account.
For further handling, follow step 10-16 described above.
To open the Customer Balance (CUSBAL) application, find Finance in the RamBase menu and then Receivable. Click Customer balances to enter the CUSBAL application.
Highlight the line representing the specific customer in CUSBAL and press ENTER.
Click on the link to the relevant invoice.
Press F12 to open the action menu and choose the option Print Copy / Resend.
In the Print/Send Document popup, select how to send it to the customer.
To preview the document, click on the PDF icon.
To open the Customer Balance (CUSBAL) application, find Finance in the RamBase menu and then Receivables. Click Customer balances to enter the CUSBAL application.
Highlight the line representing the specific customer in CUSBAL and press ENTER.
Highlight the line representing the invoice in question.
Press F12 to open the action menu and choose the option Split Sales Invoice.
Enter the new amounts and their connected due dates.
Click the OK button.
It is possible to mark Sales invoices (CIN) and Sales credit notes (CCN) when they are sent for debt collection. The CIN and CCN is marked in the same way as explained here:
To open the Sales invoice (CIN) application, find Finance in the RamBase menu and then Receivables. Click Sales invoices to enter the CIN application.
Highlight the CIN that is sent for debt collection and press ENTER.
Click the Inspect Document Account Info (DAI) icon in the top right corner.
Press F12 to open the action menu and select the Is sent for debt collection option to mark the invoice.
It is also possible to select the Undo is sent for debt collection option here, if the invoice is in status 6.
When an invoice is in status 6, payments will not be automatically registered against that invoice, but stops before registration with a message. The user becomes aware of this and can handle the rest of the process manually, both in RamBase and towards the debt collection company. To register a payment against the invoice, the invoice must first be returned to status 4.
It is possible to create and send reminder to one customer separately or all customers at the same time.
To open the Reminder (RMR) application, find Finance in the RamBase menu and then Receivables. Click Dunning batches to enter the RMR application.

Click the Create New icon on the bottom left side of the reminder menu. Much information is already entered due to default program settings, but can be edited for each reminder.

Select reminder number in the Rmr No field. The Rmr No field defines if you want to register only 1. reminders, only 2. reminders (or 3. for that matters) or all.
Optionally edit the fields Day Limit, DueDate, Due Days, Reminderfee, Group By and Amount Limits.
It is possible to create reminders for one specific customer. Filter the customer by clicking the yellow arrow icon next to the Account Name field.
Click the OK button. The reminder will now appear in the list of Reminders (RMR) ready for further handling (St:0).
Mark the actual reminder and press ENTER.

Inspect the content. If some of the generated reminders are not to be sent, discard them by clicking the icon on the related item line(s).
Press ESC.
On the document level, press F12 to open the action menu and choose the option Send This Reminder.

Select the preferred mode. This selection will be saved on the Customer (CUS) details so it is updated for the next reminder job.
Click the Send button.
The reminder will still appear in the list of RMR, but is now either printed or e-mailed to the customer (St:4).
If the Customer (CUS) is set up with more than one e-mail account to receive Reminder menu (RMR), only one e-mail account will be added to the Reminder menu (RMR). If several employees at the customers site should receive the Reminder menu (RMR) as an email, the customer could consider setting up an email account such as invoice@companyname.xxx where several employees have access.
The statuses shown are reminder-status, not the status of the Sales invoice (CIN)


Press the F12 option or right click on the mouse to see a menu option called View Report: Invoices all. This is a report where users will see both status for the invoice and the reminder status.

If the Customer (CUS) is set up with more than one e-mail account to receive Reminder menu (RMR), only one e-mail account will be added to the Reminder menu (RMR). If several employees at the customers site should receive the Reminder menu (RMR) as an email, the customer could consider setting up an email account such as invoice@companyname.xxx where several employees have access.
If an Reminder (RMR) is in Status 0, it is not possible to create a new Reminder (RMR). Either one have to complete the ongoing Reminder (RMR) or set it to Status D by using the Discard all Reminders in status:0/2 icon in the upper right corner beside the Print icon.
To open the Interest (INT) application, find Finance in the RamBase menu and then Receivables. Click Interest invoices to enter the INT application.

Click the Create New icon on the bottom left side.

Define the criteria for creating interests by enter data to the following fields:
Article ID - If this field is empty click on the magnifier icon and select the article Interests.
Interest Pct - This is setup as a default for your company, but may also be set on the customer under customer details (CUS).
After days - Number of days after due date. For payments received later than this there will be created interest invoices.
Interest amount limit, NOK - Determines the minimum interest amount to be invoiced from one invoice (CIN).
Customer amount limit, NOK - Determines the minimum interest amount to be invoiced from one customer account.
Click the OK button. The interest will now appear in the menu ready for further handling (St:0).
Highlight the actual interest job and press ENTER.
Verify the content, and discard incorrect interests manually (St:D).
The calculated interests that have not reached the customer amount limit will automatically be removed (St:D). These will thereafter be included in the next interest calculation if the customer limit then is reached.
In cases where the values in the Interest amount limint field or the After days field are not reached, the interests will automatically be closed (St:9). These interests will not be calculated anymore.
When all interests calculated (St:0) are correct, press F12 to open the action menu and choose the option Make Interest Invoices to all Customers.
Define the pay term and possibly add a fee in the new popup.
Click the OK button. Customer interest invoices (INT) will now be generated by the system.
Press F12 and choose the option Register and Send all Interest Invoices. The interest invoices are then registered (St:4) and sent to the customer, either printed or by e-mail.
Highlight the specific manually discarded interest invoice (St:D).
Press F12 and choose the option No Interests for Customer (St:9). These interests will not be calculated anymore.
Interest calculation may be turned off for a specific customer in the Finance data folder under customer details (CUS). The interest percent (INTPCT) should be set to 0.
If there are overdue invoices which are partially paid, the interests will still be calculated based on the original amount.
I If you want to create interests only for the residual amount, make sure to enter the same due date for the residual amount as for the original invoice while registering the partial payment.
In RamBase there are two different approaches to crediting. The main difference is whether flow of goods are involved or not.
In cases where goods are to be returned you have to base the credit note on a registered Deviation (CDV). When creating a credit note based on a deviation document, you achieve traceability of deviations and the value of stocks will be correct.
Credit notes may be created directly from the related Sales Invoice (CIN) in cases involving costs, rental, service or goods which are not going to be returned.
In some instances it will be recommended to base the credit note on a CDV even though it is not mandatory:
If the person who grants a credit to the customer and the one who creates the credit note are not the same person.
If you want to have the possibility to follow up on deviations, i.e. register it into your Quality Report (QAR) application.
When crediting it can be advisable to conduct clearing. Clearing is the process of counterclaiming credit notes and invoices.
If the invoice and the credit note is identical there are two ways to do it:
Open the credited invoice and press F12 to open the action menu and choose the option Clear credit and invoice.
With a setup for your company these clearings may be conducted by a batch job.
In order to create a credit note based on a registered deviation, the Customer Deviation (CDV) document have to be in (St:4).
To open the Customer Deviation (CDV) application, find Finance in the RamBase menu and then Receivables. Click Deviations for invoice or credit to enter the CDV application.
Open the relevant CDV document.
Select the Actions and Calculations folder.
In the Account Actions-section, inspect the values in the following fields and edit if needed:
AccNo - The GL account number the credit note will be posted against.
AccQty - Set the quantity to be credited.
AccPrice - If you are not going to credit the whole price, set the amount to be credited.It is the values in these fields which the credit note is going to be based on.
Press F12 to open the action menu and choose the option Account action.
In the CDV Forward alternatives-popup, select a new or existing credit note. A Sales Credit Note (CCN) is then created and a link to it will appear in the AccDoc field in the Account Actions section on the CDV. If the CCN link is marked (St:1), it is then still in editable mode and are not registered yet.
Click on the magnifier icon next to this field. Verify the content and edit if needed. Note that this is on item level.
To inspect the whole document, click on the Inspect Document icon on the upper right corner of the window.
On document level, press F12 and choose the option Forward to customer. The credit note is then registered (St:4) and may be sent to the customer either printed or by e-mail.
To open the Sales Invoice (CIN) application, find Finance in the RamBase menu and then Receivables. Click Sales invoices to enter the CIN application.
Highlight the sales invoice to be credited and press ENTER.
To make a credit note for all items on the invoice: Press F12 to open the action menu and choose the option Transport all Items or click the transport icon in upper right corner of the sales invoice (CIN) window.
To make a credit note for a single item on the invoice: Press ENTER on the specific item line. Press F12 and choose the option Transport Item, or click the transport icon on current item lines.

Select the option New Sales Credit Note and press ENTER.
If the credit note is based on a single item, verify the information in the popup and click the OK button. The new sales credit note (CCN) is editable (St:1) and information like YourNo and other terms may be added/edited.
Press F12 and choose the option Register Sales Credit Note. The sales credit note is then registered (St:4) and may be sent to the customer either printed or by e-mail. General credit notes can also be created similar to an invoice from the CCN application. However this is not recommended since general accounting principles states that credit notes should be a reversal of something that is invoiced, not as a general rebate.
ARTBILL Is similar to the customer billing report (CUSBILL) , it shows the total billing for Products, for 1 Period and 1 Year (12 previous Periods). ARTBILL has a filter, View and Group By options. in addition, you can specify the from and to dates. The default from-date is the 1st of the current month, and the default to-date is the current date. For example, 20xx.05.05 gives the from-date = 20xx.05.01 and to-date = 20xx.05.05. The default Group By is Article’.
 |  |
The first column varies, depending on the selected Group By, but otherwise it has the following columns:
Items . Thenumber of invoiced (CIN) items Qty. The sum of quantity (QTY) from the invoice items. Sale. The sum of the billing amount from the invoice items LandedCost. The sum of net landed cost amount from the invoice items Avg.price . (Sale / CIN-quantity) GM . ( 1 - LandedCost / Sale) * 100
These columns appear twice, with the first set showing data for the from/to date, and the second set showing data for 1 year back from the to-date. Customer credit note items (CCN-items) are included in the ARTBILL application, IF a return of goods is involved. The definition of return of goods is the credit note originates from a customer return (CDV) that has a Warehouse Action Code based on goods are returned from the customer, a return goods receipt (SSA) is created in the customer return (CDV) process. The Warehouse Action Codes are:
11 Return goods for repair
12 Return to Sup for repair
13 Return goods to stock
15 Send to Customer, Return to Supplier
16 Return to Supplier
18 Send to Customer, Return to Stock

The payables are the company’s unrealized debt to the suppliers or the debtors. The payables are accrued when, for example, goods or services are purchased, and a supplier invoice has been received.
The payables are connected to the General Ledger via a sub ledger called Accounts payable. The Accounts payable gives an overview of all transactions between your own company and each supplier, and is used for keeping track of the settlement of open and closed posts in the General Ledger.
An updated overview of what you owe your suppliers.
An age distributed overview of the payables.
Actions for settlement of the debts.
Supplier invoicing - To register invoices and the settlement of the debt are some of the tasks that are included in the work on payables. Depending on the type of transaction that lead to the invoice, the supplier invoices are handled in different ways in the system.There are many different types of transactions. Some of them are connected to procurement and reception of goods, e.g. purchase of goods/materials or consumables on requisitions. Other transactions are not directly connected to procurement, e.g. regular expenses like rent, electricity, or subscriptions.
Overview of the accounts payable - To ensure an updated overview of the payables, it is important to work on the Accounts payable continuously.
Follow up on the payables ledger - The suppliers sometimes need statement of accounts to get an overview of the transactions between the companies. Then the suppliers can compare, and possibly make corrections due to deviations and incorrect entries.Internally, an updated payables ledger will form the basis for the cash management, and the follow up on overdue posts.
Credit handling - When your company receives a credit note from a supplier, it has to be manually registered in RamBase. Credit notes can be a response to complaints about received goods and/or services, or disagreements regarding prices.
Setting name | Description |
Clearing of supplier invoice/credit or balance | This setting is used for triggering scheduled batchjobs that will clear Sales Invoices that are credited, or Clear all open posts if Customer Balance is "0.00" |
Create PDF for imported supplier invoice | If this setting is "ON" - The system creates automatically a PDF report if the imported supplier invoice will be registered for validation and goes to status 2. |
Handling of remittance advice | This setting spesifies how remittance advice should be printed / sent to supplier when outgoing payments are sent to bank. SKIP - No remittance advice SKIPPRT - Use Supplier handling only (no print as default) PRT - Pioritize Supplier handling, print if no handling. PRTCOPY - Use Supplier handling, but always print copy |
KID Modulus on supplier invoice | Value in this field will tell the system to control the KID that are entered on incoming invoices, and what KID modulus that should be controlled. Legal values : MOD10,MOD11 ( One of them, or both ) |
Notification PIDs for accounts payable issues | Value in this setting is a comma list of PIDs that will get a notification by IMS for finance issues related to accounts payable |
Product (ART) for Supplier Invoice (SIN) expenses | Value in this setting is a Product (ART) to be used on Supplier Invoices (SIN) for expenses. Format to be used: ART/#NNNNNN (N for numbers) |
Rate source for supplier invoice | This setting is used for telling what date should determine RATE on Supplier Invoice (SIN). Legal values: SINDATE or SSADATE. Default : SSADATE |
To register invoices and the settlement of the debt are some of the tasks that are included in the work on payables. Depending on the type of transaction that lead to the invoice, the supplier invoices are handled in different ways in the system.
A popup can be found in the Purchase order response items (SOAITEM), Purchase order items (SPOITEM) and Supplier invoice items (SINITEM), that gives an overview of whether the Purchase order item (SPOITEM), or parts of it, is confirmed, received or invoiced. It shows all related transactions created after the Purchase order item (SPOITEM) was registered. All necessary information from received confirmation(s), goods reception(s) and invoice(s) is available in this pop up.
To access it, navigate to the context menu on item level and click, View item transaction log.. The popup has two tabs: the Chart tab gives a summarized version, while the List tab presents more details from all transactions.
There are many different types of transactions. Some of them are connected to procurement and reception of goods, e.g. purchase of goods/materials or consumables on requisitions.
Other transactions are not directly connected to procurement, e.g. regular expenses like rent, electricity, or subscriptions.
The process of linking Supplier invoice items (SINITEMS) to Purchase orders (SPO) and Goods receptions (SSA) is designed to enhance automation and reduce manual workload. The system incorporates batch processes and the Supplier invoice management (SIM) application to ensure efficient handling of Supplier invoices (SIN).
The batch process for linking Supplier invoice items (SINITEMS) to Purchase orders (SPO) and Goods receptions (SSA) includes:
Expands the search for Purchase orders (SPO) references on invoice items to improve accuracy.
Adjusts and optimizes validation checks before linking to Purchase orders (SPO).
Ensures consistency by applying the same logic when Supplier invoices items (SINITEMS) are created from Received supplier invoices and credit notes (ISI) and when scheduled batch jobs attempt linking.
Batch jobs for linking Supplier invoice items (SINITEMS) to Purchase orders (SPO) run frequently with strict validations and filters.
Uses an candidate analysis to provide more accurate match scores for automatic linking.
The Supplier invoice management (SIM) application provides filtering and visualization options to track and manage invoice items pending Purchase orders (SPO) linking.
Available Supplier Invoices (SIN) columns:
VAT Amount – Displays VAT amount.
Buyers reference no – Shows reference to Received supplier invoices and credit notes (ISI) document and includes Received supplier invoices and credit notes (ISI) amount when applicable.
Deviation Icon (!) – Highlights discrepancies between Supplier invoices (SIN) and Received supplier invoices and credit notes (ISI) amounts.
Available Supplier Invoices items (SINITEMS) columns:
Supplier invoices (SIN) Icon – Direct link to Supplier invoices (SIN) application for accessing PDF and related information.
Supplier Account and Name – Displays supplier details.
Product classification (Class) – Indicates whether an item is external work, goods, or expenses.
Purchase orders (SPO)/Goods Linking Reference – Provides links to Purchase orders (SPO) and Goods reception (SSA) for quick inspection.
Purchase orders (SPO) linking info:
If linked: Displays details on how and when it was linked.
If not linked but required: Displays pending Purchase orders (SPO) linking.
Linking accuracy symbols:
Green – High accuracy Purchase orders (SPO) linking candidates.
Yellow – Medium accuracy Purchase orders (SPO) linking candidates.
Red – Low accuracy Purchase orders (SPO) linking candidates.
Pending Purchase orders (SPO) linking – Displays items requiring Purchase orders (SPO) linking, sorted by best score candidates.
Automatically linked – Shows all items that were auto-linked, sorted by most recent.
Manually linked – Displays all manually linked items, sorted by most recent.
These improvements aim to enhance efficiency, accuracy, and user experience in the supplier invoice-to-SPO linking process, reducing manual efforts and improving automated linking reliability.
The Supplier Invoice Management (SIM) application is an overview of the Supplier Invoices (SIN) and makes it easy to follow up on approvals and PreRegistered SINs waiting to be linked to Goods Receptions (SSA) items.

There are three filter options at the top of the application.
Click on the SUP icon to select a Supplier (SUP).
In the Mode dropdown menu, choose between All, Purchase Orders & Goods Receptions, Goods Receptions or Requisitions. This is only useful in the Supplier Backlog folder.
Select a specific Location (LOC) in the Loc dropdown menu.
Click on the magnifier icon to use the filter option in the Supplier Backlog folder. Can for example be used to search for a specific Purchase Order (SPO) in the Purchase Order No ( Case ) field.
Change the currency in the Choose Currency field. This will show in the Amount,XXX column and the Total,XXX: in the bottom right corner of the application. Use the Total,XXX to make sure everything is correct, or to check against invoice amount.
Create a new SIN or transport to an existing SIN by clicking the Forward icon in between the St and Item columns.
To transport the item, highlight the preferred SIN and press ENTER.
In the Transport Item popup, check the information and click the OK button.
Note: The different filter options in top of the SIM application is set with the information to the SIN you selected.
Click the magnifier icon
Write the SPO number (123456) in the Purchase Order No ( Case ) field and click the OK button.
Press F12 to open the action menu and choose the Transport All Items to Supplier Invoice option.
In the Transport Items popup, Set a date in the Date field and fill in other necessary information.
Click the OK button to transport all items.
This shows the SIN on the item level. It displays the Account dimensions, Department, Project, Assets and VAT Code.
It is possible to set or change Account, Department, Project, assets and VAT Code on the items in this folder.
Click on the magnifier on the item you want to set or change information.
Set or change the information necessary and click on the OK button.
The magnifier opens the Item Account Info popup. This is the same as the magnifier on the SIN item level.
Use the radio button Missing Account Dimensions to filter the SIN items where Account dimensions are missing.
The Supplier Invoices folder shows an overview of the SINs.
It is possible to create a SIN or a SIN for expenses directly from the SIM application:
To create a regular SIN, click the Create New Supplier Invoice icon in the lower left-hand corner of the application.
There is two option to create a SIN for Expenses. Click the Create New Supplier Invoice for Expenses or press F12 to open the action menu and choose the Create new Supplier Invoice for expenses option.
To see all items you can add to a SIN, Highlight the SIN and press ENTER.
You will be sent to the Supplier Backlog folder with filters set for the chosen SIN and SUP.
In the fourth column, there can be two different icons:
The Register/PreRegister icon can be used to Register/PreRegister the SIN.
The Info icon explains why it can not be registered yet.
Below the table, there is an Expenses ready to register option which displays only the expense invoices that are ready for registration. By using the menu option (F12) Register all from filter, a pop-up window will open where you can register all invoices currently visible in the main list.
It is an overview of all the approvals, in the Approvals folder, and it shows the approvals status.
There are different filter opportunities:
Select SUP, with the SUP icon, or use the Loc field to select a specific LOC.
Use the radio buttons to find the document(s) needed.
Should be sent for Approval
Sent to Approval, waiting to be approved
Approved, waiting to be registered
All
Click on the icon in the Approval Status to see status for the approval and information about it. If you have admittance, you can send the item for approval, or approve items from this popup.
Use the DueDate column to see when it needs to be paid. It shows the SIN with the closest due date first.
It is an overview of all the PreRegistered (PREREG) SINs in the Waiting for Goods folder.
Click the magnifier icon to see the history of the SPO item.
Click the Change Purchase Order link icon to link SIN item it to another SPO item or to remove the link. If you remove the link, it will become a regular SIN since it is not linked to a SPO or Purchase Order Response (SOA).
The Goods Reception, not registered column shows that a Goods Reception has arrived, but is not registered. This is only as information.
To open the Supplier Invoice Management (SIM) application, find Finance in the RamBase menu and then Payables. Click Supplier invoice management to enter the SIM application.
Click on the magnifier icon in the Supplier Backlog folder.

Enter the invoice Purchase Order (SPO) number (six digits) in the Purchase Order No ( Case ) field and click on the OK button. If you do not find it using the SPO number, you can write the Product (ART) name in the Product field instead.
All items on this specific SPO will be listed.
Highlight the item you want to register an invoice for and press ENTER, or click the Transport icon to the left on the current item line.
In the Supplier Document Transport Alternatives popup, highlight New Supplier Invoice, or select an already existing invoice if you want to add this item to it and press ENTER to open the Transport Item popup.
Verify the information displayed, edit it if necessary. Fill in the due date in the DueDate field and the invoice number in the YourNo field.
For Norwegian invoices you can add the KID in the Kid field.
Click the OK button.
You will now be redirected back to the Supplier Invoice Management window. Note that a link to the Supplier Invoice (SIN) appears in the upper left side of the window.
If you want to add more items to this invoice, highlight the item and press ENTER to open the Transport Item popup. Repeat step 7-9.
To open the current SIN in an editable mode (status 1), click on the SIN link in the upper left side of the Supplier Invoice Management (SIM) window.
Verify the information displayed, edit it if necessary. Check that the amount is correct, freight can be add in the Freight field, and that it is in the correct period in the Period field.
Highlight the item and press ENTER to enter the Supplier Invoice Item. Verify the account information, edit it if necessary.
When the SIN is completed, choose the context menu option Register Supplier Invoice. The SIN is now ready to be payed (status 4).
To open the Supplier Invoice Management (SIM) application, find Finance in the RamBase menu and then Payables. Click Supplier invoice management to enter the SIM application.
Select Requisitions from the drop-down menu in the Mode field.

Click on the magnifier icon in the Supplier Backlog folder.
Enter the requisition's SPO number (six digits) in the Purchase Order No ( Case ) field.
All items on this specific SPO will be listed.
Items marked with (status 3) have to be registered as received (status 4) in order to register an invoice for them.
Make sure that the goods have been received prior to registration of the invoice.
To register the items as received:
Click on the link in the Item column
Press F12 to open the action menu and choose the option Received (status 4).
Press Esc.
Highlight the item you want to register an invoice for and press ENTER, or click the Transport icon to the left on the current item line to open the Supplier Document Transport Alternatives window.
Select a New Supplier Invoice, or select an already existing invoice if you want to add this item to it.
In the Transport Item window, verify the information displayed. Edit it if necessary, and/or add more information.
Click the OK button.
You will now be redirected back to the Supplier Invoice Management window. Note that a link to the Supplier Invoice (SIN) appears in the upper left side of the window.
If you want to add more items to this SIN, highlight the desired item line and press ENTER to open the Transport Item window. Repeat step 8 and 9.
To open the current SIN in an editable mode (status 1), click on the SIN link in the upper left side of the Supplier Invoice Management window.
Verify the information displayed, edit it if necessary, and/or add more information.
If more items from the connecting requisition (SPO or SOA) are to be added, press Page Down.
When the SIN is completed, choose the context menu option Register Supplier Invoice. The SIN is now ready to be payed (status 4).
To open the Supplier Invoice (SIN) application, find Finance in the RamBase menu and then Payables. Click Supplier invoices to enter the SIN application.

Select an invoice in the Supplier invoices area to view, add and change information about the invoice by selecting the tabs and sub-tabs on the right.
Use the search field to find your invoices or click the Predefined filters icon next to the search field to select a predefined filter. There are three predefined filters: Invoices with info notification, My invoices and Pending registration.
The attachments to the selected Supplier invoice (SIN) is available in the top right corner of the application. Click the Preview icon to preview the attachment or download it with the Download file icon. The preview option is only available for PDFs.
This area contains info about the selected Supplier invoice (SIN). Here is an explanation about all the fields:
Supplier / xxxxxx – This is the RamBase supplier identifier.
Supplier’s reference - Supplier/sellers reference. Usually a person.
Location – Location identifier.
Invoice number – Suppliers/sellers reference number. Typically to an external system.
Currency – Suppliers currency. Three character code following the ISO 4217 standard.
Enterprise number, VAT registration number, intercompany code and invoice address will be added from the selected Supplier (SUP).
Bank account – Account number used to identify the bank account.
Issue date – Date when the document was issued.
Payment terms – Terms of payment. Default value is retrieved from the supplier.
Period – Accounting period identifier.
Supplier’s payment reference – Sellers reference to identify the object. In Norway this is typically a KID-number.
Due date – Date the object is due to be paid.
Buyer’s reference number – Buyers reference number.
Received date – Date when the document was received.
Assignee – User identifier.
Registration date – Date of registration.
Exchange rate – The exchange rate used in conversion.
VAT handling – Specifies how value added tax (VAT) should be calculated.
VAT period – Accounting period this VAT posting belongs to.
VAT registration number – A unique number assigned by the relevant tax authority to identify a party for use in relation to VAT.
VAT type – Type of VAT.
VAT currency – VAT currency. Three character code following the ISO 4217 standard.
VAT exchange rate – Rate between transaction currency and company VAT currency. VAT rate should be used to calculate VAT amount in company VAT currency.
Default VAT percent – VAT percent.
Default VAT code – Code that determines VAT rules used for VAT calculations.
VAT date – Date of VAT posting. Currency rate calculation use this date.
VAT country – Country name of VAT entity.
Adjusted VAT amount – Adjusted VAT amount.
The Items tab displays all items added to the selected Supplier invoice (SIN) and it is possible to edit, delete and add more items here.
All notifications will be visible in this tab and it is possible to add any info notifications with the Add info notification button.
The Inspect approval tab provides a detailed view of the approval process for the selected invoice. When clicked, it opens a breakdown of:
Who has approved or rejected the invoice.
The current status of the approval workflow.
Any pending approvals and their respective approvers.
The Create auto approval rule is used to define automatic approval rules for specific products or invoices. Auto approval rules streamline the process by automatically approving invoices that meet predefined criteria.
The amounts are visible in the bottom right corner. There you can see the freight, fee, subtotal, VAT, round off and total amount.
It is possible to edit the item directly in the Items tab. You can edit the GL Account, Department, Project, VAT Code, Net amount and Gross amount fields. Highlight the item and press F2 or click on the edit icon to the right on the item line. When you are done, press Ctrl+s or click on the checkmark to save it.

Highlight an item and press ENTER or click the arrow button to the right to open the Supplier invoice item (SINITEM) application. This is a more detailed overview of the selected item and it is possible to edit or add more information here.
The Shipping addresses tab displays where the items are shipped from and to where.

The Invoice tab shows how the invoice is posted, with link to the Payable journal entries (SAS) and General ledger posting (ATR).
You can make/edit/view the period adjustment plan for the selected SIN by clicking on Adjustments. You can read more about it in the Make period adjustments for Supplier invoices (SIN) topic.
All the VAT adjustments is displayed in the VAT adjustments tab. Click on the arrow icon in the GL posting column to enter the specific General ledger posting. You can postpone and repost VAT with the context menu options: Postpone VAT and Repost VAT...

Use the Payable ledger tab to see the specific payable information for this SIN. It displays the Payable transaction document, registration date, due date, currency, amount, link to the Payment (PAY) document when it is paid and payment date.
Details of the Supplier invoice item (SINITEM) can be viewed and edited in the Suppler invoice (SINITEM) items application. From the Supplier invoice (SIN) application, highlight an item and press ENTER or click the Arrow icon to open the Supplier invoice item (SINITEM) application.
If approval is necessary, it will be requested in the Notes tab. A flowchart of the selected item is visible at the top of the application.
To forward only one of the items on the Supplier invoice (SIN) document, enter the Supplier invoice (SINITEM) application. Select the item and click on the Forward item option in the context menu.
Use the Make/edit/view account period adjustment plan… and the Make/edit/view account posting adjustment plan… option in the context menu to see the period and posting adjustment plan.

The Delivery area consists of the Quantity field and the Change quantity icon.
Click the Quantity field and type the intended quantity to change the Supplier invoice (SINITEM) item quantity.
Note
If the Supplier invoice (SINITEM) item is forwarded from a Goods reception (SSA), the quantity can only be adjusted by clicking the Change quantity icon. This is to reflect the quantity change on the Goods reception (SSA) document.
The Price area displays all relevant price information.
Icon | Field | Description |
|---|---|---|
| Net price/CUR | An editable field where the final price per unit after deducting all discounts can be edited and viewed. If there is a price deviation between the Goods reception (SSA) and the Supplier invoice (SINITEM) item, a warning icon will be displayed. To update the price on the Goods reception (SSAITEM) item, click on the warning icon to open the Change quantity popup. Clicking the Yes button will update the price on the Goods reception (SSAITEM) item. |
Net amount/CUR | An editable field where the final item amount after deducting all discounts can be edited and viewed. | |
VAT amount/CUR | VAT amount in the currency set on the Supplier (SUP). | |
Gross amount/CUR | An editable field where the gross amount, in the currency set on the Supplier (SUP), can be edited and viewed. |

To change the quantity on a Supplier invoice (SINITEM) item and reflect the quantity changes on the Goods reception (SSA) document, click on the Change quantity icon next to the Quantity field. This will open the Change quantity popup where the following fields and checkboxes are available.
Field or checkbox | Description |
|---|---|
Goods reception item | An information field that displays the Goods reception (SSA) item document identifier. Clicking the View icon will open the Goods reception (SSA) application on the displayed Goods reception (SSA) item. |
Net price/NOK | An informational field that displays the net price of the Goods reception item (SSAITEM) being invoiced. |
Quantity | An informational field displaying the quantity of the Goods reception (SSA) document. |
Not invoiced quantity | An informational field that displays the remaining quantity that has not been invoiced. Will decrease when the Goods reception (SSA) gets invoiced. Note that Goods receptions (SSA) can get invoiced for none or part of the items. |
Current quantity | The current quantity of the Supplier invoice (SINITEM) item. |
New quantity | An editable field where the user can change the quantity of the Supplier invoice (SINITEM) item which will impact the Not invoiced quantity, if the check box Do not adjust "not invoiced quantity on goods reception item" is not checked. |
New net price | Final new price per unit after deducting all discounts after confirming the changes. |
Current net amount | Current final item amount after deducting all discounts etc. |
New net amount | New final item amount after deducting all discounts after confirming the changes. |
Do not adjust “not invoiced quantity” on goods reception item | This option will not adjust the Not invoiced quantity on the Goods reception (SSA) item. |
Adjust total amount on supplier invoice item | This option will recalculate the total amount on the Supplier invoice (SIN) item based on the new quantity set in the New quantity field and current prices. |
From the Supplier invoices (SIN) application, select the intended Supplier invoices (SIN) from the Supplier invoice list.
From the Items tab, select the item intended for quantity change and press ENTER or click the arrow to open the Supplier invoice item (SINITEM) iapplication.
From the Supplier invoice item (SINITEM) application, in the Delivery area, click on the Change quantity button to open the corresponding popup.
Adjust the New quantity field.
Check the Do not adjust "not invoiced quantity" on goods reception item checkbox if this is intended.
Check the Adjust total amount on supplier invoice item checkbox if this is intended.
Click the Change button to add the quantity change to the Goods reception (SSA) document and the Supplier invoice item (SINITEM).
GL account, dimensions and VAT may be copied to all items in the Supplier invoice items (SINITEM) and Supplier credit note item (SCNITEM) applications. This option is available via the Context menu. Via a popup, users may choose which dimensions to copy. There is also an opt out to not overwrite fields that already have a value.
Click Context menu and select Copy GL account, dimensions and VAT to all items
All the checkboxes are selected by default. Clear all checkboxes by clicking Unselect all at the top of the popup. Choose which dimensions to copy by selecting the relevant boxes
Click Update
Click on the Create new supplier invoice button.

Select the Supplier (SUP) in the Supplier lookup field.
Make sure the Issue date is correct. Use the calendar icon to change the date.
The Supplier’s payment reference, Invoice number and Due date fields is optional.
Click the Create button to create a SIN in status 1.
Add the necessary information on the newly created SIN and make sure that the existing information is correct.
Click on the Create new item button to add items to the SIN.
Set the quantity in the Qty field.
Select Product (ART) in the Product field.
Set the price in the Net price field.
Click the Create button to add the item to the SIN. Use the Create another checkbox to add more items.
Click on the Register Supplier invoice option in the context menu when finished.
It is possible to copy the latest used account dimensions to all items on Supplier Invoice (SIN) main level. This is useful if an invoice has many lines and the user must set account dimensions on all lines.
The SIN must be in status 1-3 for this function to be available.
Select a SIN in status 1-3.
In the context menu, choose the Copy the latest used account dimension to all items option.
Use the Consolidate supplier invoice items option in the context menu to make it easier to handle invoices with many items. This will be possible when:
The Supplier invoice (SIN) is in status 1.
No items on the SIN have a CASE.
No items are sent for approval.
No adjustment plans are made.
The operation will result in all items on the SIN being deleted. New items are created based on the old items, but grouped by: Product, GL account, Department, Project, Asset, VAT-code and Dimension 4-10. This means that all items with same Product, Department, Project, Asset, VAT-code and Dimension 4-10 will be consolidated to one item.
The quantity on new items will be set to 1. NetPrice and NetAmount should be set equal to the total net amount of the old lines that are being consolidated.
Text in the Description field that was included on the original items will not be transferred
Supplier Invoices (SIN) in RamBase can be Preregistered before Goods Reception (SSA) is registered, but then the Supplier invoice (SINITEM) items must have a reference to the Purchase Order (SPO).
Supplier invoice (SINITEM) items must be linked to the original Purchase order (SPO) items.
The Supplier invoice (SINITEM) item can be linked to a Purchase order (SPOITEM) item and a Goods reception (SSAITEM) item from the Supplier invoice (SIN) application by following the procedure listed below.
To open the Supplier Invoice (SIN) application, find Finance in the RamBase menu and then Payables. Click Supplier invoices to enter the Supplier invoice (SIN) application.
Select the intended Supplier invoice (SIN), from the Supplier invoices list.
From the Items tab, highlight the item you want to link to a Purchase order (SPOITEM) item, and press ENTER.
From the Supplier invoice (SINITEM) item application, choose the Link supplier invoice item to purchase order item option in the context menu to open the corresponding popup.
In the Link supplier invoice item to purchase order item popup select the Purchase order (SPOITEM) item from the Applicable purchase order item area, that matches the Supplier invoice (SINITEM) item intended for linking.
To link a Purchase order (SPOITEM) item to the Supplier invoice (SINITEM) item, click on the Link icon to the far right in the Applicable purchase order item area. Note that Linked purhcase order item field, in the header, will be updated with the newly linked Purchase order (SPOITEM) item.
If the Purchase order (SPO) item has related Goods reception (SSA) items, these will be listed below in the Related goods reception items area.
To link a Goods receptions (SSAITEM) item to the Supplier invoice (SINITEM) item, click on the Link icon to the far right in the Related goods reception items to SPO/#### area. Note that Linked goods reception item field, in the header, will be updated with the newly linked Purchase order (SPOITEM) item.
Linking can also be done from the Supplier Invoice Management (SIM) application, by forwarding the open SPO items to SIN items. The SIN item will then be created with a reference to the SPO item.
To open the Supplier Invoice Management (SIM) application, find Finance in the RamBase menu and then Payables. Click Supplier invoices management to enter the SIM application.
In the Supplier Backlog folder, click on the magnifier icon to open the SIM Filters.
Write the SPO number in the Purchase Order No ( Case ) field and click the OK button.
It is possible to transport a singel item or transport all items to a SIN.
To transport a singel item from the SPO, click the transport item icon located between St and Item and transport the item to a SIN.
To transport all items to a SIN, press F12 to open the action menu and choose the Transport All Items to Supplier Invoice option.
In the Transport Item(s) popup, set the invoice date in the date field and fill in any other info necessary. Click the OK button.
The newly created SIN can be found in the Supplier Invoices folder in the SIM application.
The SIN is created as Waiting for Goods Reception.
Highlight the SIN and press ENTER.
To pre-register the SIN, choose the Pre-register supplier invoice and wait for goods option in the context menu.
The SIN will stay in status 3, until the Goods Reception (SSA) is registered (status 3) on all items that has a link to SPO.
The linking between the SIN and the SSA will be done automatically by the system. This will explain how it is done by the system.
When a SIN is registered to St=3, the DOCTYPE and TYPE field on the SIN is updated to PREREG, and the SIN will show as PreRegistered in RamBase. PreRegistered SIN items will be picked up by a batch job that will check if the goods is received from the SPO that the SIN item has a reference to. If the Goods Reception (SSA) item(s) is found, the system will try to link the SIN item to the SSA item.
Supplier Account, Currency, Product (IT) and PurchaseOrderReferance (CASE) has to be the same on the SIN and SSA item.
The SSA item must have Status 3 and the NetQty must be greater than 0.
Batch process can link a SIN item to a SSA item if QTY is the same on the SSA item and the SIN item.
Batch process may also link 1 SIN item to several SSA items, if the total QTY on all open SSA items is the same as the SIN item. The SIN item will then, before linking, be split into many SIN items, 1 item for each SSA item that should be linked.
When a SIN item is linked to the SSA item, the system setting SupShippingAdviceAutomaticPriceUpdate will decide if the price on the SSA item should be automatically updated when there is a price-deviation between the SIN item and the SSA item. This setting has two elements (element1 and element2), where element1 is the max price deviation in percent, and element2 is the max price deviation in the invoice currency. If the deviation is within the value in this setting, the SSA price will automatically be updated to the SIN price when the items are linked. If not, the price difference will be shown as a warning on the SSA item.
When all items on a PREREG SIN is linked to SSA items, the SIN will be automatically registered (status 4) by the system when the SSA is registered (status 3). In SIN, the DOCTYPE field will be cleared and will not contain PREREG anymore. The hidden TYPE field will still have the value PREREG.
When preregistered Supplier Invoices (SIN) are linked to Purchase Order (SPO) items and waiting for goods, they will stay in status 3 until all goods are received. This means they will not be part of the Supplier Balance (SUPBAL) and general ledger balance, they will not be included in the VAT report and could not be handled by the remittance process in RamBase. It will now be possible to register these SINs to status 4, so that they will be a part of the SUPBAL and general ledger balance.
Enter a preregistered SIN.
Choose the Register supplier invoice before goods are received option in the context menu. This will set the SIN in status 4 and it will be a part of the SUPBAL and general ledger balance.
When the SIN is registered to status 4 it will receive a Product Account Transaction (PAT) document and it will be included in the Product Balance (PROBAL) application as Invoice Registered - Waiting for Goods. These transactions will also be part of the PROBAL that is imported to the general ledger. These PAT documents will be closed when goods are received, or when purchase order is cancelled.
It has been created a new Account Default (ACD), Acc Default PROING (General ledger account used when “Invoice No Goods” balance is imported to the general ledger), to automatically import invoices with no goods to the general ledger. By default this will be imported to the same general ledger account as goods with no invoice, but this can be edited by changing the account on the ACD.
The suppliers sometimes need statement of accounts to get an overview of the transactions between the companies. Then the suppliers can compare, and possibly make corrections due to deviations and incorrect entries.
Internally, an updated payables ledger will form the basis for the cash management, and the follow up on overdue posts.
Crediting refers to the process of receiving credit notes (SCN) from suppliers in response to complaints about received goods and/or services. Crediting is considered as the opposite to invoicing, according to the way the transactions are executed in the general ledger.
It is important to remember the nature of credit notes. Credit notes reduces the billed amount, it is not a new invoice. The credit note points out the decrease in payables.
When your company receive a credit note from a supplier it has to be manually registered in RamBase.
To open the Supplier Invoice (SIN) application, find Finance in the RamBase menu and then Payables. Click Supplier invoices to enter the SIN application.

Find the supplier invoice to be credited.
To make a credit note for all items on the invoice: On the document level, click on the Context menu and choose the Forward all items to supplier credit note option.
To make a credit note for a single item, click on the desired item on the invoice and then click on the Context menu and choose the Forward to supplier credit note option.
Select the option New Supplier Credit Note and press ENTER.
Verify the information in the popup and click the OK button. The new Supplier Credit Note (SCN) is editable and information like YourNo and other terms may be added/edited.
Click the Context menu and choose the option Register Supplier Credit Note. The SCN is then registered in Status 4 and awaits settlement.
You may inspect the supplier cash flow by using the Supplier Due Amount (SUPDUE) application. The application presents the account payables from a financial point of view. Here it is not the state of supplier accounts that matters, but the account payables' impact on the company's liquidity.
To open the Supplier Due Amounts (SUPDUE) application, find Finance in the RamBase menu and then Cash management. Click Supplier due amounts to enter the SUPDUE application.

Click on the blue numbers to inspect the underlying data and the relevant suppliers.
The application presents the due amounts chronologically. The empty line in the middle represents today. Above the empty line are the overdue amounts, below are the due amounts. The records close to the empty line have the heaviest impact on the company's liquidity. These are the amounts soon to be payed.
The due and overdue amounts can be presented in three different currencies (and a composite account for other currencies). The "today" line can be altered by entering another date in the Date field in the header, and the DueDate Step can be set to a fixed number of days, different from the default 7.
Supplier balance (SUPBAL) is an application used to reconcile accounts payable and to follow up on outstanding supplier balances.
Navigate to the application
Option 1: RamBase menu→Finance→Payable→Supplier balance
Option 2: Click the Program field and type "SUPBAL" and press ENTER.
Click here to read more about the user interface.
The following areas are described in the sections below:
The Supplier balance header
The Supplier balance list
The Supplier balance header contains fields which are used to filter the list below.
Fields and buttons | Description |
|---|---|
Customer filter field | Click on the Customer filter field to look up a specific Supplier balance (SUPBAL). Click on the Filter icon to select which of the following options are to be included in the search:
|
Group by field | Click on the Group by field to filter the Supplier balance (SUPBAL) list to select which of the following options are to be included in the search:
|
Due dates field | Filter the balance amounts which are due within the next:
|
Date button | Click on the Date button to filter the Supplier balance (SUPBAL) by a specified date. |
Period button | Click on the Period button to filter the Supplier balance (SUPBAL) by a specified period. |
Currency field | Supplier balance (SUPBAL) can be displayed in any available currency. This is useful when the local currency differs from the reporting currency. |
Use transaction currency checkbox | If the Transaction currency option is selected, the amounts will be shown in the original currency of the invoices, rather than being converted using an exchange rate. |
Rate field | Here, you can choose whether to view the transaction rate (the original exchange rate at the time the invoice was registered) or the rate recalculated based on the date specified in the Rate Date field. |
Balances field | Filter the balances by choosing All balances, All overdue balances or Max overdue balances. |
Clear filters button | Click the Clear filters button to remove all filters and show all Supplier balance (SUPBAL) in the list. |
View supplier balance report button | This link opens the Supplier balance (SUPBAL) report filtered according to the selections you have made in the application. |
The displayed Supplier balance (SUPBAL) are based on the selections made in the Supplier balance fields area.
The Supplier balance list includes a Search field. In addition to the fields and variables in the header, the scope of the search can be further filtered by clicking the Filter builder icon to the right of the search field.
Clicking the Filter builder icon will display a popup with the options to add a Standard filter and/or Create custom filters. All custom filters can be saved and then added to the My saved filters area.
The user can customize the order of the columns by drag and drop, in addition to hover over icons and columns for further descriptions.
Columns | Description |
|---|---|
Key | GroupBy key for the supplier balance. |
Name | Description of the key. |
Currency | Secondary grouping key for the supplier balance. |
Balance (NOK) | Balance amount. |
Not due | Balance amount which is not due. |
Due (0-30 d) | Balance amount which is due within the next 0-30 days. |
Due (31-60 d) | Balance amount which is due within the next 31-60 days. |
Due (60+ d) | Balance amount which is due within the next 60+ days. |
Use the DueDate field to control when unregistered Supplier invoices (SIN) and Supplier credit notes (SCN) are due to be paid.
The date in the DueDate field will be calculated and updated when the PayTerm and Date fields are updated before registration on Supplier invoices (SIN) and Supplier credit notes (SCN).

It is possible to import Received Supplier Invoices (ISI) automatically. This must be ordered / set up by RamBase.
The user can find all the Received Supplier Invoices (ISI) documents which needs attention, in the Received Invoices folder in the Supplier Invoice Management (SIM). Documents in status 2 (pending validation), 6 (pending corrections) and 8 (pending forward to supplier invoice / credit note) will be in this folder. Highlight the document and press ENTER to open the highlighted document in the ISI application.

The settings can be found under the module Finance / Payables. Each sub setting activates a batch job which runs every hour.
Main setting to activate the automatically process:
(ISI) Automatically processing for received supplier invoices - If this setting is "ON" - The automatically processing for received supplier invoices (ISI) is activated and several scheduled batch jobs can be activated by using the sub settings. The sub settings decide how long or what will be done by the system.
Sub settings:
Forward to supplier credit note (SCN) - If this setting is "ON" - The system checks every hour if received supplier invoices can be found in status 8 and forward one by one received supplier invoice to supplier credit note (SCN).
Forward to supplier invoice (SIN) - If this setting is "ON" - The system checks every hour if received supplier invoices can be found in status 8 and forward one by one received supplier invoice to supplier invoice (SIN) .
Register supplier invoice (SIN) - If this setting is "ON" - The system checks every hour if supplier invoices (SIN) in status 1, which comes from received supplier invoices (ISI), exist and register these invoices.
Validate received supplier invoices (ISI) - If this setting is "ON" - The system checks every hour if received supplier invoices (ISI) can be found in status 2 and try to validate these documents. If no error is found, the system sets the document in status 8. In case of at least one validation fail, the system sets the document in status 6 and the user must fix the problem(s) manually.
Other settings:
(ISI) Create PDF for received supplier invoice - If this setting is "ON" - The system creates automatically a PDF report if the received supplier invoice will be registered for validation and goes to status 2.
(ISI) Create PDF only if no attachments exists - If this setting is "ON" - The system creates the PDF report only if no attachments exists on the received supplier invoice.
(ISI) Deactivate bank account validation on received supplier invoices - If this setting is "ON" - The system does not validate the bank account information against information on Supplier.
The Received supplier invoice and credit note (ISI) application is used to import Supplier invoices (SIN) and Supplier credit notes (SCN). This can be done automatically or manually.
Contact your RamBase partner to set it up.
This is a file import, it is not possible to upload a PDF invoice.
To open the Received supplier invoices and credit notes (ISI) application, find Finance in the RamBase menu and then Payables. Click the Received supplier invoices and credit notes option to enter the application.

Click the Import supplier invoices and credit notes... option in the context menu.
Click the Select file > button.
Click the Choose File button and select the file.
Click the Upload button to import supplier invoices and credit notes.
Click the Validate option in the context menu.
The document will go to Status 8 if the validation is successful. If the validation fails, the document will go to Status 6.
If the validation fails, the data must be corrected manually. The validation error messages will be displayed as notes on the main and/or item level.

When the data is corrected, click the Validate option in the context menu to set the document to Status 8.
Click the Forward to supplier invoice or Forward to supplier credit note option in the context menu to transport the Received supplier invoices and credit notes (ISI) document to a new Supplier invoice (SIN) or Supplier credit note (SCN) document.
The Received supplier invoices and credit notes (ISI) document is set to Status 9 and is successfully forwarded to a new Supplier invoice (SIN) or Supplier credit note (SCN).
The Company setting (CSV), ImportedSupplierInvoiceItemDisableSuppliersNamePopup, can disable the Change suppliers product name? popup on received Supplier invoice items (ISIITEM). If this setting is turned on, the system disables the popup and denies the user from changing the Supplier name on the selected product.
It is possible to import Supplier invoices (SIN) and Supplier credit notes (SCN) automatically.
If all the settings for automatically processing received supplier invoices is set to ON (one main setting and four sub settings), the system will automatically import and process the Received supplier invoices and credit notes (ISI) documents.
Note
It is possible to stop automatic forward of imported invoices and credit notes in the Settings folder on the Supplier (SUP). Select the Stop automatic forward of imported invoices checkbox. The Received supplier invoices and credit notes (ISI) document will then remain in Status 8 until the user manually forwards it to a Supplier invoice (SIN).

Invoices / credit notes comes into the Received supplier invoices and credit notes (ISI) application for validation (Status 2).
The system checks every hour if Received supplier invoices and credit notes (ISI) can be found in Status 2 and try to validate these documents. (Received supplier invoices and credit notes (ISI) document in Status 2, 6 and 8 can be found in the Supplier invoice management (SIM) or Supplier credit management (SCM) application in the Received Invoices or Received Credit Notes tab.)
If no error is found, the system sets the document in Status 8.
In case of at least one validation fail, the system sets the document in Status 6 and the user must fix the problem manually. The validation error messages will be displayed as notes on the main and/or item level.
After the user has fixed the validation error messages, click the Validate option in the context menu to try to set the Received supplier invoices and credit notes (ISI) document to Status 8.
The system checks every hour if Received supplier invoices and credit notes (ISI) can be found in Status 8 and forward one by one received invoice/credit note to a Supplier invoice (SIN) or Supplier credit note (SCN).
If the setting Register supplier invoice is ON, the system checks every hour if a Supplier invoice (SIN) in Status 1, which comes from a Received supplier invoices and credit notes (ISI) document, exist and register these invoices/credit notes (set the Supplier invoices (SIN) to Status 4).
Use the Add user information button to add information manually. This information will follow the document when the Received supplier invoices and credit notes (ISI) document is forwarded to a Supplier invoice (SIN) or Supplier credit note (SCN).
If the VAT registration number is not valid on the document, it is stopped in Status 6 (Pending correction) in the Received supplier invoices and credit notes (ISI) application. The valid registration numbers will be available in the VAT registration number field.
Enter the Received supplier invoices and credit notes (ISI) document.
Click on the VAT registration number field to open the drop-down menu with the valid registration numbers.
Click on the correct registration number to set it on the selected document.
If you receive a value in the VAT registration number field on a Received supplier invoices and credit notes (ISI) document, which is not your VAT number, the Received supplier invoices and credit notes (ISI) document will be stopped in Status 6 and the correct VAT number must be selected.
This control is new, so occurrences of documents stopping in Status 6 with references to wrong VAT number might happen, even though similar documents have not been stopped before.
Note
The valid registration numbers available in the VAT registration number field depends on the VAT numbers set in the VAT Data tab in the Location (LOC) application.
To reopen a document that has been closed (Status 9 - Processed), use the Reopen option in the context menu.
The Reopen option in the context menu will reset the document to Status 2 - Pending validation.
Invoice numbers can be changed for documents in Status < 6, with validations that ensure uniqueness.
The user can use the Supplier Invoice Management (SIM) application to follow up on Received Supplier Invoices (ISI) documents. All ISI documents which needs attention can be found in the Received Invoices folder.

Status | Meaning |
0 | - |
1 | Pending registration |
2 | Pending validation |
3 | - |
4 | - |
5 | - |
6 | Pending corrections |
7 | - |
8 | Pending forward to supplier invoice / credit note |
9 | Processed |
D | Discarded |
The upload/import is done and the document is ready for the validation, before it can create a new Supplier Invoice (SIN) based on the imported data.
The validation failed and the data must be corrected manually by the user. The validation error messages will be displayed as notes on the main and/or item level.
The validation was successfully and the document is ready to be forwarded to a new Supplier Invoice (SIN) or Supplier Credit Note (SCN). After creating the SIN or SCN, the Imported Supplier Invoice (ISI) goes to status 9. Depends on the field IsCreditNote, the corresponding operation is available to forward the ISI document.
Check the list below to see how the system validates on the document main and item level. Use this list if you receive an error message.
In case of an error, the system will set the document to status 6, pending corrections.
The system will try to find the Supplier (SUP) via the Enterprise field.
The system will try to find the SUP via the Name field, which is a text search field.
In case of several SUPs with the same name and enterprise number, the system check in addition the bank account / IBAN and find a unique combination.
The system checks if the SUP is not active (status 4).
The system checks if the SPO reference is valid, must exists and have the same currency. Take the SUP from this SPO.
The system checks if the currency from the imported invoice is available as currency for the SUP.
The system checks if the bank account exists for the SUP, for the given currency.
If the bank account is not available, the system check if the IBAN and SWIFT exist.
The system checks if the count of items is not more than the max which is allowed for the SIN archive.
The system will try to find the shipping address via the Address fields in the Shipped from area.
The system checks if the shipping address is not active (status 4).
The system will try to find the Location (LOC) via the Address fields in the Shipped to area.
The system checks if more than one LOC can be found.
The system checks if the LOC is not active (status 4).
The system checks if the ISI document has a SPO reference on main level, check for exact match on quantity and amount. If there is only one match, choose product.
The system will try to find the Product (ART) via the Suppliers reference field in the Notes area on item level on the ISI document. There must be a full reference on the item level (example: SPO/102102-1).
The system will try to find the ART via the Name field in Product area.
The system will try to find the ART via the Default MPN field on the ART.
The system will try to find the ART via the Supplier's names on the ART.
The system checks if this ART was mapped earlier for this SUP.
The system checks if the ART is not in status 1 or 9.
Enter the ISI item to see how the product has been matched.

ISI items with Quantity and Gross price = 0 goes directly to status 9 and will not be transported to the Supplier invoice (SIN).
A validation can be found in the Received supplier invoice and credit note (ISI) application through a Note to check if the supplier bank account is active.
The Imported invoice product matching rule (IPR) application allows users to define matching rules that link a supplier and product to a specific RamBase product. These rules are used to automatically match items between imported invoice lines (from ISI) and existing products in RamBase.
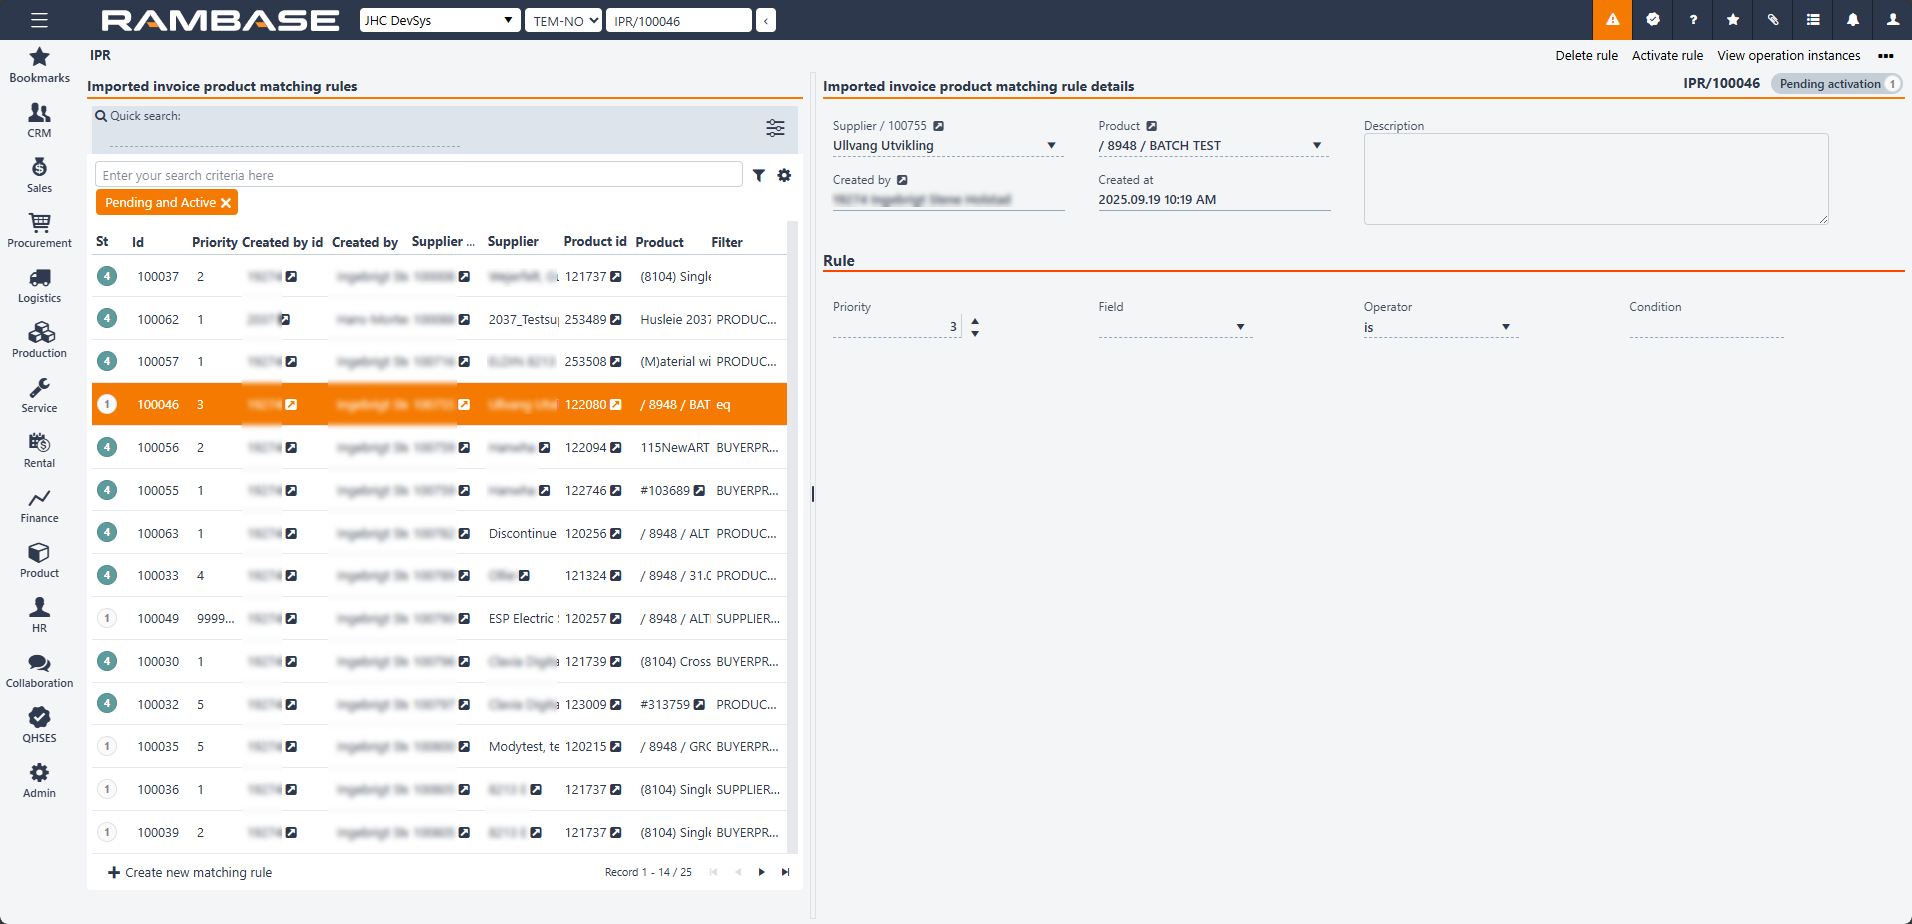
The application is divided into two main areas, the imported invoice product matching rules on the left side and the imported invoice product matching rule details on the right side.
The Imported invoice product matching rules area is filter based and can list all intended matching rules.
The header includes a search field, the Filter builder icon and the Column settings icon.
The user can create new matching rules by clicking the Create new matching rules button in the footer.
Click the Quick search icon to include or exclude the following in the search:
Supplier id
Supplier name
Product name
Click the Column settings icon to open the column settings. Here the user can add and remove columns from the Imported invoice product matching rules area, Export to excel, Reset to default view and Include custom fields.
The list under includes all included columns and filtered matching rules. The user can create a new matching rule by clicking the Create new matching rule button.
Columns | Description |
|---|---|
St | Product matching rule status. |
Id | Product matching rule identifier. |
Priority | Product matching rule priority. |
Created by id | Employee identifier. |
Created by | Who created the matching rule. |
Supplier id | RamBase supplier identifier. |
Supplier | Name of the supplier. |
Product id | Product identifier. |
Product | Name of the product. |
Filter | Provides a summary of the rule. For example, Product contains rent is created by combining the values from the Field, Operator, and Condition fields. |
The Imported invoice product matching rule details area is used to automatically assign the correct product to all invoice items and send the invoice directly to the Supplier invoice (SIN) archive with no manual actions required in Received supplier invoice/credit note (ISI).
Supplier field - RamBase supplier identifier. Can only be changed in Status 1.
Created by field - Displays the creator of the Imported invoice product matching rule (IPR)
Product field - Product identifier. Can only be changed in Status 1.
Created at field - Displays the date and time of creation in yyyy.MM.dd format.
Description box -Allows users to enter relevant information to the matching rule created or edited. This field is optional unless otherwise specified, and it supports plain text input.
Priority - It is possible to create multiple rules with different priorities for the same or different products.
Field - In this dropdown menu, you can choose the following fields from RamBase as the basis for creating the rule that will identify which product you want to match:
Name (PRODUCT)
Suppliers identification (SUPPLIERPRODUCT)
Buyers identification (BUYERPRODUCT)
Description (PRODUCTDESCRIPTION)
Operator - Operators such as Is, Contains, and Not are used to define how the text in the invoice should be matched against rules, where Contains is the most commonly used to capture variations in the invoice text.
Condition - In this field, you can enter the search criteria you want to use to match the invoice. This could be a word that always appears in the invoice text from the supplier, such as an agreement number — for example, rent. If the rule is set up like this: NAME CONTAINS "Rent" and the invoice text from the supplier is "Rent October 2025", the rule will be triggered.
Users are allowed to define matching rules that link a supplier and product to a specific RamBase product. These rules are used to automatically match items between imported invoice lines from Received supplier invoice/credit note (ISI) and existing products in RamBase. When a new invoice is imported into Received supplier invoice/credit note (ISI), the system automatically recognizes and assigns the correct product to the invoice. Based on the configuration, the invoice will either be automatically posted or ready for posting and registration (SIN).
There is a one-to-one relationship between an Imported invoice product matching rule (IPR) and a rule, meaning that multiple rules cannot be applied to the same Imported invoice product matching rule (IPR). However, it is possible to create several rules about the same matter with different priorities.
If a product has a finance account setting, the accounting will happen automatically when the invoice is recognized and assigned to the product, which reduces manual work for the user.
The upload/import is done and the document is ready for the validation, before it can create a new Supplier Invoice (SIN) based on the imported data.
Operations:
Discard received Supplier invoice / credit note - Set the document status to "D".
Validate received supplier invoice / credit note - Set the document status to "6" or "8".
The validation failed and the data must be corrected manually by the user. The validation error messages will be displayed as notes on the main and/or item level.
Operations:
Discard received supplier invoice / credit note - Set the document status to "D".
Validate received supplier invoice / credit note - Set the document status to "6" or "8".
The validation was successfully and the document is ready to be forwarded to a new Supplier Invoice (SIN) or Supplier Credit Note (SCN). After creating the SIN or SCN, the Imported Supplier Invoice (ISI) goes to status 9. Depends on the field IsCreditNote, the corresponding operation is available to forward the ISI document.
Operation:
Forward to supplier invoice - Set the document status to "9".
Forward to supplier credit note - Set the document status to "9".
Open for validation - Set the document status to "2".
To discard a ISI document, the document must be in status 2 or 6.
Enter the ISI document you want to discard.
Choose the Discard option in the context menu.
If the ISI document is in status 8, it has to be opened before it can be discarded. Choose the Open for validation option in the context menu and follow the procedure explained above.
A ISI document in status 9 is processed and can not be discarded.
It is not possible to delete an ISI item. If necessary, ISI must be forwarded to SIN and the item must be deleted there.
The ISI document can be modified in status 1, 2 and 6. If the ISI document is in status 8, it has to be opened before it can be modified. Choose the Open for validation option in the context menu.
In status 1 - 6 the following fields is open for update and a revision history is added to track the changes:
Account number
IBAN
SWIFT code
Supplier reference
Supplier reference (item level)
If RamBase does not manage to link a product to the items in the ISI document, it is possible to copy the same Product (ART) to all items without a link to an ART. Use the Copy RamBase product to all unassigned items option in the context menu. This function can be used when the user must enter to link products because RamBase have not been able to match them.
To open the Received supplier invoices and credit notes (ISI) application, find Finance in the RamBase menu and then Payables. Click Received supplier invoices and credit n... to enter the ISI application.
Highlight the ISI document.
Highlight the ISI item and press ENTER.
Find the RamBase product field in the Product area of the application. Write the Product (ART) name and select it from the list. It will be a new option in the context menu, Copy RamBase product to all unassigned items.
Click the Copy RamBase product to all unassigned items option in the context menu to copy that ART to all unassigned items. What it does is that it copies the product connected to the selected ISI item, to all other items that have not yet been connected to a RamBase product.
The operation opens a dialog where a product can be selected, a default product can be defined in the Company setting (CSV), (ISI) Product (ART) for consolidation of ISI expenses to SIN, and a table will be shown with the information on how the Supplier invoice (SIN) or Supplier credit note (SCN) will look like after creation. Quantity 1 will be used on the document. This operations makes it easier to handle expense invoices where the user would like to consolidate all Received supplier invoices items (ISIITEMS) into items grouped by the VAT percentage.
The operation is available in Status 6 and 8. In addition the ISI must not have validation errors on the main level.
Enter the File Manager to see and administrate the files attached to the ISI document.
Click on the ISI document you want to see and administrate the files for.
Press F9 or click the File Manager icon (paperclip) in the upper right corner, to enter the File Manager for this document.
Read more about the File Manager here.
There will always be a file attached to the ISI document (the import file).
A PDF file will be attached, if the setting Create PDF for received supplier invoice is turned on.
All documents provided in the source file to the ISI document will be included as an attachment.
All attachments to the ISI document will supplied to the next document (SIN / SCN).

The Supplier invoice (SIN) deviation feature enhances accuracy and control in accounts payable (A/P) by identifying discrepancies when Supplier invoice (SIN) lines are modified. If the total payable amount or VAT amount differs from the scanned invoice (original invoice), an alert will notify the user. This helps maintain compliance, reduces payment errors, and strengthens financial oversight.
When a deviation is detected, a yellow warning box appears. Users can override the scanned amount, but approval is required before processing. A log entry is automatically created to ensure transparency and maintain and auditing purposes.
To enable this functionality, these following configurations must be in place:
The Approval rules (APC), Approve imported invoice deviations, must be configured to define approvers in the approval assignment process.
Additionally, the Company settings (CSV), The maximum allowed deviations in EUR (absolute amount) between the ISI document and the SIN/SCN documents, should be configured and set the deviation threshold (default: 0.1 EUR).
It is possible to link a Supplier Invoice (SIN) to an existing Purchase Order (SPO) / Goods Reception (SSA) if SPO has a backlog and are not invoiced. This is a way of handling missing/wrong SPO number on inbound invoice. It is also possible to delete or update the link. Delete the link to register the SIN without a link to a SPO for example. This can be done in the Supplier Invoice Management (SIM) application:
To open the Supplier Invoice Management (SIM) application, find Finance in the RamBase menu and then Payables. Click Supplier invoice management to enter the SIM application.
Enter the Supplier Invoice Items folder.
Click the Change Purchase Order link icon.

Click on the magnifying glass icon to see which SPOs it is possible to link the SIN to.
Highlight a SPO and click ENTER.
Click the Update Link button to link the SIN to the SPO.
When the SIN is linked to the SPO it is possible to preregister the SIN to status 3.
Enter the SIN document.
Press F12 to open the action menu and choose the PreRegister Supplier Invoice, Wait for Goods (St=3) option.
When a Goods Reception (SSA) connected to the SPO is registered, the system will register the SIN automatically via an batch job.
To clear the historical matching information between a Product (ART) and a Supplier (SUP) must be done on the ISI item level.
Highlight the ISI document with the correct SUP and ART.
Click on the item and press ENTER.
Click the Clear historical matching information option in the context menu.
When the Imported Supplier Invoice (ISI) is in status 8, it is ready to be forwarded to a Supplier Invoice (SIN). This can be done from the Supplier Invoice Management (SIM) application or directly from the ISI application. The Imported Supplier Credit Note (ISI) can be forwarded to a Supplier Credit Note (SCN) from the Supplier Credit Management (SCM) application.
To open the Supplier Invoice Management (SIM) application, find Finance in the RamBase menu and then Payables. Click Supplier invoice management to enter the SIM application.
Click the Received Invoices folder.
Highlight the ISI document in status 8 which you want to forward and press ENTER to open this ISI document in the ISI application.
In the ISI application, click the Forward to supplier invoice option in the context menu. The ISI document will be set to status 9.
To open the Received Supplier Invoices and Credit Notes (ISI) application, find Finance in the RamBase menu and then Payables. Click Received supplier invoices and credit n... to enter the ISI application.
Highlight the ISI document in status 8 which you want to forward.
Select the Forward to supplier invoice or Forward to supplier credit note option in the context menu.
When the ISI document has been forwarded to a SIN or SCN document, the corresponding SIN/SCN document is displayed directly within the Received supplier invoices and credit notes (ISI) application. The link to the invoice/credit note can be found as a field in the Details area.
The system will calculate the VATRATE if the ISI document contains the information about the VAT in document currency (CUR) and VAT in original CUR. It will only calculate the rate if the original VAT currency from the ISI is the same as the system standard currency.
Supplier billing (SUPBILL) is a report with extensive filtering possibilities which gives an overview of total billing from supplier invoices and credits that are registered.
Navigate to the application
Option 1: RamBase menu→Finance→Payables→Supplier billing
Option 2: Click the Program field and type "SUPBILL" and press ENTER.
Click here to read more about the user interface.
The following areas are described in the sections below:
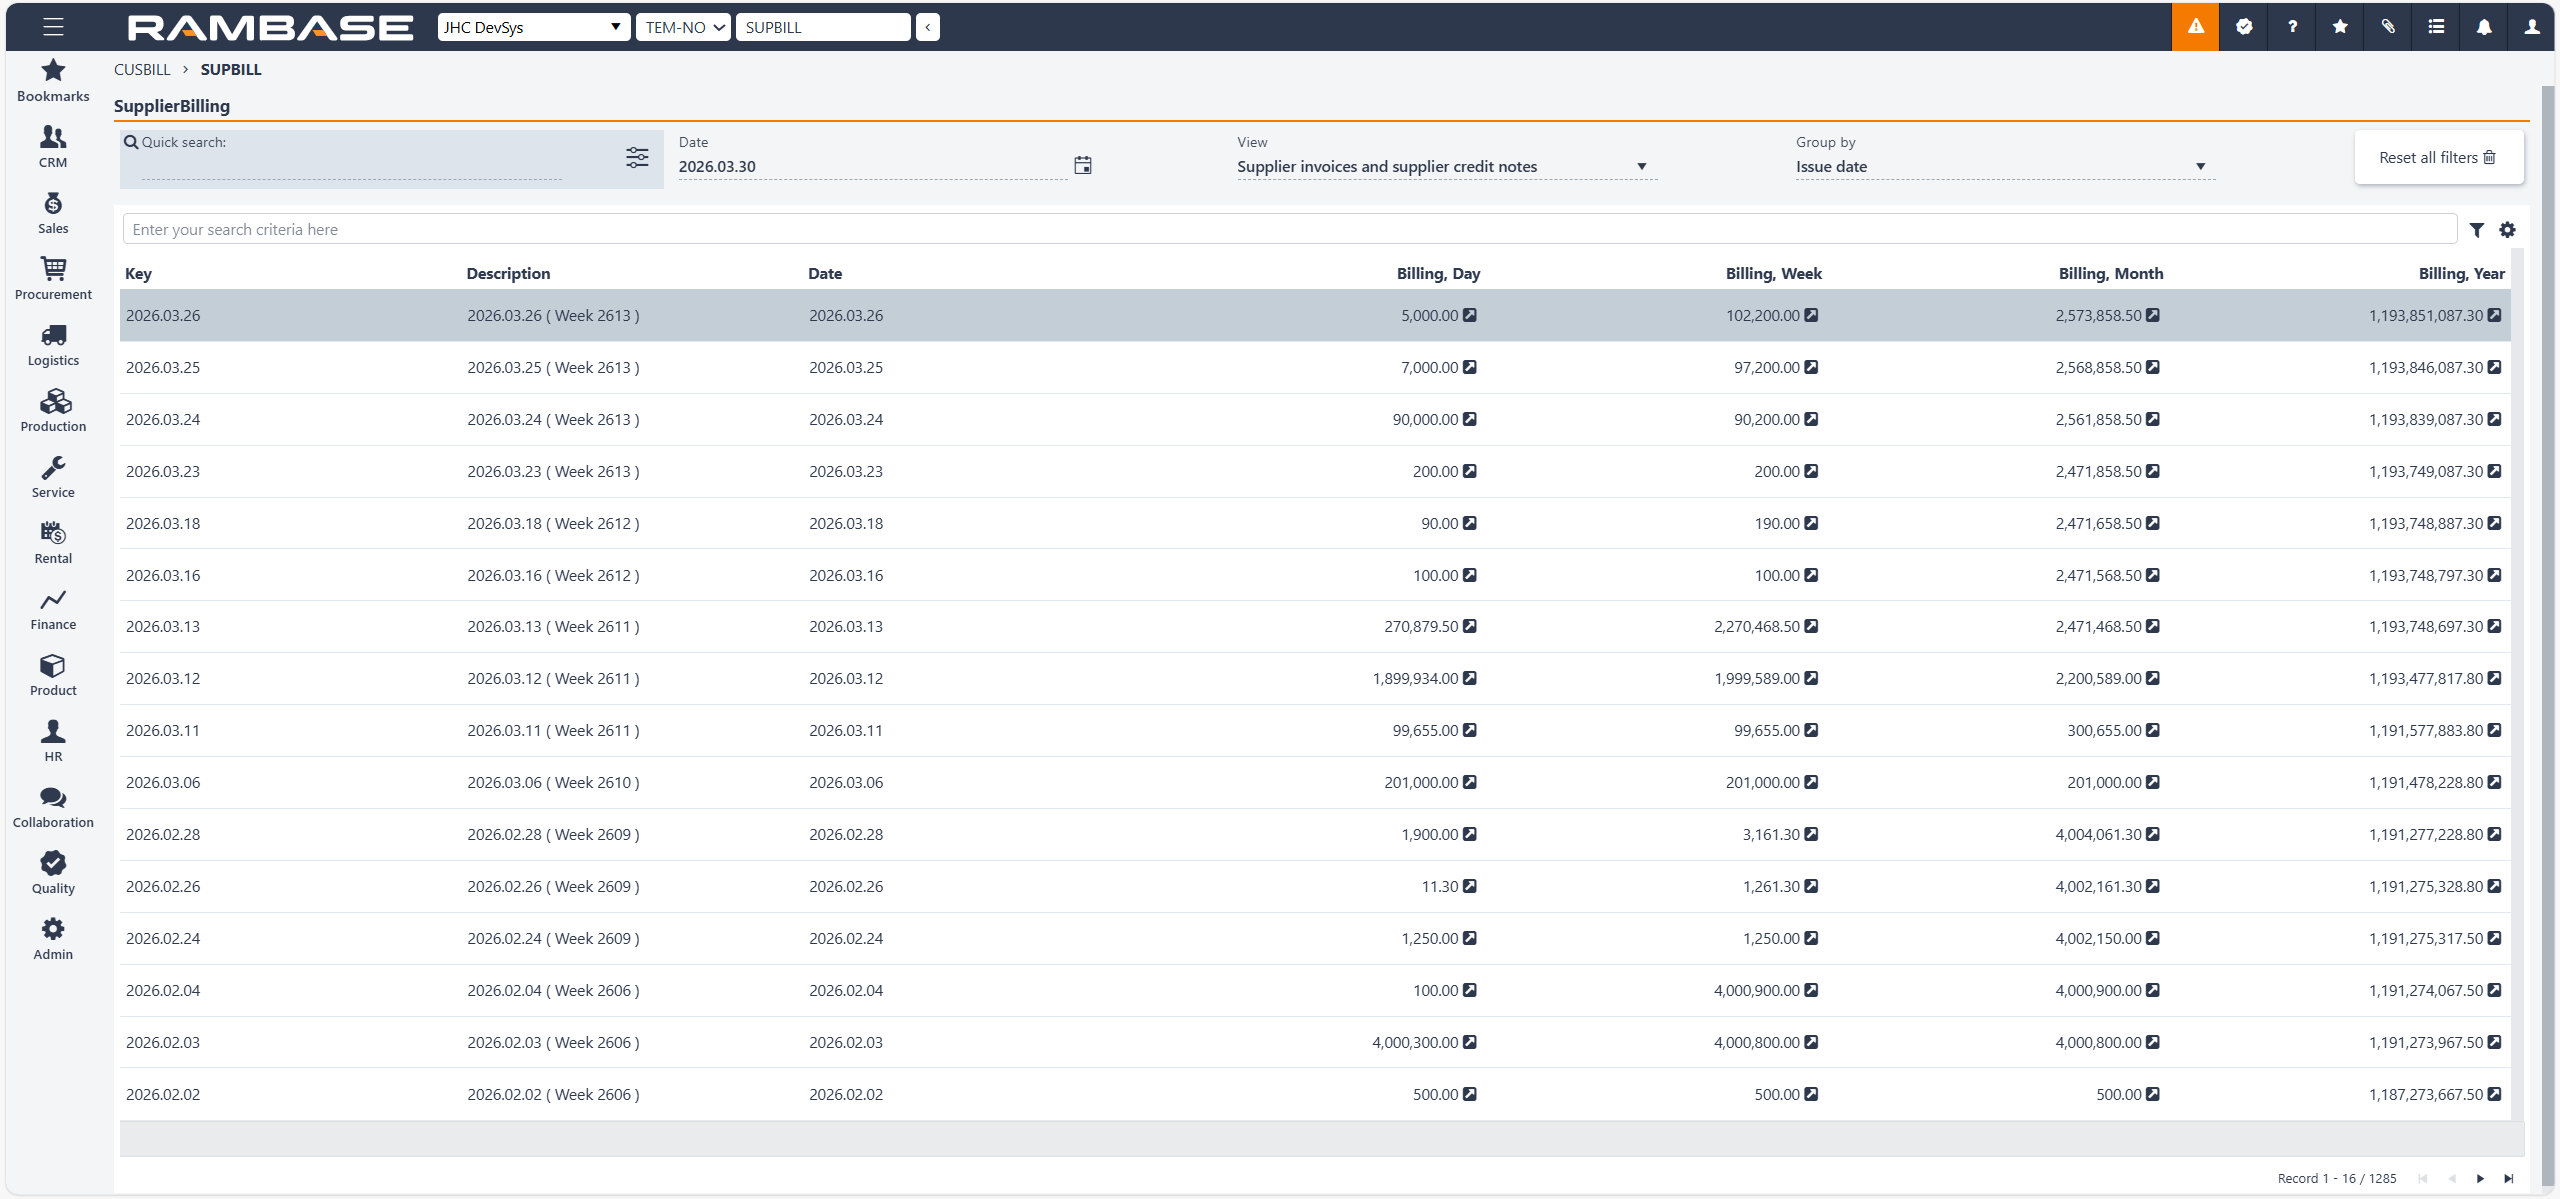
The Supplier billing header
The Supplier billing list
The Supplier billing header contains fields which are used to filter the list below.
Fields and buttons | Description |
|---|---|
Quick search field | Click on the Search field to look up a specific Supplier billing (SUPBILL). Click on the Quick search filter icon to select which of the following options are to be included in the search:
|
Date field | Click on the Date field to filter the Supplier billing (SUPBILL) up to a specified date. Click on the Calendar icon to select, or search for, a date from the Calendar popup. |
View field | Click on the View field to filter the Supplier billing (SUPBILL) list on a specific supplier invoice or credit note. Click on the Arrow down icon to select which of the following options are to be included in the search:
|
Group by field | Click on the Group by field to filter the Supplier billing (SUPBILL) list to select which of the following options are to be included in the search:
|
Reset all filters button | Click the Reset all filters button to remove all filters and show all Customer billing (CUSBILL) in the list. |
The displayed Supplier billing (SUPBILL) are based on the selections made in the Supplier billing fields area.
The Supplier billing list includes a search field. In addition to the fields and variables in the header, the scope of the search can be further filtered by clicking the Filter builder icon to the right of the search field.
Clicking the Filter builder icon will display a popup with the options to add a Standard filter and/or Create custom filters. All custom filters can be saved and then added to the My saved filters area.
The user can customize the order of the columns by drag and drop, in addition to hover over icons and columns for further descriptions.
Columns | Description |
|---|---|
Key | GroupBy key for the procurement billing. |
Description | Description of the key. |
Date | Date which is used for the calculations. |
Billing, Day | Billing amount of the day. |
Billing, week | Billing amount of the week. |
Billing, month | Billing amount of the month. |
Billing, year | Billing amount of the year. |
To open the Supplier Billing (SUPBILL) application, find Finance in the RamBase menu and then Payables. Click Supplier billing to enter the SUPBILL application.
You can use the Date, View and Group By fields in the upper right corner to filter the results. Here is an example of how the Date field and the Group By field works together:
When Group By is set to DATE, all documents up to the date in the Date field will be included.

When Group By is not set to DATE, all documents up to the date in the Date field will be included and only from the selected year.
Here you will include documents from 2018 dated before 31 January.

Here you will include all documents from 2017.

Click on the magnifying glass to enable a filter on the SUPBILL, such as on Product (ART), Supplier (SUP), date and so on.
To make a file from the SUPBILL, press F12 to open the action menu and choose the Make CSV File : Supplier Billing option. The print will be sent to the default printer registered to your PID.
To print the SUPBILL, press F12 to open the action menu and choose the Print Supplier Billing option. The print will be sent to the default printer registered to your PID.
To manage the company's cash flow is an important, daily process in all companies. The finance responsible must continuously be updated on this.
RamBase provides tools so you can monitor the cash flow and do the necessary transactions in a efficient and reliable manner.
Overview of the company's liquidity.
Basis for the bank reconciliation.
Possibility to make corrections to errors, and deviations between the bank accounts and the general ledger.
The purpose of the cash management process is to mirror the real bank accounts, so you do not have to leave RamBase to get control over your company's liquidity and the balances of the many bank accounts you have. RamBase provides tools for managing the cash flow. How well your company takes advantage of these tools, depends on your finance setup, and your daily routines.
Bank account setup - A company usually has many different types of bank accounts like operation accounts, tax accounts, and investment accounts. All bank accounts have to be connected to unique accounts in the Chart of accounts.
Register incoming payments - Incoming payments can be registered either manually or automatically. If you have many customers and a large amount of transactions, you can increase your efficiency by using EDI (Electronic Data Interchange). It will decrease the risk of errors, and your accounts receivable will always be updated.
Make outgoing payments - Outgoing payments can be made either manually or automatically. Based on updated balances from the accounts payable, you pay your debt via your bank. You can increase your efficiency by using EDI (Electronic Data Interchange). It will decrease the risk of errors, and your accounts payable will always be updated.
Bank reconciliation - When the bank accounts are reconciled, you will have an overview of your liquidity. You can increase your efficiency by using EDI (Electronic Data Interchange) for your bank reconciliation.
Setting name | Description |
Agreement number at Teller | This setting holds the companies agreement number at Teller. Needed to be able to receive creditcard payments from Teller |
Amount on Shipping Advice (CSA) will be captured | Used for credit card capture. Amount from the TOTAL field on Shipping advice (CSA) will be used as capture amount. This can differ from the authorized (reserved) amount on the Sales Order (COA) |
Customer file for SgFinance | This setting should be activated only if the customer uses SG Finance as factoring company. This setting allows the customer to create a customer file according to SG Finans'es file format |
Customer number at factoring company | Customer number. Used in the files to the factor to identify the sender |
EDI Payment Enterprise | Used to keep the Enterprise that the Bank Agreement for sending EDI payments is registered on. This EDI Payment Enterprise should be updated when the Enterprise on the Bank Agreement is different from the companies Enterprise that is registered in Company Register in Rambase ( COM ). |
Factoring Invoice journal | This setting determines if the company should produce invoice journal ( PDF ) as an overview of invoices sent to the factoring company |
Fee percent added to credit card transactions | Fee, in %, that will be added to all customer payments when they do payments with creditcard. The fee is added as a seperate line on the credit card transaction (CCT) and payment (PAY) |
Fee percent added to credit card transactions (domestic) | Fee, in %, that will be added to domestic (Customer inside own counrty) payments when they do payments with creditcard. The fee is added as a seperate line on the credit card transaction (CCT) and payment (PAY) |
Fee percent added to credit card transactions (international) | Fee that will be added to international (Customers outside own country) payments when they do payments with creditcard. |
File format for SgFinance | This setting should be activated only if the customer uses SG Finance as factoring company. This setting allows the customer to create a file according to SG Finans'es file format |
Format on file for importing bank statement | Format of bank-reconsiliation file from bank that should be imported to RamBase. |
Invoice file for SgFinance | This setting should be activated only if the customer uses SG Finance as factoring company. This setting allows the customer to create a invoice file according to SG Finans'es file format |
Limit for automatic confirmation of currency deviation | Max currency deviation, in percentage, that could be tolerated when payments are automatically confirmed. If deviation exceeds this limit, currency adjustment will not be handled automatically |
Max deviation in EUR - to be tolerated from currency calculations when Payment is loaded to Ledger Specification ( CAS or SAS ) | On some payments where foreign currencies are used on bank or/and invoices there might be some deviations when payments are loaded to Generald Ledger beacause of roundings and accuracy when currency values are calculated. This setting will give the maximum value, in EUR, that could be adjusted for when Ledger Spesification is loaded from Payment. |
Merchant ID for credit card capture | This setting is used for credit card capture. It is the merchant ID that is used to connect with credit card company. This can also be set on the capture FORMs, which will then be prioritized |
Merchant password for credit card capture | Used for credit card capture. It is the token (password) that is used to connect with the credit card company. This can also be set on the capture FORMs, which will then be prioritized |
No approval before sending payments to bank | If this setting is 'ON'- Outgoing Payments (PAY) from SENDPAY application will not need to be approved before sending to bank. In these cases the user that send the file will be updated as Approver PID (APPRPID) on Payments. |
PaymentCurrencyMethod | Payment Currency Method will tell how exhange rate on invoices and credits in forreign currency should be handled when payments are done. The value of the invoice or credit linked to a payment could be calculated based on the historic rate on the transaction, or based on the rate the day the payment was done in the bank. ( CurDate on Payment ) |
Reconcile bank statement automatic | Setting used to trigger scheduled batchjobs that will automatically reconcile imported Bank Statements ( BST ) to PAY documents. |
SepaPayDivision | Used when outgoing payments are sent by SEPA, and the company have more than 1 database, and the SEPA files are sent from a common division. |
SepaPayEnterprise | Used to keep the Enterprise that the Bank Agreement for sending SEPA payments is registered on. This SEPA Payment Enterprise should be updated when the Enterprise on the Bank Agreement is different from the companies Enterprise that is registered in Company Register in Rambase ( COM ). |
TelePayDivision | Used when outgoing payments are sent by TELEPAY, and the company have more than 1 database, and the TELEPAY files are sent from a common division. |
TelePayEnterprise | Used to keep the Enterprise that the Bank Agreement for sending Telepay payments is registered on. This Telepay Payment Enterprise should be updated when the Enterprise on the Bank Agreement is different from the companies Enterprise that is registered in Company Register in Rambase ( COM ). |
Use EDI | Possible to use EDI for sending payment files to bank, and receiving confirmation files, that should be imported to RamBase from the bank |
Use of credit card payment | Used to activate functionality that will allow company to handle creditcard payments from customers. |
Use of Factoring | Used to activate functionality that will allow company to send sales invoices (CIN) to factoring |
Use of TelePay | This setting allowes sending payment files to bank and recieve confirmation files that should be imported to RamBase from the bank in TelePay format |
VAT handling on Payments (PAY) | Specifies if payments should include VAT, and if the amounts that are specified on the paymens includes VAT. "VATINCLUDED", means VAT should be calculated when making payments, and that the amounts that are specified inludes VAT. "VATINADDITION" means VAT should be calculated when making payments, but that the amounts that are specified does not include VAT. "NOVAT" means VAT is not calculated when making payments |
To open the Bank (BANK) application, find Finance in the RamBase menu and then Base registers. Click Banks to open the Bank (BANK) application. From the list of banks, select your desired bank to view specific information.
A company usually has many different types of bank accounts like operation accounts, tax accounts, and investment accounts. All bank accounts have to be connected to unique accounts in the Chart of accounts.

The bank list area displays all the different Banks and the information connected to bank. It is possible to create a new bank by clicking on the Create new bank button and then fill out the information.
Search field - The Search field can be used to search for specific banks. Click the Search field and press SPACEBAR to list all the available parameters to search on.
Filter builder icon - Click the filter builder to list the available standard filters. The user can also Create custom filters by selecting Field + Operator + Value and clicking the Save filter button. The saved filter will be save in the My saved filters area in the Filter builder popup.
Column settings icon - To select which information is displayed, click on the Column settings icon and hover over Columns. Then select the intended columns. The selection of data can be exported to Excel via the Export to excel option in the Column settings. The Reset to default view is also useful in resetting column width and placement, since columns can be dragged and dropped to suit the user.
The table below describes the fields available in the Bank account space.
Fields | Description |
|---|---|
Bank account | Account number used to identify the bank account |
Name | Name of bank account |
Account type | Type of the bank account, for example: BBAN, Bankgiro, Plusgiro and Girokonto |
Currency | Currency used for the bank account |
SWIFT code | The SWIFT (Society for Worldwide Interbank Financial Telecommunication) Code is a standard format for Business Identifier Codes (BIC) and it's used to uniquely identify banks and financial institutions globally. These codes are used when transferring money between banks, in particular for international wire transfers or SEPA payments. |
IBAN | The International Bank Account Number (IBAN) is an internationally agreed means of identifying bank accounts across national borders with a reduced risk of transcription errors. |
GL Account | General ledger account identifier |
Category | Category of the bank, for example: Bank, Cash and Transaction |
The table below describes the different balances information
Fields | Description |
|---|---|
Group by | Group by Accounting period, Bank date or Bank reference |
Key | The key by which the balance sheet is grouped |
Incoming payments | Incoming payment balance amount for bank |
Outgoing payments | Outgoing payment balance amount for bank |
Total | Payment balance amount for bank |
Balance | Bank balance amount |
The table below describes the addresses information
The table below describes the settings functions
Checkboxes | Description |
|---|---|
Is default for remittance in NOK | Determines if this is default bank for outgoing payments |
Require structured payment reference | Structured reference to the payment |
Is used for VAT settlement | Indicates if the bank account is used for VAT settlement |
Is used for credit card payments | Indicates if the bank account can be used for credit card payments |
Is used for clearing | Indicates if the bank account is used for clearing |
Is used for factoring | Indicates if the bank account is used for factoring |
For outgoing invoices | Indicates if the bank account is used on print for outgoing invoices |
For proforma invoices, based on sales order | Indicates if the bank account is used on print for proforma invoices, based on sales order |
For proforma invoices, based on shipping advice | Indicates if the bank account is used on print for proforma invoices, based on shipping advice |
For dunnings | Indicates if the bank account is used on print for dunnings |
The table below describes the opening balances information
Columns | Description |
|---|---|
Year | Year of the opening balance |
GL account balance | Opening balance based on the sum of the general ledger account values |
Balance | Opening balance based on the value from the bank connector or the value entered manually |
 | Revision history icon |
 | Edit opening balance icon |
Create new opening balance | Create a new opening balance by choosing the Year, Bank balance and GL account balance |
A company usually has many different types of bank accounts like operation accounts, tax accounts, and investment accounts. All bank accounts have to be connected to unique accounts in the Chart of accounts.
At the respective BANK, there is a checkbox called Is default bank for outgoing payments. If you check of this checkbox at the respective BANK, the outgoing Sales invoice (CIN)/CCN will retrieve bank information from this BANK. That is, if you have a BANK in EUR that is marked with Is default bank for outgoing payments and create a Sales invoice (CIN) in EUR, payment information (such as account nuAmber etc.) will be retrieved from this BANK on the Sales invoice (CIN). In the same way: if you have a BANK in USD that is marked with Is default bank for outgoing payments and create a Sales invoice (CIN) in USD, payment information (such as account number etc.) will be retrieved from this BANK on the Sales invoice (CIN).
If you create a Sales invoice (CIN) in a currency for which you do not have a currency account/currency BANK, then payment information for this invoice will be obtained from the BANK in your company's base currency given that this BANK is set up as Is default bank for outgoing payments.
When adding new bank accounts, the values in the fields have to be entered manually by RamBase users.
To open the Finance Workspace (FINANCE) application, find Finance in the RamBase menu and then Overview. Click overview to enter the FINANCE application.

Click the Cash Management button in the Action and Links area.
Select the Banks folder.
Alternative navigation is to enter the Pay Management application (PAM) or the Bank Accounts application (BANK) directly.
Click the Create new icon in the Banks folder.

In the New Bank popup, set an internal bank account number in the No field.
Set the internal name of the bank account in the Name field.
Select the relevant currency in the Cur field.
Select the relevant category: Bank, Cash or Transfer. This is optional. If nothing is chosen here, Bank will be default.
Enter the bank account number given by the bank in the Bank Account field.
In the GL Account field, click the magnifier icon and select the general ledger account which the current bank account is supposed to be connected to.
Click the OK button.
The Bank Account area holds information about a certain bank/bank account including periodic balances for each account.
To add a new opening balance, use the Create new opening balance button. A popup opens in which you must enter the year and value. If the system uses bank integration (Aritma), then you can download the value for the selected year by clicking on the icon next to the Bank balance field.
Under the Used on print area, select where the bank account number is going to be used.
Select the file format for electronic transfers in the Remittance handling drop down menu in the Details area.
Make sure to check off the Is used for factoring checkbox option under the Settings tab if you are going to use this bank account for factoring transactions.
Check the Is default bank for outgoing payments checkbox under the Settings tab if you want this bank account to be the default account for outgoing payments.
Click on the Context menu and choose the option Activate bank.
When starting a new year, the bank accounts (BANK/***) in RamBase need to be updated with a new opening balance.
To open the Bank Accounts (BANK) application, find Finance in the RamBase menu and then Cash management. Click Banks to enter the BANK application.
Highlight the relevant bank and press ENTER.
Click on the Opening balance tab

Click on the Create new opening balance button in the bottom left. Enter the opening balance in the Bank balance field, from the bank statement as of 31.12 previous year. Opening balance from general ledger for the corresponding GL account will show in the GL account balance field. Be aware that opening balance in the bank balance could differ from the opening balance in the general ledger, if transactions are registered one year in the bank and is posted to general ledger in another year.
If the BANK is in foreign currency, the opening balance must be entered in that same currency (not in the local currency).
Click the Create button. A record for the new opening balance is now created.
It may be necessary to view details about a RamBase bank account, and sometimes it my be beneficial to add more information to the account than just the information requested in the New Bank popup.
To open the Bank Accounts (BANK) application, find Finance in the RamBase menu and then Cash management. Click Banks to enter the BANK application.
Highlight the current bank account and press ENTER.
To add more information you can double-click the preferred field and then enter the data.

Main Info area - Add the banks international identification number (SWIFT) and the account's international bank account number (IBAN) in case of international transactions.
Name and Address area - Add name and address information about the bank.
Key Figures area - Add the opening balance from both the bank account statement and the general ledger by clicking the magnifier icon.
Miscellaneous area - The bank accounts support the Norwegian KID (Customer identification) system. The KID system helps identifying the customer and the invoice by a 2 - 25 digits KID code. The systems requires the company to establish their own KID register.
The RamBase bank accounts support the Norwegian KID (Customer identification) system. The KID system helps identifying the customer and the invoice by a 2 - 25 digits KID code. The systems requires the company to establish their own KID register.
To open the Finance Workspace (FINANCE) application, find Finance in the RamBase menu and then Overview. Click overview to enter the FINANCE application.
Click the Cash Management button in the Action and Links area.
Select the Banks folder.
Highlight the current bank account and press ENTER.
To use the KID system for this specific account, choose YES in the KID field in the Miscellaneous area. Note that support on the KID system requires that your company's database is set up with this option on an overall level.
From the Banks folder and the Payments folder in the Pay Management (PAM) application, it is possible to transfer money between your bank accounts in the General Ledger (ATR). Bank transfers in RamBase do not generate any transfers in your actual bank. If you make sure that all transfers conducted are registered in RamBase, the information in the Banks folder will reflect the statement of your actual bank accounts.
To open the Pay Management (PAM) application, find Finance in the RamBase menu and then Cash management. Click Inbound payments to enter the PAM application.
Select the Banks folder.

Press F12 to open the action menu and choose the Bank Transfer option.

If there is no value in the Bank Transfer Account field, there is a missing system setup. Please contact support to fix this.
Change the date in the Cur Date field to the date the actual transfer was conducted.
Verify the Period and correct it if necessary.
Select the specific bank account to transfer from in the drop-down menu.
Type the amount in the Amount field. Indicate that this is the account you would like to transfer from by pressing the subtraction- button (-) in front of the amount (for example: - 300).
On the subsequent line, select another bank account to transfer to. RamBase will set the amount for you so that the sum in this transfer becomes 0.
Click the OK button. This action will create two Payment (PAY) documents, one for each transaction. These will appear, and can be inspected, in the Payments folder.
To open the Bank Accounts (BANK) application, find Finance in the RamBase menu and then Cash management. Click Banks to enter the BANK application.
Press F12 to open the action menu and choose the option Bank Transfer.
On line 1, select bank to transfer from, and the amount in the Amount field.
On line 2, select bank with foreign currency to transfer to. RamBase will then calculate the amount based on the currency rates in RamBase.
If the calculated amount in the foreign currency differs from the amount on the bank statement, change the value in the Amount field on line 2. The field Amount,XXX on line 2 will then be recalculated in accordance with the currency rates in RamBase.
The amount in the field Amount,XXX on line 2 must be equal to the value in the field Amount,XXX on line 1. If there is a deviation, manually change the value in the field Amount,XXX on line 2. The rate will be updated.
Click OK. Two Payment (PAY) documents will be generated automatically. In the General Ledger (ATR) it will be posted like this:

In this case there will be a gain on exchange of NOK 23,07.
This exchange difference is posted to a separate account. These differences will now be posted to your default account for exchange differences in your Payment (PAY) system: ACD/PAYCURADJ
The Payments (PAY) application displays payment transactions along with all relevant details and information.
There are two ways to navigate to the application:
Option 1: RamBase menu→Finance→Cash management→Payments transactions
Option 2: Click the Program field and type PAY and press ENTER.
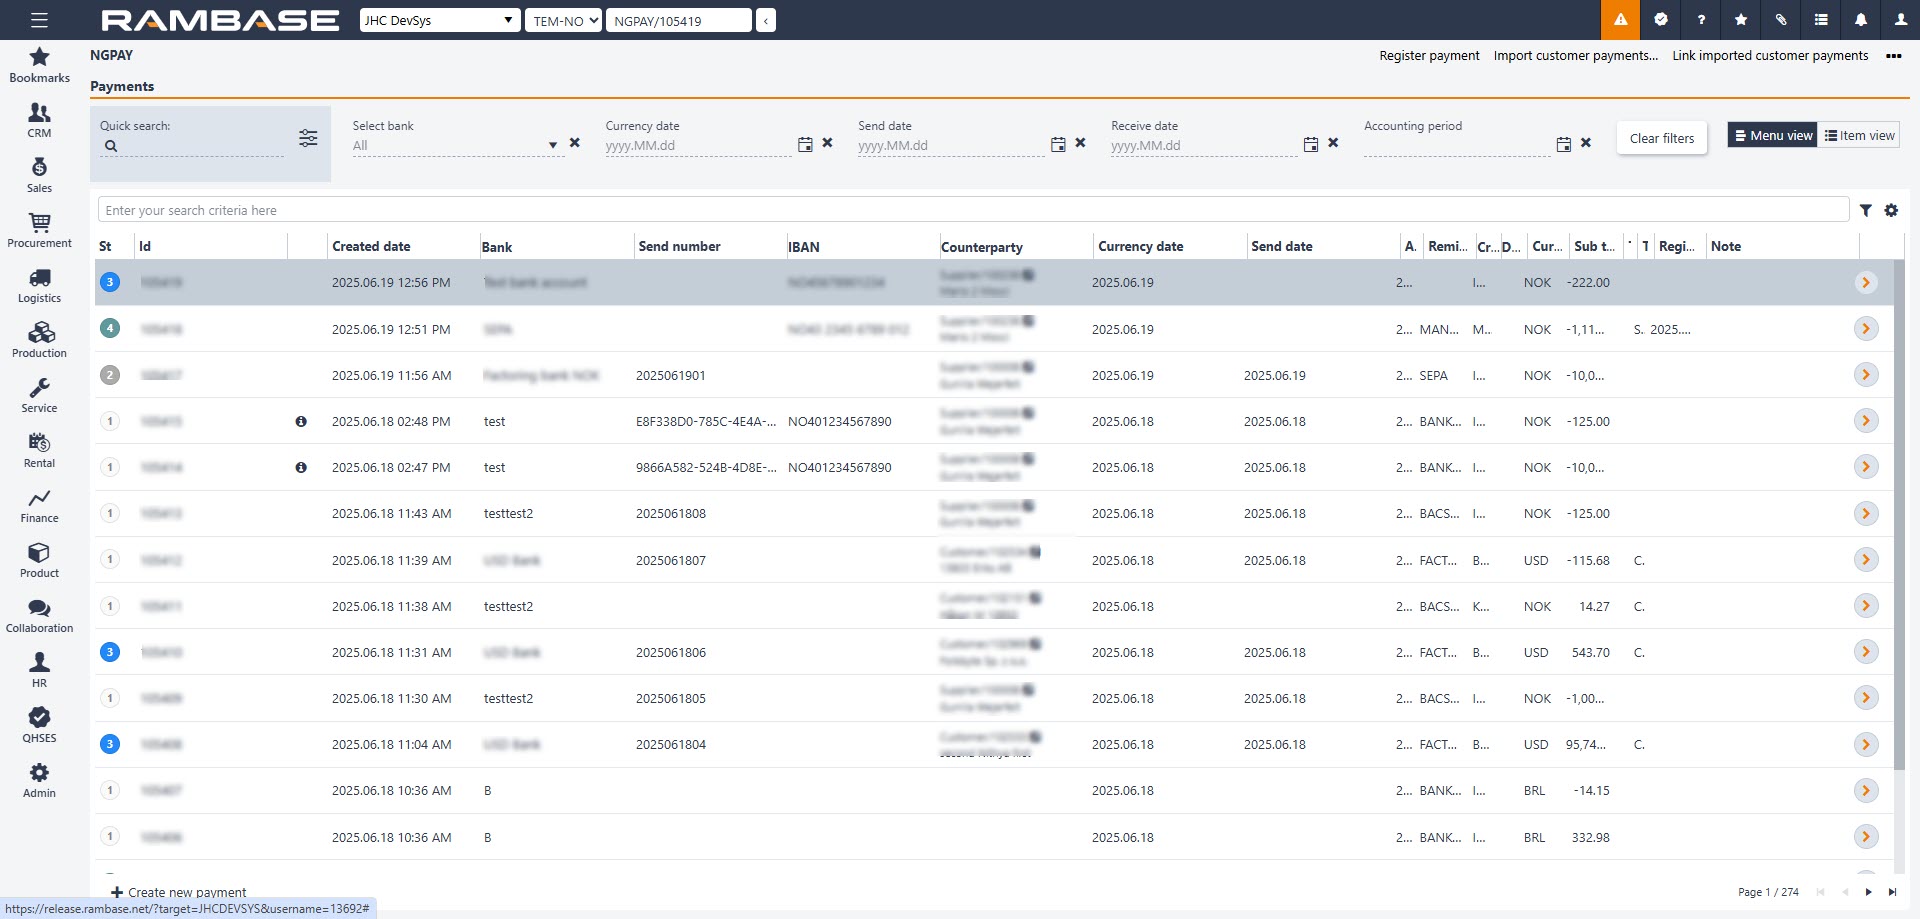
After selecting the intended Payment (PAY) in the list, the user can further filter the list by using the options in the header area. The Payments area contains of fields, drop-down menus and buttons to help the user list only the intended Payments (PAY).
Columns | Description |
|---|---|
Quick search | Allows users to rapidly find transactions or data using keywords or filters. |
Select bank | Dropdown or input field to choose the desired bank. |
Currency date | Input field to choose the transaction date. |
Send date | Specifies the date when the transaction or request was initiated. |
Receive date | Indicates the date when the transaction or funds were received. |
Accounting period | Defines the financial period to which the transaction belongs. |
Clear filters | Removes all applied search filters. |
Menu view | Provides information about payments. |
Item view | Provides detailed information about payment items. |
The list in the Payments area will list all information for the selected Payments (PAY) based on the selections made in the header. The user can also customize which columns are to be displayed by using the Column settings.
The user can also further filter the Payments (PAY) displayed by using the Filter builder where the user can select from standard filters or even create custom filters. The standard filters and the available columns are described in the tables below.
Search field - The Search filed can be used to search for specific Payments (PAY). Click the Search field and press SPACEBAR to list all the available parameters to search on.
Filter builder - Click the Filter builder icon to open a popup where the user can select filters from the Standard filters area. Selected filters will be visible below the Search field. Active filters are marked orange, inactive are marked gray. The user can also Create custom filters by selecting Field, Operator and Value in the Create custom filters area, and then pressing the Save filter button. Saved filters will be available from the My saved filters area. Click the intended saved filter to add it below the Search field.
Column settings - Click the Column settings icon to:
Export to excel - Will send an .xlsx file by email to user. The email is set up in the Personnel (PER) application.
Reset to default view - Reset all changes to selected columns and resizing of the area. This is useful if encountering unexpected errors.
Columns - Hover over to select which columns should be displayed in the list. The available columns are described in the table below.
Columns | Description |
|---|---|
St | Status of payment. |
Id | Payment identifier. |
Created date | Date and time of creation. |
Bank | Name of bank account. |
Send number | Send number. |
IBAN | The International Bank Account Number (IBAN) is an internationally agreed means of identifying bank accounts across national borders with a reduced risk of transcription errors. |
Counterparty | Identifier of the object. |
Currency date | Currency date of the transaction. |
Send date | Date when the payment was sent to the bank or in PAM the payment created. |
Accounting period | Accounting period. |
Remittance handling | Default value is retrieved from the used Bank. |
Created by | User identifier. |
Deviation | If the payment has items with deviations. |
Currency | Three character code following the ISO 4217 standard. |
Sub total amount | Total amount of the object currency. |
Term | Terms of payment. Default value is retrieved from the customer or supplier. |
Type | Type of counterparty with whom the payment is related. |
Registration date | Date of registration. |
Note | Additional information regarding the object (free text). |
Bank account id | Bank account identifier. |
Bank account | Account number used to identify the bank account. |
Bank currency | Currency used for the bank account. |
SWIFT code | The SWIFT (Society for Worldwide Interbank Financial Telecommunication) Code is a standard format for Business Identifier Codes (BIC) and it is used to uniquely identify banks and financial institutions globally. These codes are used when transferring money between banks, in particular for international wire transfer or SEPA payments. |
Bank phone | Bank phone number. |
Bank address line 1 | First address line. |
Bank address line 2 | Second address line. |
Bank postal code | Postalcode/Postcode/ZIP |
Bank city | City/town/village |
Bank country | English name of country. |
Bank country code | Two-character code identifying the country. |
General ledger account id | General ledger account identifier. |
General ledger account number | The account number of the general ledger account. |
General ledger account name | Name of the general ledger account. |
Bank statement id | Bank statement identifier. |
Bank statement accounting period | Accounting period to which the bank statement is related to. |
Total amount | Total amount. |
Incoming payments can be registered either manually or automatically. If you have many customers and a large amount of transactions, you can increase your efficiency by using EDI (Electronic Data Interchange).
It will decrease the risk of errors, and your accounts receivable will always be updated.
To open the Pay Management (PAM) application, find Finance in the RamBase menu and then Cash management. Click Inbound payments to enter the PAM application.
Select the Sent to factoring folder.

This folder lists all the documents sent to factoring, selected from the Receivables folder. All documents listed in this folder are to be handled by the factoring company.
You may follow up on these postings, but they will not be included in any reminder-procedure if that is to be performed.
If you want to inspect the payment documents for the transactions, click the links to the Payment (PAY) documents to the right of the list.
Start in the Sent to factoring folder.
Press F12 to open the action menu and choose the option Import Confirmations from file.
In the Import/Export Wizard popup, click the Select file button.
Browse for the confirmation file.
Click the Upload button. During an import of an file RamBase will register the connected PAY to ST:4 and the related invoice will be closed (ST:9).
Select documents for action.
It is possible to mark one, some or all of the documents by using the check-boxes.
To view selected documents, use the radio button. The documents may be un-checked if needed.
Click the Select Action-button below the document list.
Select action (Confirm Payment) in the new popup, or Press F12 and choose the option Select Action: Confirm Payment.
To open the Pay Management (PAM) application, find Finance in the RamBase menu and then Cash management. Click Inbound payments to enter the PAM application.
Select the Receivables folder.

The Receivables folder lists all open postings in the Customer Ledger. From this folder you may confirm payments to close the postings or send payments to factoring for further handling.
Start in the Receivables folder.
Press F12 to open the action menu and choose the option Import Payments from file.
In the Import/Export Wizard click the Select file button.
Browse for the confirmation file.
Click the Upload button.
During an import of an OCR-file RamBase will register the connected payment documents (PAY) to ST:4 and the other related transaction documents will be closed (ST:9). The PAY documents will appear in the Payments folder.
To open the Pay Management (PAM) application, find Finance in the RamBase menu and then Cash management. Click Inbound payments to enter the PAM application.
Select the Receivables folder.

The Receivables folder lists all open postings in the Customer Ledger. From this folder you may confirm payments to close the postings or send payments to factoring for further handling.
Start in the Receivables folder.
Select documents according to the received bank statement. It is possible to mark one, some or all of the documents by using the check-boxes. To view selected documents, use the radio button. The documents may be un-checked if needed.
Click the Select Action button below the document list.
Verify that there is no extra documents which might have been accidentally selected.
Click the Confirm payment button.

Verify that the selected bank match the actual bank receiving the payments.
Set the currency date to the actual date the money was received.
Make sure that there are no partial payments from one of the selected customers.
If there are no partial payments, click the Start Action button. One Payment (PAY) will be generated per customer. The PAY documents appear in the Payments folder marked with st:4 which means that the payment is received and confirmed.
A progress bar appears. When the process is complete a result window appears.
To view more information, click the numbers.
Invoices and credit notes where payments are confirmed, disappear from the Receivables folder, but will show in the Payments folder.
If there are payments that differs from the open amount - or partial payments, these payments have to be selected for a single customer only.
To open the Payments (PAY) application, find Finance in the RamBase menu and then Cash management. Click Payment transactions to enter the Payments (PAY) application.
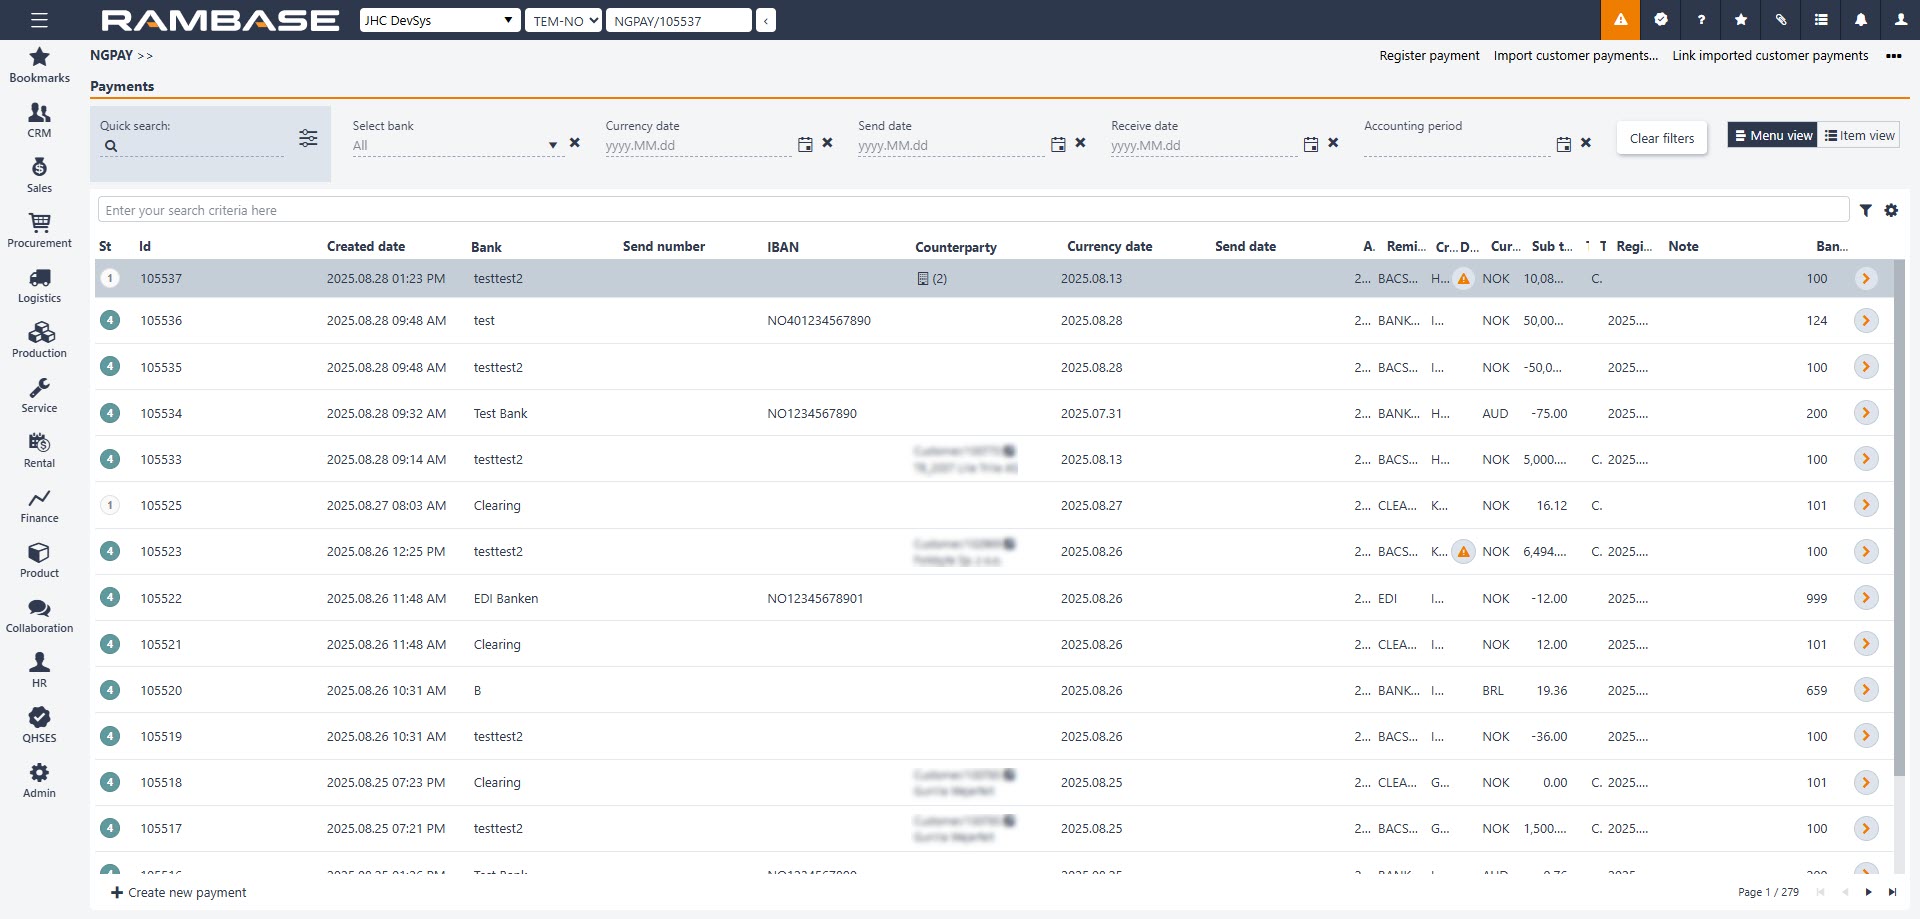
Click the Create new payment button in the lower left hand corner to create a new Payment (PAY).
Select a bank in the Bank drop down menu.
Currency date - This date is critical for reconciliation purposes and must reflect the actual bank date on which the payment was made.
Remittance handling - How you remit payments depends on the type of agreement you have with your bank. The setup defines this process, and in most cases you will not need to enter anything manually here.
Click Create.
Click on the Payment item button to create a payment item. Add relevant supplier or customer to the item.
In the Account field you can locate the relevant customer or supplier using the Customer lookup or Supplier lookup drop down menu.
In the Amount field, enter the partial payment yo want to make. Remember (-) if it is an outgoing payment.
All documents for this customer/supplier can be found in the Payment item details area if you press the Select invoice or payment button.
Click on the Select invoice or payment button in the Payment item details area to review all the unpaid invoices.
Select the relevant invoice(s) which should be marked as paid or partly paid by the received or paid amount.
In the Amount/NOK field in the Payment item details area, enter how much you have received or paid.
Press ENTER. The residual amount will appear in the Deviation amount/NOK field.
Choose Unallocated amount or GL account transaction to book the deviation amount to the subledger or the general ledger.
There are two important fields: GL Account transactions and Unallocated amount. You can choose to post either directly to the general ledger or to the subledger. Use this section to select the open items for the chosen customer or supplier.
A new line with the residual amount will appear in the Transactions field under the Payments item details area.
Click the Register Payment option in the Context menu.
The payment is now registered.
Outgoing payments can be made either manually or automatically. Based on updated balances from the accounts payable, you pay your debt via your bank. You can increase your efficiency by using EDI (Electronic Data Interchange).
It will decrease the risk of errors, and your accounts payable will always be updated.
In cases where credit notes are issued from a supplier, conducting a clearing process is recommended. The invoices and credit notes from one particular supplier will then be settled. The clearing process may be performed in advance of generating the payment file to the bank or while sending the file to the bank.
To open the Pay Management (PAM) application, find Finance in the RamBase menu and then Cash management. Click Inbound payments to enter the PAM application.
Select the Payables folder.

Clearing may be performed if there is a value in the SupCreditAmt column. Next to the value there is a bell icon. The color of the icon indicates if your company owes money to the supplier (yellow) or if the supplier owes money to you (red). In cases where there is a red icon, remittance to this supplier should be reconsidered.
Based on your company's settings in RamBase, clearing may be done automatically on a daily basis if:
The total amount on a supplier invoice (SIN) mirrors the total amount on the linked supplier credit note (SCN),
OR
The total amount for both invoices and credit notes for one specific supplier is 0,-
For other cases where there are difference, the clearing has to be done manually.
Complete the following steps to perform clearing before sending payments to the bank:
Click on the yellow bell icon. All the suppliers open postings are listed.

Un-check the documents not relevant to this clearing.
The clearing might end up with a difference. A new partial payment (PAY) document is created for the remaining amount.
Set a due date for the remaining amount.
Mark the clearing with an description in the Text field. This is not mandatory, but might be beneficial.
Click the OK button.The new PAY document will appear in the list of open postings in the Payables folder and may be selected for action at a later time.
To perform clearing while sending payments to the bank, you follow the same procedure as described in the topic Generate outgoing payment files. Note that outgoing payments has to be grouped by supplier in order to do automatic clearing. If outgoing payments are grouped by invoice, credit notes will not pass the validation since it is impossible to pay a credit amount.
To open the Pay Management (PAM) application, find Finance in the RamBase menu and then Cash management. Click Inbound payments to enter the PAM application.
Select the Payables folder.

Select documents.
It is possible to mark one, some or all of the documents by using the check-boxes.
Click the Select Action button below the document list.
Verify that there is no extra documents which might have been accidentally selected.
Click the Send to Bank button.

Select the bank account you want to pay from. The account’s balance and file format are displayed.
Select how the payments should be grouped: Either by invoice, by the due dates or by supplier.
Select the pay date: Either the documents’ due dates or specify one pay date for all of the documents. This will be Curdate on the payment.
Click the Start Action button.
A remittance process starts. Payment (PAY) documents in ST:3 are created automatically. When the process is completed, a transfer log opens. Here you may inspect the results and see the reference to the connected supplier account transaction documents.
Depending on the file format set for the current bank account, the generated file will be sent directly to the bank (Bank Connector and EDI) or emailed to the person that initiated the process (SEPA and TELEPAY). In the latter the file must be uploaded to the bank manually.
For payments in different currencies to be deducted from the respective currency bank, start by selecting the relevant payments via the checkbox to the left on each Supplier invoice (SIN). Click Select Action to go to Select Action – PAMPAYABLES and click Send To Bank to go to Start Action: PAMPAYABLES – Send To Bank. In the Bank drop-down menu, select Mix - Automatic Bank-selection based on Invoice Currency. Click Send To Bank.
Example: A Supplier invoice (SIN) in NOK and another in EUR is selected. Mix - Automatic Bank-selection based on Invoice Currency (EUR, NOK) is selected in the Bank drop-down menu in Start Action: PAMPAYABLES – Send To Bank. When Send To Bank is clicked, the Supplier invoice (SIN) in NOK is deducted from the bank for NOK and the Supplier invoice (SIN) in EUR is deducted from the bank in EUR.
Note
If Mix - Automatic Bank-selection based on Invoice Currency is not an option in the Bank drop-down menu, go back to the Pay management (PAM) application and click on the Banks tab. Select the relevant bank and press ENTER to go to Bank Account Info. In the Miscellaneous area, make sure (Default Bank for Outgoing Payments) is selected in the Outgoing pay field. This setup must be done for each bank.
Note
If there is no bank for the currency of one or more of the selected Supplier invoice (SIN), the Supplier invoice (SIN) will be remitted in the company's default currency.
To open the Pay Management (PAM) application, find Finance in the RamBase menu and then Cash management. Click Inbound payments to enter the PAM application.
Select the Payables folder.

Select documents that you want to make payments to, using the check-box to the left on each line. You may use filter on DueDate, Supplier account or other information. It is possible to select all invoices by pressing the Select All From Filter option in the dropdown menu in the St column.

If you want to pay invoice by invoice from your bank account, without creating payments in RamBase, you may now get a list of selected invoices that could be used to manually pay these out from your bank account. If you do not create these payments in RamBase, you will not be able to know what invoices you have entered in the bank. Therefore, we recommend that you use the functionality to first create the payments in RamBase, and then afterwards enter these payments manually into the bank. This is shown below under Create payments that should be entered manually into your bank.
First select your documents as shown above.
Click the Select Action button at the bottom of the page.
In the popup, click on the View Report: Selection button. This action will open a report that will list all the selected invoices and could be used to enter payments manually into your bank.
Use the Report by e-mail/print/ftp option in the context menu to send the report to an e-mail address or to print it.
First select your documents as shown above.
Click the Select Action button at the bottom of the page.
In the popup, click on the Create Payments button.
A new popup will appear, here you can select:
Bank - From what bank account you want to make the outgoing payments.
Group by - How should invoices be linked to payments: By Invoice, DueDate or Supplier.
Pay Date - When should the payments be paid out from your bank. On DUEDATE or on a given date.
Click on the Create Payments button.
This will open a new popup where you have to choices to create payments. A batch-job will run and create payments for all the selected invoices.
Create Payments ( Not sent to Bank ) - Payments will be created in status 2. When the payments are entered in the bank, use the F12 option Payment sent to Bank ( St=3 ) on all payment to update status on payments and invoices.
Create Payments ( Sent to Bank ) - Payments will be created in status 3. Select this button if the payments have been or will be entered in the bank, before you start the job.
When all payments have been created in RamBase, you will receive an e-mail with a file attachment listing all payments that have been created. This list could be used to enter these payments in your bank.
All invoices that are linked to these payments will now have Status = 8. This tells you the invoice has a payment that has been sent to the bank, but the payment is not yet confirmed from the bank.
When the bank has completed the transfers, the payments have to be confirmed in RamBase.
How the confirmation is handled depends on the file format set for the current bank account:
EDI
Within a certain time-frame (for example 60 minutes) the file sent from RamBase is handled by the bank. When the bank has completed the transfers, a file is sent directly back to the RamBase system. The confirmation is done and the Pay documents in ST:3 is automatically set to ST:4. This status indicates that the payments are confirmed by the bank.
TELEPAY
During the night the file you uploaded in the online bank is handled by the bank. When the transfers are completed, the bank generates a confirmation file. This file can be downloaded from the online bank and imported into RamBase. Use the Confirm PAY: Banks (CONFPAY) application in RamBase to handle unconfirmed payments. This process is usually performed once a day.
Log in to your online bank.
Locate the file transfer folder.
Download the confirmation file.
Save the file locally on your computer.
To open the Confirm PAY: Banks (CONFPAY) application, find Finance in the RamBase menu and then Cash management. Click Unconfirmed transactions to enter the CONFPAY application.

Press F12 to open the action menu and choose the option Import Supplier Payment Confirmations.
In the Import/Export Wizard select the format for the job.
Press the Next> button.
Upload the confirmation file you saved locally.
When the file is imported to RamBase, all associated PAY documents change status from ST:3 to ST:4 automatically, and the connected invoices will be set to ST:9 which indicates that the invoices are paid and the payments are confirmed. If there are any problems concerning the payments, the associated PAY documents will remain in ST:3.
In the Confirm PAY: Banks (CONFPAY) application you get an overview of all unconfirmed transactions.
There will be one item line for each combination of bank account and currency date. Each of these item lines contain one or more payments. You can press ENTER on an item line to view the payment(s) that are included.
If you change the currency date on one of the payments included in an item line. This will generate a new item line in the CONFPAY table with this unique combination of bank account and currency date, as long as this combination does not already exist. If so, the payment will be added to the relevant combination.
The CurDate column in the table lists the preferred payment date. This is based on the due date from the invoices that were sent for payment in the Pay Management (PAM) application.
The fields CurDate and Period in the upper right corner of the CONFPAY window reflect the bank date and the fiscal period that will be used if you use the F12 option Confirm Payments.
Make sure that the CurDate and Period fields are in compliance to the currency date on the file from the bank. All confirmed payments (PAY) will then be updated with this date and period.
If supplier payments are not successfully sent to bank, they will stop in Status 2 and may need to be sent once more to the bank. To resend payments to bank, if they stop in Status 2, go to the Remittance tab in the Pay management (PAM) application.
Highlight the record, chose menu option Delete SendNo. Sendno on the included payments will be cleared.
Highlight the record, chose menu option “Update Sendno. A new Sendno on the included payments will be given.
Highlight the record, chose menu option Send Payments to Bank ( St=3 ). If you are using the bank integration, make sure the payments have been transferred to the online bank. If you are sending the remitted payments as a SEPA file, make sure you receive the file to your e-mail and upload it to your internet bank.
If payments have been updated to Status 3, but they have not been received by the bank, these operations could be used to send the payments bank once more. To resend payments to bank, if they stop in Status 3, go to the Remittance tab in the Pay management (PAM) application.
Highlight the record, chose menu option Reverse ( Clear Sendno & Set to Status2 ). Sendno on the included payments will be cleared and the included payments will be set from Status 3 to Status 2.
Highlight the record, chose menu option Update Sendno. A new Sendno on the included payments will be given.
Highlight the record, chose menu option Send Payments to Bank ( St=3 ). If you are using the bank integration, make sure the payments have been transferred to the online bank. If you are sending the remitted payments as a SEPA file, make sure you receive the file to your e-mail and upload it to your internet bank.
Sometimes you have to pay an invoice manually in the online bank. After the payment has been made, you have to register the payment in RamBase to make a Payment (PAY), and then confirm it afterwards.
Start in the Payment (PAY) application.
Click the Create new payment button on the lower left side of the page.
Select the specific bank account in the Bank drop down menu.
Set the correct currency date in the Currency date field.
Remittance handling: How you remit payments depends on the type of agreement you have with your bank. The setup defines this process, and in most cases you will not need to enter anything manually here.
Select the correct kind of payment from the Payment type drop down menu.
Click Create.
Click on the Payment item button to create a payment item. Add relevant supplier or customer to the item.
In the Amount field, enter the payment amount using a minus sign (–) to mark it as an outgoing payment. The Amount field may be left blank to allow for the selection of invoices or credit notes later in the process at the pay item level. In some cases, manual payments are made for specific invoices or credit notes.
Click Create.
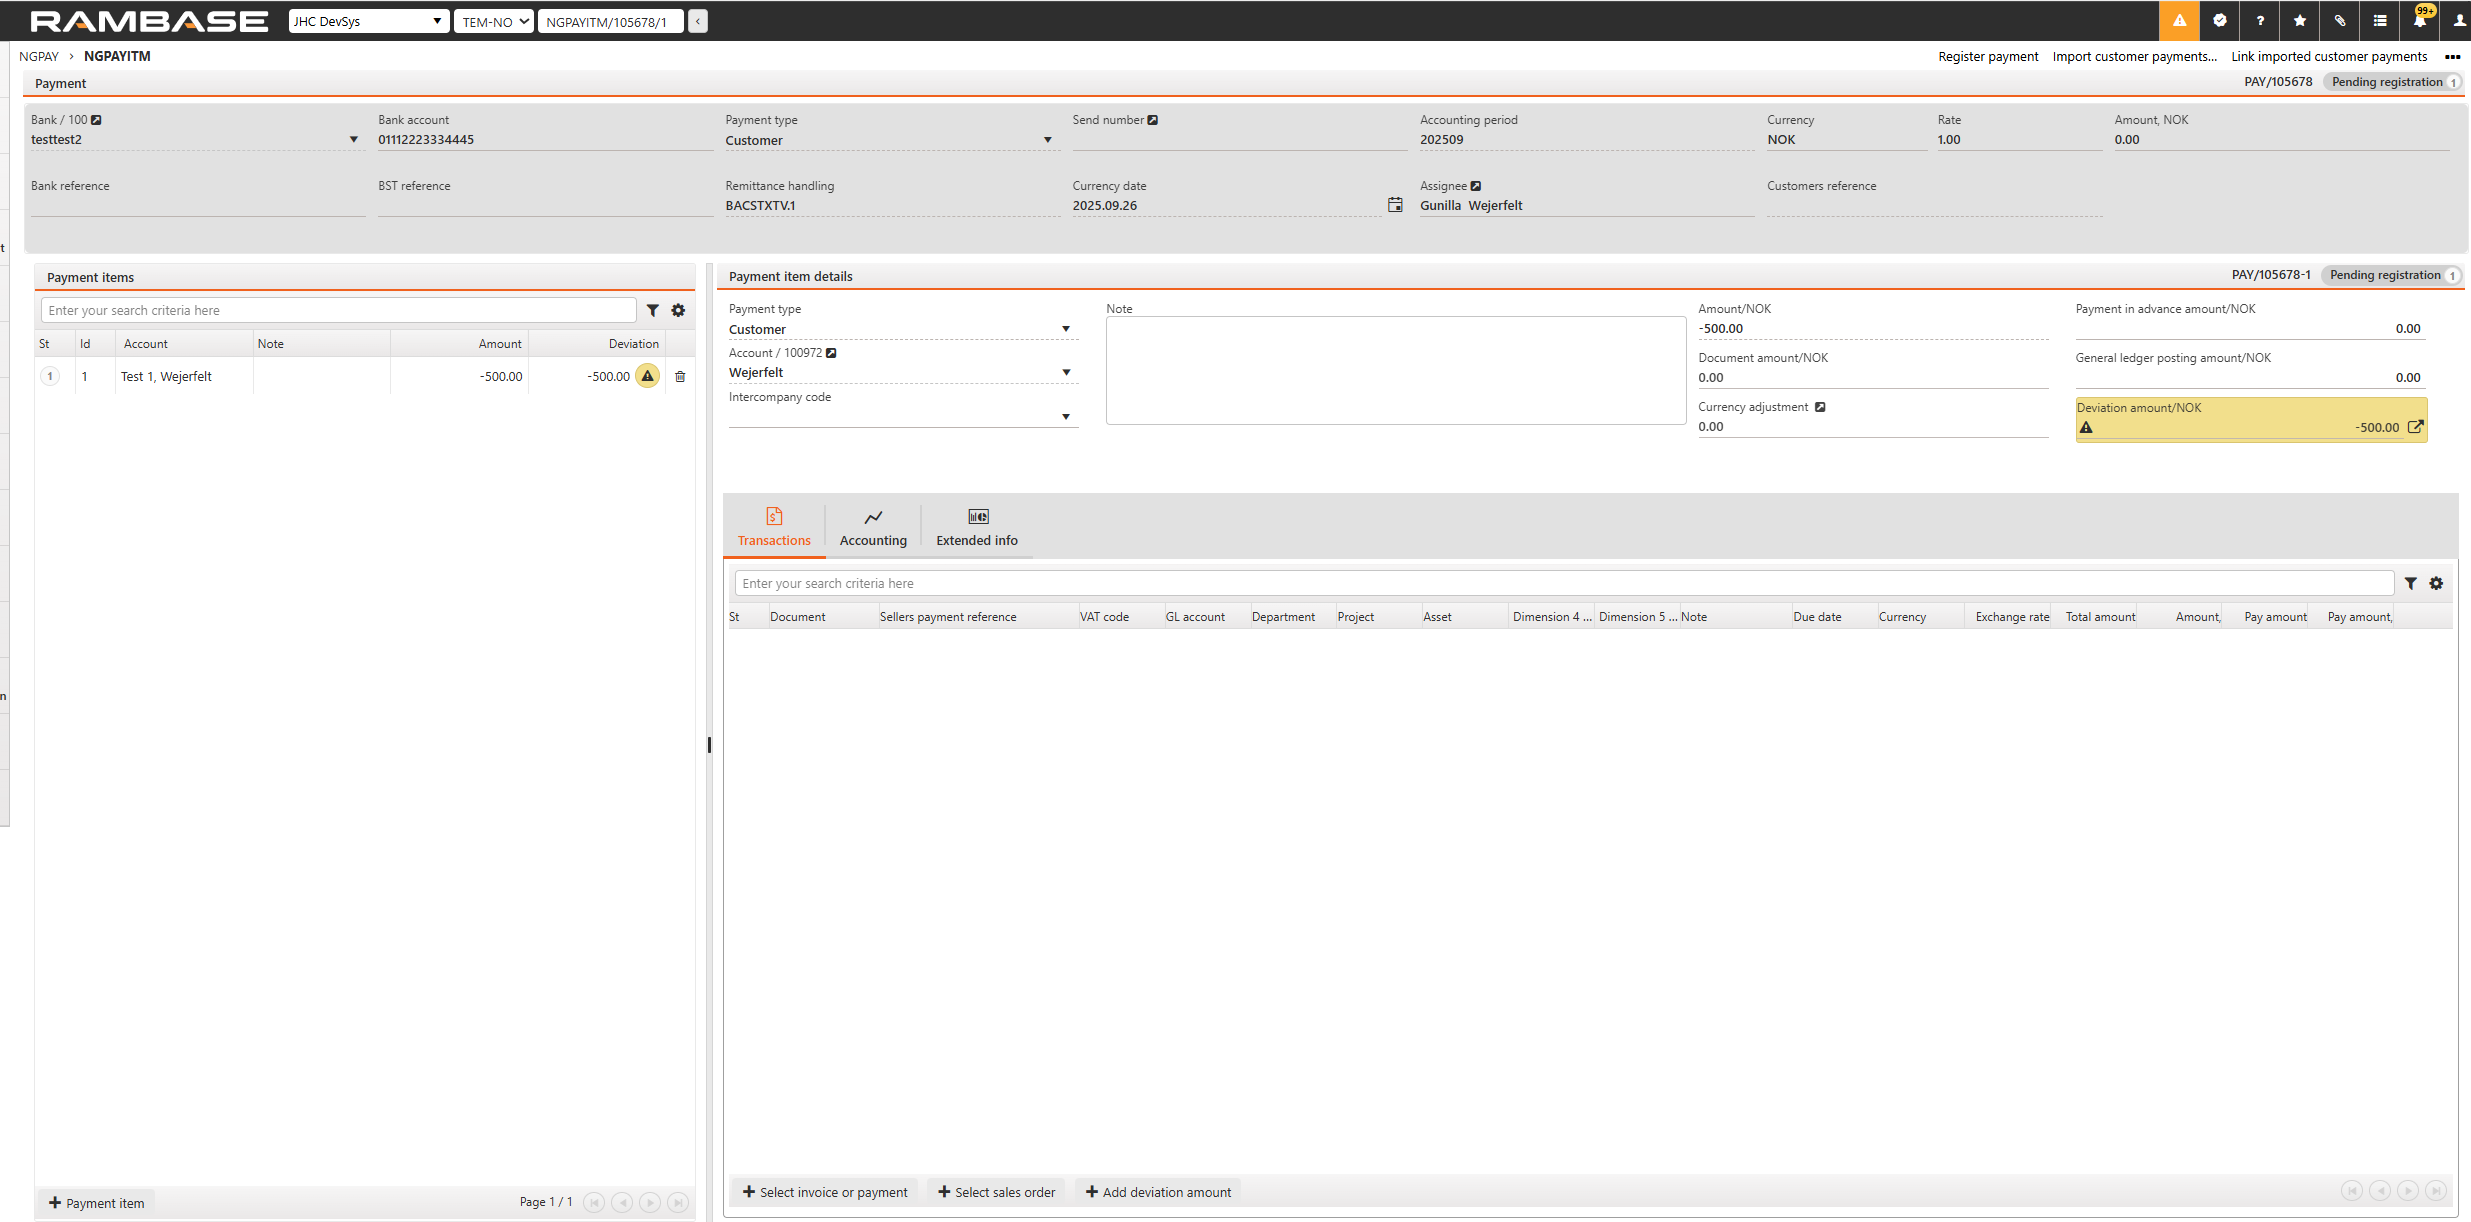
Before proceeding to step 12, users should select the invoice or payment. This action is necessary to ensure the system processes the correct transaction. If, after selecting the invoice or payment, there is still an amount displayed in the Deviation Amount field, then the user should proceed to step 12.
Click on the arrow next to the Deviation amount settle the transaction to post the full amount to the general ledger. A popup window will appear.
Choose Unallocated amount or GL account transactions to book the deviation amount to the subledger or the general ledger.
If you choose GL account transactions then: Select any account from the general ledger. The list highlights the most commonly used accounts as a suggested reference. If you choose Unallocated amount edit the amount if necessary and fill inn as much information as needed in the other fields. We recommend some text in the description field.
Click the Save button.
Click the Register payment in the context menu. The manual payment for the connected invoice/credit note is now registered and confirmed.
To open the Payments (PAY) application, find Finance in the RamBase menu and then Cash management. Click Payment transactions to enter the Payments (PAY) application.
Click the Create new payment button in the lower left hand corner to create a new Payment (PAY).
Select a bank in the Bank drop down menu.
Currency date - This date is critical for reconciliation purposes and must reflect the actual bank date on which the payment was made.
Remittance handling - How you remit payments depends on the type of agreement you have with your bank. The setup defines this process, and in most cases you will not need to enter anything manually here.
Click Create.
Click on the Payment item button to create a payment item. Add relevant supplier or customer to the item.
In the Account field you can locate the relevant customer or supplier using the Customer lookup or Supplier lookup drop down menu.
In the Amount field, enter the partial payment yo want to make. Remember (-) if it is an outgoing payment.
All documents for this customer/supplier can be found in the Payment item details area if you press the Select invoice or payment button.
Click on the Select invoice or payment button in the Payment item details area to review all the unpaid invoices.
Select the relevant invoice(s) which should be marked as paid or partly paid by the received or paid amount.
In the Amount/NOK field in the Payment item details area, enter how much you have received or paid.
Press ENTER. The residual amount will appear in the Deviation amount/NOK field.
Choose Unallocated amount or GL account transaction to book the deviation amount to the subledger or the general ledger.
There are two important fields: GL Account transactions and Unallocated amount. You can choose to post either directly to the general ledger or to the subledger. Use this section to select the open items for the chosen customer or supplier.
A new line with the residual amount will appear in the Transactions field under the Payments item details area.
Click the Register Payment option in the Context menu.
The payment is now registered.
To initiate a prepayment, you can use the menu option Initiate Prepayment to supplier on a specific Supplier (SUP). This menu option is also available in the Payables folder in Payment management (PAM).
Select the Initiate Prepayment to supplier option in the context menu.
Select supplier in the Supplier Name field.
Select supplier bank account in the Supplier Bank field.
Select due date in the DueDate field.
Select currency in the CUR field.
Select amount in the Amount field.
Recommended, but optional, write a reference in the Text field. For example, a reference to the Purchase order (SPO).

Click the OK button.
Upon initiating the prepayment, a single Accounts payable transaction (SAT) is created. This SAT document will not be part of the supplier balance, and it will not show in any reports/applications, other than PAM_Payables. In PAM_Payables, these SAT documents for initiated prepayments will by default be sorted at the top.

This SAT document serves as a record of the prepayment and can be selected and sent to the bank in the standard payment process and will then be part of the total outgoing payment amount sent to bank.
When payment is sent to bank, the PAY document will go to Status 3. The SAT document is still not part of the supplier balance.
When the payment is confirmed, the original SAT document for prepayment will be closed but a new SAT document for the prepayment amount will be created in Status 4 and this SAT document will be part of the supplier balance.
After receiving the supplier invoice, a manual clearing process should be performed to offset the supplier invoice against the prepayment. Create a manual Payment (PAY) on the clearing bank to complete this step.
Enter the Payment (PAY) application.
Click the Create PAY icon.
Select the Clearing bank and press ENTER.

Select period in the Period field.
Select the currency date in the CurDate field.
Select Sup in the PayType field.
Click the New PAY item icon.
In the Pay Item window, select the Supplier (SUP) in the Account field.
Click on the InvoiceRef field and press ENTER.

Select the Supplier invoice (SIN) and Payment (PAY) documents and click the OK button.
Press F12 to open the action menu and choose the Register Payment option to register the Payment (PAY).
If the SAT document for prepayment is not correct, or should not be used, operation Delete Initiated Prepayment could be used in PAM_Payables to discard the SAT document.
Highlight the incorrect prepayment document I PAM_payables.
Use menu option Delete Initiated Prepayment.
The prepayment does no longer show in the PAM_payables menu.

Before starting a bank reconciliation, the bank statements have to be imported from the bank into RamBase.
When bank statements are imported, the reconciliation job can be initiated manually, or carried out automatically on a regular basis due to your company's setup. Regardless of how the reconciliation job is initiated, the reconciliations must be inspected and confirmed manually.
The Bank statement (BST) application lists all bank statement documents. These documents are based on the files imported from the bank(s).
From the Bank statement (BST) application, you may import bank statement files from a bank and initiate an automated bank reconciliation. The reconciliation will be performed automatically on a regular basis if the Company setting (CSV) ‘Reconcile bank statement automatic’ is activated. Manual bank reconciliation can be initiated from each Bank statements (BST) document in Status 2 or from the Bank statement (BST) menu.
To go to Bank statement (BST) enter Finance, then Cash management and then Bank statements.
Start in the Bank statement (BST) application.
Click the Import bank statement... option in the Context menu.
Choose a format.
Click the Next button
Click the Select file button and browse to the bank statement file. Click the Upload button and a progress bar will appear.
When the import is finished, one or several Bank statement (BST) documents are created One Bank statement (BST) document is created for each transaction date. All transactions on the same date will appear as items on the relevant Bank statement (BST) document. The generated Bank statement (BST) documents will be listed in Status 2. This means that is and are ready for reconciliation. If the Bank statement (BST) document is listed in Status 1, there is a deviation. The deviation is typically between closing and opening balance between two dates or if the sum of Bank statement (BST) item does not match the sum of opening balance - closing balance for that specific Bank statement (BST).
The company using RamBase must have the bank integration active to import bank statements from bank integration manually.
Click the Import bank statement from bank integration... option in the Context menu.
Fill out Bank account, From date, To date fields in the popup.
Click Confirm. When import job is finished, one or several Bank statements (BST) in Status 1 is created.
When the import is finished, one or several Bank statement (BST) documents are created in Status 1. One Bank statement (BST) document is made for each transaction date. All transactions on the same date will appear as items on the relevant Bank statement (BST) document. The generated Bank statement (BST) documents will be listed in Status 1 until the opening and closing balance for the Bank statement (BST) is imported. When the opening and closing balance are imported, the Bank statement (BST) will be listed in Status 2. Bank statement (BST) in Status 2 means that it is ready for reconciliation. If the Bank statements (BST) documents remain in Status 1 after having imported the opening and closing balance, there is a deviation. The deviation is typically between closing and opening balance between two dates or if the sum of Bank statement (BST) item does not match the sum of opening balance-closing balance for that specific Bank statement (BST).
The company using RamBase must have the bank integration active to import bank balances from bank integration manually.
This will happen automatically, but it is possible to trigger it if you want to start the job manually.
Start in the Bank statement (BST) application
Mark the Bank statement (BST) in Status 1 and click the Context menu and choose the Import bank balances from bank integration option.
The Bank statement (BST) document will be listed with Status 2 after the import is done. Bank statement (BST) in Status 2 means that it is ready for reconciliation. If the Bank statements (BST) document remains in Status 1 after having imported the opening and closing balance, there is a deviation. The deviation is typically between closing and opening balance between two dates or if the sum of Bank statement (BST) item does not match the sum of opening balance-closing balance for that specific Bank statement (BST).
From the Bank statement (BST) application, you may initiate a bank reconciliation. The reconciliation will be performed automatically on a regular basis if the Company setting (CSV) ‘Reconcile bank statement automatic’ is activated.
Manual bank reconciliation can be triggered from each Bank statements (BST) document in Status 2 by clicking the Reconcile this bank statement… option or from the Bank statement (BST) menu.
Start in the Bank statement (BST) application.
Open the Context menu and click on the Start bank statement reconciliation job option. The reconciliation tries to match the bank transactions in the Bank statement (BST) against the Payment (PAY) documents registered in RamBase.
If RamBase finds a match between a Bank statement (BST) item and a Payment (PAY) document, the Bank statement (BST) item will be put to Status 8. When all Bank statement (BST) items in one BST have a match against a Payment (PAY) document, the Bank statement (BST) will be set to Status 8. A Bank statement (BST) document in Status 8 can be confirmed as reconciled to Status 9 which is typically done at month end.
If RamBase finds a partial match, that is a match with minor deviations, the Bank statement (BST) item is put to Status 3.
If RamBase does not find a match, the Bank statement (BST) item is put to Status 2.
Bank statement (BST) documents in Status 1 indicates a deviation. The deviation is typically between closing and opening balance between two dates or if the sum of Bank statement (BST) item does not match the sum of opening balance-closing balance for that specific Bank statement (BST).
Start in the Bank statement (BST) application.
Select a Bank statement (BST) document in Status 2.
On the Bank Transaction item lines, all transactions for that specific date Bank statement (BST) items will be listed. The list is sorted by status code, putting transactions with Status 2 on top.
Select an unmatched transaction Status 2.
Click on the Arrow symbol. The Bank Statement Line popup will appear.
The Linked Payments section displays Payment (PAY) documents that correspond to the Bank statement (BST) item.
In the Select Payments section, users have two options:
Users can initiate the selection process by clicking on the relevant status symbol associated with each Payment (PAY) document and then click on Link selected to BST item.
Alternatively, users can utilize the filter options to refine their search, and then click on Link filtered payments to BST item to link all displayed payments to the Bank statement (BST) item. It opens a popup with the numbers of Payment (PAY) that will be linked.
Note the default value in the Date from and Date to fields. Change them if necessary. Users may also use the Amount (minimum) and Amount (maximum) fields to limit the number of possible documents.
If no Payment (PAY) document matches, a payment has not been registered yet. If so, you can create a payment manually or follow this procedure:
Click on the Arrow icon in the Bank statement (BST) item and select the Select payment tab.
Click the Create new Payment button. A Payment (PAY) document in Status 1 is created.
Check the payment information and make necessary changes.
Use the Context menu on the Payment (PAY) and click on the Register Payment option.
Start in the Bank statement (BST) application.
Select a Bank statement (BST) document in Status 3.
Press ENTER. All transactions for that specific date will be listed. The list is sorted by status code, putting transactions with Status 3 on top.
Select a partial matched transaction.
Click on the Arrow symbol. The Bank Statement reconciliation popup will appear.
Inspect the invoice, the bank statement, and the Payment (PAY) document, and compare the amounts.
If the deviation is due to errors when entering the Payment (PAY) document manually, do as follow:
Click on the Unlink this payment button on the line of the incorrect Payment (PAY) document/documents. The Payment (PAY) is no longer linked to the BST.
Make corrections on the Payment (PAY) and make sure to register the Payment (PAY) to Status 4 after the correction.
Go back to the Bank statement (BST) and enter the BST item. Link the corrected Payment (PAY) to the BST item manually or use the menu option Reconcile this bank statement for linking the corrected Payment (PAY) to the Bank statement (BST) item.
If there exists a deviation between the Bank statement (BST) item and the Payment (PAY) and if it’s not possible to correct the Payment (PAY), the Bank statement (BST) item remains in Status 3. The Bank statement (BST) item then must be approved. By highlighting the Bank statement (BST) item, using the Context menu and clicking on the Approve bank statement item option, the Bank statement (BST) item will be forwarded from Status 3 to Status 4.
If there are more Bank statement (BST) items in Status 3 on the same BST, the Bank statement (BST) remains in Status 3. Repeat the procedure until all Bank statement (BST) items in Status 3 are reconciled. All Bank statements (BST) items and the Bank statements (BST) document will be put to Status 8 when the last Bank statement (BST) item is reconciled.
To complete the bank reconciliation, the Bank statements (BST) must be confirmed to Status 9. There are two ways of doing it; either confirming all Bank statements (BST) for one bank at the same time or confirming each Bank statement (BST) document individually.
Before confirming the Bank statements (BST) to Status 9, the closing balance of the Bank statement (BST) of the last day of the month should be reconciled against the balance of the connected General Ledger account (ACC) for that specific accounting period.
Also, it is recommended to make sure that there are no unreconciled Payments (PAY) in Status 4, for the given accounting period and for the given bank account which is not linked to a Bank statement (BST). If there exists such a Payment (PAY), investigate why it is not linked to a Bank statement (BST) and/or if it is a duplicate.
Start in the Bank statement (BST) application.
Select a Bank statement (BST) document in Status 8.
Click on the Context menu and choose the Confirm Bank Statement option.
Start in the Bank statement (BST) application.
Click on the Context menu and choose the Confirm Bank Statements based on bank account and date option to confirm multiple bank statements for one bank with the To date field filled.
When a Bank statement (BST) document is confirmed to Status 9, the connected Payment (PAY) document will be put to Status 9. This indicates that it is reconciled and there is no need for further handling.
If there is a deviation between the value in the Movement field in the Bank transaction-section and the total amount of the item lines, the Bank statement (BST) document will be in Status 1, and you will not be allowed to proceed.
If this deviation depends on a BST item missing on the Bank statement (BST) compared to the bank statement in the online bank, Click the Context menu and select the Create new item from deviation amount option.
A new Bank statement (BST) item line with the amount of the deviation will be created. The Bank statement (BST) document will be in Status 2, and you can continue the bank reconciliation procedure.
Sometimes the bank reconciliation must be done manually. The Bank statement (BST) application lists all bank statement documents. These documents are based on the files imported from the bank(s).
Start in the Bank statement (BST) application. To enter the Bank statement (BST) application, go to the RamBase menu, select Finance, navigate to Cash management, and then click on Bank statements.
Click on the Create new bank statement button in the Bank statements area.
Choose a bank from the drop-down menu. When a Bank is selected, then the main grid is automatically filtered by the selected bank.
Booking date field: Select booking date based on the bank statement
Closing balance field: Enter the closing balance for the chosen booking date.
External bank reference field: Optional to enter a value, for example a reference from the bank stated on the bank statement.
Check the Exclude from automatic reconciliation checkbox. When the Exclude from automatic reconciliation option is checked, the reconciliation popover will appear after a new bank balance is created. By checking out the Exclude from automatic reconciliation checkbox, the selected bank will not be automatically included in the process where the system matches transactions to ensure they correspond with bank records. This allows for manual review and prevents the system from reconciling these items without user intervention.
Click Create. A new bank statement and transaction are generated, both set to Status 2 upon creation.
Please read Automated bank statement reconciliation (BST) on how to link Payments (PAY) to a bank statement item.
Bank integration is currently available for Scandinavian banks. Please contact your RamBase partner to get started.
Do the following to generate a payment file.
To open the Pay management (PAM) application, find Finance in the RamBase menu and then Cash management. Click Inbound payments to enter the PAM application.
Enter the Payables tab.
Select documents. It is possible to mark one, some or all of the documents by using the checkboxes.
Click the Select Action button. Verify that there are no extra documents which might have been accidentally selected.
Click the Send To Bank button.

Select the bank account you want to pay from in the Bank field. The account balance and file format are displayed in the Bank field.
Select how the payments should be grouped in the Group by field. Either by Invoice, DueDate or Supplier.
Select the pay date in the Pay Date field. Either the documents’ due dates or specify one pay date for all of the documents. This will be currency date on the payment.
Click the Send To Bank button. The payment is now sent to bank, and the user must log in to the online bank to approve the payments.
Note
If the payment is rejected, the Payment (PAY) document will stay in Status 2.
Enter the Payment (PAY) item or the Remittance tab in the Pay management (PAM) application to read the rejection message. The Remittance tab gives an overview over all remittance sent and their status.
If, for example, the structure creditor reference is invalid or missing. The user must discard the Payment (PAY) document, correct the creditor reference on the invoice, and try to pay the invoice one more time.
When using bankconnector, incoming payments will be directly transferred from bank to RamBase. If RamBase can match the payment against an invoice automatically, the Payment (PAY) document will go directly to Status 4. If there is some payment RamBase can not match automatically, the Payment (PAY) document will stay in Status 2. If this is the case, the user must do the matching manually.
Enter the Payment (PAY) document.
Press F12 to open the action menu and choose the Reopen Payment (ST=1) option.
Enter the Payment (PAY( item and connect the payments to the correct invoice or GL account.
Register the payment with the F12 option Register Payment.
When using bankconnector there will be imported bank reconciliation files to RamBase daily. The files are imported in two steps:
First all transactions are created on a Bank statement (BST) document. When this is done, the Bank statement (BST) document will receive Status 1.
Then the balances are imported to the same Bank statement (BST) document. The status of the Bank statement (BST) document are now dependent on different factors.
If ingoing balance on the Bank statement (BST) document equals outgoing balance on the previous Bank statement (BST) document, the document will receive Status 2.
If ingoing balance on the Bank statement (BST) document does not equal outgoing balance on previous Bank statement (BST) document, the document will stay in Status 1. This will normally happen for the first Bank statement (BST) document after you have started with bankconnector, or if something has gone wrong in the bank. For the first Bank statement (BST) document, please see description further below. If something has gone wrong in the bank, please contact your RamBase partner.
When a Bank statement (BST) is created in Status 2, RamBase runs automatically reconciliations jobs in given intervals to reconcile the bank statement.
Note
If a Bank statement (BST) is available in ZDATA, it will be automatically imported to RamBase. But only yesterday's Bank statement (BST) is imported. This means that the Bank statement (BST) will not be imported automatically if ZDATA receives it later then one day.
For the first Bank statement (BST) document that is imported, it is not possible to control ingoing balance against any other Bank statement (BST). RamBase will check balance against the balance in the Bank (BANK).
If there are no Payment (PAY) documents in the BANK, RamBase will check the balance against Balance, Bank in the Key Figures area.
If there is Payment (PAY) documents registered, RamBase will check the balance against Payments, Reconciled in the Key Figures area.

To get the first Bank statement (BST) document in Status 2, make sure that all transactions until the date of the first Bank statement (BST) is registered and reconciled in RamBase.
1. To set up the new integration, start with activating the following Company settings (CSV) in RamBase:
Activate Bank Integration – Setting for the bank integration, containing bank statements, incoming payments and remittance. Please note that a valid bank agreement has to be made and that agreement ID is added on relevant bank accounts in the BANK application.
Use production environment – If this setting is activated, the bank integration will use the production environment of the providers. Activate this setting only on production systems!
When the Company settings (CSV) in step one is activated, you will see a new sub folder under the Settings folder in the BANK application, Bank connector. SWIFT-code is the key to RamBase/Bankconnector to understand which bank the setup applies to.

Note that the customer must accept the product terms. Until the product terms are approved, the fields Contract ID, User name, Password set, Activate bank statement, Activate remittance and Activate incoming payment are inactive.

To activate the bank integration, the company must set up a banking agreement between company and bank. The process for this is different depending on the bank. By entering Onboarding instruction, you will see onboarding instructions.
The link which you receive from Onboarding instruction, shall be sent to the customer so that the customer can use this link when logging in to the online bank and apply for the bank integration.
NB: It is important that the customer informs the bank that approval of outgoing payments should be done in the online bank. Approval of outgoing payments is currently not supported by RamBase.

When the customer has ordered the integration at the bank, the consultant can start the onboarding process with Aritma. Enter the Setup Aritma bank integration.
(Request Process):
Request Company ID

Request Service

NB! If the company being set up must approve the payments in the Aritma portal, then Bank approval must NOT be ticked. If Bank Approval is ticked, then approval of the payments must take place in the bank (the user must log in to the bank to approve the payments).
Request Bank Account

Request Company User:
For most banks it is not necessary to request company user. This is only necessary if the customer is using Nordea and don’t have “Corporate nettbank” or if they use some of the Eika banks.
For more information, see Bank specific information in the bottom of the documentation.
If you must create a company user the process for this is:
Add the user that shall send the payment. It is not recommended to fill out password in this step. When the user gets created, that person will get an email from Aritma with a link where the user can create a password.
NB: As mentioned the user will get an email from Aritma that a user has been created, so the user should be informed about this beforehand.

Until the bank has finished their setup the status will be «WaitForAritmaApprove».
It is important NOT to tick the boxes for Activate Bank Statements, Activate remittance or Activate Incoming Payments before the status is Active. This will normally be the same day as the bank has finished their setup.

When status is changed to Active you could tick of the 3 boxes in the BANK application. The integrations are activated and ready to use when this is done.
Please note that it is not necessary to fill out Contract Id, User Name or Password.


With regards to the request process, it is only necessary to run the Request bank account on the rest of the accounts as long as it is the same bank. If the bank is different, the same setup must be done all over for the new bank, including a new bank agreement with this bank.
Mark and copy the Sendno from the PAY you need more detail about:

Enter Setup Aritma bank integration and the Payment tab. In the Sendno field paste the Sendno and press enter
All the payments belonging to this Sendno is presented in the box Payments list. Mark the payment you wish to see more details about. The details are presented in the box Payment details:

When the first bank reconciliation document (BST) gets imported to RamBase, ingoing balance must match either the last Bank statement (BST) document or the opening balance set up for the given BANK.
If this does not match, the Bank statement (BST) will stay in Status 2 with an error message.
To correct this, you must reconcile the bank until the date of the first Bank statement (BST) document. The first Bank statement (BST) document from the bank will only contain transactions and closing balance. To find the opening balance, RamBase calculated this by taking closing balance + transactions. It is the calculated opening balance that is controlled against either the last Bank statement (BST) document or opening balance setup up for the given BANK
To get this right you must reconcile the bank until the date of the first Bank statement (BST) document. The first Bank statement (BST) document from the bank will only contain transactions and outgoing balance. To find the ingoing balance, RamBase calculated this by taking outgoing balance + transactions. It is the calculated IB that gets controlled against either the last Bank statement (BST) documents, or balance on the given BANK.
To find out what calculated IB is and how big the difference is, you can enter the iol/bankstatement.balances and enter one of the jobs there. You will find one job per bank several times a day.

If you for some reason are missing Bank statement (BST) documents for a given period, it is possible to request historical transactions. In the Bank statement (BST) application user can use menu option Import Bank Statements from Bank Integration. Here you choose the bank account and from/to date. It is possible to request transactions back to the day the integration where activated.
Aritma does not need information that a new customer has been onboarded. They receive this information through the API. But, if there is a demand of a specific start date or if they should deliver files from a given date, this must be emailed to them specifically. This information can be sent to: Support@aritma.com.
Nordea:
In Nordea you could either have a “Nettbank bedrift” deal or “Corporate Nettbank”. If the company has “Nettbank Bedrift” it is not possible to approve payments in the online bank. This is only possible then using “Corporate nettbank”. For companies with “nettbank bedrift” it is 2 alternatives to get outgoing payments to work using the bank integration:
Create a Corporate nettbank deal with Nordea.
Customer can approve payments on Aritma site by logging into pay.zdata.no with the user that gets created through the APIs by using “Request company user” in step 4.
Eika Banks:
Eika banks does not support approval of outgoing payments in the online bank. To get this to work the customer must approve payments by logging in to pay.zdata.no with the user that gets created through the APIs by using “Request company user” in step 4.
The Aritma bank integration set up must be done by a RamBase consultant or a RamBase partner consultant.
In RamBase, the logistic system holds all details about inbound and outbound movements in the warehouse, on a transaction level. Transactions in the logistic system will not be posted directly to accounts in the general ledger. The inventory balances are kept in a separate register called Stock Value (SVR) application. The values in this register are recalculated every night, and will be imported into the general ledger either automatically on a scheduled basis, or manually.
There is a setting in the system where you decide if the inventory balances should be imported to the general ledger as a total amount or be split between the physical stock value and work in progress balances.
The inventory balance in the SVR application do not include goods that are customer owned or supplier owned, only goods that your company owns. Information about the inventory balance is grouped by product, currency, warehouse location and account dimensions like department, projects etc. It also holds information about each article's turnover.
Detailed information about the inventory balances can be inspected in the Inventory Balances (INVBAL) application.
For detailed information about each product, use the SVR application.
Detailed information about the work in progress balances can be inspected in the Product Work Balances (PWBAL) application.
Setting name | Description |
Date for price depreciation on Shipping Advice (SSA) | This setting decides the default date in popup shown by F12 - ""Price Depreciation"" from a Shipping advice (SSA) item. SYSDATE = Todays date SSADATE = Date from Goods reception (SSA.DATE) - If price revision already exist, use last revision date |
Date for price protection on Shipping Advice (SSA) | This setting decides the default date in popup shown by F12 - ""Price Protection"" from a Purchase Order (SPO) item, Purchase order response (SOA) item or a Goods reception (SSA) item. SYSDATE = Todays date SSADATE = Date from document (DOC.DATE) - If price revision already exist, use last revision date |
Date for price reduction on Shipping Advice (SSA) | This setting decides the default date in popup shown by F12 - ""RMA Price Reduction"" from a Shipping advice (SSA) item. SYSDATE = Todays date SSADATE = Date from Goods reception (SSA.DATE) - If price revision already exist, use last revision date |
Date when changing price on Shipping Advice (SSA) | This setting decides the default date in popup shown by F12 - ""Change Price"" from a Shipping advice (SSA) item. SYSDATE = Todays date SSADATE = Date from Goods Reception (SSA.DATE) - If price revision already exist, use last revision date |
Days to Keep Goods Reception Items (SSA) in Product Balance - Goods No Invoice | Number of Days to Keep Goods Reception Items ( SSA-Items ) as part of Product Balance, Waiting for Supplier Invoice (SIN). When this number of days passes, the Goods Reception Item wil automatically be closed (Item Status=9) and will not be part of the Product Balances that will be imported to General Ledger |
Goods Reception (SSA) Automatic Price Update | Batch job "FINANCE: Link SSA to SIN in St0/St3" checks this parameter to decide if price on SSA should be automatically changed by this batch. E.g of Value: SSAPRICEUPD,10,150 - where the 2nd commalistelement holds max %-deviation between SSA.PRICE and SIN.PRICE that will be changed automatically. 3rd element is max change in total SSA.AMOUNT. |
Import of claims from and to supplier | Used to activate functionality that will post Goods Receiption ( SSA ), Supplier Return ( SRT ) and Supplier Credit Claim ( SCC ) to Product Account Register ( PAT ), so that Shipments that are not invoiced and Claims that are not credited could be imported to General Ledger (ATR). |
The accounting inventory value in RamBase is calculated based on the registration of inbound or outbound shipping advices or when materials are picked to be used in production.
This example will illustrate how inventory value is generated/calculated in RamBase.
A company purchases 20 pcs of the Product (ART) "Diode" for 15 NOK a piece.
The company receives an invoice for 10 pieces of "Diode".
The company sells 2 pieces of "Diode".
The company receives an invoice for the last 10 pieces of "Diode"
When goods are received in the warehouse, the goods will be registered on a goods reception document, called an SSA document. This document indicates goods reception or an inventory batch. The goods received in this reception, will always “live” on this SSA document for as long as they are in stock. That means that a Product (ART) can exist on several SSA documents at the same time. In the example above, the company already has 10 pcs in stock. That means that the product "Diode" will exist on (at least) two SSA documents. The status flow for an SSA document is as follows:
Status 1: The goods have arrived at the warehouse, undergoing reception control.
Status 2: Warehouse labels are printed, and the goods are about to be registered as stock.
Status 3: Goods are registered as stock.
When the SSA document is forwarded to Status 3, the accounting is affected. As previously mentioned, the value of the accounting inventory is calculated when the goods are registered as stock. This is usually before you have received the accounting document – the inbound invoice.
The accounting inventory value is calculated based on goods receptions of SSA documents where the SSA documents are grouped by product. The total inventory value for each product is calculated and stored on a stock value register document - SVR document in RamBase. The Stock Value Register is relatively invisible for the user. The user will see the inventory subledger - Inventory Balances or INVBAL as the application is called. In the inventory subledger, there is one entry for each product, the opposite of the SSA documents.
In the example above, the company had 10 pcs in stock already and therefore would have another SSA document holding information about those 10 pieces. In the inventory subledger there would be only one entry for the product "Diode". In this example, the inventory subledger would have displayed 30 pieces of "Diode" in stock to a value of 450 NOK.
450 NOK would be the accounting inventory value for the product "Diode". How the accounting inventory value is posted to the general ledger will be explained later. First, we will describe the purchase of the 20 pieces of the product "Diode" as in our example.
When goods are registered as stock, the SSA document will be forwarded to Status 3 and the accounting inventory value will be calculated and posted to the general ledger. The general ledger account for inventory is debited with 20 pcs of the product, 300 NOK and the general ledger account for inventory change is credited accordingly. A value has been added to the general ledger. An asset account is debited, and a cost account is credited.
Since an inbound invoice has not yet been received for this amount, a balance provision must be created to register the cost/debt obligation which the purchase has generated. If you just register goods to stock, this will give you a result that is too good. In theory, you might say that you have made an "accrual" of the value added to the general ledger the day the goods actually were registered as stock and to balance your accounting, you need to make an "accrual" of the cost/debt obligation that this added value has generated.
This is handled by the product sub ledger, or the PROBAL application as it is called in RamBase. The purpose of the product sub-ledger is divided in two. First, the application may be used to follow up inbound invoices (and credit notes for supplier returns) and second, the product sub-ledger automatically handles "accruals" of the cost part of the goods reception, as mentioned above.
When an SSA is forwarded to Status 3, a posting in the product sub-ledger is created. The total of these sub-ledger postings will be transferred to the general ledger on a daily or monthly basis. The accounting for just this transaction is displayed in the example below.
GL account inventory (balance) | GL account inventory change (P&L) | GL account inventory provision (balance) | GL account inventory provision change (P&L) | |
|---|---|---|---|---|
Inventory 20 pcs of "Diode" | 300,00 | -300,00 | ||
Balance provision - inventory | -300,00 | 300,00 |
The GL account for inventory provision is credited and the GL account for Inventory provision change is debited. You have posted a debt obligation and the offset is posted as a cost of goods. When looking at the goods reception (from SSA) and the balance provision (from product sub-ledger) together, it will have the following effect on the P&L and balance.
The P&L is not affected. The value added through inventory and the cost of balance provisions offset each other. In the balance, this is displayed as an increase of your inventory which is offset by a short-term debt obligation.
The next step is to have a look at what happens when the company receives the inbound invoice for "Diode". To make it a little bit more complicated, let us say that the company receives an inbound invoice on only part of the goods reception. The company receives an invoice for 10 pieces of "Diode".
It is important that the invoice is linked to the goods reception which is already transferred to your accounting inventory. RamBase has the functionality to control this, but nevertheless one should be aware of the rules. RamBase operates with different types/classes of Products (ART). A purchase should initially be registered as a Purchase order (SPO) and the goods should be registered as products with CLASS < V, for example P (part), M (materials), C (consumption) or K* (kits). These are physical goods that can be registered to stock. The purchase order will specify which warehouse Location (LOC) the goods are to be delivered to. When the purchase is registered in this way, you will have full system control when receiving the inbound invoice. Inbound invoices are normally registered from the Supplier invoice management (SIM) application.
Direct costs such as power and telephone and purchase of services cannot be registered as stock. This type of purchase is viewed upon as requisitions or as costs (inbound invoice is registered directly) and products used will be class V (services) or X (costs). Requisition and cost invoices registered directly, will be created against warehouse location XXX – a virtual location which indicates that these are not goods to be registered as stock inventory. It is possible to register the invoice directly for costs or by checking the invoice against a requisition purchase order when posting the invoice, but there is no SSA document involved – cost and services cannot be registered as stock.
When the invoice is correctly registered, the following will happen with the SSA document:
Each item on a SSA document contains the fields Quantity and Not invoiced Quantity that both indicate the quantity registered as stock. Quantity indicates how many units are put to stock and Not invoiced Quantity indicates the number of units waiting to be invoiced. When registering an inbound invoice for 10 pcs and linking it to goods reception for 20 pcs, the specific SSA item will show 20 in the field Quantity and 10 in the field Not invoiced Quantity. This is to be understood as there is still 10 pcs not yet invoiced for this SSA item. When the field Not invoiced Quantity is 0, the SSA document will change Status from 3 to 9. Please be aware that goods may still be in stock even though the Status on the SSA item is 9. The SSA document is not “historic” even though it has this Status.
The original posting in the product sub-ledger for 20 pcs à 15 NOK is closed and a new posting in the product sub-ledger is automatically created for 10 pcs à 15 NOK.
When registering the inbound invoice, the following postings will be made:
GL account inventory | GL account inventory change | GL account inventory provision | GL account inventory provision change | GL account payables | GL account COGS | |
|---|---|---|---|---|---|---|
Inventory 20 pcs. "Diode" | 300,00 | -300,00 | ||||
Balance provision - inventory | -150,00 | 150,00 | ||||
Inbound invoice | -150,00 | 150,00 |
The increase of the inventory is still 300 NOK. The increase of the inventory provision due to the purchase is reduced to 150 NOK. The original posting to the product sub-ledger is closed and a new posting for 10 pcs. à 15 is created. The difference between the old inventory provision and the new is a result of the posting of the inbound invoice. Account payables increased with 150 NOK and is posted against a COGS account. This clearly shows the mission of the inventory provision. It works as an “accrual” of the debt obligation connected to the purchase. The cost accrues when the goods are received – it is then posted as a provision in the balance. When receiving the inbound invoice, the cost is realized, and the amount is moved from the balance provision to account payables/COGS.
P&L and the balance will look like this:
When goods are sold, this will affect the accounting inventory value. As mentioned in the beginning, the trigger point for a reduction of the accounting inventory value is when shipping goods out of stock – not when the outbound invoice is created. The sales process itself has additional effect on the transaction documents relating to the inventory values.
Especially three fields that state quantity on SSA items should be paid attention to - the fields Quantity, Not invoiced Quantity and Available Quantity. Quantity refers to quantity registered as stock, Not invoiced Quantity refers to quantity that is not posted against an inbound invoice and Available quantity refers to the quantity that is free stock, meaning stock that is not reserved for a specific order/customer. In the example above we have an SSA item with Quantity of 20. An inbound invoice is received for 10 of these. Initially, the SSA item will have the following values in the quantity fields:
Quantity = 20
Not invoiced Quantity = 10
Available Quantity = 20
A seller creates a sales order for the product "Diode". A customer has placed an order for 2 pcs. Automatic routines in RamBase allocate goods to the order and will link the sales order to stock when the order is created. At the same moment as the goods from the warehouse are allocated to the sales order, Available Quantity on the SSA item will be reduced. The SSA item will now have the following values in the different quantity fields:
Quantity = 20
Not invoiced Quantity = 10
Available Quantity = 18
2 pcs of "Diode" are allocated against a sales order and 18 pcs remain to be sold. The transaction so far has not had any impact on the accounting inventory value but you have an indication in the inventory sub-ledger that the inventory is reduced and soon will have an effect on the accounting inventory value.
The accounting inventory value is calculated and transferred to the Stock Value Register (SVR). When ‘Available Quantity’ on the SSA item is reduced, it will show in the inventory sub-ledger but it will not reduce the accounting inventory value yet. On the SVR document for the article «Diode», you will see the following fields:
StockQty/StockAmt - Refers to quantity and value for product registered as stock.
OrderQty/OrderAmt - Refers to quantity and value allocated against order.
FreeQty/Free/Amt - Refers to quantity and value for available quantity.
In the example above, the accounting inventory value is 20 pcs of the product "Diode", à 15 NOK, altogether 300 NOK. The SVR document will now show:
StockQty = 20, StockAmt = 300
OrderQty = 2, OrderAmt = 30
FreeQty = 18, FreeAmt = 270
In the inventory sub-ledger, or the INVBAL report, this will be displayed as BacklogQty = 2, BacklogAmount = 30, StockQty = 20 and StockAmount = 300. This tells the accountant that the inventory value for the product "Diode" is 300 NOK, but shortly it will be reduced to 270 NOK. The value of "not-sold" inventory is 270 NOK. It does not affect the general ledger but might be useful information regarding period closure for companies where the changes in the value of inventory is a critical factor for the period’s P&L.
The next step in the sale process is to release the order to picking and packing in the warehouse. This is made by transferring the Sales order (COA) to a Shipping advice (CSA) document. The Shipping advice (CSA) document changes Status codes according to the picking and shipping process. When the goods are waiting to be picked, the Shipping advice (CSA) document is in Status 2. The Shipping advice (CSA) document has Status 3 when the goods are ready for packing and adding shipment information. The Shipping advice (CSA) document has Status 4 when the goods are ready for delivery to the customer. When the Shipping advice (CSA) document is forwarded to Status 4, the accounting inventory value is reduced. At this moment, the balance and the P&L will be the following:
Balance | Debit | Credit |
|---|---|---|
GL account inventory | 270,00 | |
GL account inventory provision | -150,00 | |
GL account payables | -150,00 |
P&L | Debit | Credit |
|---|---|---|
GL account inventory change | -270,00 | |
GL account inventroy provision change | 150,00 | |
GL account COGS | 150,00 |
We can see that the accounting does not balance. The debt obligations are higher than the assets and the costs are higher than the inventory change. This will give a deficit effect. The sale is done, the revenue is accrued but not yet realized/registered. There is no balance provision for accrued revenue not yet realized. However, RamBase will handle this.
An outbound invoice is created by forwarding one (or several) Shipping advice (CSA) document in Status 4, which reflects the delivery, to an invoice. This is either done from each Shipping advice (CSA) document, from the application Customer invoice management (CIM) or by initiating automatic invoice consolidation. Regardless of how the invoice is created, the system will choose to post the invoice in the same period as the shipment/ Shipping advice (CSA) document. This means the revenue will be realized in the same period as it was accrued, which will give a correct result for the period. A requirement is that the period where the Shipping advice (CSA) document is posted is not closed when the invoice is registered. A good routine at period closure is to make sure that everything that could be invoiced, really is invoiced to avoid discrepancy between accrued and realized revenue. This will not be a problem when automatic invoicing/invoice consolidation is used since the invoice is created automatically based on deliveries being made. That means the revenue is registered as realized immediately after it is accrued. After the sale of goods, the accounting will look as this:
GL account inventory | GL account inventory change | GL account inventory provision | GL account inventory provision change | GL account payables | GL account COGS | GL account receivables | GL account sales | |
|---|---|---|---|---|---|---|---|---|
Inventory 18pcs "Diode" | 270,00 | -270,00 | ||||||
Balance provision - inventory | -150,00 | 150,00 | ||||||
Inbound invoice | -150,00 | 150,00 | ||||||
Outbound invoice | 30,00 | -30,00 |
The effect on the balance and P&L will look like this:
Balance | Debit | Credit |
|---|---|---|
GL account inventory | 270,00 | |
GL account inventory provision | -150,00 | |
GL account payables | -150,00 | |
GL account receivables | 30,00 |
P&L | Debit | Credit |
|---|---|---|
GL account inventory change | -270,00 | |
GL account inventory provision change | 150,00 | |
GL account COGS | 150,00 | |
GL account sales | -30,00 |
The goods are sold without a profit which is not a good idea, but it works in our example. Debit and credit are in balance. To complete the example, we should make the last warehouse transaction and the inbound invoice for the last 10 pcs of the product "Diode".
Since the SSA item has Not invoiced Quantity = 10, the Status for this SSA item is still 3. 10 pcs are not forwarded to an inbound invoice. When the SSA item has Status 3, the item will still be available in the application for inbound invoices (SIM). Inbound invoice for the remaining 10 is received and registered against the goods reception/SSA document item.
Not invoiced Quantity on the SSA item will be 0 when the invoice is created (invoice has Status 1) and the SSA item will get Status 9. Please notice that the SSA item is not “dead” even though it now has Status 9. There are still 18 pcs on stock. The posting in the product sub-ledger will not be closed before the invoice is registered to Status 4. This prevents a time gap between the balance provision and posting of the COGS. The accounting effect of the dissolvement of the balance provision will be accordingly:
GL account inventory | GL account inventory change | GL account payables | GL account COGS | GL account receivables | GL account sales | |
|---|---|---|---|---|---|---|
Inventory 18 pcs. "Diode" | 270,00 | -270,00 | ||||
Inbound invoice | -300,00 | 300,00 | ||||
Outbound invoice | 30,00 | -30,00 |
The whole purchase/goods reception is now posted as account payables and COGS. There is no longer any balance provisions and the whole amount is posted as COGS in the P&L account. The balance provision is dissolved.
Supplier invoices (SIN) in RamBase can be pre-registered before the Goods reception (SSA) document is registered. In that case, the Supplier invoice items (SIN items) must have a reference to a Purchase order (SPO). When a Supplier invoice (SIN) is registered to Status 3, the DOCTYPE and TYPE fields on the Supplier invoice (SIN) are updated to PREREG, and the Supplier invoice (SIN) will appear as Pre-Registered in RamBase. Pre-Registered Supplier invoice items (SIN items) will be picked up by a batch job that will check if the goods are received on the specific Supplier order item (SPO item) that the Supplier invoice item (SIN item) has a reference to. If the SSA item(s) is found, the system will try to link the Supplier invoice item (SIN item) to the SSA item(s). When all items on a pre-registered supplier invoice (PREREG SIN) is linked to SSA items, the Supplier invoice (SIN) will be automatically registered to Status 4 by the system when the SSA item is registered to Status 3.
When pre-registered Supplier invoices items (SIN items) are linked to Purchase order items (SPO items) and waiting for goods, they will stay in Status 3 until all goods are received. This means they will not be part of the Supplier balance (SUPBAL) and general ledger balance; they will not be included in the VAT report and could not be handled by the remittance process in RamBase. However, it is possible to register these SINs to Status 4, so that they will be a part of the SUPBAL and general ledger balance. When the SIN is registered to Status 4 it will receive a Product account transaction (PAT) document and it will be included in the Product balance (PROBAL) application as Invoice registered - Waiting for goods. These transactions will also be part of the PROBAL that is imported to the general ledger. These PAT documents will be closed when goods are received, or if a purchase order is cancelled.
Finally, we describe the postings of the inventory changes in the general ledger. As previously described, the value of the inventory and inventory provision are held outside the general ledger in the applications Inventory balance (INVBAL) and Product balance (PROBAL). The transfer to the general ledger is either done automatically once a day or manually at period closure. The transfers are displayed in the application for Period closure (PAR) and this is also where manual transfer to the general ledger is conducted.
Below is a description of the postings to the general ledger.
It is important to see the changes on the inventory value since this influences COGS and gross margin for the period. The change in inventory value for the above example of the product "Diode" can be described in this simple calculus. Only the inventory is described in the calculus:
How the inventory change is handled in RamBase:
Post ingoing inventory.
Reverse last month's outbound inventory.
Transfer this month's outbound inventory from INVBAL and PROBAL.
Inventory change shows as the difference.
The inventory transaction in RamBase can be described like this:
Ingoing inventory is posted/transferred to the balance.
Last periods outgoing balance is reversed.
This month's outgoing balance is transferred/imported.
Account is terminated and differences posted to balance respectively P&L.
GL account inventory | GL account inventory change | GL account provision | GL account provision change | |||||
|---|---|---|---|---|---|---|---|---|
Period 1 | ||||||||
Ingoing balance | 0,00 | 0,00 | 0,00 | 0,00 | ||||
Transfer outgoing balance | 300,00 | -300,00 | -300,00 | 300,00 | ||||
Sum | 300,00 | 0,00 | 0,00 | -300,00 | 0,00 | -300,00 | 300,00 | 0,00 |
To balance | -300,00 | 300,00 | ||||||
To P&L | 300,00 | -300,00 | ||||||
Balance Sum | 0,00 | 0,00 | 0,00 | 0,00 | ||||
Period 2 | ||||||||
From balance (ingoing balance) | 300,00 | -300,00 | ||||||
Reverse last outgoing balance | -300,00 | 300,00 | 300,00 | -300,00 | ||||
Transfer new outgoing balance | 270,00 | -270,00 | -150,00 | 150,00 | ||||
Sum | 570,00 | -300 | 300,00 | -270,00 | 300,00 | -450,00 | 150,00 | -300,00 |
To balance | -270,00 | 150,00 | ||||||
To P&L | -30,00 | 150,00 | ||||||
Balance Sum | 0,00 | 0,00 | 0,00 | 0,00 | ||||
The effect on P&L and balance:
Balance | ||
|---|---|---|
Period 1 | Debit | Credit |
Inventory P1 | 300,00 | |
Provision P1 | -300,00 | |
Period 2 | Debit | Credit |
Inventory P2 | 270,00 | |
Provision P2 | -150,00 | |
Result | ||
|---|---|---|
Period 1 | Debit | Credit |
Inventory change P1 | -300,00 | |
Provision change P1 | 300,00 | |
Period 2 | Debit | Credit |
Inventory change P2 | 30,00 | |
Provision change P2 | -150,00 | |
It must be mentioned that the effect on COGS and gross margin alone cannot be deduced from these figures. Please remember that the balance provision is gradually dissolved so that a reduction of the provision will always have a corresponding value in COGS and thus have a zero-effect on COGS and gross margin. It should also be mentioned the importance of following up the product sub-ledger. If the provision sub-ledger contains provisions where the reception of an inbound invoice is unlikely, these provisions should be zeroed out, otherwise the provisions will be posted as provisions which effects the COGS and gross margin when they should not.
When the SSA item is forwarded to Status 3, the value of this (+ other SSA item with the same product) are grouped, summarized, and stored in Stock value register (SVR). SSA documents for customer- or supplier owned goods are not included to SVR (this is not included in the accounting inventory value). The sum of all SVR documents are transferred/registered to the general ledger on a daily or periodic basis.
When the SSA item is forwarded to Status 3, a posting to the product sub-ledger is created (PAT document). The sum of all open PAT documents is transferred/registered to the general ledger as a provision for accrued but not realized cost of goods (purchase). The transfer/registration to the general ledger is done on a daily or periodic basis.
When inbound invoice is received, Not invoiced Quantity on the SSA-item is reduced according to the invoice quantity. If Not invoiced Quantity is reduced to 0, the status on the SSA-item is changed to 9. Not invoiced Quantity on an SSA-item indicates the quantity for a specific goods reception where an inbound invoice has not been posted.
The posting in the product sub-ledger is closed and possibly a new posting is created if Not invoiced Quantity is larger than 0.
The provision for accrued, not realized costs is dissolved.
Realized cost is posted on inbound invoice (purchase).
When a sales order is placed, free quantity will decrease, and order quantity/backlog will increase accordingly. This has no effect on the accounting inventory value but indicates that the accounting inventory value is about to be reduced.
When shipping the goods, the Customer shipping advice (CSA) is forwarded to Status 4 and the accounting inventory value is reduced. Quantity on SSA-item is reduced and Stock value register (SVR) is recalculated correspondingly. There has been a reduction of the inventory value which is forwarded to the general ledger. A revenue has accrued.
When the invoice is registered a sale of goods is posted, and the revenue is realized. There is no balance provision between accrued and realized revenue/sale of goods. The accounting periods of the two transactions will nevertheless be the same when the invoicing is done, making sure the result of the period is correct. A requirement for this is that the period to which the Customer shipping advice (CSA) is posted is not closed when the invoice is registered.
Consolidation of invoices could also be used to automate the invoicing and in that way avoid a time shift between shipping/accrued revenue and invoicing/realized revenue.
When creating Purchase orders (SPO) and receiving goods, freight percentage will by default be updated from the product, if a freight percentage is set up in the Product (ART) application. Freight percentage may also be added or adjusted manually, directly on the Purchase order item (SPOITEM) or Goods reception item (SSAITEM). This will affect the landed cost on the Goods reception item (SSAITEM) and the cost when the stock is allocated to productions or sold to customers.
The company setting, Include freight in inventory balance, is an on and off setting. By activating this setting, inventory balance in GL will have separated items for the freight value.
Inventory balances (INVBAL) application, and related reports, will display separate columns for freight if the setting is activated, and the total balance will be included freight. The Stock value register (SVR) application, which displays inventory values for products, will show additional columns and fields for the freight value.
In the Stock (STOCK) application, and in the application showing Stock Items (STIITEMS), the Work In Progress values are replaced by Freight values, allowing the user to see the amount of freight values that is put into stock. Changes in these applications will affect values that are displayed in the tabs Totals, Stock Value History, Stock transaction types and Stock transactions. Also in the Product (ART) application, in the Stock tab where stock values are displayed, the freight value replaced the work in progress values.
It will be possible to post freight values to separate GL accounts by using the General ledger default account assignments (ACD) application to link the GL accounts. 2 new default account settings have been created to make this possible:
Account default for inventory, balance side : Inventory Balance, Freight value
Account default for inventory, result/cost side : Inventory Balance Changes, Freight value
If these settings are not linked to any GL accounts, the freight will be added to the existing GL accounts for the inventory balance.
Cost calculation for production and billing (sales invoices) will not be affected by these changes as freight is already included in the total cost in production and billing system.
The inventory balance in the Stock Value (SVR) application is recalculated every night so it is updated in accordance with the logistic system. When inventory balances are imported to the general ledger, the values will be posted as assets in the Balance sheet and cost of goods in the Profit and loss account.
Automatic - On a scheduled basis, the inventory balance is imported to the General ledger by nightly batch jobs. Valid options for automatic import to the General ledger are daily (D) and monthly (M). The schedule is defined in the setting GL Import Inventory Schedule.
Manual - It is also possible to initiate import of the inventory balance manually. This is often done through the accounting period closure procedure. If you do not import the inventory balance on a daily basis, the General ledger will not be updated with correct cost of goods. If you are going to create a correct profit and loss report, make sure to import the inventory balances.
Inventory accounting is a separate register in RamBase.
Value of goods in stock (StockAmt).
Value of goods in production (ProdAmt) - only relevant for the Production module.
Value of goods on order (BacklogAmt) - only relevant for the Auction module.
One of the procedures during period closure is to import the inventory balance to the general ledger. A decrease in stock value gives an increase in cost of goods, which again has a negative impact of this periods net margin.
When closing an accounting period, the closing period's opening balance has to be reversed, and the current period's balance has to be imported.
Based on your company's setup it is possible to import inventory balances automatically on a nightly or monthly basis.
To open the Period Account Register (PAR) application, find Finance in the RamBase menu and then General ledger. Click Accounting periods to enter the PAR application.
Highlight the relevant period and press ENTER. Periods in status 4 are open for posting, periods in status 6 are closed, but finance super-users can still make changes.
Select the Inventory Balances folder.

Click on the + icon on the line marked with Invent in the Transaction column and Reversal in the Type column. A progress bar appears.
A General ledger (ATR) posting will be created, and you will see a link to it.
Click on the + icon on the line marked with Invent in the Trans column and Import in the Type column. A progress bar appears.
A ATR posting will be created, and you will see a link to it.
When the inventory balances are imported there will be an amount showing on the right side on the Imported line. This is the new balance and shows the impact on the balance account. On the bottom right corner there will be an amount on the Change in period line, this balance shows the impact on the cost account.
Note the amount showing on the Imported line. Click the numbers and you will be redirected to the Inventory Balances (INVBAL). The amount in the StockAmt column on the bottom right corner of INVBAL should be equal to the amount on the Imported line in the (PAR) application.
For manufacturing companies, subtract the amount in the ProdAmt column from the amount in the StockAmt column in INVBAL and the sum should be equal to the amount on the Imported line in PAR.
It is possible to report all inventory movement (in or out) for a specific number of months, as in the Stock Value Register (SVR) there is a field that tells when a product was last registered into stock (LINDATE = Last In Date) and when it was last taken out of stock (LOUTDATE = Last Out Date).
These fields can be used as a filter in stock reports to list articles that have / have not been moved for a given period of time.
The report SVR Turn-Report: Group by Art (REP/100343) can list articles with movement before a given date (e.g. 1st of February 2019) by using this filter: REP/100343;LOUTDATE<2019.02.01
The Inventory Balances (INVBAL) can list stock value for articles per end of a specific year (e.g. 2018), but only articles that have had no movement after a given date (e.g. 25th of January), by using this filter: INVBAL1/201812;LOUTDATE<2018.01.25
To get the report as a file attachment by e-mail:
Select the option Make CSV file from the context menu
The stock entry system in RamBase consist of the Stock (STOCK), Stock items (STI) and Stock entries (INV) applications. They give the user an opportunity to gain full control over the stock value, both current and historical, on different levels.
The STOCK application shows the total value of goods in stock.
The STI application shows the total value of goods in stock.
The INV application shows the total value of each goods reception and provides a detailed list of all transactions related to that specific reception, from the first reception to the picking/shipping of the last related item.
Each type of transaction that affect the stock will get tagged with a transaction type. We currently operate with the following transaction types in RamBase:
These transactions occur when a Goods reception (SSA) is registered to a status greater than 2. When a Goods reception (SSA) is registered, the Stock entry (INV) is created. At the same time, a transaction is added to the cost change log. Finally, it adds a transaction to the transactions log stating the quantity and cost.
The transaction types from 1 – 14 is goods received from outside the company, while transaction types from 21 – 32 is goods received from another location within same company (database). In addition, we have transaction type 65 which happens after a manual correction of stock.
1 – Goods reception | This is a standard Goods reception (SSA) document that is registered when goods are received to stock. |
2 - Produced goods | This is when you register a Goods reception (SSA) document with type: Production. Meaning you have produced goods that are now placed to stock. |
3 – Service | This is when you register an SSA document of type: Service. |
4 – Customer owned product | When you receive a product that is owned by your customer. This will not affect the value of STOCK (Since this is base for your accounts), but it will be registered as a transaction and affect the count so it will be possible to keep track of the movement of these products. |
5 – Return of goods | When you register an SSA that is a return from customer. |
6 – Return for repair or service | Goods received for repair or service are registered as customer owned. |
7 - Supplier owned product | If you receive something to stock that is owned by your supplier. Mostly used by auction companies. |
8 - Replacement from supplier | If you receive something to stock from your supplier that is replacing another product. |
9 - Repaired by supplier | Goods reception with type REPAIRSUPRETURN registered. |
10 - By-product of production | Goods reception with type BYPRODUCT registered from a production. |
11 - Part changed during production | Goods reception with type PARTCHGPROD registered from a production. |
12 - Part from dismantle | Goods reception with type DISMANTLE registered. |
13 – Return of unknown shipment | Goods reception document registered, and shipment/origin is unknown. |
14 – Return of materials inserted in produced products | Goods reception from production when a material inserted in a produced production is returned. |
21 - Transfer of regular goods | Goods reception received from another location within same company. |
22 - Transfer of produced goods | Goods reception of products that are produced in the same company but at a different location. |
23 - Transfer of serviced goods | Goods reception from another location within same company and the document type is Service. |
24 - Transfer of Customer owned product | Goods reception from another location within same company. Product is owned by the customer. |
25 - Transfer of returned goods | Goods reception from another location within same company. Product is returned by the customer. |
26 - Transfer of repair or service | Goods reception from another location within same company. Product is owned and returned by the customer. |
27 - Transfer of supplier owned product | Goods reception from another location within same company. Product is owned by the supplier. |
28 - Transfer of replacement from supplier | Goods reception from another location within same company. Product is sent from supplier to replace another product. |
29 - Transfer of repaired by supplier | Goods reception from another location within same company. Product is returned from supplier after repair. |
30 - Transfer of by-product | Goods reception from another location within same company. Product is a by-product from production. |
31 - Transfer of part changed during production | Goods reception from another location within same company. Product is a part that is changed from a previous production at another location. |
32 - Transfer of part from dismantle. | Goods reception from another location within same company. Product is a part that is dismantled from a previous production at another location. |
65 - Stock correction, increase | On a Goods reception item it is possible to correct the quantity of the product if it proves that it is not correct. If you correct the quantity up this transaction will occur in STOCK to log that. |
There are several ways the system will consume goods from stock and by that reducing the value of your stock. The different types of transactions that will reduce the stock quantity are listed below:
100 - Shipping advice | This is a transaction based on a standard shipping advice when goods are shipped to the customer. |
110 - Pick to production work order | Transaction occurs when products are picked from stock into a production work order. These products will be part of work in progress. |
120 - Supplier return | Transaction occurs when shipping products that are going to be returned to the supplier. |
130 - Stock correction, decrease | On a goods reception item it is possible to correct the quantity of the product if it proves that it is not correct. If you correct the quantity down this transaction will occur in STOCK to log that. |
140 - Service order | Transaction occurs then sending out goods on a service order. |
150 - Goods transfer | Transaction will occur when transferring goods from one location to another location within same company (database). |
60 - Undo shipping of shipping advice | Transaction will occur when undo shipping is done on a shipping advice. This will place the product back into stock and increase the stock value. |
70 - Undo shipping of supplier return | Transaction will occur when undo shipping is done on a shipping advice of type: Supplier return. This will place the product back into stock and increase the stock value. |
81 - Undo pick in production | Transaction will occur when a picked product is unpicked. This will place the product back into stock and increase the stock value. |
250 - Change of price | Transaction will occur when price is changed on a Goods reception document. Change of price can be caused by:
Change in price will either increase of decrease the value of the goods remaining in stock. If the goods have been taken out of stock, a price change will not affect the stock value back in time. It will only affect the cost of the given goods:
|
350 - Change in exchange rate, when running GM-model C (Current) | Some companies run on GM-model Current, meaning stock in foreign currency will get recalculated every day, via an automatic nightly batch job, because of new currency rates. These updates will get logged with a separate transaction. |
The STOCK application shows the total value of goods in stock, and goods picked to productions at the accumulated level.

In the first view when entering the STOCK application, you will get the total stock value, continuously updated.
By default, the numbers are displayed based on all locations, but it is possible to check only one by selecting the location in the top left corner. It is also possible to choose if you want to see all the values based on the products costing method, or by specific identification in the Present with field.
There are five different tabs in the STOCK application. They will give the user different details and insight into the stock values:
This gives an overview over total stock value over time and changes in stock value from period to period. It is possible to view the numbers in a chart or in a list view.
You can choose to see the numbers grouped by Date, Week, Month, Quarter or Year. It is also possible to filter on Department (DEP) or Project (PRJ).
Stock items presents a list over all products registered that can have an affect on stock value, which is Products (ART) with class c, p, m and K*. It gives you the quantity currently in stock and total stock value. Highlight a product and pressing ENTER will take you to the Stock items (STI) application.
Stock entries shows a list over all entries to stock registered on goods reception documents. Highlight an entry and pressing ENTER will take you to the Stock entries (INV) application.
This view can give a good overview over how much the different transaction types affect your stock over a given period. Add a from date, or from and to date in the From date and To date fields, to define which time period you want to take a look at.
This will display all transactions and how much they have affected the stock value. Click the arrow icon next to the stock transaction type name to open the Stock transactions tab, with predefined filter to show you all underlying transactions that forms a base for the value change.
The Stock items (STI) is the mid-level application where it is possible to get an overview over stock value and transactions grouped by product. By default, the numbers are displayed based on all locations, but it is possible to check only one by selecting the location in the top left corner. It is also possible to choose if you want to see all the values based on the products costing method, or by specific identification in Present with field.

The application consists of a list on the left side where all products on stock, or with a stock history, is listed with quantity and stock value. It is also possible to add a column which shows the products costing method. To add the Costing method column, click the cogwheel and select it in the Columns list.
The right side of the application gives a summary of the product in the top, with name and description of the product, costing method and type of product. It also displays the quantity and value of goods in stock and quantity and value of work in progress (WIP). Note that the Total WIP value field shows you the material value of work in progress, and does not included labor cost, machine cost etc. To see the total work in progress value, go to the Production work order balances (PWBAL) application.
There are five different tabs in the STI application:
Shows all goods receptions done on this product with remaining quantity and value. Highlight an entry and pressing ENTER will take you to the Stock entries (INV) application.
List all transactions related to the specific product with details on how it has affected the quantity and value of stock. Click the arrow icon in the Stock entry column to open the related Stock entry (INV) document.
This view can give a good overview over how much the different transaction types affect your stock over a given period. Add a from date, or from and to date in the From date and To date fields, to define which time period you want to take a look at.
This will display all transactions and how much they have affected the stock value of this product. Click the arrow icon next to the stock transaction type name to open the Stock transactions tab, with predefined filter to show you all underlying transactions that forms a base for the value change.
This tab list all goods transfers that are done on this product from one location to another. It shows from where and to where it was transferred and provided a link directly to the Goods transfer (STW) document. Click the arrow icon in the Id column to open the STW document.
The INV application is where you can get control over the stock transactions on the lowest level.

The INV application shows a list over all goods reception items that are still in stock or a part of work in progress. By default, the numbers are displayed based on all locations, but it is possible to check only one by selecting the location in the top left corner. It is also possible to choose if you want to see all the values based on the products costing method, or by specific identification in the Present with field.
On the right side of the application you will find information about selected goods reception, at what date it is received to stock, link to goods reception item document etc. The Cost / XXX field shows the price per unit of the product on the given goods reception.
There are two different tabs in the INV application:
This will list all transactions that will affect the cost of the product on the given goods reception document. One example could be if a user choose to change price manually on the goods reception document.
The cost change log will always be updated, regardless if the product is still in stock or not. This is to track all changes in gross margin on sales, or updated cost in production if the product is used in productions.
Return from customer is done through a Customer deviation (CDV). A return from the customer will create a stock entry with the same cost as the original goods reception document had when the goods were shipped to the customer. If there have been any price changes on the original goods reception after the goods were shipped to the customer, these price changes will be copied from the original stock entry to the new stock entry. In this way, RamBase ensures that the cost of the returned goods will be up to date.
The quantity that is undone, is returned to the stock entry it was picked from. The parts get the current value/cost of the stock entry at the time they are put back.
When a Goods transfer (STW) process is initiated, when you ship a STW, the STW does not immediately consuming stock on the location you are transferring goods from. This is different compared to shipment of for example Shipping advices (CSA), which consumes the stock immediately. The stock will be consumed on the source location at the time it is registered into stock at the destination location. This is because you should not get any changes in stock value due to a goods transfer process, as this often takes several days.
A Goods transfer (STW) can only be done for a single Goods reception (SSA) item, so the STW will only be linked to one SSA in the Stock assignment register (SAR), or in the stock entry.
To add an inventory balance account to a Product (ART) you must enter the Product (ART) application.
To open the Product (ART) application, find Product in the RamBase menu and then Product management. Click Products to enter the ART application.
Highlight the Product (ART) you want to add an inventory account to and select the Finance account settings option in the context menu.
Click the Inventory balance account icon in the lower left-hand corner. The AccKey field will automatically be set to Inventory when you use this icon and cannot be changed.
Find the account in the Account field in the Item account info popup.
The other fields are optional.
Click the OK button to add the inventory balance account to the Product (ART).

When the inventory balance account is updated, this account will be used to update inventory balance for this Product (ART) in the general ledger.
It is possible to see the total for each inventory balance account in the Inventory balances (INVBAL) application. Select Balance Account in the Group By field to view only balance accounts in the Inventory balances (INVBAL) application.
If you add an inventory balance account to a Product (ART) on the product itself, as explained in this topic, this will overrule the account set in the Account defaults (ACD) application.
Assets management is about the financial overview of your fixed assets, and the automation and control of the depreciation of them.
Overview of your investments.
Automatic monthly depreciations.
Prognosis over your depreciation costs.
Possibilities to create reports used in audits.
In addition to full control of the periodic costs, you will get prognosis of future depreciations and an overview of when the assets will be phased out. Used together with accounting dimensions, you will have an overall view of the depreciations, operating costs and incomes on each asset.
Activate fixed assets - An investment is a tangible fixed asset that exceeds a value given by the authorities. If the purchase price exceeds this value, the tangible fixed asset must be activated in a register. This is usually done when the invoice is received.
Make depreciations - Depreciation of the asset is a periodic activity usually done every month. If the fixed asset register is updated, the depreciation can be done with a few keystrokes.
Depreciation rules - The tangible fixed assets' financial lifetimes vary. A large machine in a manufacturing company might have 10 years financial lifetime, or more. An expensive computer might have 3 years financial lifetime. Land and buildings have very long financial lifetimes, sometimes eternal value. All of these scenarios must have separate depreciation rules.
Write-down of fixed assets - If tangible fixed assets get obsolete, damaged etc. the value decreases. You perform write-down of the fixed assets to update the general ledger with correct values.
Register assets - Fixed assets are registered based on supplier invoices. The system provides an efficient way of importing information from the supplier invoices into the fixed assets register.
Register assets manually - It is possible to manually register the fixed assets directly into the register. Possible reasons for doing this:
Initial system setup.
The asset is already in use.
The asset is for some reason not registered yet.
An accounting error.
Adjustments on existing assets - It is possible to adjust a fixed asset's postings in the general ledger. A reason for adjusting can be that the depreciation is not set up correctly.
When goods are transferred from inventory to Fixed assets (FAR), the system automatically performs both the standard Fixed Assets (FAR) posting and an additional settlement posting. When using the Goods reception item (SSAITEM) command Move goods to rental fleet, both postings are created within the same transaction, ensuring correct settlement of the Depreciation rules (DPR) and removing the need for manual General ledger (ATR) adjustments.
Fixed assets (FAR) posting
Debit: ACD/INVENTORYCHG
Credit: DPR Investment Account (ACC)
Automatic settlement posting
Debit: DPR Investment Account (ACC)
Credit: ACD: Asset Capitalization
This General ledger default account assignment (ACD) Asset Capitalization represents the cost account for capitalizing goods transferred from inventory.If required Accounts default (ACD) settings are missing, the system will block the posting and notify the user.
When an investment is done, it has to be posted against balance and not cost accounts. This process is referred to as activation.
In RamBase the invoices for investments are posted against special investments accounts. In regular time-intervals (or automatic), the investments are transferred to a ledger balance account. Which balance account depends on the type of investment and depreciation plan that has been selected.
Once the asset is activated, it is ready for depreciation.
RamBase supports the handling of Fixed assets (FAR) that are under construction. This allows users to accumulate investments related to an asset before the asset is activated and depreciation begins.
A fixed asset (FAR) can be created and marked as Under Construction, allowing the value of the asset to be built up gradually through investments. When all investments have been collected and the asset is ready for use, the asset can be activated and handled through the normal depreciation process.
An indicator in the Fixed asset register (FAR) shows whether a fixed asset is under construction. A dedicated Under Construction Account can be defined in the posting rule to control how investments are posted while the asset is being built or acquired.
When a Fixed asset (FAR) is created in the Fixed asset (FAR) archive, the user can mark the asset as Under Construction. The asset can then be moved to Status 2 – Construction in Progress using the menu option Construction in Progress.
In this status, the asset is not yet activated but is prepared for collecting investments related to the asset while construction or acquisition is ongoing.
When opening the Fixed asset (FAR) record, the user can view the Under Construction indicator, the associated Under Construction account, and the Investments tab. The Investments tab is used to register and manage investments that contribute to the value of the asset during the construction period.
Investments related to the asset are registered through the Investments tab. These investments typically originate from incoming invoices but can also be added manually when needed.
Each time an investment is registered, the system creates an accounting posting where the value is transferred from the investment account to the Under Construction account. This posting follows the configuration defined in the General ledger posting (ATR) logic connected to the Depreciation rule (DPR).
If an investment is removed from the asset, the system generates a reversing posting of the original transaction. This ensures that the accounting remains balanced while preserving the transaction history. Both the original posting and the reversing entry can be viewed in the General ledger posting (ATR) application. In situations where the investment does not originate from an invoice registered in RamBase, users can register manual investments directly on the asset. This makes it possible to record additional value adjustments, such as external cost estimates or valuation changes, even if the transaction is not linked to a document in the system.
When investments originate from invoices or other accounting transactions, the system evaluates how the investment account in the line has previously been used in the Fixed asset register (FAR).
Based on this evaluation, the system determines which actions are available when creating or linking a fixed asset.
If the Investment Account in the line is used in at least one Fixed asset register (FAR) with status Status 2 – Under Construction, the following options are available:
Create under construction fixed asset
Append investment to under construction fixed asset
Create standard fixed asset
This allows users to either continue adding investments to an existing asset under construction or create a new fixed asset.
If the Investment Account in the line has only been used on standard fixed assets, the following options are available:
Create standard fixed asset
Create under construction fixed asset
The option to append to an existing asset under construction is not available because no such asset exists for that investment account.
If the Investment Account in the line has not been used in any Fixed asset register (FAR) the following options are available:
Create standard fixed asset
Create under construction fixed asset
Since the account has not previously been used for fixed asset investments, the system allows the user to create either type of asset.
While the asset is under construction, all investments are posted to the Under Construction account. When the asset is ready to be placed in service, it can be activated and moved to Status 3 – Planned for Depreciation.
During this transition, the system transfers the accumulated value from the Under Construction account to the standard balance account for fixed assets. After activation, the asset follows the normal depreciation process according to the defined depreciation plan.
The Depreciation rule (DPR) posting contains a field for the Under Construction account. This allows users to define which account is used for postings while the asset is under construction.
The Under Construction account is visible as a column in the Depreciation rule (DPR) overview and can be used when searching or configuring posting rules. This ensures that the accounting setup for assets under construction is maintained together with the rest of the fixed asset posting configuration.
Monthly depreciations is used to post the cost of the investment in small portions in accordance to expected financial lifetime of the asset. If a building has an financial lifetime for 25 years, the cost is divided and posted for 300 periods/months. The rules for financial lifetime is usually set by national tax rules. RamBase supports standard depreciation rules, which can be overruled by rules created by the user.
Before the first month of depreciation, a plan or prognosis for depreciations for the financial lifetime is created in the assets register.
Depreciations for all assets in a period/month can be done in one operation.
The value of an asset can be re-valuated during the depreciation periods. Usually this is a write-down of the value. The write-down is registered as a breakpoint which recalculates the remaining periods in the depreciation plan.
An asset can also be re-valuated at a zero value, which will make it possible to end the depreciation of the asset. The depreciation will of course also be ended when costs are posted in all estimated periods.
RamBase supports a linear depreciation model.
Use the Depreciation templates (DPT) application to create templates that can be used in the Depreciation rules (DPR) application.
The templates created will be used for all companies in the same system.
To open the Depreciation templates (DPT) application, find Finance in the RamBase menu and then Asset management. Click Depreciation rule templates to enter the DPT application.
Click the Create new depreciation template button.

Fill in information in the popup:
Name - Name of the DPT.
Description - Description of the DPT.
Country - Select country for the DPT.
Effective period - The start of the DPT.
Type - Set Linear type.
Deprecation periods - How many periods the DPT is active.
Click the OK button to create the DPT in status 1 (Pending registration).
As long as the DPT is in status 1 it is possible to edit information, make sure all information is correct before activating it. It is not possible to edit the DPT after it has been activated (status 4 or greater).
Select the Activate depreciation template option in the context menu to set the DPT in status 4 (active).
If your company is using the fixed assets register it needs to be set up with depreciation rules. This is done during the initial fixed assets register setup, but also if your company requires another depreciation rule than the already existing ones. You may create a depreciation rule based on a template, or create a new one.
To open the Depreciation Rules (DPR) application, find Finance in the RamBase menu and then Asset management. Click Depreciation rules to enter the DPR application.
Click the Create new depreciation rule button.

Select the depreciation template in the drop down menu. The templates listed in this view are standard depreciation rules for the country your company is reporting to.
Click the OK button. The fields contain default values from the template, but may be altered to fit your company's setup. Make sure to verify the values in the fields before registering the depreciation rule. Make sure to enter the proper balance account and depreciation account from your ledger before registering the depreciation rule.

When all fields are correct, click the Activate depreciation rule option in the context menu.
The depreciation rule is now activated and will appear in the list of depreciation rules that will be displayed when setting up an investment account for depreciation.
To open the Depreciation Rules (DPR) application, find Finance in the RamBase menu and then Asset management. Click Depreciation rules to enter the DPR application.
Click on the Create new depreciation rule button.
In the popup, fill in the name and a description of the rule, and set the period the rule will apply from in the Effective period field.
Click the OK button.

Add data to the fields.
To enter your company's GL accounts, click the arrows next to the Balance account field and the Depreciation account field.As long as the new depreciation rule is in editable mode (St=1), you may edit the values.
When all data is entered, click the Activate depreciation rule option in the context menu.
The depreciation rule is now activated and will appear in the list of depreciation rules that will be displayed when setting up an investment account for depreciation.
To open the Fixed Assets (FAR) application, find Finance in the RamBase menu and then Asset management. Click Fixed assets to enter the FAR application.

Press F12 to open the action menu and choose the option Forward new Investments to Fixed Assets Register. A batch job will pick the supplier invoices registered against the investment ledger accounts.
Select the documents you want a depreciation plan for by clicking the + icon to the left on the item line. When the + icon has been clicked, the item will disappear from the popup.
Press Esc to return to the fixed assets menu. The new fixed asset register (FAR) documents will be listed on top of the table. They are not yet activated (St=1).
Highlight the desired document (St=1) and press ENTER.
Press F12 and choose the option Activate Fixed Asset (St=2).
In the new popup, set the period from when the asset shall be depreciated and click the OK button. The value of the asset is now debited into a balance account.
Press F12 and choose the Register Fixed Asset & Create Plan (St=3) option. The asset is now booked in your balance and a depreciation plan is made, but the depreciation is not initiated (St:3).
Press Esc to return to the fixed assets menu.
Press F12 and choose the option Make Depreciations to Fixed Assets.
In the new popup, set the period for the depreciation. The current period is set by default.
Press the + icon to the right of every item line. Press Esc. The fixed asset is depreciated for the current period (St=4).
Press ENTER.
Press Esc.
Repeat from step 5 for all FAR documents in St:1 listed in the FAR application.
A Fixed asset (FAR) is usually created from the invoice when the investment is posted, but it is also possible to create fixed assets manually.
To open the Fixed assets (FAR) application, find Finance in the RamBase menu and then Asset management. Click Fixed assets to enter the FAR application.
Click the Create New icon on the bottom left side.

In the new popup, enter data in the following fields:
Name - Enter the name or a description of the investment.
Document - Enter a reference to the original invoice.
Document Period - Year/month of the investment.
Amount - The investment amount.
Investment Account - Choose the relevant investment account. The list is limited to investment accounts which are connected to depreciation rules.
Depreciation, Start Period - The period from when the depreciation started in the previous system or should start in RamBase.
Depreciation, Next Period - The next depreciation period in RamBase.
Activated Period - If the fixed asset is already activated in the general ledger, fill in the period from when it was activated. Leave the field empty if the fixed assets is not activated yet.
If the investment account allows it, it is recommended to enter information to the fields Department, Project and Asset in the Account info area by clicking the magnifying glass icon. In most fixed asset registers setup, the asset dimension is mandatory on the investment accounts and must be entered.
Click the OK button in the New Fixed Asset popup.
The asset is now booked in your fixed assets balance and a depreciation plan is made, but the depreciation is not initiated (St=3). Depreciations performed prior to registering the fixed asset in RamBase have been taken into account when the manually created asset is booked in the fixed assets balance.
When a Fixed asset (FAR) is registered and depreciation has started, there are two options in the action menu that could be used to make changes to the depreciation plan:
Close earlier Depreciation and handle in this Period
Make Adjustment to Depreciation Plan
This option could be used if fixed asset depreciation has not been performed in one or more previous periods, and the total of the depreciation left behind should be added to the current period.
This action menu will be available in a Fixed assets (FAR) document when a future depreciation line (depreciation line in Status 0) is highlighted. All depreciations from earlier periods which have no GL postings for depreciation, will then be closed and added to the planned depreciation amount for current (highlighted) period.
Both the depreciation lines that are closed, and the one for the current period, will get a description in the NOTE field. This note will include the date when this adjustment was done and a text explaining what changes that have been made. The depreciation lines for earlier periods that are closed will then go from Status 0 (planned) to Status 9 (closed). The Context menu option Close Fixed Asset (St=9) opens a popup to enter a VALIDTO period and close the FAR in Status 9.This new operation is available on FAR in Status 8 and with no depreciation (DEPR=”N”).It will create an adjustment line with 0 in amount and balance. The Current investment amount will be set to 0. Balance on main level of the FAR document will be blank.
This action menu could be used if the investment amount, and then also the balance and depreciation amount, should be adjusted after depreciation have been started. This option could be used to remove the total balance for the asset, e. g. because the asset was sold, or to increase or decrease the value of the asset.
When the balance is cleared out the depreciation plan for future periods will be removed, and the Fixed assets (FAR) document for the asset will be set to Status 9 (discontinued), while an increase or decrease in the value of the asset will lead to a change in the deprecation plan for future periods.
The action menu Make Adjustment to Depreciation Plan will show a popup where adjustment amount and note can be entered, and method for handling the adjustment could be selected before adjustment is created.

The following methods are used for calculation of depreciation after adjustment:
Adjust Remaining Plan - The revision of the asset affects future depreciation schedules.
Current Period - The depreciation of the asset to date is re-evaluated based on revised values, and any variance between the newly calculated depreciation and the previously posted depreciation is recorded in the present accounting period.
When an adjustment line is created, the adjustment line will show in the depreciation plan with a date, reference to user who created it, and amount for adjustment. A GL posting will be created for the adjustment amount, and the link to the GL-posting will appear in the DocRef field in the Depreciation plan. This GL posting will have 1 item for the adjustment amount for the assets balance account, and the user need to add an item for the opposite side and register the GL posting so that the balances in General Ledger are updated.
This table will give you an overview how adjustments, done with methods Adjust Remaining Plan or Current Period, will affect depreciation plan:
Description | Value | Calculation |
|---|---|---|
Investment amount | 12 000.00 | |
Asset lifetime | 12 periods | |
Depreciation amount, period | 1 000.00 | |
Depreciation period2 | 2 | |
Total Depreciation amount | 2 000.00 | |
Balance | 10 000.00 | |
Adjustment amount | 2 000.00 | |
New Balance | 12 000.00 | |
Adjust Remaining Plan | ||
Next depreciation amount | 1 200.00 | = 12 000 / 10 |
Current Period | ||
New Investment amount | 14 000.00 | = 12 000 + 2 000 |
Next Depreciation amount | 1 166.67 | = 14 000 / 12 |
Adjusted Depreciation amount | -333.33 | (1 000 - 1 166.37) * 2 |
If an adjustment was incorrect, you can reverse the General ledger (ATR) and then enter the Fixed assets menu (FAR) document and mark the adjustment line. Here you will have a menu option called Reverse Adjustment and Regenerate Depr- Plan. When using this menu option, the adjustment item on the Fixed assets menu (FAR) document is removed and Balance on the Fixed assets menu (FAR) document is recalculated.
RamBase supports entering budgets and reporting against them. Budgets can be created in RamBase, or in a spreadsheet and subsequently imported into RamBase. The budget can be divided into one post per budget account, period, department, and project. RamBase supports simple consolidation of budgets.
Most users prefer to enter budget numbers in a spreadsheet, as it speeds up the registration. If different spreadsheets do not contain the same combination of account, period, department and project, the budget will be consolidated while it is loaded into RamBase. This makes it possible to distribute the budget process to different departments and projects.
Budget numbers are stored on separate budget accounts and are mapped against the Chart of accounts in RamBase. This gives flexibility in the budget structure. Budgets can be placed against both balance accounts and result accounts.
Control over revenue and costs.
Basis for comparison and analysis.
A tool for planning and measuring the financial development.
One way to work with budgeting is to compare the account balances with the budget accounts, create analysis, and make a basis for new budgets as part of your daily tasks. Another way to work with it is do it once or twice a year, and create the budget based on last year's numbers, and experiences. A third approach to budgeting is to create sales prognosis and look at the cost key figures.
You have to work through many sub-processes before registering the final budget.
Create budget - The budget is created in a separate register. The budget, with its connections to the Chart of Account (ACC), periods and dimensions, are held in the budget register.
Import budget - The budget can be imported by an Excel-file (CSV format). Use of Excel increases your efficiency when it comes to registering the budget in RamBase. The budget must be configured for RamBase.
Manual registration of the budget - It is very time-consuming to register the budget manually. On the other hand, it will give you an extra control of the numbers.
Compare the budget and the general ledger - It is important to compare the budget with the general ledger. Use account groups to ease the comparison.
The Budget (BAC) application in RamBase is a parallel to the Chart of accounts (ACC). However, registration on these accounts does not occur through the Chart of accounts (ACC), but from the Budget (BAC) application.
When numbering the budget it is advisable to use numbers in accordance to the account numbers in Chart of accounts (ACC). You can link budgets to accounts in the Chart of accounts (ACC) application manually. Budgets linked manually will not be changed if the Bulk Link Budgets to Corresponding GL Accounts option in the context menu is used afterwards.

St - Show what status the budget has. Status 1 (Pending registration) if the budget is open, Status 4 (Registered) if the budget is registered and Status 9 (Processed) when the budget is deactivated.
Budget number- Show the budget number.
Name - Name of the budget.
Require Finance Project - Show if the budget requires a project.
Require Department - Show if the budget requires a department.
Latest budget year - The latest budget year column show the last year with budget numbers.
Use the Chart tab to read and understand the budget numbers quickly. Use the Year, Finance project, Department and Chart type fields to filter the chart.
There are 4 steps to get your budget in RamBase.
Create budget manually in RamBase or import budget from file.
Use a report as a quality assurance test to make sure everything is entered correctly in RamBase. Choose the Budgets, by BudgetNo or Budgets, by BudgetNo, DepNo, PrjNo option in the context menu.
Link the budgets to the GL accounts. Link manually in the Linked general ledger account field or choose the Bulk Link Budgets to Corresponding GL Accounts option in the context menu.
Register the budgets. Select the Register All Budgets option in the context menu.
It could be time-consuming to create the budget manually. On the other hand, it will give you an extra control of the numbers.
To open the Budget (BAC) application, find Finance in the RamBase menu and then Budgeting. Click Budgets to enter the BAC application.
Click on the Create new budget button in the lower left hand corner of the application.
In the popup, fill in relevant information.
Write the account number in the Budget number field.
Write the account name in the Name field.
Set the start for the period in the Effective period field. Normally this will be the the first period of the accounting year.
Click the OK button to create a new budget account in Status 1 (Pending registration).
Fill in relevant information in the Budget account area.
Click the Amounts folder.
Click the Add budget amounts button.
Select the year you want to add budget amounts to in the Year field.
In the popup, add the budget numbers. It is divided into twelve periods in a fiscal year.
Set the income or costs evenly throughout the year or depending on the expectation.
Click the Add button.
Back in the Budget (BAC) application, check the budget amounts for each budget line with the Budgets, by BudgetNo option in the context menu and check the numbers.
Link the budgets automatically to the General Ledger (GL) accounts in the Budget (BAC) application when the budgets numbers are set. Choose the Bulk Link Budgets to Corresponding GL Accounts option in the context menu. It is possible to link the budgets manually to a GL account in the selected budget.
The budget number must match the number of the GL account to which it will be linked.
Register all budgets in the Budget (BAC) application when the budgets numbers are set. Choose the Register All Budgets option in the context menu. The accounts with budget numbers will be registered, and set to Status 4 (Registered), the rest will stay open in Status 1 (Pending registrtaion). It is possible to register the selected budget manually with the Register Budget option in the context menu.
Repeat the procedure until a budget has been placed on all your budget accounts.
The budget is first imported into RamBase from file, and is then linked the to Chart of Accounts (ACC). The budget file has to be a semicolon-separated list (CSV file) and contain the following fields: No, Name, Year, DepNo, PrjNo and the months Jan, Febr, March, April, May, June, July, Aug, Sept, Oct, Nov and Dec.
To open the Budget (BAC) application, find Finance in the RamBase menu and then Budgeting. Click Budgets to enter the BAC application.
Choose the Import Budget from File option in the context menu.
Click on the Select file > button and upload the budget file.
Back in the BAC application, take a QA test with the option Budgets, by BudgetNo in the context menu.
The budgets will be listed in the BAC application with status 1.
The budgets are imported, but need to be linked to accounts (ACC) and then registered.
As soon as the budgets are imported they will be included in calculations and financial reports.
Link the budgets automatically to the GL accounts in the BAC application when the budgets numbers are set. Choose the Automatically Link Budgets to Corresponding GL Accounts option in the context menu.
It is possible to link the budgets manually to a GL Accounts (ACC) in the selected budget.
Register the budgets in the BAC application. Choose the Register All Budgets option. The accounts with budget numbers will be registered (status 4), the rest will stay open (status 1).
It is possible to register a selected budget manually, press F12 to open the action menu and choose the Register Budget option.
It is not possible to enter a revised budget in RamBase, but budget numbers for a fiscal year can be changed. In the selected budget account, choose the Open Budget option in the context menu. This will open the budget account and make it possible to change the budget numbers.
When the budget numbers is ready, it will be visible in the Chart of accounts (ACC) application. Use the Include budget checkbox to include the budget.
Intercompany trade is the processes done between companies within a group with the same parent company. From a finance perspective, this usually refers to invoicing, payments and reporting.
Intercompany invoices that are registered and reconciled.
Intercompany payments that are registered and reconciled.
Report consolidation.
Internal invoices are created.
Automating the finance processes between companies strengthen the overview of them. Ledger postings from within the group are automatically registered with an internal trade dimension, which makes it possible to consolidate and summarize reports on the group level.
Intercompany invoicing - There are two ways to carry out intercompany invoicing: Sales invoices sent from one company to another company within a group, will be copied to the other company's system. Sales invoices for expenses sent from one company to another company within a group are copied to the other company's system. Automated intercompany Supplier invoices (SIN) copied from Sales invoices (CIN) will include a PDF copy of the Sales invoice (CIN).
Intercompany payments - Intercompany payments give an overview of the corporate incoming and outgoing payments that are connected to your company. If payments are missing in your company's system, they can be created from the intercompany payment application.
Report consolidation - Financial data can be accumulated from all of the companies in a group. Reports created in the finance report editor can be consolidated across this group. One company's account structure can be defined as the report master. Report consolidation can also be carried out by using dedicated consolidation reports. These reports list the intercompany transactions and simplifies the process of creating consolidated accounts. Based on the initial intercompany system setup, all intercompany transactions can be automatically registered in the general ledger with a dedicated account dimension. This makes it possible to report on all intercompany transactions, and on the company related to each of the transactions.
Internal invoicing - Internal invoicing is about invoicing within one company, e.g. from one department to another department. How to carry out internal invoicing depends on your company's requirements for cost accounting.
Enter ICR in the Program field and select the Enter Key to open the ICR menu.
Tip
If the company using RamBase is part of a corporation, you can set up the other companies in the corporation in the ICR archive. The companies set up in ICR does not have to use RamBase.
The value set up in ICR consists of three letters as an abbreviation for the company and then 2 letters for the country where that internal company is situated. For example XXX-NO for a Norwegian company.
The value set up in ICR is then chosen for the CUS/SUPs (field Intercompany code) that are set up for the internal companies. Documents such as orders/invoices for these internal CUS/SUPs will be marked with the respective Intercompany code.
If relevant GL accounts are set up with Intercompany code = Required/Optional this value will be brought into the General ledger (GL) and the user will be able to pull up reports based on intercompany code. Also, in the Period closure register (PAR), there will be a reconciliation between the internal companies.

To create a new database, click the Create new button.

In the ICTDB field, enter the database abbreviation for the other company. This allows you to mark the Customer (CUS) and Supplier (SUP) in the respective database with an inter-company code. You can select the inter-company code in the Customer (CUS) and Supplier (SUP) applications under Settings, then Finance.
Enter ICT in the Program field and select the Enter key to open the Inter Company Trading (ICT) application.
Tip
If the company using RamBase is part of a corporation, it is possible to set up that outgoing cost invoices, created in one company, should be created as an ingoing invoice in the other company. Companies set up in the ICT archive must use RamBase.

Select the icon on the left, Create ICT setup for Expenses.

Select the two applicable databases in From and To and select OK
Set Automatic invoicing to Yes.

To register the Supplier invoice (SIN) automatically to Status 4 without approval, clear Register invoice. If Register invoice is selected, the Supplier invoice (SIN) remains in Status 1, even if an approval is not required.
Set Automatic Crediting to Yes if inter-company credit should be created automatically.
In Articles, select
 and specify the article used for nnvoices. This is the article used in the incoming invoices.
In Configurations, select the DEF-line and press the Enter key.

Specify the Customer (CUS) and Supplier (SUP). The correct customer or supplier appears if you have marked them with the inter-company code. If you have not marked the customer and supplier with the inter-company code, do that first.
Set up a Notify PID to specify the user to receive an internal message when a new incoming invoice is created.
Setting name | Description |
Type of company when using intercompany trade functionality | Used to identify owner and seller companies when 1 enterprise have more than 1 database, and they are organized in 1 inventoryowner company and 1 ore more salescompanies. OWNER - Inventory Owner company / SELLER - Salescompany |
Tax handling refers to the process of creating separate tax accounting overviews that can be audited. Most frequently used is the Value Added Tax (VAT) accounting overviews.
Configure the VAT reference system.
Configure multinational VAT setups.
Do Intrastat reporting.
Handle and report sales tax.
Satisfactory tax handling requires that the company's system is configured in accordance with the company's standards, and the applicable laws and regulations given by the authorities.
VAT reference configuration - RamBase VAT handling is based on the VAT reference system. The VAT reference system helps you to pick the correct VAT code based on automatically registered country codes. It simplifies time-consuming VAT handling, especially when a company has VAT registrations in many countries.
Multinational VAT configuration - If a company has a warehouse or an agent (location) that is VAT registered in another country, you have the possibility to set up separate VAT rates for that country / VAT registration number. Transactions where this location is the consignment country, will then be handled with a separate set of national VAT rules. Based on the setup chosen, it is possible to run VAT reports for different countries in the same accounting system.
Intrastat reporting - It is possible to issue the EU Intrastat sales- and purchase reports to report trade between companies within the European Union.
Handling sales tax - For trade between companies within the United States (US), the VAT reference system traces the states for consignment and shipment. A state can be defined on transactions, and for suppliers and customers. This gives the possibility to manually post and report trade between US states. RamBase does not support automatic handling of sales tax.
Setting name | Description |
Calculate VAT on Fee for customer documents | This parameter is used to tell if fee on customer documents should have VAT calculated. "YES" : Calculate VAT on fee if documents have item(s) that have VAT. "NO" : Do not calculate VAT from fee |
Calculate VAT on Freight for customer documents | This parameter is used to tell if freight on customer documents should have VAT calculated. "YES" : Calculate VAT on freight if documents have item(s) that have VAT. "NO" : Do not calculate VAT from freight |
Method for calculation VAT | The value "SHIP" in this setting means VAT handling will depend only on the Shipping address. The value "INVOICE" means both Shipping address and Invoice address will have influence on VAT handling |
Supplier Documents - VAT on Fee calculated | This parameter is used to tell if Fee on Supplier documents should have VAT calculated. If setting in 'ON' - Calculate VAT if documents have item(s) that have VAT. If setting is 'OFF' - Do not calculate VAT from fee |
Use of Intrastat report | Setting used for activating functionality that will tag transaction documents that should be Intrastat reported. When goods are sent from 1 EU country to another EU country. RamBase Intrastat Reports will then be used to report these transactions |
Use of Altinn from RamBase | Activate functionality for sending VAT declaration directly from RamBase to Altinn. NB! User has to approve VAT declaration in Altinn |
Group tax report across company's | Comma separated list of companies to include in VAT report in addition to current company. Grouped companies must have same VAT periods and VAT codes must have same setup. |
Use SalesTax instead of VAT | This setting determens if MVA in Company info should be replace with the text "Sales Tax" |
VAT on freight | This setting is used to tell if FREIGHT on supplier documents should have VAT calculated. If value "YES" : Calculate VAT on FREIGHT if documents have item(s) that have VAT. "NO" : Do not calculate VAT from FREIGHT |
VAT handling for ATR documents created by file-import | This setting will tell how VAT should be handled when ATR documents are created by file-import, and the file contains row(s) with VAT Code that should generate VAT The setting will tell if VAT is included in the amount from 1 line, or if the amount is the Net Amount and VAT should be added, if the line has a VAT code that should produce input and / or output VAT. It is also possible to set up that no VAT calculation should be done. Then the importfile should include separate lines for Net amount and VAT amount. These are the 3 variables to choose from as a default value:
|
It is possible to create combinations of VAT reference codes, general ledger accounts and VAT codes that apply for one Article (ART) only.
You may have up to 10 separate VAT reference codes (VatRef) on each ART.
To open the Article (ART) application, find Product in the RamBase menu and then Product management. Click Products to enter the ART application.
Highlight the ART in question and press ENTER.
Open the Finance folder.
Click the + icon in the lower left corner. The Item Account Info popup appears.
Enter data. The mandatory fields are DB (database), DefCode (VAT reference code), AccNo (general ledger account) and VatCode.
Example: The default setup for the VAT reference code HOMESALE is ACC/3000 and VAT code 03, but for this specific ART the VAT reference code HOMESALE the setup will be ACC/3010 and VAT code 03.
The ART specific account-/VAT code -combination overrides the system defaults.
If you need a to customize VAT handling for customers and suppliers, it is possible to manually change the posting suggestions in the Customer (CUS) application and the Supplier (SUP) application.
Specify how value added tax (VAT) should be calculated. Either always include VAT, always exclude VAT or use standard/default VAT rules.
To open the Customer (CUS) application, find Sales in the RamBase menu and then Customer management. Click Customers to enter the CUS application.
Highlight the specific CUS and press ENTER.
Open the Finance Data folder.
Note the field InclVat in the Finance Data section.
Valid options:
Yes - Always include VAT for transactions with this CUS, which means that the VatRef code always will be set to VATSALE. It will be possible to manually change the suggested VAT handling on a specific transaction if this option is selected in the CUS application for this customer.
No - Never include VAT for this CUS, which means that the VatRef code always will be set to XMSALE. It will be possible to manually change the suggested VAT handling on a specific transaction if this option is selected in the CUS application for this customer.
Auto - The system generates the VAT reference code based on the country code in the To- and From- addresses. It will be possible to manually change the suggested VAT handling on a specific transaction if this option is selected in the CUS application for this customer.
To open the Supplier (SUP) application, find Procurement in the RamBase menu and then Supplier management. Click Suppliers to enter the SUP application.
Highlight the specific SUP and press ENTER.
Open the Finance Data folder.
Note the field InclVat in the Finance Data section.
Valid options:
Yes - Always include VAT for transactions with this SUP, which means that the VatRef code always will be set to VATPURCH. It will be possible to manually change the suggested VAT handling on a specific transaction if this option is selected in the SUP application for this supplier.
No - Never include VAT for this SUP, which means that the VatRef code always will set to XMPURCH. It will be possible to manually change the suggested VAT handling on a specific transaction if this option is selected in the SUP application for this supplier.
Auto - The system generates the VAT reference code based on the country code in the To- and From- addresses. It will be possible to manually change the suggested VAT handling on a specific transaction if this option is selected in the SUP application for this supplier.
If you need to customize VAT handling for a single transaction, it is possible to manually change the posting suggestions on any of the related transaction documents. If changes are made on a Sales Order (COA), both the Shipping Advice (CSA) and the Sales Invoice (CIN) will inherit the changes.
You can change the suggested VAT reference code (VatRef) by use of the VAT handling field in the Finance section of the transaction document window.Valid options:
Yes - VATSALE / VATPURCH: Sale or purchase shall always generate VAT.
No - XMSALE / XMPURCH: Sale or purchase shall never generate VAT.
Auto - The VatRef will automatically be set based on the To- and From-addresses.
You can keep the suggested VatRef code, but change the VAT code. This is done from the Item Account Info-popup of the document. In the Accounting folder, it is possible to change the VAT code.
Manually select a general ledger (GL) account different from the suggested one. This is done from the Item Account Info-popup.In this case the standard VAT code for the specific GL account will be used.
If somebody else has created the document, you must click the Transfer Document to Myself-icon in the upper right corner of the window to enable editing.
You can change the suggested VAT reference code (VatRef) by use of the VAT handling field in the Finance section of the transaction document window.Valid options:
Always include VAT - VATSALE / VATPURCH: Sale or purchase shall always generate VAT.
Never include VAT - XMSALE / XMPURCH: Sale or purchase shall never generate VAT.
Use default VAT rules - The VatRef will automatically be set based on the To- and From-addresses.
You can keep the suggested VatRef code, but change the VAT code. This is done from the Item level of the document. In the Accounting folder, it is possible to change the VAT code.
Manually select a general ledger (GL) account different from the suggested one. This is done from the Item level of the document, in the Accounting folder.In this case the standard VAT code for the specific GL account will be used.
The invoice is in a currency (EUR) other than the local currency (NOK), but the VAT must be entered in local currency (NOK) to a specific amount stated on the invoice. Create the invoice and add the invoice items.

In this example, the Exchange rate is 10.486.

Open fields for VAT and change the VAT exchange rate. In this example to 10.523

Register the invoice to Status 4. On the VAP document you can see that the VAT rate is 10,523 and the VAT amount in NOK. VAP is the basis for VAT reporting. The VAT amount is registered in VAP in the currency with which the VAT code used is set up in the VAT register (In the VAP document this is stated as VAT currency)

In the journal entry, a separate entry has been created, posting the VAT amount change to the default account in the ACD/VATRATEADJ setup. In this example account 8395.

Image of default account for VATRATEADJ in the general ledger default account assignments (ACD) archive:

The journal entry is loaded to the general ledger.

Norwegian companies are responsible for the Value Added Tax (VAT) accounting, calculation of the tax, and creation of the VAT return in connection with import of goods and services to Norway.
In addition to the general ledger (GL) in RamBase there is a separate sub-ledger called VAT Postings (VAP). This sub-ledger holds all the details about the VAT accounting. All VAT postings are loaded to the VAP application.
The VAP application is based on standard VAT codes (SAF-T codes) to ensure that the national requirements are met, even though the companies define their own VAT code numbering. There are SAF-T codes for high, medium and low VAT rates.
In the example that follows, the high VAT rate is being used.
Follow the standard procedure for registration of supplier invoices based on goods receptions.
In this invoice, create a new item line and add the invoice's net amount.

Use the correct General Ledger (GL) account (e.g. account number 4013).
Use the correct VAT code. For example code 21. This code is a standard code used for VAT accounting related to import of goods.
Register the invoice.

In the GL, the net amount is posted as an accounts payable with the counterpart entry on a cost account. No VAT will be calculated on this invoice, but the net amount will be registered at VAT code 21. In the VAP register it will look like this:

In order to utilize the functionality in RamBase, it is advisable to create a product (ART) with class X and LOC:XXX, and a supplier (SUP) used for VAT accounting purposes only. In Norway the supplier could for example be called Merverdiavgift, Innførsel.
Use these when handling invoices connected with import of goods or services. This will give a good overview of the details in the invoices connected to the VAT accounting in RamBase, and it will make it easier to separate the invoices connected to the import: Invoices based on costs/goods, and VAT invoices. Register a new supplier invoice based on the received customs declaration.
Use the supplier you have created for VAT accounting purposes.

On item line 1, book the invoice amount against a current liability account, numbered close to the tax liability accounts or similar in the GL.
Use VAT code 81 (high rate).
Add a new item line.
To ease traceability, write a short description in the Text field.

On item line 2, add the invoice's negative net amount so the total amount on the invoice becomes 0.
Book against the same account number (ACC) as item line 1.
Use VAT code 21.
Register the invoice. In the GL it will look like this:

There will be a reverse charge procedure for the inbound- and outbound VAT on the invoice.
In this example the amount is 1250,-
A credit is booked against ACC/2750 with VAT code 21.
A debit booked against ACC/2750 with VAT code 81.
This will not affect the booked value, but the VAT amount will be moved from the VAT code 21 to VAT code 81. Both outbound- and inbound VAT has been booked against VAT code 81.
In the VAP register it will look like this:

When the invoice based on goods reception (supplier invoice) is booked, the accounting item, posted with VAT code 21, will become a debit amount of NOK 5000,- in the GL. This indicates that a purchase of imported goods, where the VAT has not been calculated yet, has been booked.
In this example the second line in the picture below.

When the invoice based on the Customs declaration (VAT invoice) is booked, the accounting item, posted against ACC/2750 with VAT code 21, will become a credit amount of NOK 5000,- in the GL.
In this example; the first line in the picture above:
The amount on the VAT code 21 will then be 0,-
The counterpart entry to the VAT invoice with VAT code 21 is also booked against ACC/2750, but with VAT code 81.

This will not have any financial impact, but the invoice amount will be moved to VAT code 81, which is the tax code for the reconciliation of the invoice amount and the VAT.
Posting the supplier invoice to VAT code 21, and the VAT invoice to VAT code 81, helps you to keep track of which purchases you have registered VAT for, and not.
Follow the standard procedure for registration of supplier invoices from costs.
Use the correct General ledger (GL) cost account. For example ACC/6701.
Use the correct VAT code. For example VAT code 86 which is the SAF-T standard.

Forward the invoice to register (St:4) and it will be posted like this in the GL:

Posting to VAT code 86 calculates both inbound- and outbound VAT. You will find the VAT accounting details in the VAP register.
In this example; the invoice amount is NOK 2500,- and the VAT code is 86. This results in both a credit post and a debit post of NOK 625,-

Verify that Postponed VAT is set up in the General ledger default account assignments (ACD).
To verify
From the RamBase menu, click Finance and then Base registers. Finally click Default accounts.
In the Search field type Postponed VAT, or find it in the list.

Recommended reading
To set up read more about the Enter Account defaults (ACD) application.
It is possible to postpone VAT if you are unsure of the period in which it will be reported. It is possible from both incoming and outgoing invoices.
From the RamBase menu, click Finance, then Payables and finally Supplier invoices to open the Supplier invoices (SIN) application.
Select or search for the supplier invoice in question.
From the Context menu, select the Postpone VAT option.
A banner will be displayed with the text Postponed in the VAT area.
If the Supplier invoice (SIN) is in Status 1 - Pending internal validation or registration
Use the Postpone VAT checkbox in the VAT area.
Click the Accounting tab and then the sub tab VAT adjustments.
Listed here are all the General ledger items (ATR) for the selected Supplier invoice (SIN), where the VAT amount has been moved from the VAT account to the Account for Postponed VAT.
In the VAT area, click the View icon next to the VAT posting field to open the VAT posting (VAP) application. A Yes will be stated in the Postponed field.
Note that the VAT period field will be blank if it is undecided which period this is to be reported. To respost the VAT to a specific period, follow the procedure below.
From the RamBase menu, click Finance, then Payables and finally Supplier invoices to open the Supplier invoices (SIN) application.
Select or search for the supplier invoice in question.
From the Context menu, select the Repost VAT option.
In the Repost VAT popup, click the VAT period dropdown and select a period.
Click the OK button.
Note that the Postponed banner is now updated with the Reposted banner, in the VAT area.
Click the Accounting tab and then the VAT adjustments tab.
Note that the reposted General ledger items (ATR) are now included
In the VAT area, click the View icon next to the VAT posting field to open the VAT posting (VAP) application. A NO will be stated in the Postponed field.
The value selected in the VAT period dropdown in the Repost VAT popup, will be displayed in the VAT Period field.
It is possible to add text to each VAT code that will be visible on Sales invoices (CIN) and Sales credit notes (CCN) if the VAT code is used.
To open the VAT code (VAT) application, find Finance in the RamBase menu and then Base registers. Click VAT codes to enter the VAT application.
Highlight the VAT code and press ENTER.
Add text in the Invoice text field.

There is a set of interfaces for integration between RamBase and other finance systems.
Payroll systems
Bank transactions
Credit card transactions
Invoices
Import ledger posting from payroll system - There is a two-way integration between RamBase and a payroll system. Hours reported in the work time reporting system in RamBase are exported to the payroll system. A ledger posting is then imported from the payroll system into RamBase. It is possible to import the ledger posting from a payroll system independent of the work time reporting system in RamBase. The integrations are file based and require a special setup. You are not required to have an integration between the payroll system and RamBase. You can create the general ledger posting manually.
Handling bank transactions - Standard integrations against Norwegian bank accounts are file-based and will only require a basic setup. Supported file formats are BBS-OCR, DIBS, NETS, EDI and TELEPAY.International bank account transactions based on the EDI DEBMUL and CREMUL formats can be supported. Integrations against foreign bank accounts require a comprehensive setup.Bank transactions can also be made against finance institutions like factoring and debt-collection agencies. Due to lack of standards in this business, integrations usually need be tailor made.
Handling credit card transactions - For credit card transactions, RamBase has a seamless integration against the NETS and DIBS transaction providers. The credit card payment process is traceable. The actual transfer of the payment from the transaction provider to RamBase is made by file transfer, quite similar to the BBS-OCR format.
Handling supplier invoices and sales invoices - Sales invoices can be sent as electronic invoices in most EDI and XML formats. Reception of supplier invoices must be handled manually. The use of electronic invoices will always require a special setup, and it will have a transaction fee.
When the salaries are remitted from the payroll system, a manual General Ledger posting (ATR) must be created in RamBase. This posting is based on details from the payroll system. The payment transactions from the payroll system are included in the manual ATR, which means that no payment documents (PAY) are created in RamBase. This results in payment transactions registered in the General Ledger (GL), but not registered in the cash management system (PAY). This will give a deviation in the accounting period register (PAR) when the period is to be closed.
The deviation in PAR must be verified and reconciled with the manual ATR posting.
To open the General Ledger: ATR-Items (ATRLIST) application, find Finance in the RamBase menu and then General ledger. Click General ledger details to enter the ATRLIST application.
Filter on the period to be closed.
Set the transaction type to PERWAG.
Set the correct account number (AccNo). One bank account for payment and one for tax.
The filter may look like this: ATRLIST;TRANS="PERWAG*",ACCNO:1950
If the total amount of the payment transactions is equal to the deviation shown in the accounting period register (PAR), the cash management system is reconciled, and the deviation in PAR can be reconciled.
Region-specific functionality refers to functionality that is specific for one or a few countries or regions.
Region-specific functionality in EU.
Intrastat reporting is used for EU countries to report sales and purchases between two EU countries.
The Company setting (CSV) Use of Intrastat report must be ON.

Make a copy of the global Intrastat report, one for sales and one for purchase, to two local reports. These global reports can be found in the JHC-NO database, write REP/*intra in the program field and press ENTER. Select the Maintain All Reports tab. This must be done by a RamBase consultant.

Highlight the report and press ENTER to open the Report definition (RPD). Press F12 to open the action menu and choose the Copy to new RPD option.
The new RPD will be in status 1. Make sure the Scope field is set to LOCAL.

Do the following:
The Name field should start with the database XXX-XX.
Set up correct parameters in the Param field. Parameter = DB, TRANSTYPE, VATNO, COUNTRY and CURRENCY.
DB - the name of the database in format: XXX-XX.
TRANSTYPE for the report showing purchase from other EU countries is set to SUPPURC and TRANSTYPE for the report showing sale to other EU countries is set to CUSSALE.
VATNO must correspond with VATNO in COM.
VATCC (VAT Country Code) - Two letter country code.
CURRENCY – Three letter abbreviation.
Set up DBList by selecting correct database from dropdown.
Click the checkbox for Show in REP-menu.

Make sure the column containing amount is thousand separated by going to the Fields tab and click on the magnifying glass on the AMOUNT line. Choose Space as 1000 separator. Click the Confirm button.

Change DB to the company’s DB and enter the Admittance to view report tab for adding Roles (ROLE) to the report. Add the ROLEs by clicking on the create new icon in the lower left corner.

Register the report to status 4 by pressing F12 to open the action menu and choose the Make Main Version (ST=4) option.

The report is now visible in the company’s DB in the report menu.

Repeat the steps above to create a report showing sales to other EU countries. The ROLEs for the Intrastat sales report is displayed in the following picture:

Country-specific functionality in Norway.
SAF-T financial is a standard format for exchanging accounting data used in Norway.
The SAF-T Code field is the basis for the account number reported in the SAF-T file. It can be found in the Main Info area in the Chart of Accounts (ACC) application.

The SAF-T Code field will be the basis for the account number reported in the SAF-T file. The reason for this is that one should report on standard accounts in the SAF-T file. It is therefore important that you go through the Chart of Account (ACC) and ensure that all accounts have a standard account in the SAF-T Code field before submitting this file for the first time.
The Validate Accounts to SAF-T Accounts report shows an overview of all ledger accounts and which SAF-T code is used, as well as which standard account they are linked to. Open the ACC application and press F12 to open the action menu and choose the Report: Validate Accounts to SAF-T Accounts option.

Note: If an account does not have a SAF-T code, RamBase will use the linked standard account when reporting the SAF-T file. RamBase uses the four-digit standard SAF-T chart of accounts as default accounts for mapping.
It is only possible to order a SAF-T file for closed periods.
To open the General Ledger Postings (ATR) application, find Finance in the RamBase menu and then General ledger. Click General ledger postings to enter the ATR application.
Press F12 to open the action menu and choose the Order Norwegian SAF-T Financial data file option.
Select period in the Period field and click the OK button to order the SAF-T file.
SAF-T financial is a standard format for exchanging accounting data used in Norway. Version 1.30 is required from 1 January 2025. From this date, the SAF-t grouping codes will be included in the SAF-T file instead of the SAF-T code. However, SAF-T code in ACC will not be removed for now, since it might be needed if SAF-T should be reported for data prior to 2025.
The element TaxAmount is replaced with two new elements, DebitTaxAmount and CreditTaxAmount.
GroupingCategory and GroupingCode has replaced the SaftStandard account.
ModficationDate is added.
To support the SAF-T grouping fields, we have implemented the country requirements concept.
Tab for Country requirements, in the Chart of accounts (ACC) application to show the country requirements – This will show the two new grouping fields. These two new fields will replace the SAF-T code field, which is placed in the header of each General ledger account (ACC), in the SAF-T file.
Grouping category used for SAF-T file.
Grouping code used for SAF-T file.
Menu option in the context menu, Assign SAF-T grouping, in the Chart of accounts (ACC) application – This will automatically fill out the grouping fields. When using Assign grouping code menu option, grouping codes are set based on value in the SAF-T code field. If SAF-T code is empty, a pre step is run where RamBase tries to find a SAF-T code to the Chart of accounts (ACC) based on the functionality Assign SAF-T code. However, the SAF-T code which is found will not be written to the Chart of accounts (ACC). RamBase will just "keep it in mind" when looking up the grouping codes based on the SAF-T code. The grouping codes found will be written to the Chart of accounts (ACC).
Report Chart of account compared to SAFT grouping category and code, available from the Chart of account (ACC) application – This will show the overview of status of mapping and is available in the Chart of account (ACC) application with the menu option View report for SAF-T grouping code validation in the context menu. In this report (REPORT/115110), predefined filters are available:
Accounts that have SAF-T grouping fields.
Accounts missing SAF-T grouping fields.
If the grouping codes are not automatically set when using menu option Assign SAF-T grouping in the Chart of accounts (ACC) application, values in the fields Grouping category used for SAF-T file and Grouping code used for SAF-T file may be chosen manually by the user or loaded by the user.
When loading values in the fields Grouping category used for SAF-T file and Grouping code used for SAF-T fil, use INP/81654. The load contains of three fields ACCCODE, GROUPINGCATEGORY and GROUPINGCODE.

The values in the GROUPINGCATEGORY must be identical as in the value CODE, which is shown when opening the dropdown for the field Grouping category used for SAF-T file. Easiest is probably to export the columns to excel and use this when preparing the load. Press the cogwheel to initiate export to excel.
The values in GROUPINGCODE should only be the number after the "/" which is shown when opening the dropdown for the field Grouping code used for SAF-T file. Easiest is probably to export the columns to excel and use this when preparing the load. Press the cogwheel to initiate export to excel.

It is only possible to order a SAF-T file for closed periods.
To open the General ledger postings (ATR) application, find Finance in the RamBase menu and then General ledger. Click General ledger postings to enter the General ledger postings (ATR) application.
Press F12 to open the action menu and choose the Order Norwegian SAF-T Financial data file option.
Select period in the Period field and click the OK button to order the SAF-T file.
Enter the Company settings (CSV) application.
Activate the Use of Altinn from RamBase setting. By activating this setting, the Altinn : Register VAT option in the action menu is available on a period under the VAT spec tab in the Accounting periods (PAR) application.
If several companies (databases) should collectively report VAT, activate the Group tax report across companies setting, by adding the databases, for example: XXX-NO,XXX-NO. The settings must be activated in the company database that should report on behalf of the other companies.
Grouped companies must also have the same VAT periods, and the VAT codes must have the same setup.
To be able to submit the VAT report, the user needs the Reconcile and report VAT duty, available in the Duty (DUTY) application. The global role that contains this duty is the Finance manager.
To open the Accounting periods (PAR) application, find Finance in the RamBase menu and then General ledger. Click Accounting periods to open the application.
Highlight the period you want to send to Altinn and press ENTER.
Click on the VAT spec tab.
Press F12 to open the action menu and choose the Altinn : Register VAT option.
A popup will appear with different login option, for example: MinID or Bank ID, to login to Altinn.
When the VAT report is ready to be submitted, click on the Verify button.
If there is no need for corrections, click on the Submit scheme button. After a short time, the payment information for the submitted VAT report will appear.
When reporting VAT, the users can decide them self it they should do the VAT clearing general ledger posting (ATR) in the Accounting periods (PAR) application or the reporting to Altinn first. But it is a good idea to create the VAT clearing general ledger posting (ATR) first, to make sure that everything is correct in the general ledger before reporting to Altinn.
After reporting to Altinn, it is recommended to close the period(s) in the Accounting periods (PAR) application. This is to avoid having new entries added to the reported period, which could affect the reported VAT.
In the Include attachments field the users can add files as attachments in the VATALTINN application by uploading them. When clicking the Upload files button, the user can choose the desired file(s) from the file explorer. For the files to be attached to the VAT settlement, which is being sent to Altinn/Tax authorities, the belonging checkbox must be checked before clicking the Submit schema button. Files that previously have been uploaded to the Accounting period (PAR), related to the VAT period, will also show as possible attachments. Attachments are validated during the submit step by clicking the Submit schema button.
The uploaded attachments can be found in the Filemanager in RamBase under My uploaded files and they are automatically attached to Accounting periods (PAR) related to a VAT period,
Country-specific functionality in Poland.
Polish legislation requires companies to issue and report invoices through the national KSeF (National e-Invoice system). RamBase supports this requirement by enabling invoice submission to KSeF from RamBase and by supporting automated integration through a certified third-party provider. The solution is designed to support both low-volume and high-volume invoicing while maintaining compliance with Polish e-invoicing regulations.
To use KSeF in RamBase, the company must be registered as a Polish legal entity and configured for KSeF usage. Required KSeF dictionaries must be available through the integration, and the company must be set up for manual or automated invoice submission.
Before KSeF functionality can be enabled, the integration must be agreed and ordered through RamBase Support. Activation of the functionality requires acceptance of applicable product terms, and the necessary setup is performed as part of this agreement.
KSeF functionality is enabled through a system setting:
Company setting (CSV): Run functionality for sending and receiving KSEF-documents
This setting can only be activated after the KSeF integration has been ordered and agreed with RamBase Support, including acceptance of the relevant product terms.
When this setting is enabled:
The user can initiate the sending from sales invoices and credit notes to KSeF by navigating to the Context menu under the Print/send section.
Outgoing sales invoices and credit notes (CIN) that are sent to KSeF are temporarily set to Status – 3 until a response is received from KSeF.
When a KSeF reference number is returned, the document status is automatically updated from Status – 3 to Status – 4. For Polish customers, the invoice is delivered to the recipient through KSeF once the status changes to Status – 4. For non-Polish customers, the invoice is distributed from RamBase according to the standard customer delivery setup.
If email delivery is enabled for Polish customers, they will receive both the invoice via KSeF and an email from RamBase. To avoid duplicate delivery, email distribution must be disabled for Polish customers if KSeF should be the only delivery channel.
Registration of invoices and credit notes without sending them to KSeF is blocked if the document contains a Polish VAT registration number.
Incoming KSeF documents are enabled for processing through the integration.
For proper operation, the KSeF extension must also be enabled. Without the extension, required KSeF-specific invoice fields will not be available and submission will fail.
A dedicated KSeF extension is used to support structured invoice submission. The extension adds approximately 20 additional invoice fields required by KSeF. The values for these fields are populated automatically, retrieved from official KSeF dictionaries, or derived from existing invoice data.
The extension is mandatory for Polish customers using KSeF. Once activated, the additional fields are available for all relevant invoice processes.
Sales invoices are created and approved in RamBase according to standard procedures. When RamBase is approved for KSeF submission, it is set to Status – 3, indicating that it has been sent to KSeF and is awaiting a response.
When an invoice is approved for KSeF, a webhook is generated. This webhook allows the integration platform to retrieve the invoice data from RamBase using exposed APIs.
The integration platform validates the invoice data and submits it to KSeF in the required XML format, including authentication of the issuer. Status information and reference data returned from KSeF are sent back to RamBase and stored on the invoice.
The KSeF reference number returned from KSeF is stored in the field External system invoice number on the Sales invoice (CIN).
Connectivity issues or missing or invalid invoice data are reported with status information and error codes, allowing the issuer to correct the invoice if needed.
Inbound invoices originating from KSeF are received through the integration platform. The supplier submits the invoice to KSeF, after which the invoice data is transferred to RamBase as a structured Peppol BIS 3.0 invoice.
The invoice is processed in RamBase and included in the standard Received supplier invoice (ISI) process (Read more about the Received supplier invoice (ISI) here). The recipient can review the invoice, match it with relevant documents, and prepare it for payment. All required invoice fields and attachments are mapped to RamBase structures.
JPK_V7M / JPK_V7K is a standard format for exchanging account data in Poland. JPK_V7M is a file used for monthly reporting, while JPK_V7K is a file used for quarterly reporting.
Start by entering the VAT Specification (VAS) application.
Press F12 to open the action menu and choose the Order SAF-T file: V7M ( JPK_V7M ) or Order SAF-T file: V7K ( JPK_V7K ) option.
This will open a pop-up menu where the user can fill inn information relevant for the JPK file. All information the user add in this pop-up will be added in the JPK file.
Select the correct period and click OK. The JPK file will be sent to the user's email.
New functionalities have been released in RamBase due to the requirements of the contents of this file. This is done so that the user can fill in the correct information on all the documents.
Split payment functionality
Split payment could be used when paying invoices, so that the VAT amount is split and transferred to a separate VAT bank account. This bank account can only be used to pay VAT or other taxes to the government.
It is now possible to mark both Supplier invoice (SIN) and Sales invoice (CIN)/Sales credit note (CCN) as Subject to split payment.
This can be done by using the F12 option Subject to Split Payment.
It is also possible to remove this tag by using the F12 option Not subjected to Split Payment.
SW – EU sale to a non-company
Used to mark all sales to non-companies in other EU countries.
This value will automatically be set to True, if RamBase register a Sales invoice (CIN)/Sales credit note (CCN) marked as EUSALE and the customer is not a company.
The information will be visible in the Additional information tab in the Document Account Information. Here it is also possible to add/remove the tag manually.
Third party transaction code
On Sales invoices (CIN) and Sales credit notes (CCN), it is possible to mark the documents with a third party transaction code: Procedure 42, Procedure 63 or Not selected. This can be done by entering the Additional information tab in the Document Account Information.
TP – Related business entity
Businesses are obligated to tag business related entities. I.e if you own a company, and your spouse is owning a separate company, these companies are business related.
On both Supplier (SUP) and Customer (CUS) it is now possible to mark the business card as Related entity. This information will then be delivered in the JPK file for all trade documents with this entity.
WEW – Internal invoice
It is possible to mark a Supplier invoice (SIN) as internal, by using the F12 option Mark as Internal Supplier Invoice.
It is also possible to unmark the invoice by using the F12 option Unmark as Internal Supplier Invoice.
GTU code
RamBase will use an existing field for GTU code on Products (ART). The field GR3 on the ART is located in the Classification area in the Misc tab. The user can fill inn GTU_01, GTU_02 etc. in this field and it will be included in the JPK file.
MK – Cash method settlement
In Poland companies can settle accounts with government in two ways – Standard method and Cash method. If your supplier uses the Cash method, you should mark the Supplier card so the field MK in the JPK is tagged correctly.
On the Supplier (SUP) card it is possible to mark the entity with Is Using Cash Method Settlement.
This could be done by entering the Finance Data tab on the SUP. Here you get a option to mark the Supplier as Is Using Cash Method Settlement.
IMP – Purchase outside of EU
All purchases (imports) from outside of EU must be marked.
Invoices with SAFT code: C37 will automatically be marked as IMP (purchase outside of EU).
In addition, the user will have an option to remove or add the IMP tag on the Supplier invoice (SIN) and Supplier credit note (SCN). This can be done by entering the Additional information tab in the Document Account Information.
Additional information
If there is a need to fill in additional company information for the JPK files, the user can enter Company (COM) application on the specific company. When entering the specific COM, click on the Extended Data tab to fill inn extended address information: Municipality, County, Province, Post Office, Building & Apartment.
There is a Tax Data area to enter extended tax data: Region id and Tax Office Code
JPK_MAG is a standard format for exchanging warehouse data in Poland.
Order Polish JPK_MAG file
Start by entering the Inventory balances (INVBAL) application.
Press F12 to open the action menu and choose the Order SAF-T file: Warehouse (JPK_MAG).
This will open a popup menu where the user can fill inn information about period and purpose of submission.
Click OK when the data is entered, and the file will be sent to the users email.
JPK_KR is a standard format for exchanging accounting books in Poland.
Order Polish JPK_KR file (2025 and beyond)
Start by entering the General ledger postings (ATR) application.
Choose the Order JPK_KR_PD file for general ledger... option in the context menu.
This will open a popup menu where the user can fill inn the year of the file in the Year field (YYYY).
Click OK after year is entered, and the file will be sent to the users email.
Order Polish JPK_KR file (2024 and earlier)
Start by entering the General ledger postings (ATR) application.
Chose the Order JPK_KR file for general ledger... option in the context menu.
This will open a popup menu where the user must select the period in the Period field.
Click OK after the period is selected, and the file will be sent to the users email.
JPK_FA is a standard format for exchanging information about VAT invoices in Poland.
Order Polish JPK_FA file
Start by entering the VAT specification (VAS) application.
Press F12 to open the action menu and choose the Order SAF-T file: VAT (JPK_VAT).
This will open a pop-up menu with different information.
The VAT number of the company will show.
VAT period where the user can fill in the wanted period of the file.
Link to the VAT report.
Validation field where the user can get error message for example if a supplier is missing VAT number.
After the correct data is filled in, click OK and the file will be sent to the users email.
To support the JPK KR_PD tag fields, we have implemented the country requirements concept which can be found in each GL account (ACC).
Values in the fields Control account tag for JPK KR_PD, Analytic account tag for JPK KR_PD and Non-deductible expenses account tag for JPK KR_PD may be chosen manually or loaded by the user.
Please note the following:
The field Control account tag for JPK KR_PD is mandatory.
The field Analytic account tag for JPK KR_PD is optional.
The field Non-deductible expenses account tag for JPK KR_PD can only be set if the account type is set to Result account.
The report Report for validating assignment of tag for JPK KR_PD file generation is available from the Chart of account (ACC) application – This will show an overview of the mapping and is available in the Chart of account (ACC) application with the menu option View report for JPK KR_PD validation in the context menu. In this report (REPORT/115528), predefined filters are available:
Accounts that have control account tag.
Accounts missing control account tag.
When loading values in the fields Control account tag for JPK KR_PD, Analytic account tag for JPK KR_PD and Non-deductible expenses account tag for JPK KR_PD, please use INP/81681. The load contains of four fields ACCCODE, ANALYTICACCOUNTTAG, CONTROLACCOUNTTAG and NONDEDUCTIBLEEXPENSESACCOUNTTAG.
The values in the fields Control account tag for JPK KR_PD, Analytic account tag for JPK KR_PD and Non-deductible expenses account tag for JPK KR_PD must be identical as in the value CODE, which is shown when opening the dropdown for each respective field. Easiest is probably to export the columns to excel and use this when preparing the load.
Press the cogwheel to initiate export to excel.
Whitelist is an extension to RamBase, provided as an additional feature in our Marketplace. Please contact your support partner to activate this feature.
Whitelist is a feature that allows you to verify if a Supplier (SUP) is an active, registered VAT payer and whether a specific bank account is registered as belonging to that VAT payer. The application enables real-time bank account verification and status history. The returned results from the verification can be either a pass or fail.
RamBase offers integration between the system and Whitelist VAT payers. Thanks to the solution you do not need to switch between your system and taxpayers list. System will automatically check all required data.
The use of RamBase Whitelist is included in the Polish localization.
Every night, the Polish Ministry of Finance publishes an updated version of the Whitelist with valid VAT numbers and bank account connected to them. It is downloaded and stored in a way to make it possible for RamBase to access it. Nightly validations of supplier, with regards to VAT number and bank accounts, are performed by RamBase.
The Whitelist check is only applicable to suppliers (SUP) that are set up with Country Code=PL, where VAT number is set and where a Polish bank account is set up with Country code=PL.
The Whitelist extension in MARKETPLACE must be activated.
Company setting (CSV) Account transactions with amount higher than set in this setting are verified against the Polish whitelist in the remittance process needs to be verified. Default value in this setting is 15 000.
There are 3 components in SUP application related with the Whitelist solution.
The first component is the Bank account grid on SUP which has been extended with 3 additional columns; Exists on whitelist, Last positive whitelist check and an icon to call up the account verification on the whitelist.
The Exists on whitelist column presents information on whether a bank account is on the whitelist of the VAT payer.
The Last positive whitelist check column shows the date and time of the last positive validation of a given bank account on the VAT taxpayer whitelist.
An icon calling the check of a given bank account on the VAT taxpayer whitelist. The result of this validation is immediately visible in the columns “Exists on whitelist” and “Last positive whitelist check” (if the validation was positive).

The second component displays three types of messages if the extension is enabled, if the supplier country code is “PL”, VAT number is set on supplier and at least one Polish bank account exists.
Whitelist is not published is displayed when there is no data from the current day in the database. This can occur due to problems on the government side, where they may not have published information on a given day or publish such a file later.

Whitelist validation failed is displayed when database is up to date and at least one of the Polish bank accounts is not on the whitelist of VAT taxpayers.

Whitelist validation succe... is displayed when all Polish bank accounts are successfully validated on the whitelist of VAT taxpayers.

The third component is the checkbox option Allow to continue payment even if bank account is not validated through whitelist”. If the amount on the payables transaction is higher than in the Company setting (CSV) Account transactions with amount higher than set in this setting are verified against the Polish whitelist in the remittance process and if the checkbox on SUP is checked, it will be possible to make a payment to a supplier's bank account, through the remittance process in PAM application, even though the bank account has not been properly validated against the VAT taxpayer whitelist.

The folder Payables in PAM has been extended with 1 additional column called Last Positive Whitelist Check. It will show if Supplier (SUP) and the bank account is validated in last updated Whitelist check. Depending on status, 3 different icons can show:
Not on Whitelist – Icon will show if company is not validated and “Allow to continue payment even bank account is not validated through whitelist” setting on SUP is not set. Mouseover will show information “Not on whitelist''.
If a payment has this red icon and has a higher amount then in the company setting, remittance of this payment will not be allowed.

Not on Whitelist, but payment is allowed by setting on supplier - Icon will show if company is not validated and “Allow to continue payment even bank account is not validated through whitelist” setting on SUP is set. Mouseover will show information “Not on whitelist, but payment is allowed by setting on supplier”.

Is on today’s whitelist – Icon will show if company and selected bank account pass validation.

This is a routine for internal invoice in Poland when the purchase is from an EU country or a country outside the EU.
Transport the Purchase order (SPO), Purchase order response (SOA) or Goods reception (SSA) to a Supplier invoice (SIN).
Make sure the Supplier invoice (SIN) is posted against VAT code 50 (No VAT).
Set invoice date, period and other useful information such as suppliers invoice number and more.
Register the Supplier invoice (SIN) to Status 4 (Pending remittance). This invoice is for paying the Supplier (SUP).

Go to the Accounting tab in the Supplier invoice (SIN) to find the value in PLN, calculated based on the currency used in the Supplier invoice (SIN).

Create a new Supplier invoice (SIN) with the same Supplier (SUP) account, suppliers invoice number, date and period.
This Supplier invoice (SIN) should be in PLN, based on the PLN value of the first invoice.
Set Always include VAT in the VAT handling field.
Create item 1 on the Supplier invoice (SIN) with the Product (ART), INVOICE, or another dedicated Product (ART).
Add explanation/information in the Description field.
The amount on item 1 should be in credit (-).
Choose the same account as the first invoice and VATcode 23, 24, 25 or 26.
Create item 2 on the Supplier invoice (SIN) with the Product (ART), INVOICE, or another dedicated Product (ART).
Add explanation/information in the Text field.
The amount on item 2 should be in debit (+).
Choose the same account as the first invoice and VATcode 36, 37, 38 or 39 for purchases, or 45, 46, 47 or 48 for purchase of fixed assets.
Register the Supplier invoice (SIN) with the Register supplier invoice option in the context menu.
The sum of the second invoice should be 0, therefor the Supplier invoice (SIN) goes to Status 9 (Confirmed paid).
Main level:

Item level:

The VAT calculation is done in the VAT posting (VAP) document, but the total VAT amount is 0.

The posting to the general ledger for the internal invoice will look like this:

The Polish correction invoice feature is utilized in instances where errors occur on the original invoice, such as inaccuracies concerning the product, quantity, or price, or when one of the product lines deviates from the order. It pertains exclusively to the Customer invoice (CIN). By generating the correction, you explicitly outline the discrepancies between the original invoice and the desired correction, detailing what was initially recorded, how it should be rectified, and any variances in quantity or value.
This is created for Poland since it is required by Polish law.
Country-specific functionality in Sweden.
SIE-4 financial is a standard format for exchanging accounting data used in Sweden.
To open the General Ledger Postings (ATR) application, find Finance in the RamBase menu and then General ledger. Click General ledger postings to enter the ATR application.
Press F12 to open the action menu and choose the Order audit file : SIE4 format option.

Select period in the period field and click the OK button to order the SIE-4 file.
The codes in the SIE-4 file are uploaded in format "A-Z" as the first character + serial number. First character is code for transaction type, while the serial number is only a counter for general ledger document number for the relevant transaction type.
Overview of transaction types and letter as first grade:
A CUSCIN - Sales invoices
B CUSCCN - Sales credit notes
C CUSCPA - Sales posting adjustment
D CUSPAY - Customer payments
E SUPSIN - Supplier invoices
F SUPSCN - Supplier credit notes
G SUPSPA - Supplier posting adjustment
H SUPPAY - Supplier payments
I ATRPAY - Payments without customer/supplier
J FARttt - Postings from fixed assets (activations and depreciation)
K INVttt - Imports of stock balances
L PROttt - Imports of inventory provisions
M Others - All other. Typical manual ledger entries.
Start by entering the VAT specification (VAS) application.
Click on the menu option and choose the Order Swedish VAT file option.
This will open a pop-up menu with different information.
VAT period where the user can fill in the wanted period of the file.
A Remark field.
After the correct data is filled in, click OK and the file will be sent to the users email.
Note
If any required information is missing or incorrect, the system will notify the user and prevent export until the issue is corrected.
Country-specific functionality in the United Kingdom (UK).
Activate the Use of HMRC from RamBase setting in the Company settings (CSV) application. This setting activates functionality for submitting VAT return to HMRC.
To open the Period account register (PAR) application, find Finance in the RamBase menu and then General ledger. Click Accounting periods to enter the PAR application.
Highlight the period you want to send to HMRC and press ENTER.
Click on the VAT Spec tab.
Press F12 to open the action menu and choose the HMRC: Register VAT return option.
Authenticate: This will open a popup to HMRC where you will need to log in with your public gateway account and give RamBase the authority to interact with HMRC on your behalf.
Form: Check the prefilled form based on data from RamBase, and then click the Submit button to register the VAT return report electronically to HMRC.
Receipt: Receipt from delivery of the VAT return report.